Table of Contents
Advertisement
Quick Links
Advertisement
Table of Contents

Subscribe to Our Youtube Channel
Related Manuals for Pidion BIP-6000


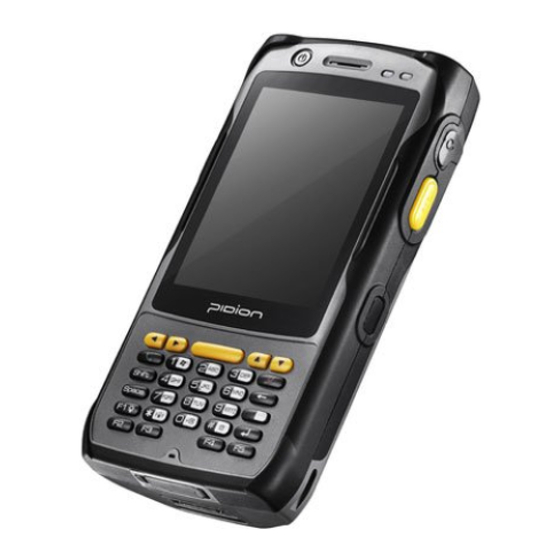
Summary of Contents for Pidion BIP-6000
- Page 2 This wireless device may cause propagation interference, and so, it cannot be used for life-saving services. Trademark PIDION aims for leading brand in the future mobile industry. As a global brand representing the image of reliability, representativeness, and cutting-edge technologies, this mark has been registered by Bluebird Soft Inc.
-
Page 3: Table Of Contents
Contents BIP-6000 Knowing the product 8. Communication status 34 Inputting text 5. Managing Delected indication 1. Selecting Text Input Items Safety Instructions I 9. Adjusting screen Mode 6. Managing Sent Safety Instructions II 10. Using stylus pen 2. Block Recognizer Messages 11. -
Page 4: Knowing The Product
The SAR limit of USA (FCC) is 1.6 W/kg averaged over one gram of tissue. BIP-6000 Device(FCC ID : SS4P1770) has also been tested against this SAR limit. The highest SAR value reported under this standard during product certification for use at the ear0.424W/kg and when properly worn on the body is 0.289 W/kg. -
Page 5: Safety Instructions I
Safety Instructions I BIP-6000 Read these instructions and warnings to use the Product in a safe manner and to prevent accidents. Cautions in relation with batteries Make sure that battery terminals (metal part) should not contact with any conductive materials like a necklace or coin. -
Page 6: Safety Instructions Ii
5. Do not use this Product in a hot or humid place. Using the using the Product and see a doctor. Product under a hot/humid temperature such as rain or sauna may cause a trouble. In this case, no warranty service will be provided. BIP-6000 Manual... -
Page 7: About The Product
Please contact the Customer Care Center if you wish to purchase any additional or optional products. [ Desktop Cradle ] [ Battery ] [ Stylus Pen ] [ BIP-6000 Main Body ] [ Adapter ] [ USB cable ] [ Spring Wire ]... -
Page 8: Checking Names Of Parts
Earphone Camera Power LED Jack Speaker Communication Side Side Scanner Scanner Reset Button Button Button LCD Screen Front Scanner Button IrDA Battery Direction/Call/End/ Battery Fixing Pin Number/Character/ Function Buttons Microphone Hand Strap Holder - Bottom USB Cable Connector BIP-6000 Manual... -
Page 9: Buttons
BIP-6000 Buttons Button Description Button Description Power button Arrow buttons Used to switch On/Off the terminal. Used to move left/right/up/down. Barcode buttons (Right/Left) Call button Used to operate the barcode functions. Used to start the phone program. If you press this button once while using the phone... - Page 10 The default is Numeric. Alphabets and Space button symbols are activated until you press the The cursor moves to the right, leaving an mode change button again. empty space. It works like the Space key in computer. BIP-6000 Manual...
- Page 11 BIP-6000 Button Description Button Description Light button # button Press this button to set the Function key. On the Phone main window, # is entered. If you press and hold this button for over 2 On the windows other than the Phone...
-
Page 12: Features
INTERFACE RS-232, USB 1.1 Host & Client, IRDA Hard Reset The product is initialized. BATTERY Rechargeable, 3.7V 4400mAh, Li-ion SIZE 80(W) x 160(H) x 35.5(D)mm WEIGHT 425g (incl. a hand strap) ADAPTER 5V 3A BIP-6000 Manual... -
Page 13: Communication Spec
BIP-6000 Communication spec. Item Description Frequency : TX (1922.4MHz~1977.6MHz) RX (2112.4MHz~2167.6MHz) Frequency stability : within ±200Hz WCDMA Antenna power : 250mW Propagation type : G7W, D7W Modulation method : QPSK/BPSK(FDD) Frequency : 2412MHz~2472MHz No. of channels : 13 Wireless Antenna power : 10mW/MHz Propagation type : GID, D2D Modulation method : DSSS/CCK(802.11b),... -
Page 14: Learning Basics
2 Turn the battery battery. pins inside to fix the battery. 3 Lift off the battery to the arrow direction. Before removing a battery, make sure to switch off the terminal. An abrupt power shutoff may result in a trouble. BIP-6000 Manual... -
Page 15: Inserting/Removing Usim/Usam Card
BIP-6000 Inserting/Removing USIM/USAM card Inserting a USIM/ Removing a USIM/ USAM card USAM card Insert a USIM/USAM Remove a USIM/USAM card to the arrow card to the arrow direction. direction. - Page 16 This chip is required for communication with the 3rd generation WCDMA terminals. You can use this card in voice mobile call including international roaming and e-commerce service regardless of type of terminal and communication service provider. BIP-6000 Manual...
-
Page 17: Setting Password
BIP-6000 Setting password In order to prevent your USIM Cautions card from being used by another PIN code is a password used to protect the data in a person, you need to lock your USIM card. The default PIN code is <0000>, and you USIM card. -
Page 18: Inserting/Removing Microsd Card
If the memory card gets stuck to the device, do not remove the card by force, but visit the nearest after-sales service center. And then, replace or return the card to the dealer from which you purchased the card. BIP-6000 Manual... -
Page 19: Charging A Terminal With A Desktop Charger
BIP-6000 Charging a terminal with a desktop charger Place the terminal on the desktop charger, and connect Use the dedicated adapter for maximum safety the adapter to the adapter jack on the rear side of the and effectiveness. desktop charger. -
Page 20: About Battery
Battery charging time The time required for charging is depending on the Charging Extended charging status. If the charging time gets shorter by time battery half, you need to purchase a new battery. Time Within 5 hours BIP-6000 Manual... -
Page 21: Switching On/Off Power
BIP-6000 Switching On/Off power Communication status indication You can switch on/off power by pressing the [Power] For the terminals which support WCDMA communication, button on the upper part of the terminal. you can view the GSM or WCDMA 1xEVDO communication status with the [Communication status indication lamp] on the upper right side of the terminal. -
Page 22: Adjusting Screen
Used to view the functions of the selected item. If you tap and hold with the stylus pen, a menu pops up as you select an item and click the right mouse button. BIP-6000 Manual... -
Page 23: Using Earjack
BIP-6000 Using earjack Resetting terminal You can use an earphone by Press the [Reset] button removing the earphone cover on the back of the terminal on the right top of the terminal slightly with the stylus pen. Earjack and inserting the earphone to cover the jack. -
Page 24: Hard-Resetting
Note that hard-reset deletes all programs, IrDA port documents and settings in the memory (RAM). Bluebird Soft assumes no responsibility for loss of data and program. Therefore, you should back up critical data and programs before hard- resetting the terminal. BIP-6000 Manual... - Page 25 BIP-6000 Procedures of using IrDA port 1 Select Start ► Settings ► Connections Tab ► Wireless Communication. 2 Select <Receive all wireless data>, and click [ok]. 3 Check the data to be sent, and select Menu ► Wireless Communication. 4 Check the corresponding IrDA port and touch the...
-
Page 26: Using Usb Cable
You can use various USB peripherals connected with the terminal by selecting [Use advanced network function]. This menu is enabled as the peripherals are connected with the terminal through USB cables. BIP-6000 Manual... -
Page 27: Connecting Activesync
Connecting ActiveSync BIP-6000 Installing ActiveSync To connect the terminal with PC, you need to 1 Download [Microsoft ActiveSync] from the website install the [Microsoft ActiveSync] program in of Microsoft, and install the program in the PC. your PC. If the [MicroSoft ActiveSync] program is already installed in your PC, you don’t need to install the... - Page 28 3 The [Microsoft ActiveSync] is installed when ► On the [Customer Information] window, fill in installation process is ready. the <User Name> and <Company> field ► the [Target Folder] window, select the <Installation Location>. 4 The [Microsoft ActiveSync] program is installed. BIP-6000 Manual...
-
Page 29: Using Activesync
BIP-6000 Using ActiveSync The screenshots are for the [Windows Mobile] 1 Place the terminal on the desktop charger, and version. The images may vary depending on the connect the charger or the terminal with the version of the software. computer through the USB cable. - Page 30 2 When the terminal is connected with the computer 3 The <Mobile Devices> folder shows the image, successfully, the [Microsoft ActiveSync] program is music or document folders in the terminal. You can started automatically. Click the [Search] button. save the files in the computer. BIP-6000 Manual...
- Page 31 BIP-6000 Precautions in using ActiveSync The terminal does not work when you remove and return the battery The message “Unknown Device” pops up after the To prevent this problem, you should press the [Power] computer detects the USB device button or select [Exit] in the Start menu with the stylus...
-
Page 32: Using Barcode Reader
(10cm) and angle between a barcode and the barcode scanner window. Barcode button Correct scanning angle Incorrect scanning angle When you use barcodes in a specific program, contact the developer of the program for details. BIP-6000 Manual... -
Page 33: Reading Barcode
BIP-6000 Reading barcode Start ► Programs ► Notes On <Notes>, select [New] button and read a barcode. Then, the barcode data are displayed. If you read a barcode as <Notes> is open, the barcode is saved automatically in [Notes]. If you read a barcode as <Notes>... -
Page 34: Today Screen
Status]. 3 Select [Set as Today See p.50 for details. Background...]. You can set the [Start] menu as 4 Select the transparency level you like. of the background image, and See p.48 for details. select [ok]. BIP-6000 Manual... -
Page 35: Adjusting Volume
BIP-6000 Adjusting volume Checking battery You can adjust volume of the Select in the top right of the folder/menu selecting tone or screen, and you can check the the ringer. battery status. Select in the top right of the screen, select Setting, and you can adjust system/ringer volume. -
Page 36: Inputting Text
The left side is used to write letters and the right side is for number entry. Symbols and common functions are located in other smaller boxes located in the right of the writing box area. BIP-6000 Manual... -
Page 37: Key Pad
BIP-6000 Key Pad Keyboard Input letter or number by terminal keyboard if choose This input method displays an on-screen keyboard that Key Pad on terminal screen shown as below image. can be used to input characters by tapping the screen using the stylus pen. -
Page 38: Letter Recognizer
Transcriber supports both printing and cursive writing styles and then automatically types the information on Characters are entered by printing letters in each the screen. area. The character is then analyzed and typed on the screen automatically. BIP-6000 Manual... -
Page 39: Phone Program
Phone program BIP-6000 Making a call Receiving a call Execute the phone program by If the terminal rings and a call selecting the [Phone] button, receiving message is displayed, enter a telephone number, and click the [Call] button or select... -
Page 40: Rejecting Calls
Select the [End] button in the bottom of the screen or press the bottom of the screen or press the [End] button on the keypad to cut [End] button on the keypad to off an incoming call. automatically end a call. BIP-6000 Manual... -
Page 41: Phonebook
Phonebook BIP-6000 Searching phonebook Registering entry 1 Select the [Phonebook] button 1 Select the [New] button in the in the bottom right of the bottom left of the Phonebook Today Screen, or select Start screen. ► Contacts. 2 Enter a name in the [Enter a 2 Select the type of phone Name...] field to search for the ... -
Page 42: Registering Entry
<Show contact names only>. View By : You can set the display standard of phone number by name / Company. Filter : You can set filters for display. Select Contacts : You can select Several / All. BIP-6000 Manual... - Page 43 BIP-6000 If you press and hold the selected phonebook entry, you can use various menus. Call Work/Home/Mobile : A call is made to the registered number. Send E-mail : An e-mail is sent to the registered e-mail address. Send Text Message : An SMS message is sent to the registered number.
-
Page 44: Text Message
Recipient...] to add massage Tap Menu and Select tap receiver. Contacts and select [Send Text Maximum 18 people can be Message] added to message reciever. Tap Inbox on Text Message screen. Inbox shows Deleted Items/ Drafts/Outbox/sent Items folders BIP-6000 Manual... -
Page 45: Viewing Text Messages
BIP-6000 Viewing Text messages Managing Draft messages Checking a text message from A creating message will be ‘Inbox’ folder. stored automatically in Draft folder if error is occured in Start ► Messaging ► Text sending a message. Messages ► Inbox Start ►... -
Page 46: Managing Delected Items
Find the deleted message from Find the deleted message from Start ► Messaging ► Text Start ► Messaging ► Text Messages ► Deleted Items Messages ► Sent Items Tap the sent message at least 2 second to Reply/Delect/forward. BIP-6000 Manual... -
Page 47: Camera
Camera BIP-6000 Taking photos Start ► Programs ► Camera If you press the [Barcode] button, the terminal takes the Still/Video and automatically saves the Still/Video in the album. Menu Video : Switches into video recording. Mode : You can select Normal/ Burst/Timer. -
Page 48: Viewing Album
If the camera is not used for 1 min, the terminal switches into the standby mode. The video function may be different from this User’s Manual according to the camera program. BIP-6000 Manual... - Page 49 BIP-6000 By selecting the [Menu] button, you can select Zoom, Play Slide Show, Set as Today Background, Beam picture, Save, Edit, Properties, Options or Send to your space for the selected Still/Video.
-
Page 50: Settings
[Start] menu on the title the selected button. bar. (You can check up to 7 programs.) Available programs In addition to basic programs, you can allocate all programs installed by yourself. BIP-6000 Manual... - Page 51 BIP-6000 Sounds & Notirications Sounds Tab Notirications Tab You can select whether to use notirication tones for You can select the sound method and notirication tone Events, Programs, Screen taps, Hardware buttons. for status or event. Start ► Settings ►...
-
Page 52: Owner Information
2 Select the [Folder] in which the terminal is switched on. the desired photo is stored. 3 Select the picture file [Type]. 4 Select the picture file and press the [ok] button. BIP-6000 Manual... - Page 53 BIP-6000 Input Items Tab You can select the text input method or the voice You can select items to be displayed on the Today recording format. screen. Start ► Settings ► Personal Start ► Settings ► Personal ► Today ►...
- Page 54 Password field, and enter it again for confirmation. Select [Prompt if device unused for], and enter time. The password should be 4 ~ 8 digits, and repeated numbers (e.g., [1111]) or sequential numbers (e.g., [1234]) is not allowed. BIP-6000 Manual...
- Page 55 BIP-6000 Phone Hint Tab Phone Tab Enter the words which will help you remembering your You can select/deselect sound of the terminal. password. A [Hint] window pops up if you fail to enter the correct password for 4 consecutive times.
-
Page 56: Setting System Environment
[ok]. for memory storage and program. To change your password, select [Change PIN]. Storage Card Tab See p. 15 for details. You can find the status (In use / Free) of the MicroSD memory and ProgramStore. BIP-6000 Manual... -
Page 57: External Gps
BIP-6000 External GPS Task Manager Program Tab The list of the programs in use and the memory status Select the port to be used by the program to import the are displayed. GPS data. Start ► Settings ► System Tab Start ►... - Page 58 The shorter the LED Off time, the Time], the battery life extends battery life extends longer. longer. The LED is turned on when you The keypad remains off if no press any button or touch the [LED Lighting Time] is selected. screen. BIP-6000 Manual...
- Page 59 BIP-6000 Remove Programs Brightness Tab The list of programs installed personally or by the You can control brightness by moving the slider bar. company, except the basic programs, is displayed. Start ► Settings ► System Tab Start ► Settings ►...
-
Page 60: Setting Connection Environment
3 Select [Finish] after confirming The text size displayed on the the chosen device name. screen can be set by 5 steps. Starting of Bluetooth device is depending on the Bluetooth device model. Please refer to the manual of the Bluetooth device. BIP-6000 Manual... - Page 61 COM Ports Tab Turn on Bluetooth : Select whether to use the Bluetooth device. To extend the battery life, you should uncheck this option. Make this device visible to other devices : This option allows BIP-6000 to be searched by other devices.
- Page 62 Internet. through RNDIS. In this case, uncheck [Enable advanced network functionality] before attempting to connect. If [ActiveSync] is not started when the terminal is connected with PC normally, you should select [Enable advanced network functionality]. BIP-6000 Manual...
-
Page 63: Wireless Manager
BIP-6000 Wireless Manager Setting wireless Internet Start ► Settings ► Connections Tab ► Wireless Manager 1 Select Wi-Fi on the Wireless Manager window. Then the list of nearby APs is displayed. You can select [All] to enable/disable three functions at... - Page 64 Wireless Manager When you enable this function, you can set the details of this function. When you disable this function, you can set the function independently by selecting the [Menu] button in the bottom right of the screen. BIP-6000 Manual...
- Page 65 Q & A BIP-6000 The terminal is wet. What can I do? How can I ask for after-sales service? Detach the battery from the terminal and dry it. If the Please send the product to the Customer Care terminal still doesn’t work after it is dried for a certain Center in the head office through a pre-paid delivery ...
-
Page 66: Customer Service
We recommend you to use the box and protective cover supplied with the product. Make sure to deliver the product in a safe way. Bluebird Soft assumes no responsibility for loss of the product during delivery. BIP-6000 Manual... -
Page 67: Service Center Information
Service Center Information BIP-6000 Regulations on Free/Charging Repairs Contents of Compensation Type of Customer Damage Within the Term of Guarantee After term of guarantee When requesting important repairs within 10 days of purchase Exchange or Repayment Requesting important repairs within 1 month since purchase date... - Page 68 Damage to the product after 10 days of purchase, flood damage, etc.). the product will either be exchanged or provided with - Expendable parts have exhausted there life (batteries, after-sales service (note, returning of goods or antenna, or other component parts). repayment is not allowed). BIP-6000 Manual...
-
Page 69: Warranty Certificate
Warranty Certificate BIP-6000 Thank you for purchasing a product from Bluebird Soft Inc. Warranty 1. Bluebird Soft Inc. (hereinafter referred to as Bluebird) If a circumstance arises where you lose a receipt or the provides the warranty service for its products in compliance... - Page 70 Customers Service Center Hours Mon.- Fri. : 9 A.M. ~ 6 P.M. (GMT Time: +9 Hours) We are not open on Saturday, Sundays and National Holidays. Address : Customers Service Center 2nd Floor, 558-8, Sinsa-dong, Gangnam-gu, Seoul, Korea Bluebird constantly strives to bring utmost satisfaction to all our customers.
Need help?
Do you have a question about the BIP-6000 and is the answer not in the manual?
Questions and answers