Table of Contents
Advertisement
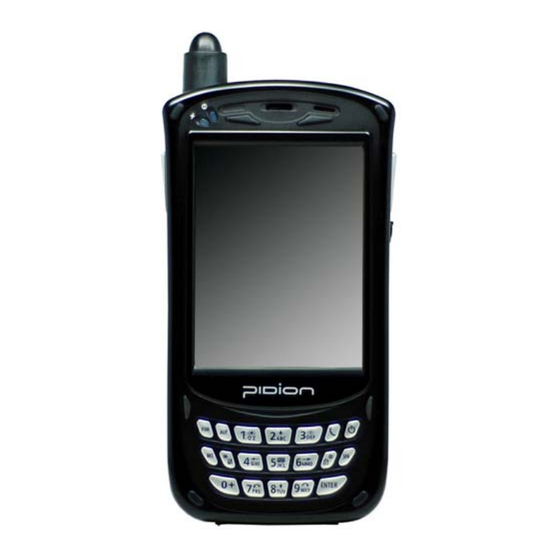
BIP-5000 GPS
BIP-5000 (Black) User Manual
User Manual
• Please read the following warnings before using the product.
• Shapes and colors of the images shown in this manual may differ from the actual products.
• Contents of the manual may differ based on the software version of products or conditions of the wireless provider.
Advertisement
Table of Contents

Related Manuals for Pidion BIP-5000


Summary of Contents for Pidion BIP-5000
- Page 1 BIP-5000 GPS BIP-5000 (Black) User Manual User Manual • Please read the following warnings before using the product. • Shapes and colors of the images shown in this manual may differ from the actual products. • Contents of the manual may differ based on the software version of products or conditions of the wireless provider.
- Page 2 Registered Trademark PIDION is a Leading Brand in the mobile industry. Bluebird Soft Inc. is a trusted global company which represents high technology and is currently registered worldwide with its PIDION trademark legally protected by law.
- Page 3 Cautions and Instructions Cautions and Instructions Please follow the instructions to properly use the product and avoid accidents in advance. This PDA device has passed the standard for the emission of electromagnetic waves. However, for the users health and safety please only use the authentic products provided by Bluebird Soft Inc.
- Page 4 Certification Certification Certification BIP-5000(Black) ※ The CE certification of the BIP-5000 communication. Model: BIP-5000 TYPE: PDA Satisfies all the technical regulations applicable to the product within the scope of Council Directives 99 /5/EC, 89 /336 /EEC, and 73 /23 /EEC:...
-
Page 5: Table Of Contents
Table of Contents Table of Contents Ⅰ. Knowing the Product Ⅲ. Functions 1. Using Barcode Reader • 24 1. Components • 5 2. Basic Terms • 6 2. Using Camera • 27 3. Button Description • 7 3. Using Infrared Port (IrDA) • 29 4. -
Page 6: Ⅰ. Knowing The Product
I. Knowing the Product I. Knowing the Product 1. Components Thank you for purchasing a PIDION product. Please check and make sure the following components are included in the package. [BIP-5000 PDA 1 unit] [BIP-5000 Cradle 1 unit] [Battery (standard/Extend)]... -
Page 7: Basic Terms
I. Knowing the Product I. Knowing the Product 2. Basic Terms Barcode Hand scanner Camera Antenna strap Window Speaker Flash fixed Power (LED) Camera (LED) Barcode/ Barcode/ Camera Camera Button Button Power button Hand Send strap button fixed Battery Case Fixed screw [Front] [Right side]... -
Page 8: Button Description
I. Knowing the Product I. Knowing the Product 3. Button Description Use it to turn on/turn off the PDA Laser(1D,2D) Barcode / Camera Type : Press left button to use barcode scanner Press right button to use camera CMOS Barcode Type : Use right and left button to activate barcode. Execute after user input Change character input mode. -
Page 9: Function Key Description
I. Knowing the Product I. Knowing the Product 4. Function Key Description - To use the Function keypad - The following functions will be executed after pressing the function key and button. Contents Description Function + 1 LCD getting darker Function + 2 Moving one space up Function + 3... -
Page 10: Attaching/Detaching The Battery
I. Knowing the Product I. Knowing the Product 5. Attaching/Detaching the Battery [Attaching the Battery] [Detaching the Battery] • Sit the battery to the groove, • Swivel the screw in arrow direction until Put the cover and swivel the screw. detached, take off battery. -
Page 11: Charging The Battery
I. Knowing the Product I. Knowing the Product 6. Charging the Battery [While connecting the adapter to the table charging cradle] * Connect the adapter with table charging cradle as showed. • Note: Using the provided/approved adapter is the most safely and effective way to use PDA. -
Page 12: About Batteries
I. Knowing the Product I. Knowing the Product 7. About Batteries [Battery charging and working time] Working time Standard (2200mhA) Charging Time Standard (2200mhA) Less than 4 hours (main Talk time 6 hours Time battery), less than 72 hours (backup battery) 12 hours (LCD on, Standby time backlight off),... -
Page 13: Pda Specification
I. Knowing the Product I. Knowing the Product 8. PDA Specification Contents Description GSM/GPRS/EDGE Marvell PXA320 806MHz Window Mobile 6.1 DISPLAY 3.5”, 240 x 320 / 260,000 color 1 x USB 1.1 Client / Host 1 x RS-232C INTERFACE Mini-SD slot IrDA 1.2 (Option: Bluetooth class ) Integrated GPS CAMERA... -
Page 14: Ⅱ. Learning The Basics
II. Learning the Basics II. Learning the Basics 1. Turning On/Off - Power Button * Press power button to turn on the PDA * Depress power button for 2 seconds in the condition of PDA is turned on, the Front light will be turned on or turned off. -
Page 15: Starting The Pda
II. Learning the Basics II. Learning the Basics 3. Starting the PDA [Windows Mobile Starting Screen] [Adjusting the Screen] ▪ Optimize the screen input by using the Stylus Pen on ▪ Once you complete the initial wizard, you will see the starting screen as shown below. - Page 16 II. Learning the Basics II. Learning the Basics 3. Starting the PDA [Starting Windows Mobile] ▪ When you press the Start button on the upper left-hand corner of the title bar, the start menu will appear. Start Button Start Menu Running Programs and Settings...
-
Page 17: Making/Receiving Calls
II. Learning the Basics II. Learning the Basics 4. Making/Receiving Calls [Making Calls] Push and make a start the phone program. 2) Enter the phone number. 3) Edit the phone number with make you phone call. • Re-send function: Automatically make a phone call which is the last number you input 5) Connecting. - Page 18 II. Learning the Basics II. Learning the Basics 4. Making/Receiving Calls [Using call program] 1) Dial number a. Dial a phone number or a speed dial number b. Number can be cleared by using [CLR] button c. Press [SEND] button to make a call - Redial function: Without inputting numbers, press the [SEND] button to redial the lasted call number d.
-
Page 19: Typing
II. Learning the Basics II. Learning the Basics 5. Typing [ Keyboard ] [ Letter Recognizer ] [ Transcriber ] The transcriber option is This input method displays This option allows you to similar to the letter an on-screen keyboard that enter texts using your own recognizer. - Page 20 II. Learning the Basics II. Learning the Basics 5. Typing [ Selecting Text Input Mode ] [ Block Recognizer ] [ Built-in Numeric Keypad ] There are five different This input method uses the Using Keypad, you can type character input traditional writing area box letters, punctuations, methods available:...
-
Page 21: Using Sd Memory Card
II. Learning the Basics II. Learning the Basics 6. Using SD Memory Card [Insert Mini SD card] [Take out Mini SD card] Memory Memory Card Card * Push the memory card into the slot as shown until * Press the memory card down deeply as shown and it it’s plugged. -
Page 22: Software Reset (Initialization)
II. Learning the Basics II. Learning the Basics 7. Software Reset (Initialization) • Press reset softly by using stylus * Soft reset can be used to restart the PDA when there is error occurred and PDA stopped working. Same as computer reset, all the unsaved data will be lost. -
Page 23: Using Sim Card
II. Learning the Basics II. Learning the Basics 9. Using SIM Card Detach the battery before using the SIM Card. Please insert the SIM card in this slot. SIM Card Slot... -
Page 24: Using Barcode Reader
III. Functions III. Functions 1. Using Barcode Reader [Using laser Scanner] [Using CMOS Imager Scanner] [correct] [incorrect] [correct] -Barcode can be read in every direction [correct] * Face the PDA the barcode as shown and press left/right button to use. - Page 25 III. Functions III. Functions 1. Using Barcode Reader [Basic test method of laser barcode] 1) Run notepad 2) Create new notepad file 3) Face the scanner to the barcode and press barcode button. 4) The captured barcode value is shown in the new notepad. •...
- Page 26 III. Functions III. Functions 1. Using Barcode Reader [Basic CMOS barcode test method] 1) Run notepad 2) Create the new notepad file 3) Face the scanner to the barcode and press barcode button. 4) The read barcode value is shown in the new notepad. •Please consult the program’s manufacture for using the special barcode program.
-
Page 27: Using Camera
III. Functions III. Functions 2. Using Camera [Taking Photo] ▪ Go to [Start] → [Programs] → [CAMERA] program. ▪ If you use Mapping to use the side button of the PDA as the camera button, the [CAMERA] program will launch when you press the side button. ▪... - Page 28 III. Functions III. Functions 2. Using Camera [Viewing album] ▪ Start ► Programs ► Camera► Thumbnails You can extend/reduce the selected Still/Video, or check information on the Still/Video. By selecting the [Menu] button, you can select Zoom, Play Slide Show, Set as Today Background, Beam picture, Save, Edit, Properties, Options or Send to your space for the selected Still/Video.
-
Page 29: Using Infrared Port (Irda)
III. Functions III. Functions 3. Using Infrared Port (IrDA) • Matching the IrDA port as shown (transmission speed is fastest when the distance at shortest) Sample) 1. Start->Setting 2. Select WL transmission after pressing “connect” tab. 3. Click “OK” after check “receiving all the incoming WL” 4. -
Page 30: Using Bluetooth
III. Functions III. Functions 4. Using Bluetooth You can launch Bluetooth devices (Bluetooth printer, card reader, etc.) separately from the PDA. Devices and connections of Bluetooth can be setup. ▪ Example of Using Bluetooth: ① Steps: [Start] -> [Settings] ② Press [Connections] tab and select [Bluetooth] ③... - Page 31 III. Functions III. Functions 4. Using Bluetooth Scan and pair up with other Bluetooth devices. ▪ Example of using Bluetooth: ① Steps: [Start] -> [Settings] ② After pressing [Connections] tab, select [Bluetooth] ③ On the [Devices] tab, select ‘Add new device...’ ※...
-
Page 32: Using Wireless Admin
III. Functions III. Functions 5. Using Wireless Admin As an overall wireless administration, you can set up Bluetooth and Wi-Fi (Wireless LAN) easily and conveniently. ▪ Example of using Wireless Admin: ① Step: [Start] -> [Settings] ② After going to [Connections] tab, select [Wireless Admin] ③... -
Page 33: Using Wireless Lan Features
III. Functions III. Functions 6. Using Wireless LAN Features 1) The “WLAGS4681” menu window appears. If the “WLAGS4681” menu window does not appear, double click “ ”in the tool bar. Click “Wireless Information”, select the corresponding AP, and select “Connect”. If the AP information does not exist, enter it manually. -
Page 34: Host Pc Connection Method
III. Functions III. Functions 7. Host PC connection method [Connect the cradle] [Connect to PDA directly] *Connect the PDA (cradle) -cable-computer as shown * Connect PDA-cable-computer as shown • ActiveSync can be used after connecting the PC or notebook to copy the files or install the new program by synchronizing the PDA with PC. -
Page 35: Using Ear Jack
III. Functions III. Functions 8. Using ear jack • Take off the ear jack cover and plug it straight into the PDA as shown. -
Page 36: Ⅳ. Connecting Activesync
IV. Connecting ActiveSync IV. Connecting ActiveSync 1. Installing ActiveSync ▪ When the installation screen shows up, click Install. ▪ Download Microsoft ActiveSync Version 4.5 from http://www.microsoft.com/downloads/ ▪ When ActiveSync starts, click Next. The screenshots are for the Korean version of Microsoft ActiveSync 4.1 . - Page 37 IV. Connecting ActiveSync IV. Connecting ActiveSync 1. Installing ActiveSync ▪ Exit the installation by selecting Done once the installation is finished. ▪ It might be necessary to restart the PC based on the environment of your PC. If requested please restart your PC. ※...
-
Page 38: Downloading Files
IV. Connecting ActiveSync IV. Connecting ActiveSync 2. Downloading Files ▪ Once you connect the PDA to the PC with ActiveSync, you ▪ In order to use ActiveSync, connect your PC or can synchronize features such as Favorites, Contact, laptop to the PDA with the USB cable. Schedule, Tasks, E-mail Inbox, etc. -
Page 39: Setting
V. Setting V. Setting Phone • Phone Tab • You can select/deselect sound of the terminal • Start ► Settings ► Personal • Tab ► Phone ► Phone Tab • Ring type : You can select Ring • / Increasing ring / Ring once •... -
Page 40: Appendix
VI. Appendix VI. Appendix 1. Q&A Q. What should I do if the PDA gets wet? A. You should detach the battery from the PDA, and lay it out to dry. If your PDA does not work even after drying you may need to change the main board or other components, so please contact Customers Service. -
Page 41: Customer Service
VI. Appendix VI. Appendix 2. Customer Services [Before Requesting Customers Service] [ Bluebird Soft Customers Service ] • Phone : +82-2-1588-1380 • FAX : +82-2-548-0870 • Please backup all the data in your PDA before • E-Mail : gcs@bluebird.co.kr requesting customers service. •... - Page 42 3. Authenticated Facts ▪ Name of Authenticator: Bluebird Soft Inc. ▪ Name of Product: Wireless product for the wireless data communications system (Industrial PDA) ▪ Model: BIP-5000 ▪ Date of Production: 2009. 06. ▪ Manufacturer/Country: Bluebird Soft Inc./Republic of Korea...
Need help?
Do you have a question about the BIP-5000 and is the answer not in the manual?
Questions and answers