Table of Contents
Advertisement
Advertisement
Table of Contents

Subscribe to Our Youtube Channel
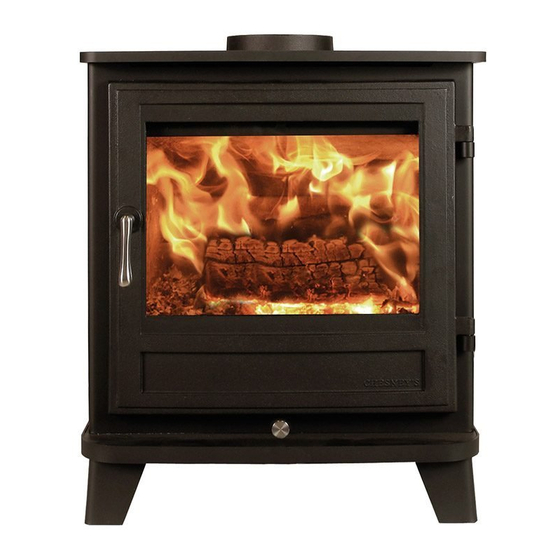
Related Manuals for Chesney's Beaumont 8SGS


Summary of Contents for Chesney's Beaumont 8SGS
- Page 2 Technical Manual PIN: 0558CM1311 User and Installation Instructions Model No. 8SGS – 6SGS Model Names 8 Series Gas Stoves 6 Series Gas Stoves Beaumont 8SGS Alpine 6SGS Belgravia 8SGS Beaumont 6SGS Salisbury 8SGS Belgravia 6SGS Shipton 8SGS Salisbury 6SGS Shoreditch 8SGS...
-
Page 3: Table Of Contents
Contents Section Pages Unpacking Technical data Installation parameters Balanced flue configurations / information 10-14 Appliance setup information 15-22 Control system information 23-34 Injector information Placement of fibre logs and embers 36-38 Commissioning the fire unit 39 - 40 Briefing and handover to the customer Servicing and maintenance 41-56 Fault finding... -
Page 4: Unpacking
1. Unpacking Remove the appliance from its packaging, and check that it is complete and undamaged. If satisfied by the condition and the contents is as specified, proceed with the installation. The installation should only be carried out by a competent person and all gas work must be carried out by a Gas Safe Registered person in accordance with national and local regulations for both gas and electricity (If required). -
Page 5: Technical Data
2. Technical Data Chesney’s gas stove specifications Gas Connection Size 8.0mm O.D. tubing Pilot Assembly SIT NG 9029 Control System Mertik Maxitrol GV60 (Radio Frequency) Appliance Mass Range (kilograms) 65.5-91.0 Countries of Destination Gas Category, Type Type and Supply Pressure ... - Page 6 Model Overall dimensions (mm) Approx. Balanced Back and Top Flue System weight flue fire Flue Exits (mm) (kg) External 150 (6”) Alpine 6 Internal 100 (4”) External 150 (6”) Beaumont 8 Internal 100 (4”) External 150 (6”) ...
- Page 7 6 Series SALISBURY SHIPTON BEAUMONT SHOREDITCH ALPINE BELGRAVIA...
- Page 8 Main Balanced Flue Parts Product Code for Stainless Steel Air Intake Collar CH 150 Emissions Exit Collar CH 100 Air Intake Gasket CH 150G Emissions Exit Gasket CH 100G Blanking Plate Gasket for Air Intake CH 100G Wall Terminal Style 1 CH USDHC2 10 Wall Terminal Style 2 CH USDHC3 10...
-
Page 9: Installation Parameters
3. Installation Parameters This appliance must be installed in accordance with the rules in force, and used only in a sufficiently ventilated space. Consult instructions before installation and use of this appliance. NOTE – This appliance is heavy, care must be taken when installing or servicing to avoid personal injury. - Page 10 It is advised that provisions be made for the removal of the appliance without the need to dismantle the flue system. The gas connection must be in accordance with Local and National regulations. This appliance is intended for use on a gas installation with a governed meter. The pilot fitted to this appliance is not to be adjusted or put out of action.
-
Page 11: Balanced Flue Configurations / Information
4. Balanced flue configurations / information Positioning of balanced flue outlets. Minimum Distances for terminals 1) 1500mm from a structure on the roof. 2) 600mm above the highest point of intersection with the roof. 3) Flue must not penetrate the shaded area (separation distance of 600mm). 4) Flue must not penetrate the shaded area (separation distance of 2000mm). - Page 12 Types of chimney or flue Chesney’s Gas stoves are Balanced Flue appliances this means they vent directly outside through a co-axial tube (one tube within a larger tube). The outer tube draws air in from the outside and the inner tube expels the combustion gases. These appliances can be routed through an existing chimney, a pre-fabricated flue or where a room has no chimney.
- Page 13 Vertical Terminal Vertical terminal – CH/USDVC2 10 Full flue restrictor fitted The appliance is usable with: 1. 1.0m minimum vertical height up to a height of 8.0m plus length of terminal. Other combinations are possible provided the vertical height is not below the minimum.
- Page 14 Up and out the wall Terminal Wall terminals – CH/USDHC2 10 / CH/USDHC3 10 No flue restrictor fitted The appliance is usable with: a 1.0m minimum vertical with a maximum horizontal length of 0.475m (length of wall terminal piece). a 1.5m minimum vertical with a maximum horizontal length of 7.475m (length of flue sections and wall terminal piece).
- Page 15 Terminal Guards The flue outlet should be protected with a terminal guard if persons could come into contact with it, or if it could become damaged or if a flue outlet is in a vulnerable position such as where the flue discharges is within reach from the ground (less than 2 meters), balcony, veranda or an opening window.
-
Page 16: Appliance Setup Information
5. Appliance setup information Chesney’s Alpine WARNING – This appliance is heavy Lifting this appliance requires 2 persons. Handle the appliance with care to avoid damage. - Page 17 The images below are of the Salisbury – Appliances Shoreditch, Shipton, Beaumont, and Belgravia have the same controls, body and internals, only the top panel, legs and door have differences. All appliances are supplied with a metal data plate attached to it and must remain with the appliance for annual services.
- Page 18 Changing the flue opening For opening the door please read instructions on page 43. If the flue is to be changed to run through the rear of the appliance follow these steps. Step 1 Alpine model Remove the door by taking the weight of the door at 90° remove the hex socket bolts circled to release the door clear from the hinges and remove the controls access door.
- Page 19 Step 4 (Alpine model only) Remove the 4 securing bolts shown below to allow the movement of the gas cube in the cladding. Step 5 (Alpine model only) Remove the inner flue collar then unscrew the outer flue collar by moving the gas cube slightly within the cladding to access all the screws.
- Page 20 Step 7 Swap over the flue collars and blanking plates and ensure all parts are sealed then refit the fire cube. Step 8 Refit the door and adjust the box within the Alpine cladding to re-line up the door then re-tighten up the bolts then fit the blanking plate over the opening.
- Page 21 Fitting the restrictor plate Important Before fitting the appliance check the flue setting to see if a flue restrictor plate is required. All wall terminals (CH/USDHC2 10 / CH/USDHC3 10) do not require a restrictor plate. Both restrictor plates are fitted as standard, if they are to be adjusted or removed, access is made by removing the baffle plate via the 5 screws circled below.
- Page 22 IMPORTANT NOTE Setting up the aeration. The appliance aeration must also be set according to how the flue is set. Under the appliance is a screw located next to the injector, when screwed fully out the aeration is closed and when screwed fully in the aeration is open. Only adjust the aeration when the appliance is cool.
- Page 23 All Chesney’s appliances have been tested to ensure safety. NOTE – All gas work must be carried out by a qualified gas installer to all relevant regulations. Ensure that the gas supply is capable of delivering the required amount of gas, and is in accordance with the rules in force.
-
Page 24: Control System Information
6. Control system information Features and Options No external electrical power required. Used with standard thermocouple and standard ODS pilot Flame height adjustment with remote control or switch Compact design with large capacity Thermoelectric flame failure device ... - Page 25 WARNING Fire or explosion hazard. Attempted disassembly or repair of controls can cause property damage, severe injury or death. Do not disassemble the gas valve; it contains no serviceable components. For your safety, read the user instructions before attempting to light the appliance. Do not store or use gasoline or other flammable vapors and liquids in the vicinity of this control or other appliances.
- Page 26 TECHNICAL SPECIFICATIONS Gas combination control according to CSA or CE approval (see label for certification) Fuels: CSA: Suitable for use with natural, manufactured, mixed and propane (LP) gases and LP gas-air mixtures. CE: Suitable for use with gases of EN 437 gas family 1,2, and 3. Approvals: ...
- Page 27 Remote NOTE: These remote handsets, receiver, wall switches, switch panels and touch pads are not interchangeable with previous versions. Approvals: ANSI Z21.20/CSA 6.20 for U.S. & Canada. CE: Gas Appliances Directive 90/396/EEC and EN298-2003 Max. Ambient Temperature: Remote Handset and Receiver: 140°F (60°C) Wall Switch/Touch Pad: 176°F (80°C) Switch Panel: 221°F (105°C) 8 Wire Connecting Cable, Thermo Current Cable: 221°F (105°C)
- Page 28 Make sure the ambient temperature does not exceed the ambient temperature ratings for each component. WARNING GV60 standard version is suitable for indoor use only. CONNECTIONS – MAIN AND PILOT GAS WARNING Fire or Explosion Hazard. Can cause property damage, severe injury or death. Do not bend tubing at gas valve connection point after compression fitting has been tightened.
- Page 29 Connection Pilot Gas (Tubing Connections) 1. Ensure tubing end is square and free from burrs. 2. Insert pilot tubing into pilot outlet using fitting provided until it bottoms, and turn finger tight. Do not use pipe joint compound. 3. Turn with wrench until you shear off the ferrule. Turn an additional ¾ turn to make a gastight seal. 4.
- Page 30 Ignition Cable NOTE: Do not damage the ignition cable while attaching it to the ignition electrode. When the cable is in place, avoid contact with sharp objects or edges. Cables longer than 900mm, avoid contact with metal parts, as this could decrease spark. Attach ignition cable to receiver tab 2.8 x 0.8mm (SPARK), and connect other side to ignition electrode.
- Page 31 ADJUSTMENT WARNING Do not adjust ODS (vent free) pilot. WARNING It is the appliance manufacturer’s responsibility to determine GV60’s suitability for a specific application. WARNING Do not attempt to remove screws from the top of the gas valve. Do not change any adjustments marked with tamper indicating paint;...
- Page 32 If the desired outlet pressure or flow cannot be achieved by adjusting the gas valve, check the gas valve inlet pressure using a manometer at the valve inlet pressure tap. If the inlet pressure is in the normal range, replace the gas valve; otherwise take the necessary steps to assure proper gas pressure to the valve.
- Page 33 OPERATING INSTRUCTIONS - FOR OEM USE ONLY WARNING Fire or explosion hazard. Attempted disassembly or repair of controls can cause property damage, severe injury or death. Do not disassemble the gas valve; it contains no serviceable components. If the information in this manual is not followed exactly, a fire or explosion may result causing property damage, personal injury or loss of life A.
- Page 34 GENERAL NOTES Batteries – Remote Handset: 1 x 9V Block (quality alkaline recommended) Batteries – Receiver: 4 x 1.5V “AA” (quality alkaline recommended) An AC Mains Adapter may be used instead of batteries (only the Mertik Maxitrol AC Mains Adapter or one approved by Mertik Maxitrol can be used).
-
Page 36: Injector Information
Back log retaining bracket / pilot shield The back log retaining bracket / pilot shield is located above the pilot and is attached to the pilot bracket. The back log sits on top of the bracket to ensure the log is in the correct area and the bracket also improves pilot flame stability. -
Page 37: Placement Of Fibre Logs And Embers
8. Placement of fibre logs and embers Logs and glow embers are only available from Chesney’s stockists. Important notes: The placement of fibre logs and embers must be installed in accordance with these instructions; any deviation may cause poor combustion. If any of the components of the log effect burner are broken DO NOT INSTALL. - Page 38 Locate the hole on the pin attached to the perforated bed laying the log against the back wall of the appliance. Embers Place the embers all around log 1 ensuring there are no embers under log 2. Log 3 Place log 3 so that the end of the log sits on the ledge of the bracket circled below...
- Page 39 On the underside of log 3 is a raised area this is to locate in the groove on Log 1 Lay the log at a 45 degree angle so that the log locates in the groove on log 1. Fit the log retainer.
-
Page 40: Commissioning The Fire Unit
9. Commissioning the fire unit Turn on the gas supply. Check the gas supply and gas appliance for soundness. The appliance must be fully fitted, the door and glass on the appliance must be sealed. Check areas around the door for gaps and that the rope seal is tightly sandwiched between the door and enclosure. -
Page 41: Briefing And Handover To The Customer
Other models – Lock the door using a Alpine models - Lock the door using a hex key castle nut spanner clockwise to tighten 10. Briefing and handover to the customer Instruct the customer on the full operation of the appliance. Warn the customer that the fire unit may give off a temporary odour;... -
Page 42: Servicing And Maintenance
11. Servicing and maintenance It is advised that the appliance is serviced annually by a qualified person to Local and National Regulations. Only carry out maintenance work when the appliance is cool. Exchangeable components list Pilot unit (natural gas) SIT-NG9029 Gas Injector (Natural Gas) Single hole / dia.1.8mm Control Valve... - Page 43 Door Handle information Alpine model To remove the handle unscrew the door locking grub screw then turn the handle180° and remove the screw on the door handle boss. On the underside of the handle boss is an opening, the handle must be facing upwards to access the grub screw.
- Page 44 Opening the door should only be carried out by a Gas Safe Registered person Important note - The door must only to be opened when servicing the appliance. Only open the door when the appliance is off and cool. Alpine model On the Alpine the door is fitted with a grub screw to stop the door from being opened (shown below).
- Page 45 Changing the door glass Note attention must be paid to the curing time and temperature rating of the silicone used with the glass and door seals. Replacement glass is only available from Chesney’s stockists. Only carry out a service or repair when the appliance is cool. If the glass is damaged such as cracks or breaks do not use the fire until the glass is replaced.
- Page 46 Adjusting the door seal Important note - The door should only be opened when switched off and only if the appliance requires maintenance. Ensure the door is properly sealed. To adjust the seal on the left hand side for Beaumont, Salisbury, Shipton, and Belgravia firstly undo the grub screw to allow the handle to turn fully (Shoreditch and Alpine models do not have the grub screw fitted).
- Page 47 Aligning the door (Alpine models) To align the Alpine door with the cladding Undo the 4 securing bolts - 2 at the front and 2 at the back of the appliance. Move the gas fire cube within the cladding until the door lines up then tighten up the bolts.
- Page 48 Removal of the gas cube Alpine model Remove all the gas logs and embers from the appliance. Remove the door by taking the weight of the door at 90° remove the hex socket bolts circled and lift the door clear from the hinges. Remove the 4 securing bolts - 2 at the front and 2 at the back of the appliance.
- Page 49 Removal of the gas cube All other models The gas logs and embers must be removed from the appliance. Remove the top cover. Open the door and lift the door clear from the hinge pins then remove the controls cover. Remove the bolts holding the legs to the gas fire cube a lift away from the legs.
- Page 50 Pilot Removal Work should only be carried out by a competent person and all gas work be carried out by a Gas Safe Registered person in accordance with national and local regulations. The pilot to be exchanged must be a genuine like for like part. Part - SIT Pilot NG9029...
- Page 51 Pilot removal NOTE – Before removing the pilot ensure you have a seal set. (Only supplied by Chesney’s). Isolate the appliance. Remove the logs and embers. Remove the log base to access the pilot. Remove the white heat protective fibre then pull the spark lead from the pilot. Undo the 4mm tube nut and release from the pilot then remove the pilot shield and pilot bracket from the enclosure.
- Page 52 Remove the 2 gasket seals and assess for damage and replace if required. NOTE- One of the gaskets is fitted so that the slots are pointing upwards and the other fitted downwards to ensure a good seal. Remove the pilot nut from the valve then pull the pilot free from the appliance. Replace with genuine parts refitting in the reverse order.
- Page 53 Replacing the pilot spark lead Isolate the appliance. Remove the logs and embers. Remove the log base to access the pilot. Remove the white heat protective fibre then pull the spark lead from the pilot. Pull the spark lead from the controls box then pull the lead through the appliance. Assess for damage to the protective sleeve and replace if required.
- Page 54 Control Valve Removal – Mertik GV60 (Fully remote controlled)
- Page 55 Removing the gas valve Isolate the appliance. Release the front panel via the four screws Remove the cover plate (Beaumont / Belgravia / Shipton) by unscrewing the bolts at each end using the hexagon key. Undo the 2 screws holding the valve bracket assembly then slide the bracket forward to drop the assembly.
- Page 56 The valve assembly can be turned to access the connections to the injector, pilot 4mm OD tube nut and thermocouple nut. Undo the screws to release the valve from the bracket. IMPORTANT – Only use a Chesney’s factory set valve. Fit the new factory set valve and refit the interrupter block, tube and wiring connections.
- Page 57 Pairing the handset The handset has been paired with the appliance at the factory. If the handset is to be exchanged or is not responding with the appliance then the control box RF receiver will require setting to allow communication. The control box RF receiver has to learn the handset code: Press and hold the control box RF receiver’s reset button until you hear two (2) beeps.
-
Page 58: Fault Finding
12. Fault finding Symptom Check List Unit does not respond. Check Remote is working properly Check Battery power supply. Check wiring is correct. Remote does not work. Check Battery Power. Check Remote eye is visible and facing in the correct position. Hardwire switch does Check Switch is wired properly. -
Page 59: User Instructions
13. User Instructions General The flue must be fitted in accordance with Local and National Regulations. The flue must not be shared with any other appliance. It is advised that flue specialist inspect the flue system on an annual basis to ensure that the flue system is sound and the combustion products outlet (terminal) is clear of obstruction. - Page 60 Important notes The appliance door must only to be opened when servicing the appliance. The appliance must not be operated with the door open. The appliance must not be operated if the appliance glass front is damaged or has been removed.
-
Page 61: Lighting The Appliance
Lighting the appliance The GV60 is fully remote controlled. IMPORTANT NOTE - The appliance should always be observed when lighting. If the appliance makes a long beep when starting the appliance then the on/off switch is set on the OFF (0) position, switch the unit to the ON (1) position. Note - If the handset is out of action or is not obtainable the appliance can be turned off by pressing the ON/OFF switch to the OFF (0) position (located on the left side of the appliance). - Page 62 When the acoustic signal stops the main valve opens to ‘High rate’ to allow gas through to the main burner. All of the main burner should light within 6 seconds lighting the whole burner area. IF THIS DOES NOT HAPPEN THEN THE APPLIANCE SHOULD BE TURNED OFF ALLOWING 5 MINUTES BEFORE ATTEMPTING TO RELIGHT.
-
Page 63: Changing The Batteries
Changing the batteries The batteries will require changing yearly (based on the average usage) this may differ depending on usage and on the quality of battery, the battery change is best done on the annual service of the appliance. However if the appliance is showing signs of diminishing signal or during the lighting sequence then the batteries may need changing. -
Page 64: Cleaning
Cleaning Cleaning should only be carried out when the fire is turned off and cold. This appliance contains no asbestos. Cleaning paintwork Use a clean soft dry brush to remove dirt and debris from the appliance. If the appliance has ingrained dirt use soapy water to dampen a soft cloth and use to clean. -
Page 65: Installer Checklist
14. Installer check list Flue checklist PASS FAIL Flue Size Flow test Spillage test Gas checklist PASS FAIL Soundness Standing Pressure Working Pressure PASS FAIL Ventilation Ventilation requirements for appliance 15. Dealer and Installer Information Dealer and Installer Information Dealer Installation Company Contact No. -
Page 66: Annual Service Record
Annual service record Annual service record Year 1 Year 2 Gas Safe Registered Engineer Gas Safe Registered Engineer Contact No. Contact No. Gas Safe Register No. Gas Safe Register No. Date of Service Date of Service Annual service record Annual service record Year 3 Year 4 Gas Safe Registered Engineer...
Need help?
Do you have a question about the Beaumont 8SGS and is the answer not in the manual?
Questions and answers