Chesney's BEAUMONT Installation & User Manual
Gas effect stoves
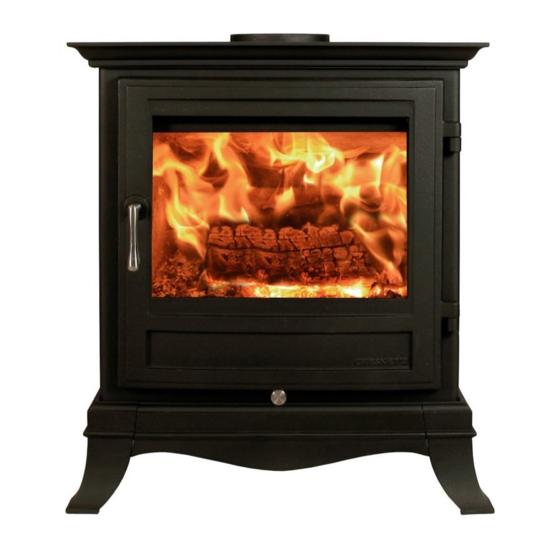
standard & large
Hide thumbs
Also See for BEAUMONT:
- User's installation manual (35 pages) ,
- Installation & user manual (82 pages)

Related Manuals for Chesney's BEAUMONT


Summary of Contents for Chesney's BEAUMONT
- Page 1 CHESNEY’S GAS EFFECT STOVES STANDARD & LARGE INSTALLATION & USER MANUAL chesneys.co.uk Version 005. Sept 2016...
- Page 2 Technical Manual User and Installation Instructions Model No. Standard Gas Stoves: Salisbury Beaumont Shoreditch Shoreditch LS (Available at a later date) Shoreditch XLS (Available at a later date) Large Gas Stoves: Salisbury Beaumont Shoreditch Belgravia Shipton (Available at a later date)
-
Page 3: Table Of Contents
Contents Section Pages 1 Unpacking 2 Technical Data 3 Installation Parameters 4 Construction Information 5 Appliance Details 6 Preparing the Appliance for Installation 7 Installation 8 Placement of Fibre Logs, Chippings and Embers 9 Commissioning the Fire Unit 10 Briefing and Handover to the Customer 11 Servicing and Maintenance 12 Fault Finding 13 User Instructions... -
Page 5: Unpacking
1. Unpacking Remove the appliance from its packaging, check that it is complete and undamaged. If satisfied by the condition and the contents is as specified, proceed with the installation. The installation should only be carried out by a competent person and all gas work must be carried out by a Gas Safe registered person in accordance with national and local regulations for both gas and electricity (If required). - Page 6 Fig.4 Logs Standard Stove Large Stove Fig.6 Remote Control Handset Fig.5 Bag of embers (Please refer to page 40) Fig.7 Stainless steel panels for Fig.8 Interior Panel Boards the Large Stove models...
-
Page 7: Technical Data
Rate Class Size Type Pressure Marking (Single (Gross) hole) Standard Stoves: G20 at 20mbar Salisbury G20 at 20mbar Beaumont 1.45 1.45mm 0.315 Shoreditch G20/G25 at Shoreditch LS 20/25mbar Shoreditch XLS Large Stoves: G20 at 20mbar Salisbury G20 at 20mbar Beaumont 2.0mm... -
Page 8: Installation Parameters
3. Installation Parameters This appliance must be installed in accordance with the rules in force, and used only in a sufficiently ventilated space. Consult instructions before installation and use of this appliance. NOTE - Wear protective clothing when fitting or carrying works out on the appliance. For your safety it is law that all gas appliances must be installed by a competent person, in accordance with the current gas safety regulations applicable in the country of use. - Page 9 Before the appliance is installed, the flue / chimney must be inspected to ensure that it is structurally sound and free from obstructions. Ensure the builders opening and supports are made of non combustible and heat resistant material. Do not cover the appliance and or do not wrap it in an insulation blanket or any other material Do not make any changes to the appliance.
- Page 10 All appliances are supplied with a metal data plate attached to it and must remain with the appliance for annual services. The data plate is attached to the rear of the appliance (see fig.9) NOTE: DO NOT attempt to remove the data plate while the appliance is HOT! Fig.9...
-
Page 11: Construction Information
4. Construction Information Hearths A hearth conforming to national regulations shall be provided for the stove extending to at least the front of the supporting legs, and to at least each side of the stove. Chesney’s recommend a hearth footprint 50mm more on all 4 sides than the footprint of the appliance. - Page 12 Conventional Class 1 Chimney (lined only) / Factory made flue system conforming to BS 5440-1. Fig.10 Installed into a chimney recess / builders opening. Flue pipe connection direct to a flexible flue liner Flue system to terminate with a flue terminal conforming to BS 5440-1...
- Page 13 Fig.11 Free standing installation connected to a factory made flue system. Flue system to terminate with a flue terminal conforming to BS 5440-1 The flue system used should be in accordance with the appliance manufacturer’s installation requirements Dilution air through integral draught divert...
- Page 14 The Builders Opening Use non combustible heat resistant materials for the chimney breast, including the top of the chimney breast, the material in the chimney breast and the back wall of the chimney breast. The construction must comply with all relevant regulations. The appliance can be used with a sound Class 1 lined flue with a minimum 4”...
-
Page 15: Gas Connection
Gas Route For your safety it is law that all gas appliances must be installed by a competent person, in accordance with the current Gas Safety regulations applicable in the country of use. Ensure that the gas supply is capable of delivering the required amount of gas, and is in accordance with the rules in force. -
Page 16: Appliance Details
5. Appliance Details Fig.14 Appliance dimensions Standard Gas Stoves A mm B mm C mm D mm Beaumont Salisbury Shoreditch Shoreditch LS Shoreditch XLS Large Gas Stoves A mm B mm C mm D mm Beaumont Belgravia Shipton Salisbury Shoreditch... -
Page 17: Preparing The Appliance For Installation
6. Preparing the Appliance for Installation The appliance is supplied in separate boxes, stove, burner assembly, logs set. The interior panels are pre-fitted to the appliance. The installer is required to install the burner and logs into the appliance. Important Notes •... -
Page 18: Installation
7. Installation IMPORTANT Please ensure the gas pipe has been routed and the flue connection is terminated in a suitable position ready for connection. Fixing of the appliance The gas stove is a free standing appliance and does not require any additional fixing to the floor or walls. - Page 19 Fitting or replacing the interior panel boards For correct installation of the interior panel boards please follow these instructions. If the panels are to be replaced, remove the burner assembly from the unit, to allow for removal of the existing panels. Prior to fitting the new panels please ensure the internal surfaces are clean and free from any dirt and debris.
- Page 20 Fig.19 SIDE ELEVATION The rear end of the top panel board has an angled edge that is to be placed at the rear of the stove. The top board must be inserted at an angle, then it is to be swivelled so that the rear of the board rests on the top of the rear panel board.
- Page 21 Fig.21 Ensure the bottom of the side and rear panels are firmly resting on the shelves. Then place the top panel so that it rests on top of the rear and side panels as shown. If the panels are fitted correctly there should be no gaps between the panels and shelves. The large stove has additional stainless steel side panels which are to be fitted on to the side panels.
- Page 22 Fig.23 Connect the main gas valve inlet to the gas isolation valve via the flexible gas pipe fitted to the burner assembly. Fig.24 Soundness testing At this stage gas soundness test can be performed, connect a suitable test meter to the pressure test point ensuring the tube is routed under the main body of the appliance and not through the door.
-
Page 23: Placement Of Fibre Logs, Chippings And Embers
8. Placement of Logs & Embers Logs and embers are only available from Chesney’s stockists. Important Notes: The placement of fibre logs and embers must be installed in accordance with these instructions; any deviation may cause poor combustion. If any of the components are broken DO NOT INSTALL. Do not to add more fibre logs onto the fire bed than specified. - Page 24 Log 4 is to be placed behind the burner, the left side of the log will rest between the two knuckles of log 2, the right side of log 4 will sit on the raised platform, with the rear of the log will resting against the back interior panel. Log 3 has a triangular piece that rests directly on the burner bed and any embers should be cleared from this area.
- Page 25 Fitting the log base for the Large gas stove Embers Pour the embers in to the burner tray and spread the embers evenly across the tray bed. The embers provided are to be placed in a single layer on the top of the burner bed, do not over load.
- Page 26 Place the embers on the left and right hand side sides of the burner shelf, ensuring not to obstruct any of the aeration holes. Fig.29 Fitting the log set for the Large gas stoves Fit the log set according to the following set of photos. Fig.30 Log 5 is to be placed at the rear of the chamber resting on the burner...
- Page 27 The bottom of log 10 is to be placed into the bottom right corner, between the side panel and log retainer. The log has a formed angel that is designed to fit against the log retainer. The other end will will rest on log 5.
-
Page 28: Commissioning The Fire Unit
9. Commissioning the Fire Unit Check the gas supply and gas appliance for soundness. The appliance must be fully fitted; the door of the appliance must be sealed. Check that there is no movement of the door or gaps in the seal. Check that all the products of combustion are entering the flue and that no products of combustion are entering the building Lighting the appliance for the first time. - Page 29 Position a lit smoke match under the appliance 50mm in and 50mm above the inside edge of the plinth of the appliance. Fig.31 50mm in and up If the appliance and chimney is functioning correctly all smoke will be drawn into the air intake and out of the room.
-
Page 30: Briefing And Handover To The Customer
10. Briefing & Handover to the Customer Instruct the customer on the full operation of the appliance. Warn the customer that the fire unit may give off a temporary odour; this is normal running in of the unit, and will disappear after a short period of use. Inform the user that the appliance glass is only to be opened when servicing, and not to disturb the fibre logs as this may disturb the combustion. -
Page 31: Servicing And Maintenance
11. Servicing & Maintenance It is advised that the appliance is serviced annually by a qualified person to Local and National Regulations. Only carry out maintenance work when the appliance is cold. Exchangeable Components List Complete burner assembly Under warranty only Pilot unit Two flame ODS Pilot assembly: OXP-PG-82-330NG Injector (Standard Gas Stove) - Page 32 Inspecting the Flue / Chimney The appliance must be serviced by a qualified person in accordance with local and national regulations. An inspection of the flue / chimney must be carried out on an annual basis or if the appliance is suspected that it is not expelling the emissions correctly. Check the effectiveness of the flue by carrying out a spillage check.
-
Page 33: Fault Finding
12. Fault Finding Symptom Check List Unit does not respond. Check Remote is working properly Check Battery power supply. Check wiring is correct. Check main switch is in the on position Handset does not work. Check Battery Power. Check handset is in range (wifi symbol displayed on handset) Ensure the handset is paired Unit starts but no spark... - Page 34 FAULT CODE DESCRIPTION OF FAULT ACTION TO TAKE TESC locked Unlock the handset Low current from thermocouple Reset. Too high ambient temperature Allow appliance to cool before relighting Thermocouple not connected or bad Check all connections connection and rectify Flame signal after burner shutdown Reset Flame signal before burner has started Reset...
-
Page 35: User Instructions
13. User Instructions General The flue must be fitted in accordance with Local and National Regulations. The flue must not be shared with any other appliance. It is advised that flue specialist inspect the flue system on an annual basis to ensure that the flue system is sound and the combustion products outlet (terminal) is clear of obstruction. - Page 36 All parts of the appliance become hot while running and should therefore be considered to be a working surface. It is also advised against placing combustible materials or soft furnishings directly in front or above the appliance. Floor coverings, such as carpets (up to the hearth), are considered to be acceptable.
- Page 37 Cleaning Cleaning should only be carried out when the fire is turned off and cold. This appliance contains no asbestos. Cleaning Paintwork Use a clean soft dry brush or a vacuum to remove dirt and debris from the appliance. DO NOT USE ANY CHEMICALS OR OILS TO CLEAN THE APPLIANCE. Cleaning Glass The glass is specially formulated to withstand very high temperatures use a mild glass cleaner.
- Page 38 It is necessary to clean the fire if debris or soot deposits have accumulated on the logs. A soft brush is advised to clean the logs and burner unit. The ceramic parts are fragile; care must to be taken when handling this product. Warning –...
-
Page 39: Control System Information
14. Control System Information Control System The appliance is fitted with the Thermo Electric Safety Control (TESC). The system operates on radio frequency and has a remote control handset. The gas control has an automatic ignition system, therefore does not have a standing pilot. - Page 40 Handset function and display Fig.31 Mode – MAN(Manual), Zzz (Snooze), thermostat or timed Time (12 hour or 24 hour display) Day of the week Gas fire burner status In Range of fire (missing if not in range or if Fire Control turned off) Battery condition –RC handset, FC fire control...
- Page 41 Lighting the appliance Important – To operate the handset it must always be unlocked, this is carried out by firmly holding the handset in one hand, which will allow operation of all functions. Step 1. Unlock the handset by holding it. The green unlock light will illuminate.
- Page 42 Additional control functions In addition, the remote control can also be used to set a number of additional functions: • Time and date • Temperature display in degrees Celsius or Fahrenheit • Snooze mode • Thermostat function Caution - Although highly improbable, we cannot rule out that your appliance’s ignition process can be started unintentionally through other remote controls.
- Page 43 Setting the day of the week Press and release the “+” and “–” buttons until the correct day of the week is shown on the display. (Mo = Monday, Tu = Tuesday, We = Wednesday, Th = Thursday, Fr = Friday, Sa = Saturday and Su = Sunday).
- Page 44 Thermostatic mode The handset has within it a thermostat sensor and this can be set so the fire will heat the room to match he temperature set in the handset. There are 2 temperature types that can be set: • Day mode temperature that has a sun symbol on the display - the default temperature is 24 degrees Celsius.
-
Page 45: Installer Checklist
15. Installer Check List Flue Checklist PASS FAIL Flue Size Flow test Spillage test Gas Checklist PASS FAIL Soundness Standing Pressure Working Pressure Ventilation PASS FAIL Ventilation requirements for appliance... -
Page 46: Dealer And Installer Information
16. Dealer and Installer Information Dealer Contact No. Date of Purchase Model No. Stove Serial No. Burner Serial No. Gas Type Installation Company Gas Safe Registered Engineer Contact No. Gas Safe Register No. Date of Installation... -
Page 47: Annual Service Record
17. Annual Service Record Annual Service Record Annual Service Record Year 1 Year 2 Gas Safe Registered Engineer: Gas Safe Registered Engineer: Contact No.: Contact No.: Gas Safe Register No.: Gas Safe Register No.: Date of Service: Date of Service: Door seal replaced: Door seal replaced: Annual Service Record... - Page 48 Annual Service Record Annual Service Record Year 5 Year 6 Gas Safe Registered Engineer: Gas Safe Registered Engineer: Contact No.: Contact No.: Gas Safe Register No.: Gas Safe Register No.: Date of Service: Date of Service: Door seal replaced: Door seal replaced: Annual Service Record Annual Service Record Year 7...
- Page 49 Notes: ........................................................................................................................................................................................................................................................................................................................................................................................
- Page 50 Notes: ........................................................................................................................................................................................................................................................................................................................................................................................
-
Page 51: Chesney's Warranty Registration
18. Chesney’s Warranty Registration To validate and start your warranty please fill out this form and send it back to: Chesney’s Warranty Registration Field House 284b Battersea Park Road London SW11 3BT Alternatively, log on to: www.chesneys.co.uk/warranty/registration.asp and complete the online form. All items are required: YOUR DETAILS NAME...
Need help?
Do you have a question about the BEAUMONT and is the answer not in the manual?
Questions and answers