Table of Contents
Advertisement
Advertisement
Table of Contents

Related Manuals for Chesney's 8 Series


Summary of Contents for Chesney's 8 Series
- Page 2 Free Standing Stove Technical Manual 8 Series User and Installation Instructions For use in GB & IE (Great Britain and Republic of Ireland). IMPORTANT Please read thes e Instructions carefully before installation or use. Please note that it is a legal requirement under England and Wales Building...
-
Page 3: Table Of Contents
Contents Section Pages Unpacking Technical Specifications Pre-Installation Unit Basic Information Installation 9-12 Commissioning Briefing and handover to the customer Servicing and Maint enance 15-21 Spare Parts User Instructions 23-31 Lighting Instructions 26-27 Performance tips Installer Check List Dealer and Installer Information Annual Service Rec ords... -
Page 4: Unpacking
1. Unpacking Remove the appliance from its packaging and check that it is complete and undamaged. If satisfied by its condition and that the cont ents are as specified, proceed with the installation. The stove is supplied in an assembled state. The installation should only be carried out by a qualified pers on in accordance with national and local regulations. -
Page 5: Technical Specifications
2. Technical Specifications Wood Logs All tests used 2.25 – 2.5 kg of test fuel (at 12.1% moisture) – 2 logs (12 inches) All efficiencies in the table are Net values Total Efficiency 76% Parameter Mean Test Duration 0.92 1.00 0.93 0.95 Nominal heat output... -
Page 6: Pre-Installation
3. Pre-Installation Products of combustion entering the room can cause serious health risks. This appliance must be fitted in accordanc e with building regulations and by an approved HE TAS registered installer. IMPORTANT: Seek specialist advice if the installation is in a dwelling with a thatched roof. -
Page 7: Unit Basic Information
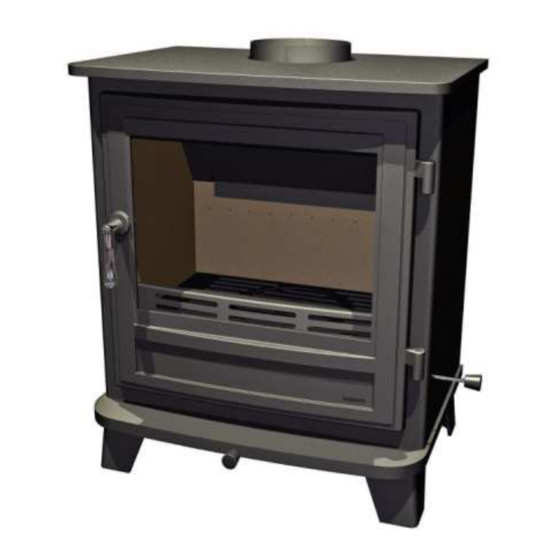
4. Unit – Basic Information Appliance types and approximate weights Flatford 143kg / Petworth 151kg / Barrington 148kg / Hampstead 155kg Hampstead LS 172kg / Hampstead XLS 180kg / Belgravia 148kg... - Page 9 Appliance Dimensions Flue size 150mm (6”)
-
Page 10: Installation
5. Installation Please read these instructions before installing the appliance. In all cases the installation must comply with current Building Regulations, Local Authority Byelaws and other specifications or regulations as they affect the installation of the stove. It should be not ed that the Building Regulations requirements may be met by adopting the relevant recommendations given in British Standards BS 8303, BS EN 15287-1:2007 as an alternative means to achieve an equivalent level of performance to that obtained following the guidance given in Approved Document J. - Page 11 Changing the flue outlets This appliance is pre-assembled with the flue set to come from the top. When carrying out a survey assess the situation as to the exit of emissions. If the flue is to exit the rear of the appliance then an additional blanking plate should be ordered.
- Page 12 4) Remove the blanking plate via the bolts. 5) Change over the blanking plate with the flue collar and secure. Seal the joint with fire cement. 6) Ensure the blanking plat e (additional part) is bolted to the underside of the removable top.
-
Page 13: Installation
It is an offence to burn wood or other non-authorised smokeless fuels in a smoke control area on an appliance that is not exempt ed for burning the non-authorised fuel. Currently Chesney’s 8 Series Stove Collection are not exempt applianc es. Hearths The area where the appliance is to be fitted must have a suitable load-bearing capacity for both hearth and appliance. -
Page 14: Commissioning
6. Commissioning Before Lighting Ensure that all parts are in position such as firebricks, baffles, grate, riddle plate, fuel retainer bar etc. All castings, joints and door seals must be checked for soundness. Check that the riddling lever, fuel selector lever and the air flow bar operate smoothly. Flue draught When commissioning the installation it may be necessary to carry out a flue draught test. -
Page 15: Briefing And Handover To The Customer
7. Briefing and handover to the customer Explain to the user the full operation of the appliance. Warn the customer that the fire unit will give a temporary odour caused by the paint ‘curing’. This is normal running in of the unit and will disappear after a short period of use. Inform the user not to use the appliance as an incinerator and ex plain the importance of using appropriate fuels. -
Page 16: Servicing And Maintenance
8. Servicing and Maintenance It is important that this appliance is properly installed and regularly maintained. Periods of Prolonged Non-Use If the stove is to be left unus ed for a prolonged period of time then it should be given a thorough clean to remove ash and unburned fuel residues. - Page 17 Paintwork It is generally accepted that stove paintwork may need a light re-spray occasionally after a seasons use, stoves painted in a lighter colour are more likely to require this. Touch-up spray is available from most Chesney’s stockists. Ensure that there is adequate ventilation and that areas to be sprayed are clean and dry. Make sure that all parts and the surrounding area that do not require paint are properly masked up.
- Page 18 Removal and refitting of the fuel retaining bar To remove the fuel retaining bar lift from the slot in the fire grate and rot ate to clear the sides and door. Cleaning is done using a wire brush. Replace in the reverse order. Removal and refitting of the riddling plate The riddling plate is removable for cleaning and inspection.
- Page 19 Removal of the main fire grate Ensure that the appliance is cool before starting. Before removing the main fire grate, the fuel retaining bar, ashpan and riddle plate need to be removed. (See ‘Removal and refitting of the fuel retaining bar’ and ‘Removal and refitting of the riddling plate’).
- Page 20 Removal and refitting of the firebricks Always ensure that the appliance is cool before starting any maintenanc e work. Replace any damaged firebricks as soon as possible. When removing the firebricks wear protective clothing and take care when removing as these can become fragile after use.
- Page 21 Removal and refitting the baffle plates Wear protective gloves. Removal of these parts also gains access to the flue openings. The first baffle plate is in place on the firebricks. To remove this - follow the instructions ‘Removal and refitting of the firebricks’ steps 1 – 3. (Page 19) The second baffle plate is hooked in place using key-hole slots.
- Page 22 Replacing the glass seal Stove glass seals are available from most Chesney’s suppliers. The glass seal is a peris hable item and at some point may need changing. If the seal leaks emissions then it must be replaced. To replace the glass seal see instructions ‘Removal of the glass panel’ ,Page 16, for removing the glass.
-
Page 23: Spare Parts
9. Spare Parts ITEM NO. PART NUMBER The body of the stove is covered by the warranty, not consumables. 101-105 Main body 106 Flue Blanking Plate Cons umables are as follows: 107 Top Duct 108 Baffle Plate Glass seal 109 Side Fire Brick Door rope seal Baffle plate 110 Flue Adaptor... -
Page 24: User Instructions
10. User Instructions General Before using this appliance please read these instructions carefully. All local regulations, including those referring to National and European Standards must be complied with when installing this appliance. The builder's opening or fireplace opening must be constructed of a non-combustible material. - Page 25 De-ashing and refuelling may occasionally emit fumes into the room. If there are a lot of fumes in the room open a window or door to the outside to ventilate the room. If fume emission persists, open all doors and windows to ventilate the room and eit her allow the fire to burn out or safely dispose of the fuel from the appliance.
-
Page 26: Lighting Instructions
Lighting Instructions Your Chesneys stove has been designed to operate with minimum effort. The appliance door should be closed except when attending. Lighting the appliance for the first time. Due to the newness of materials, the fire will give off an unpleasant odour for a period of time after commissioning. - Page 27 Lighting the fire Your Chesneys stove has been designed to operate with minimum effort. It is important that appropriate fuels are used in this appliance. Once set in its fuel position, a Ches neys stove implements a sophisticated air system to control the primary, secondary air and air wash with the use of a very simple single lever control.
- Page 28 Lighting Pull the air flow bar fully out towards you, allowing full primary and secondary air into the stove. (Setting lll) Lay the fire using dry kindling wood and paper or firelighters. Place these on the bas e of the stove and cover with two small split logs.
- Page 29 From time to time the glass may require cleaning as tars and creosotes from the fuels build- up. To reduce this effect do not over fill the appliance and burn newly added logs on ‘high’ output (S etting lll) for a short period before adjusting For a cleaner and more efficient appliance refuel little and oft en.
- Page 30 Open the door. Under the grate is a compartment where the ashpan is located this collects the ash and requires emptying from time to time, take care when emptying. Using the gloves provided and the ashpan handle (supplied) hook the handle to the ashpan and carefully remove the ashpan safely away from the appliance and dis pose of the ashes into a non combustible metal ash bin.
-
Page 31: Performance Tips
11. Performance tips Useful tips Use good kindling wood to start the fire. Use good quality wood with a moisture content of less than 20%. Only use an approved anthracite or smokeless fuel suitable for closed appliances. Burn at high out puts for short periods to avoid large build-ups of soot on the glass. Provide sufficient amount of air to the appliance to ens ure the fire keeps burning. -
Page 32: Installer Check List
12. INSTALLER CHECK LIST Flue Checklist PASS FAIL Flue system correct for the appliance Flue swept Spillage test Smoke test on Installed Unit Unit Checklist PASS FAIL Appliance controls operates correctly Seals in good condition 13. Dealer and Installer Information Please complete the following information:- DEALER AND INSTALLER INFORMATION Dealer... -
Page 33: Annual Service Rec Ords
14. Annual Service Record Annual service record Annual service record Year 1 Year 2 Engineer Engineer Contact No. Contact No. Date of Service Date of Service Annual service record Annual service record Year 3 Year 4 Engineer Engineer Contact No. Contact No.
Need help?
Do you have a question about the 8 Series and is the answer not in the manual?
Questions and answers