Table of Contents
Advertisement
Quick Links
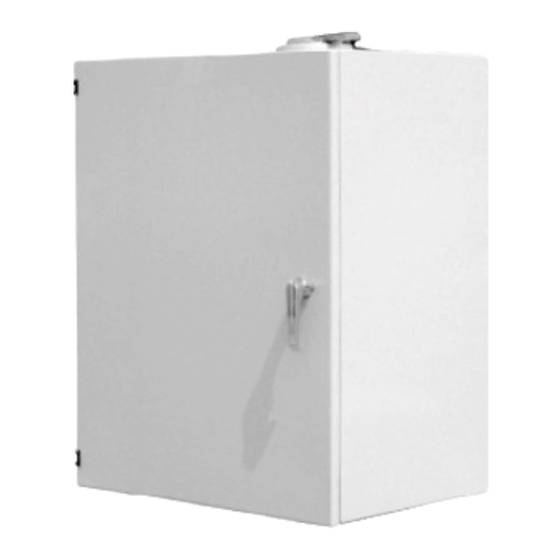
Motor Operator
for
Overhead Distribution Switch
with Reciprocating Controls
®
POWER SYSTEMS, INC.
A.B. Chance Company
210 North Allen Street,
Centralia, MO 65240-1395
Tel: (573) 682-5521
P817-1187 Rev A
Installation, Operation and
Maintenance Manual
®
IMPORTANT!
For future reference:
• Keep this manual with the motor operator.
• Store it inside the plastic bag and information holder
located on the right hand wall of the enclosure.
1
Advertisement
Table of Contents

Related Manuals for Hubbell CHANCE


Summary of Contents for Hubbell CHANCE
- Page 1 ® ® POWER SYSTEMS, INC. IMPORTANT! For future reference: A.B. Chance Company • Keep this manual with the motor operator. 210 North Allen Street, • Store it inside the plastic bag and information holder Centralia, MO 65240-1395 located on the right hand wall of the enclosure.
- Page 2 Chance Company terms and conditions of sale constitute the entire obligation of A.B. Chance Company. The warranty in the terms and conditions of sale is the sole warranty of A.B. Chance Company. Any statements in this document do not create new warranties or modify any existing warranty.
-
Page 3: Table Of Contents
Limit switch thumbscrews ......21 P817-1187 Rev A ©Copyright 1998 A.B. Chance Company, 210 North Allen Street, Centralia, MO 65240... -
Page 4: Overview
1—Overview Introduction DANGER This manual is to guide you through the in- Hazardous voltage. stallation of the motor operator for an overhead distribution switch with reciprocat- Will cause severe personal injury, death, or property damage. ing controls. This manual does not claim to Only qualified personnel should work on or around this equipment cover all situations that may arise during in- after becoming thoroughly familiar with this document and other... -
Page 5: Operating Environment
1—Overview Application/Mounting The motor operator for an overhead distribu- tion switch with reciprocating controls is de- signed for mounting on wooden utility poles. If the utility pole is steel or concrete, mount- ing may be accomplished if holes can be made in the pole or by using brackets. -
Page 6: Installation Notes
2—Installation Notes For future reference, use this space to make notes specific to this unit’s installation, opera- tion and maintenance. Date Installed: Model Number: Serial Number: RTU: Protocol Radio Sensors P817-1187 Rev A... -
Page 7: Customer Supplied Requirements
3—Customer Supplied Requirements The following is required for installation. Be Electronic sure to have these items on hand before • Correct communications equipment appli- beginning installation. cable for this installation • Current/voltage sensors with cables if ap- Safety Equipment plicable for this installation •... -
Page 8: Receiving And Handling
4—Receiving & Handling Inspect Packaging Table 1 – Parts List • Upon receipt, immediately inspect packag- Item Quantity Description ⁄ " split lock washer (stainless steel) ing for signs of damage ⁄ " - 13 X 1- ⁄ " long bolt (stainless steel) •... -
Page 9: Component Locations
4—Receiving & Handling Components Figure 2 – Component Location • Become familiar with the component names and locations shown in Figure 2 • Open the motor operator door and identify all the items shown in Figure 2 • Match the components in the following list with those on the motor operator: 1. -
Page 10: Installation
5—Installation Preparation WARNING Step 1. — Modify Existing Switch Handle External parts can move suddenly and unexpectedly. • Refer to Figures 3a and 3b This can pose a danger to the general public. • Make sure overhead switch is closed In areas accessible to the general public, this motor operator should •... -
Page 11: Mounting Holes In Utility Pole
5—Installation Step 2. — Drill Mounting Holes Figure 4 – Mounting Holes In Utility Pole • Refer to Figure 4 • Mark upper hole location on the utility pole by measuring 12.75 inches (324 mm) down from the bottom of the control pipe and 2.5 inches (63 mm) around the pole from the control pipe centerline. -
Page 12: Mounting Motor Operator
5—Installation Mounting Figure 5 – Mounting Motor Operator Step 1 — Mounting The Motor Operator • Refer to Figure 5 • Ready lifting equipment to hoist motor op- erator NOTE: Lift motor operator by lifting eye- bolts only. • Attach lifting strap, chain or cable safety hooks/shackles to lifting eyebolts only. -
Page 13: Key Components
5—Installation • Insert the switch control pipe in the crank Figure 6 – Key Components casting. Depending on crank style, the control pipe length may need to be short- ened for proper fit. Tighten fasteners until switch control pipe is firmly held. •... -
Page 14: Wiring
6—Wiring Wiring Guidelines WARNING 1. If low voltage and high voltage wires cross paths, make sure the intersection is made at a Hazardous Voltage. right angle. Contact with an energized and/or ungrounded motor operator compo- 2. To minimize noise coupling, use twisted pair nent will result in death, severe personal injury, erratic operation of sensor wires. -
Page 15: 115Vac Power Connection
6—Wiring • Set control box in a clean, dry area where Photo E it will not fall or be subject to damage • Locate and loosen terminal block cover re- Terminal taining screw (see Photograph E) block 2 cover • Remove terminal block cover and set it aside with the control box Terminal •... -
Page 16: Pre-Operation Checks
7—Pre-Operation Checks Energizing CAUTION Step 1. — Reassembly Prior To Energizing Voltage selector switch must be set properly. • Refer to Photograph F Misapplied voltage will result in mis-operation and/or damage equipment • Place control box into mounting slots Set voltage selector switch on the back of the control box back to match incoming power •... -
Page 17: Operation
8—Operation Energizing, Exercising & DANGER Inspecting Hazardous voltage. Step 1. — Turn On Power Electrical contact with system voltage will cause severe injury or death. • Turn the power supply “ON” at the fuse/ breaker box if applicable Do not exercise overhead switch while it is energized. •... -
Page 18: Shift Handle - Decoupled
8—Operation Decoupling & Coupling Motor Operator Photo J Step 1. — Decoupling Motor From Drive Casting Shift handle in • Refer to Photograph J DECOUPLED • Decouple the motor operator by pulling out position and down on the shift handle (see Photograph J) •... -
Page 19: Manual Operating Handle
8—Operation Manual Operation WARNING Step 1. — Manual Switch Opera- tion Hazardous voltages and high speed moving parts. • Decouple the motor as outlined in the These can cause death, serious personal injury or damage equip- Decoupling & Coupling Motor Operator ment. -
Page 20: Adjusting Limit Switches
8—Operation Remote Operation The switch can be operated from central control via a communication link to the RTU, allowing for remote configuration, di- agnostics, and operation. Refer to the SCADA system instruction manual for spe- cific instructions. Regardless of the type or make of the SCADA system, the user must place the Remote/Local switch in the "Re- mote"... -
Page 21: Adjustment
9—Adjustment IMPORTANT NOTICE The limit switches adjust the motor Photo P operator for normal opening and closing. Limit switches will not compensate for an improperly ad- justed overhead switch. Limit switch adjustment on this motor operator is normally not "CLOSE" "OPEN"... -
Page 22: Maintenance
10—Maintenance Enclosure Exterior Light Bulbs & Control Box Status Lights The enclosure has been factory painted to deliver years of protection. If the paint finish Both the enclosure light and control box status has been damaged, touch-up affected spots lights should come “ON” when the enclosure with ANSI 61 gray enamel (Wiegmann Enclo- door is opened. -
Page 23: Trouble Shooting
11—Trouble Shooting The following table presents the most common symptoms, their possible cause(s) and likely corrective action(s). These do not cover all possible problems. If you are unable to correct a problem using this trouble shooting guide, contact your factory representative. Table 2 –... - Page 24 ® POWER SYSTEMS, INC. © Copyright 1999, A.B. Chance Company 210 North Allen Street, Centralia, MO 65240-1395 Printed in U.S.A. P817-1187 Rev A...
Need help?
Do you have a question about the CHANCE and is the answer not in the manual?
Questions and answers