Table of Contents
Advertisement
Advertisement
Table of Contents

Subscribe to Our Youtube Channel
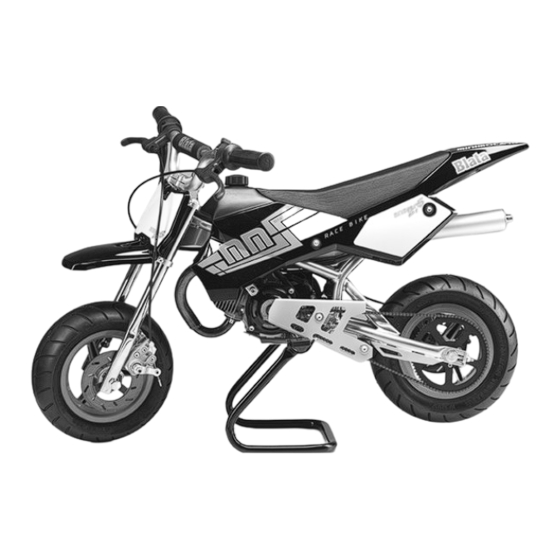
Related Manuals for Blata minimocard 2.6


Summary of Contents for Blata minimocard 2.6
-
Page 3: Safety Warning
SAFETY WARNING Always pay attention to the instructions and safety warnings below This manual contains important safety information and instructions which should be read carefully before operating the vehicle. For your own safety and the safety of others follow these rules. Neither manufacturer nor distributor is responsible for injuries caused by unsafe and improper use of the vehicle. -
Page 4: Table Of Contents
MINIMOTARD 2,6 SERVICE MANUAL FOR USE AND MAINTENANCE AND SPARE PARTS LIST OF MINIMOTARD Before starting the operation of your Minimotard, read thoroughly these directions. For your safety and the safety of others Follow these recommendations in order to use your Minimotard safely and correctly. CONTENTS PAGE INTRODUCTION ...................... -
Page 5: Introduction
INTRODUCTION Minimotard 2,5 is intended for a drive on closed tracks with even, smooth, and dust-free surface. Both growns - up and children can ride on the Minimotard. Children only under the supervision of a grown - up and responsible person. If the terms of a track are fulfilled, the Minimotards can be used for races. -
Page 6: Unpacking And Basic Controls - Fig. 1
UNPACKING AND BASIC CONTROLS The Minimotard is packed and delivered with demounted handlebars . After unpacking, set up the handlebars in a function position with two clamps and set up that will suit you best. However at maximum handlebars turning, the brake levers must not bump into the lining. -
Page 7: Starting The Engine - Fig. 2
STARTING THE ENGINE To be done only on the starting stand - Fig. 2. After opening the tank filling hole, fill the tank with fuel and close it by screwing - in cap.Open the petrol supply cock by turning the small lever into position “ON”, Fig.3. Set the choke lever into position “C”... -
Page 8: Periodic Maintenance
The Minimotard engine will be switched off by pusching the red pusch - buttom of the stop switch on handlerods. After the first half- hour ride it is necessary to check the tightening of screws and nuts, especially of the engine. Check also the brake setting. -
Page 11: Part List
MINIMOTARD – 2,6 170.000.00 MINIMOTARD 2,6 510.002.00 STARTER COMPLETE ENGINE 510.003.00 STARTER ROPE 110.001.00 ENGINE COMPLETE 510.004.00 HOLDER 110.001.01 ENGINE PROPER 510.005.00 HOLDER 110.002.00 CARBURETTER SHA 1412L 510.006.00 GUIDE BUSH 110.004.00 PISTON COMPLETE - A 510.007.00 STARTER CASE 110.004.01 PISTON COMPLETE - B 510.008.00 STARTER SPRING 110.004.02... - Page 12 119.011.00 LINING RUBBER FOR FRAME 114.015.00 CHAIN COVER 119.013.00 HOSE CLAMP 114.016.00 CHAIN COVER, POLISHED 119.020.00 STAND 174.001.00 LINING COMPLETE, NON VARNISHED 119.035.00 WASHER 6,4 x 18 x 1 174.002.00 LINING COMPLETE, VARNISHED 129.008.00 HOSE CLAMP 174.004.00 129.017.00 SADDLE, NON VARNISHED WASHER 6,4 x 16 x 1 174.005.00 FRONT FENDER, NON VARNISHED...
-
Page 13: Front And Rear Brakes - Fig. 7
916.072.02 916.072.02... -
Page 14: Adjusting The Brakes - Fig. 4
ADJUSTING THE BRAKES Fig. 4 Small incremental brake adjustment : Free play at the handlebar lever is effected by turning the knurled end on the cable adjustor. This will allow the lever to be set at the nominal to ¼ inch of free lever movement. -
Page 15: Dismantling And Mounting The Rear Wheel - Fig. 5
DISMANTLING AND MOUNTING THE REAR WHEEL, FIG. 5 Unscrew the rear axle nut 920.011.01 and loosen the nuts 920.009.01 on chain tighteners and the screw M6 on . Shift the wheel forward and remove the chain. At pulling out the wheel axle, secure the rear wheel two distance rollers fall out. -
Page 16: Storage Procedures
* Long period is 90 days and longer. Rights reserved for technical, text and design changes of the BLATA Company. It is a great honor for us, that you have chosen our product. We believe that the MINIBIKE will work for you without problems and will bring you much pleasure and fun.
Need help?
Do you have a question about the minimocard 2.6 and is the answer not in the manual?
Questions and answers