Table of Contents
Advertisement
Advertisement
Table of Contents

Subscribe to Our Youtube Channel
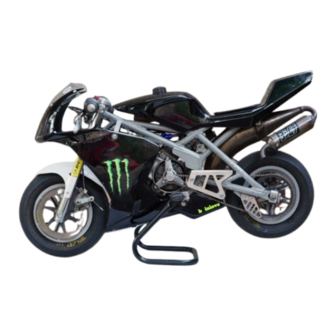
Summary of Contents for Blata Elite 14 - 4,2
- Page 2 Noise emitted by machinery and equipment (Minibike BLATA ELITE 14) - Measurement of emission sound pressure levels at a work station and at other specified positions. Levels measured by authorized person ( TUV CZ s.r.o.). Test record (no. : 814/90/06/BT/IZ/H) is deposited with producer.
- Page 3 SAFETY WARNING Always pay attention to the instructions and safety warnings below This manual contains important safety information and instructions which should be read carefully before operating the vehicle. For your own safety and the safety of others follow these rules. Neither manufacturer nor distributor is responsible for injuries caused by unsafe and improper use of the vehicle.
-
Page 4: Table Of Contents
REAR BRAKES PADS REPLACEMENT ..............6 MINIBIKE ELITE 14 – 4,2 - FIG. 5 ................7,8 PARTS LIST ......................9,10 ENGINE BLATA – FIG. 10 ..................11 CLUTCH COMPLETE - FIG. 6 ..................12 FRONT AND REAR BRAKES - FIG. 7 ................ 13 REMOVE AND REFIT THE FRONT WHEEL............... -
Page 5: Introduction
The minibike is constructed especially for racing competitions on special racing tracks. Minibike Blata should not be used during winter season and under bad weather conditions. Usage under these conditions leads to abnormal mechanical wear and corrosion of most minibike parts - especially those directly exposed to climatic influences. -
Page 6: Unpacking And Setting Up Before Riding
UNPACKING AND SETTING UP BEFORE RIDING The minibike is delivered in a cardboard carton and packed with folded handlebars and brake levers. After unpacking, set up the handlebars into the position, that suits the best for driving. The maximum pulled brake lever position should not touch on the handlebar grip. -
Page 7: Starting The Engine - Fig. 2
STARTING THE ENGINE Engine starting should be done only on the stand - Fig. 2. Fill the fuel tank and close it with the filler cap. Open the Gas petcock. Set the petrol supply cock. Set the choke lever into position “C”, Fig. 3. Without turning the accelerating handle, pull gently twice the starting wire and by next guick pull start the engine. -
Page 8: Periodic Maintenance
PERIODIC MAINTENANCE Periodic maintenance is the best way to help the machine perform well, give longevity and provide safety and low cost operation. In addition, you will be spared from many worries from self caused problems, resulting from poor maintinence or no maintinence. A - Before every ride: 1. -
Page 9: Brakes Adjusting - Fig. 4
ADJUSTING THE BRAKES Small incremental brake adjustment Free play at the handlebar lever is effected by turning the knurled end on the cable adjustor. This will allow the lever to be set at the nominal to ¼ inch of free lever movement. Basic brake adjusting: Screw in the knurled cable adjustor at the brake lever (512.004.00) so the cable is in it’s most slack starting position.. -
Page 12: Parts List
MINIBIKE ELITE 14 - 4,2 180.000.00 MINIBIKE ELITE 14 - 4,2 330.083.00 AIR FILTER LI - 60 ENGINE 330.085.00 BEARING CASE 110.080.76 JET 76 330.091.00 CYLINDER GASKET - 4 PCS 110.002.10 CARBURETOR SHA14 / 12 510.005.00 STARTER ROPE HAND HOLDER 120.041.00... - Page 13 184.004.00 SEAT-TAIL ASSEMBLY NON VARNISHED OTHER HARDWARE 184.006.00 FAIRING VARNISHED 911.002.01 SCREW M 8 x 45 184.007.00 SEAT-TAIL ASSEMBLY VARNISHED 911.005.01 SCREW M 8 x 110 314.010.00 FRONT FENDER NON VARNISHED 911.007.01 SCREW M 10 x 140 314.011.00 FRONT FENDER VARNISHED 912.006.01 SCREW M 5 x 16 334.009.01...
-
Page 15: Clutch Complete - Fig. 6
FIG. 6 FIG. 16 MP - 1 159.019.00... -
Page 16: Front And Rear Brakes - Fig. 7
FIG. 7 512.060.00... -
Page 17: Remove And Refit The Front Wheel
REMOVE AND REPLACE THE FRONT WHEEL - FIG. 5 Before dismantling the front wheel it is necessary to remove the front brake pads from the front brake, so it is possible to move the brake caliper from the wheel and be able to draw out the wheel and tire. Remove the front axel nut M10 (920.011.01) .Draw out the axel from the fork and wheel. -
Page 18: Replacement Of Tire
REPLACEMENT OF TIRE – FIG. 5 Remove the wheel from the minibike. For the front wheel unbolt the brake disk and for the rear wheel, the brake disk and sprocket. Deflate the tire, by removing the valve stem. Place the wheel on a hard surface and press the tire bead from the wheel rim in to the middle relief at centre of rim. -
Page 19: Torque Settings
TORQUE SETTINGS (1 FT-LB = 1.3558 Nm) PART NAME TORQUE SETTING (FT-LB) SECURED BY ENGINE Cylinder head, liquid cooled – M6 Cylinder – nuts M6 Intake manifold – M5 Starter cover – M6 Ratchet wheel –bolt M6 Loctite 243 Magneto (rotor) – nut M10 Starter prowls –... -
Page 20: Storage Procedure
* Long period is 90 days and longer. Rights reserved for technical, text and design changes of the BLATA Company. It is a great honor for us, that you have chosen our product. We believe that the MINIBIKE will work for you without problems and will bring you much pleasure and fun.


Need help?
Do you have a question about the Elite 14 - 4,2 and is the answer not in the manual?
Questions and answers