
Related Manuals for Everlast 16517455


Summary of Contents for Everlast 16517455
- Page 1 OWNER’S MANUAL MODEL NO. 16517455 Assembly Operation Trouble –Shooting Parts Warranty CAUTION: You must read and understand this owner’s manual before operating unit.
-
Page 2: Table Of Contents
TABLE OF CONTENTS SAFETY PRECAUTIONS………………………………………2 IMPORTANT OPERATION INSTRUCTION…………………. 4 GETTING TO KNOW YOUR ELLIPTICAL……………………5 ASSEMBLY INSTRUCTION……………………………………6 COMPUTER INSTRUCTIONS………………………………..13 CARE AND MAINTENANCE………………………………….17 TROUBLE SHOOTING………………………….…………….18 PARTS LIST & DIAGRAM……………………………………..19 TRAINING GUIDELINE………………………………………..21 STRETCHING…………………………………………………..27 WARRANTY…………………………………………………..29 Customer Service 1-888-707-1880 Maurice Pincoffs Canada Inc. ©2011 Email: customerservice@pincoffs.ca... -
Page 3: Important Safety Information
IMPORTANT SAFETY INFORMATION THIS UNIT IS INTENDED FOR HOUSEHOLD USE ONLY READ ALL INSTRUCTIONS BEFORE USING THIS ELLIPTICAL CAUTION: Before starting any exercise program, it is recommended that you consult your physician. WARNING: Connect this unit to a properly grounded outlet only. DANGER: To reduce the risk of electric shock, always unplug the treadmill from the electrical outlet immediately after using and before cleaning. - Page 4 To disconnect, turn all controls to the off position, then remove plug from outlet. Use the elliptical only for its intended use as described in this manual. Do not use any attachments that are not recommended by the manufacturer. User weight should not exceed 350lbs (159 kgs). Never allow more than one person on the elliptical at once.
-
Page 5: Important Operation Instruction
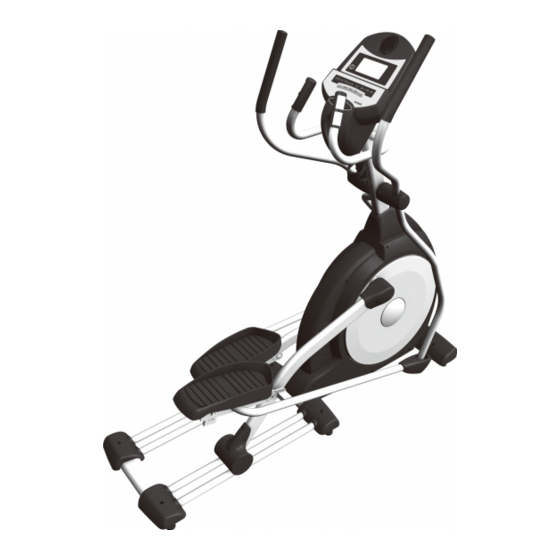
Important Operation Instructions NEVER operate this elliptical without reading and completely understanding the results of any ● operational change you request from the computer. Understand that changes in resistance do not occur immediately. Set your desired level on the ● computer console and release the adjustment key. - Page 6 HOW THE ELLIPTICAL WORKS The elliptical allows your feet to move in a natural elliptical path, minimizing the impact on your knees and ankles. The elliptical provides smooth, quiet and variable exercise capabilities with: Dual Action Handles for total body workout Stationary handlebar for stability Consol Handpulse...
- Page 7 ASSEMBLY PACK CHECK LIST STEP 1 #66. M5 × 10m/m #96. 3/8" × 2T #84. 3/8" × 23 × 1.5T Phillips Head Screw Split Washer (1pc) Curved Washer (2pcs) (4pcs) #103. 3/8" × 3/4" #60. 3/8" × 2-1/4" Hex Head Bolt (2pcs) Hex Head Bolt (1pc) STEP 2 #79.5/16"×23×1.5T...
- Page 8 STEP 4 #87. Ø 3.5×12m/m #105.M5 × 15m/m Sheet Metal Screw (8pcs) Phillips Head Screw (14pcs) Tools Step 4 #108. Phillips Head Screw Driver (1 pc) #107. Short Phillips Head Screw Driver (1 pc) #109. 12m/m Wrench (1pc) #106. 13/14m/m Wrench (1pc) Customer Service 1-888-707-1880 Maurice Pincoffs Canada Inc.
-
Page 9: Assembly Instruction
Assembly instructions STEP 1: CONSOLE MAST ASSEMBLY 1. Locate the Console Mast (12) and Console Mast Cover (41) and slide the Cover onto the Mast as far as it will go. Make sure the Console Mast Cover is facing the correct way. 2. - Page 10 Customer Service 1-888-707-1880 Maurice Pincoffs Canada Inc. ©2011 Email: customerservice@pincoffs.ca...
- Page 11 STEP 2: HANDLE BAR ASSEMBLY 1. Install the two 17m/m Wave Washers (83) onto the Left and Right side of the Handle Bar axle. 2. Slide the Left (10) and Right (11) Handle Bars onto the appropriate side of the axle. The handlebars have a small sticker on them indicating L (left) and R (right).
- Page 12 STEP 3: CONNECTING ARM ASSEMBLY 1. Align the hole in the rod end of the left Connecting arm (8) with the hole in the bracket of the left Handle Bar (10). The rod end should be on the inner side of the Handle Bar bracket. Make sure the ty-wrap is removed from the rod end and the sleeve spacer (22) does not fall out during assembly.
- Page 13 STEP 4: PLASTIC PARTS ASSEMBLY 1. Install the Connecting Arm Covers (2 each 57, 58) over the connection of the rod end and Handle Bars with four M5×15m/m Phillips Head Screws(105) and two 3.5×12m/m Sheet Metal Screw (87) by using the Short Phillips Screw Driver. 2.
- Page 14 Operation of Your Elliptical Power up The Elliptical is supplied with an external power supply. When power is connected to the Elliptical, the console will automatically power up. If there is no input to the console for 20 minutes the console will go to stand-by mode.
-
Page 15: Quick Start
Starting a program Quick Start After the console powers up you may press the Start key to begin, this will initiate the Quick Start mode. In Quick Start the Time will count up from zero and the workload may be adjusted manually by pressing the Up/Down buttons. -
Page 16: User Program
The Pulse window will now be blinking. Entering a Pulse number will set an alarm that will beep when your heart rate reaches the programmed number to let you know you have reached your target. Once you have set the data you may press Start to begin the program. You may also press Start at any time during the programming to begin. - Page 17 FUNCTIONS TIME: Count up: accumulates training time from zero to 99:59. Count down: counts down from preset time to zero. Automatically toggles between SPEED and RPM every 6 seconds. Speed is in SPEED/ RPM: miles per hour (or kilometers per hour) Count up: accumulates training distance from 0.00 to 99.99 miles.
- Page 18 Maintenance: 1. Wipe down all areas in the sweat path with a damp cloth after each workout. 2. If a squeak, thump, clicking or rough feeling develops the main cause is most likely one of two reasons: The hardware was not sufficiently tightened during assembly. All bolts that were installed during assembly need to be tightened as much as possible.
-
Page 19: Trouble Shooting
TROUBLE SHOOTING Problem Cause Correction Monitor does not Adaptor not plugged in or Plug adaptor in or insert batteries display batteries not installed No speed or distance Sending unit not connected Securely plug sending unit into displays on the monitor extension wire and the back of the monitor Sending unit not working... - Page 20 PARTS LIST PART NO DESCRIPTION O'TY 1745501 Main Frame 1745502 Rear Rail Assembly 1745504 Cross Bar 1745505 Bushing Housing, Pedal Arm 1745506 Pedal Arm (L) 1745507 Pedal Arm (R) 1745508 Connecting Arm (L) 1745509 Connecting Arm (R) 1745510 Swing Arm (L) 1745511 Swing Arm (R) 1745512 Console Mast 1745513 Idler Wheel Assembly...
- Page 21 PART NO DESCRIPTION O'TY 1745544 Round Disk 1745545 Round Disk Cover 1745546 Handgrip Foam 1745547 Pedal Arm Cover (L) 1745548 Pedal Arm Cover (R) 1745549 Front Stabilizer Cover 1745550 Pedal (L) 1745551 Pedal (R) 1745552 Slide Wheel Cover 1745553 Button Head Plug 1745554 Front Handle Bar Cover (L) 54~1...
- Page 22 DESCRIPTION O'TY 1745588 4 × 19m/m_Sheet Metal Screw 1745589 5 × 16m/m_Tapping Screw 1745590 Spacer Bushing 1745592 Rubber Foot Pad 1745593 Steel Cable 1745594 1/4" × 19m/m_Flat Washer 1745595 M8 × 20m/m_Carriage Bolt 1745596 3/8" × 2T_Split Washer 98~1 1745598-1 Drink Bottle 1745599 Ø17 ×...
- Page 23 PARTS DIAGRAM Customer Service 1-888-707-1880 Maurice Pincoffs Canada Inc. ©2011 Email: customerservice@pincoffs.ca...
-
Page 24: Training Guideline
TRAINING GUIDELINES Exercise Exercise is one of the most important factors in the overall health of an individual. Listed among its benefits are: Increased capacity for physical work (strength endurance) Increased cardiovascular (heart and arteries/veins) and respiratory efficiency Decreased risk of coronary heart disease Changes in body metabolism, e.g. - Page 25 Progression As your become fitter, a higher intensity of exercise is required to create an overload and therefore provide continued improvement Overload This is where you exercise at a level above that which can be carried out comfortably. The intensity, duration and frequency of exercise should be above the training threshold and should be gradually increased as the body adapts to the increasing demands.
- Page 26 Pulse Count The pulse count(on your wrist or carotid artery in the neck, taken with two index fingers)is done for ten seconds, taken a few seconds after you stop exercising. This is for two reasons: (a) 10 seconds is long enough for accuracy, (b) the pulse count is to approximate your BPM rate at the time you are exercising.
- Page 27 If you experience major discomfort, you may be on a program that is too advanced or you have increased your program too rapidly. If you experience PAIN during or after exercise, your body is telling your something. Stop exercising and consult your doctor. What to Wear Wear clothing that will not restrict your movement in any way while exercising.
-
Page 28: Stretching
STRETCHING Stretching should be included in both your warm up and cool down, and should be performed after 3-5 minutes of low intensity aerobic activity or callisthenic type exercise. Movements should be performed slowly and smoothly, with no bouncing or jerking. Move into the stretch until slight tension, not pain, is felt in the muscle and hold for 20-30 seconds. - Page 29 INNER THIGH STRETCH TOE TOUCHES Sit with the soles of your feet together with your Slowly bend forward from your waist, letting knees pointing outward. Pull your feet as close your back and shoulders relax as you stretch Into your groin as possible. Gently push your toward your toes.
-
Page 30: Warranty
Manufacture’s Limited Warranty Maurice Pincoffs Canada Inc. warrants all its elliptical parts for a period of time listed below, from the date of retail sale, as determined by a sales receipt or in the absence of a sales receipt. Maurice Pincoffs Canada Inc.’s responsibilities include providing new or remanufactured parts, at Maurice Pincoffs Canada Inc.’s option, and technical support to our independent dealers and servicing organizations.
Need help?
Do you have a question about the 16517455 and is the answer not in the manual?
Questions and answers