Daikin FTXS20G2V1B Installation Manual
R410a split series
Hide thumbs
Also See for FTXS20G2V1B:
- Service manual (316 pages) ,
- Operation manual (38 pages) ,
- Technical data manual (18 pages)
Table of Contents
Advertisement
Quick Links
INSTALLATION
MANUAL
R410A Split Series
Models
FTXS20G2V1B
FTXS25G2V1B
FTXS35G2V1B
FTXS42G2V1B
FTXS50G2V1B
Installation manual
R410A Split series
Installationsanleitung
Split-Baureihe R410A
Manuel d'installation
Série split R410A
Montagehandleiding
R410A Split-systeem
Manual de instalación
Serie Split R410A
Manuale d'installazione
Serie Multiambienti R410A
Εγχειρßδιο εγκατÜστασηò
διαιροýìενηò σειρÜò R410A
Manual de Instalação
Série split R410A
Рóêоводство по монтажó
Серия R410A с раздельной óстановêой
Montaj kýlavuzlarý
R410A Split serisi
English
Deutsch
Français
Nederlands
Español
Italiano
ΕλληνικÜ
Portugues
Рóссêий
Türkçe
Advertisement
Table of Contents

Related Manuals for Daikin FTXS20G2V1B


Summary of Contents for Daikin FTXS20G2V1B
- Page 1 Split-Baureihe R410A Manuel d’installation Français Série split R410A Montagehandleiding Nederlands R410A Split-systeem Manual de instalación Español Serie Split R410A Models FTXS20G2V1B Manuale d’installazione Italiano Serie Multiambienti R410A FTXS25G2V1B FTXS35G2V1B Εγχειρßδιο εγκατÜστασηò ΕλληνικÜ διαιροýìενηò σειρÜò R410A FTXS42G2V1B FTXS50G2V1B Manual de Instalação Portugues Série split R410A...
- Page 2 3SB64115-1...
-
Page 3: Safety Precautions
Safety Precautions • Read these Safety Precautions carefully to ensure correct installation. • This manual classifies the precautions into WARNING and CAUTION. Be sure to follow all the precautions below: they are all important for ensuring safety. WARNING....Failure to follow any of WARNING is likely to result in such grave consequences as death or serious injury. CAUTION....Failure to follow any of CAUTION may result in grave consequences in some cases. -
Page 4: Choosing An Installation Site
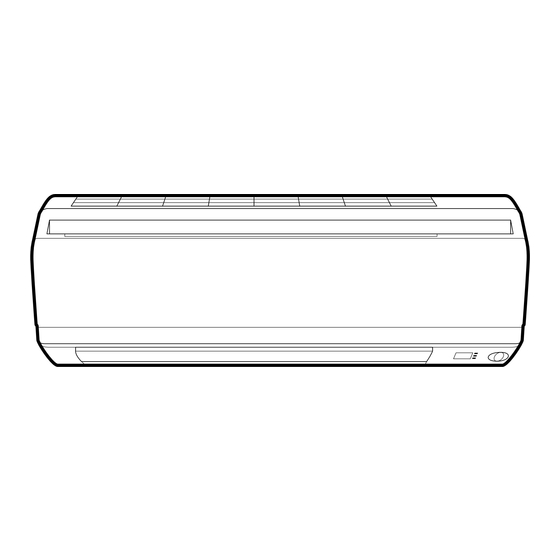
Accessories – ndoor unit Mounting plate Remote controller holder. Operation manual Titanium Apatite AAA dry-cell batteries Installation manual Photocatalytic Air-Purifying Filter Indoor unit fixing screws Wireless remote controller (M4 × 12L) Choosing an Installation Site • Before choosing the installation site, obtain user approval. Indoor unit. -
Page 5: Installation Tips
Installation Tips Removing and installing front panel. • Removal method Hook fingers on the panel protrusions on the left and right of the main body, and open until the panel stops. Slide the front panel sideways to dis- engage the rotating shaft. Then pull the front panel toward you to remove •... -
Page 6: How To Set The Different Addresses
How to set the different addresses. When two indoor units are installed in one room, the two wireless remote controllers can be set for different addresses. 1) Remove the front grille. (2 screws) 2) Remove the electrical wiring box. (1 screw) 3) Remove the metal plate electrical wiring cover. -
Page 7: Indoor Unit Installation Drawings
Indoor Unit Installation Drawings How to attach the indoor unit. Mounting Hook the claws of the bottom frame plate to the mounting plate. If the claws are difficult to hook, A Mounting plate remove the front grille. Clip How to remove the indoor unit. Push up the marked area (at the lower part of the front grille) to Bottom frame... -
Page 8: Indoor Unit Installation
Indoor Unit Installation Installing the mounting plate. • The mounting plate should be installed on a wall which can support the weight of the indoor unit. 1) Temporarily secure the mounting plate to the wall, make sure that the panel is completely level, and mark the boring points on the wall. -
Page 9: Installing Indoor Unit
Indoor Unit Installation Boring a wall hole and installing wall embedded pipe. • For walls containing metal frame or metal board, be sure to use a wall embedded pipe and wall cover in the feed-through hole to prevent possible heat, electrical shock, or fire. Inside Outside •... -
Page 10: Left-Side, Left-Back, Or Left Bottom Piping
3-2. Left-side, left-back, or left bottom piping. emove pipe port cover 1) Attach the drain hose to the underside of the refrigerant pipes here for left- with adhesive vinyl tape. side piping. Left-side piping Left-back emove pipe port cover here for left-bottom piping. piping Left-bottom piping 2) Be sure to connect the drain hose to the drain port in place of a... -
Page 11: Drain Piping
Indoor Unit Installation Wiring. ith a multi indoor unit , install as described in the installation manual supplied with the Multi outdoor unit. 1) Strip wire ends (15mm). 2) Match wire colours with terminal numbers on indoor and outdoor unit’s terminal blocks and firmly screw wires to the corre- sponding terminals. -
Page 12: Refrigerant Piping Work
Refrigerant Piping Work ith a multi indoor unit , install as described in the installation manual supplied with the Multi outdoor unit. Flaring the pipe end. (Cut exactly at 1) Cut the pipe end with a pipe cutter. right angles.) Remove burrs 2) Remove burrs with the cut surface facing downward so that the chips do not enter the pipe. -
Page 13: Pump Down Operation
Refrigerant Piping Work 2-1. Caution on piping handling. Be sure to place a cap. 1) Protect the open end of the pipe against dust and moisture. Rain If no flare cap is 2) All pipe bends should be as gentle as possible. Use a pipe bender available, cover for bending. -
Page 14: Trial Operation And Testing
Trial Operation and Testing Trial operation and testing. 1-1 Measure the supply voltage and make sure that it falls in the specified range. 1-2 Trial operation should be carried out in either cooling or heating mode. ■ For Heat pump •... - Page 15 Two-dimensional bar code is a code for manufacturing. 3P207052-1 M07B016 (0711) HT...
Need help?
Do you have a question about the FTXS20G2V1B and is the answer not in the manual?
Questions and answers