Table of Contents
Advertisement
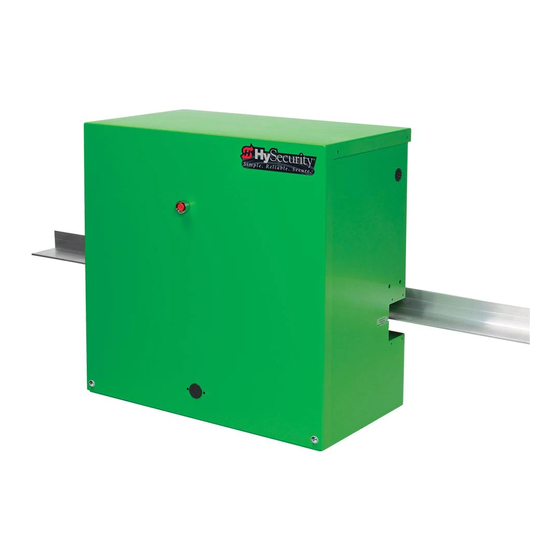
Hy-Security
Gate Operators
HYDRAULIC
SLIDE GATE
Operators
With Smart Touch Controller
Installation and Maintenance Manual
Models 222 SS, E, EX, XI
333 MS, E, EX
222 CF, CE, CX
444 XS
and
DC Battery Operated Models
222 DS, DE, DX
444 DX
Revision: ___
Hy-Security Gate Operators
Phone: 1-800-321-9947
INSTR# 103
FAX: (206) 286-0614
Internet: www.hy-security.com
Date 04/01/02
Email: Info@hy-security.com
Advertisement
Table of Contents

Related Manuals for Hy-Security 222 SS


Summary of Contents for Hy-Security 222 SS
- Page 1 Gate Operators HYDRAULIC SLIDE GATE Operators With Smart Touch Controller Installation and Maintenance Manual Models 222 SS, E, EX, XI 333 MS, E, EX 222 CF, CE, CX 444 XS DC Battery Operated Models 222 DS, DE, DX 444 DX...
- Page 2 All rights reserved. No part of this manual may be reproduced by any means: photocopier, electronic or mechanical, without the express written permission of Hy-Security Gate Inc. Additionally, Hy-Security Inc. makes no representations or warranty with respect to this manual. We also reserve the right to make changes in the products described without notice and without any obligation to notify any persons of any such revision or change.
-
Page 3: Table Of Contents
Installation and Maintenance Manual Table of Contents Introduction ......................... v Warranty Registration ....................vi Available Models and Features ................1-2 I. Safe Gate Design Important Information ....................3 Entrapment Protection Schematic ................4 Install an Automatic Operator only When: ..............5 Important Information for Gate System Owners &... - Page 4 V. Detectors and Loops Loop and Detector Installation Guide ............... 36-38 Vehicle Detector Options ..................39 Hy-Security Hy-5A Vehicle Detector Installation ............. 40 Standard 11 Pin Vehicle Detector Installation ............41 Vehicle Detector & Loop Fault Diagnostics ............42 Vehicle Detector Configuration and Anti-Tailgate Modes ........43 VI.
-
Page 5: Introduction
When the installation is complete, leave this manual for the owner’s use and reference. Please do not hesitate to give your Hy-Security distributor a call if you experience any difficulties during the installation. They are experienced... -
Page 6: Warranty Registration
Installation and Maintenance Manual For warranty registration, please fill in this information, fax or mail a copy to Hy-Security, then give this manual to the owner of the gate. Owner Name: _______________________________ Telephone number: ___________________________ Hy-Security Distributor: ________________________ Telephone number: ___________________________... -
Page 7: Available Models And Features
All of the operator models are derived from the standard 222 SS, upon which this manual is designed. Take a moment to identify the operator model you have and note there are some changes in the instructions, especially in regards to final adjustments. - Page 8 1200 pounds of draw bar pull. The Smart Touch Controller This is the brain of Hy-Security’s automatic operators. Truly high technology, but also very rugged to reliably serve in the harshest environments. The Smart Touch Controller can quickly be configured by an installer or user to adapt to about any functional requirement for a specific site.
-
Page 9: Important Information
Installation and Maintenance Manual READ THIS FIRST! Important Information - Review Before Installation Automatic gate operators provide convenience and security to users. However, because these machines can produce high levels of force it is important that all gate operator system designers, installers and end users be aware of the potential hazards associated with improperly designed, installed or maintained systems. -
Page 10: Entrapment Protection Schematic
Installation and Maintenance Manual Entrapment Protection Device Schematic for Sliding Gates Guard posts Photo Eyes for Attention Keep this gap as both directions small as possible Gate edge sensors Physical travel stop, both ends Warning signs must be on both sides Stop and reset button Access controls at... -
Page 11: Install An Automatic Operator Only When
Installation and Maintenance Manual Install An Automatic Sliding Gate Operator Only When: • The gate moves freely in both directions. Never over-tighten a clutch or pressure relief valve to compensate for a stiff gate. • The operator will be installed on the secured (non-public) side of the gate. •... -
Page 12: Important Information For Gate System Owners & Users
Installation and Maintenance Manual Important Information For Gate System Owners & Users WARNING: To reduce the risk of serious injury or death, read and follow all instructions in the gate operator handbook and on the warning labels. Save These Important Owner and User Instructions: (Installers - be certain to instruct the owners and users about the following items) •... -
Page 13: Tools Required - Getting Started With An Automated Gate System
Installation and Maintenance Manual Tools Required for an Efficient Installation 1. chalkline or other 2. carpenter’s 3. concrete anchor 4. allen wrench set 5. hammer builder’s string pencil or crayon bolts - four " x 4 6. screwdriver sets, 7. wrench set, open 8. - Page 14 • Accessory Compatibility Hy-Security’s Hydraulic Slide Operators are fully compatible with all standard access control de- vices and entrapment protection devices, some of which are listed below. • Pedestrian Entrapment Protection Read and understand all the Important Information in Section 1, the Entrapment Protection Sche- matic on page 4 and the UL requirements on page 31 before beginning the installation.
-
Page 15: Installation Preparations And Installation
Gate distance Also check that electrical conduits are correctly located from operator: " back of to enter the chassis. Hy-Security recommends a slab drive rail to edge reaches below the local frost line and extends some- of operator Drive rail what above grade. -
Page 16: Installation
Installation and Maintenance Manual Installation 1. Drill four holes for concrete anchors Each operator comes with a paper template with the anchor slab slots. Place the template on the slab; making sure that it is parallel to and 1 3/4" from the gate. Trace the slots, remove the template, and then scribe the locations for your anchor bolts. - Page 17 Installation and Maintenance Manual Installation 6. Install Grip Tape to Underside of Drive Rail Two pieces of grip tape have been provided that should be installed on the underside of the drive rail. Place the tape on the first and last 2 ft. of travel, just in front of each limit ramp. Be certain the drive rail is clean and dry, and then peel off just a bit of the backing to expose only about 2"...
- Page 18 Wait to connect the external controls until you have reviewed the Smart Touch Control- ler instructions and tested the basic functions. Note: Hy-Security has an installation CD available free of charge to installers. Call a Hy-Security distributor for a copy.
-
Page 19: Mechanical & Hydraulic Adjustments
Installation and Maintenance Manual Mechanical and Hydraulic Adjustments 1. Drive Wheel Spring Tension When the drive wheels are fully clamped on the rail, the red spring should be compressed to 2" in height. If adjustment is necessary, turn the nut at the bottom of the threaded rod assembly. Slightly less compression is okay for lighter gates. -
Page 20: Technical Drawings
Installation and Maintenance Manual NOTE: COVERS MUST BE USED FOR NOTE: DRIVE RAIL HEIGHT PROTECTION ON ALL EXPOSED WHEELS IS MARKED ON THE SIDE AND/OR HARDWARE. COVERS ARE SHOWN OF EACH CHASSIS. HERE AS DOTTED LINES. POWER NOTE: SEE DWG# S13B FOR RECOMMENDED SLAB DIMENSIONS. - Page 21 Installation and Maintenance Manual FENCE LINE GATE POST ALLOW 12" TO 16" GATE PANEL WITH 1-3/4" DRIVE RAIL ATTACHED GATE OPERATOR NOTE: CANTILEVER WHEELS MUST BE COVERED TO HELP PREVENT INJURIES. COVERS SHOWN HERE IN DOTTED LINES. NOTE: MINIMUM CONCRETE SLAB DIMENSIONS RECOMMENDED ARE: 30"WIDE, 20"...
- Page 22 Installation and Maintenance Manual VERTICAL GATE MEMBER "U" BOLTS LIMIT SWITCH RAMP KEYWAYS FOR SPLICE PINS LIMIT SWITCH RAMP SECTION THROUGH DRIVE RAIL AND LIMIT SWITCH WHEEL LIMIT SWITCH SHOWING RELATIONSHIP OF SWITCH, LIMIT RAMP AND DRIVE RAIL. OPERATOR LIMIT SWITCH LIMIT SWITCH BODY DRIVE RAIL...
-
Page 23: Basics Of Using The Smart Touch Controller
Installation and Maintenance Manual Basics of Using the Smart Touch Controller System Read this page if you are unfamiliar with using the Smart Touch Controller. You must learn to navigate and change menu settings within the Smart Touch Controller before an installation can be completed or any control settings or function changes can be made. -
Page 24: Installation Configuration For Smart Touch Controller
Installation and Maintenance Manual b. Press the Program Menu button and watch the LCD scroll the system data, or press the Pro- gram Menu key a 2nd time to skip the scroll. The scrolled data displays the information in the table on page 22. -
Page 25: Wiring Control Inputs To The Smart Touch Controller
Installation and Maintenance Manual Wiring Control Inputs to the Smart Touch Controller 1. Test the basic open and close operator function before wiring the external control inputs. This makes it easier to troubleshoot if an unexpected function issue arises. 2. Each input has an LED to indicate when that input is active. To disclose the input status, the LED tact button must be pushed. - Page 26 - activates when starting or stopping. COMMON Clock BUSS Battery RELAY POWER SUPPLY 15 AMP Optional PROGRAMMABLE BOARD USER RELAY Hy-Security HY-5A Vehicle Detector Modules 15 AMP PROGRAMMABLE USER RELAY 15 AMP PROGRAMMABLE USER RELAY Processor heartbeat LED. Blinks at...
-
Page 27: Connecting A Master/Slave Pair
Installation and Maintenance Manual Connecting a Master / Slave Pair Configuring two operators to be a Master & Slave pair is easy with the Smart Touch Controller. There is no need to order a special model or any adapters. The area of the board marked Dual Gate employs a 3-wire RS485 serial port for communication between Master &... -
Page 28: Table Of User And Installer Menu Functions
Installation and Maintenance Manual Smart Touch Controller User Menu Functions Initial Power Up - When power is turned on, the display will disclose the software revision: Display Revision Number 2s delay Displays software version Number, ex. [h3.02] System Data and accessing the User Menu Settings: If the gate is stopped in the Run Mode, pressing of the Menu button accesses the User Menu. - Page 29 Installation and Maintenance Manual Smart Touch Controller Installer Menu Functions The Installer Menu can be accessed only by entering the User Menu first, and then by pressing the Reset button and the Open button simultaneously. To restore the factory default settings, go to menu item [Fd_0] and change the setting to 1, then press the Program Menu button.
-
Page 30: User Menu: Description Functions Available
Installation and Maintenance Manual Description of Functions Available in the User Menu User 1 [Ct _] Close timer setting: This menu item is the automatic close timer for the gate. The factory setting is zero, which is off. It may be configured up to 99 seconds. User 2 [hC 0] Momentary Close: This menu item is to configure for the system for constant hold push button Close function. -
Page 31: Installer Menu: Description Functions Available
Installation and Maintenance Manual Description of Functions Available in the Installer Menu Installer 1 [uC 0] Set UL Usage Class: This menu item is used to set the UL usage class, which must be set by the installer before the operator will function. See page 18, step 3. Installer 2 [Sh 0] Set Handing of gate: This menu item is used to set the gate handing, which must be set by the installer before the operator will function. - Page 32 Installation and Maintenance Manual Description of Functions Available in the Installer Menu Installer 16 [gr 0] Edge reverse to open: The default for this menu item is for a 2 second reversal if the gate edge is triggered. The optional setting of [gr_1] will cause the gate to reopen fully if triggered while closing.
-
Page 33: Correctional Facility / Interlocked Pair / User Optional Wiring
Installation and Maintenance Manual Correctional Facility - User Optional Wiring A special terminal strip has been pre-wired in Correctional facilities models to the three user relay outputs for easy field wiring of the common interconnect options. If alternate output functions are required, see page 28 titled Options for User Programmable Output Relays 1-3. -
Page 34: Options For User Programmable Output Relays
Installation and Maintenance Manual Options for User Programmable Output Relays 1-3 The Smart Touch Controller can be set to interface to many types of external devices through the use of its programmable output relays. All of the output functions listed below are accessible in the Installer Menu under the selection [r1 __], [r2 __] and [r3 __]. -
Page 35: Clock Functions
Installation and Maintenance Manual Clock Functions Setting the time and Date The Smart Touch Controller is equipped with a 24 hour (military time), 365 day clock, so that events of significance can be logged and stamped with both the time and the date. This feature is useful to record key historical operational data and a log of Alerts, Faults and Errors all of which can be accessed via the RS232 port with a PC computer or a PDA using the Palm OS. -
Page 36: Entrapment Protection
Installation and Maintenance Manual Entrapment Protection Device Schematic for Sliding Gates Guard posts Photo Eyes for Keep this gap as both directions small as possible Attention Gate edge sensors Physical travel stop, both ends Warning signs must be on both sides Stop and reset button Access controls at... -
Page 37: Ul 325 Standard Requirements For Entrapment Protection Devices
Installation and Maintenance Manual UL 325 Standard requirements for Entrapment Protection Devices Gate Operator Category Horizontal Slide, Vertical Lift, Vertical Pivot, Swing and Vertical Barrier (arm) Usage class Primary type Secondary type Primary type Secondary type Vehicular I and II A B1, B2, or D A, or C A, B1, B2, C, or D... -
Page 38: Placement And Use Of Secondary Pedestrian Entrapment Sensors
Installation and Maintenance Manual Placement and Use of Secondary Pedestrian Entrapment Sensors WARNING: To reduce the risk of serious injury or death, read and follow all instructions in the gate operator handbook and on the warning labels. Automatic gate operators are intended only for vehicular use and pedestrians must be routed to a separate man gate, however sensors are still required in order to provide a degree of protection should anyone happen to stray into the area of an automatic gate. -
Page 39: Installing Gate Edge (Contact Type) Reversing Sensor
Installation and Maintenance Manual Installing Gate Edge (Contact Type) Reversing Sensor 1. Follow the guidelines in the Entrapment Protection Schematic to plan the most appropriate mount- ing positions for the edge sensors to be installed. For sliding gates, one or more sensors shall be located at the leading edge, trailing edge and post mounted both inside and outside of a sliding gate. -
Page 40: Installing Photoelectric (Non-Contact) Sensor
A requirement of the UL 325 standard is that a photoelectric sensor be laboratory tested and “rec- ognized” under UL 325. In order to be compatible with a Hy-Security operator, a photo eye must be rated to function from 24 Volts DC source power. - Page 41 Photo eyes usually provide alignment aid LED’s for this setup, but they can be hard to see. Hy-Security has provided a unique feature that causes our buzzer to chirp when the photo eye enters and exits alignment. See User menu 9.
-
Page 42: Detectors And Loops Loop And Detector Installation Guide
Installation and Maintenance Manual Detector Installation Guide Detector Basics The vehicle detector passes a small current flow through the “loop” which then becomes an induc- tive coil. When a vehicle passes over a loop the detector senses the resultant drop in the induc- tance, and actuates the detector output. - Page 43 Like This NOT Like This OR This Detector Logic Hy-Security Gate Operators recommends that vehicle detectors be used for free open and obstruc- tion sensing logic only. The exception is in parking applications with our HTG 320 operator where detectors may be also used to close the gate. In applications employing our swing, vertical lift, or sliding gate operators, closing logic cannot be used.
- Page 44 Installation and Maintenance Manual EXIT ENTER BI-DIRECTIONAL TRAFFIC SYSTEM ACCESS CONTROL WITHCONTROLLED ACCESS ENTRY DEVICE, CARD (CARDREADER RADIO CONTROL, ETC.) READER, ETC. AND FREE EXIT GATE IS CLOSED BY A "TIMER TO CLOSE". FOR A SINGLE OBSTRUCTION DIRECTIONAL SYSTEM OMIT EITHER LOOP THE FREE EXIT LOOP OR THE ENTRY CONTROL DEVICES.
-
Page 45: Vehicle Detector Options
Standard box type 11 pin (24 Volt DC or 24 Volt AC) vehicle detectors may be connected in the traditional manner, see page 41. Hy-Security also offers a custom mini detector module that plugs directly into the Smart Touch Control board. Not only is the field installation much faster, but there is also a large performance benefit. -
Page 46: Hy-Security Hy-5A Vehicle Detector Installation
Installation and Maintenance Manual Hy-Security Hy-5A Vehicle Detector Installation 1. Insert the locking end of each of two 1" long white plastic standoffs into the mounting holes on the detector. 2. Plug the detector into the appropriate socket along the right side edge of the Smart Touch Controller board for the detector function that is desired. -
Page 47: Standard 11 Pin Vehicle Detector Installation
Installation and Maintenance Manual Standard 11 Pin Box Type Vehicle Detector Installation 1. If standard 11 pin vehicle detectors are to be used, snap up to three sockets onto the aluminum DIN mounting rail, with the key in the center hole facing to the left. 2. -
Page 48: Vehicle Detector & Loop Fault Diagnostics
Installation and Maintenance Manual Detector & Loop Fault Diagnostics If Hy-Security HY-5A mini detector modules are used, the Smart Touch Controller has ability to store and report detector and loop fault information for performance diagnostics. If The Smart Touch Controller senses a loop or detector problem, the LCD display will flash the abbreviation for the affected detector (ELd - ioLd - ooLd - SLd) then it will flash the appropriate Alert Code [ALE_] to disclose the nature of the problem and the buzzer will chirp. -
Page 49: Vehicle Detector Configuration And Anti-Tailgate Modes
Installation and Maintenance Manual Vehicle Detector Configuration & Anti-Tailgate Modes Standard and Anti-tailgate modes are selectable under item [dL__] in the Installer Menu (See installer menu #23 described on page 23 and 26) The detector function modes that result in Anti-Tailgating logic (modes 3 & 4 below) require the use of a separate inner and outer obstruction detectors. -
Page 50: Accessories 24 Hr / 7 Day Time Clock Option
Installation and Maintenance Manual 24 hr 7 day Timer Connection to Smart Touch Controller This option generates an open command, which will hold the gate open until released. Programming 24 hour or 7 day Schedules Continued... These Programs need to be entered: Program 1: Press the key once ON symbol... -
Page 51: Connecting A Radio Receiver
Installation and Maintenance Manual Connecting a Radio Receiver Mount a commercial style 24-Volt radio receiver (external antenna type) on the inside of the opera- tor, below the electrical box. Knock out the smallest hole in the lower right corner of the electrical box and route the wires to the area marked Radio Options. -
Page 52: Remote Release Mechanism
Installation and Maintenance Manual Remote Release Mechanism (Model #A MILR 001 R or A MILR 001 RCF) Instructions for Releasing Drive Wheel Clamp Mechanism for Manual Operation This remote release device consists of an air cylinder inside the operator, which pushes the wheel clamping device open, a length of flexible air tubing, and a remote box containing a hand pump. -
Page 53: Internal Solenoid Lock Options
A solenoid lock must be activated prior to any gate motion or the gate will bind the lock mechanism. Hy-Security’s internal lock must also remain engaged until the soft stop time cycle is complete at the end of travel. To provide the solenoid lock logic requirement, one of the three user relays (typically user relay 2) must be set to function #6 and wired to supply power to the lock solenoid. - Page 54 Installation and Maintenance Manual UPPER TORSION SUPPORT ARM DRIVE WHEELS DRIVE RAIL LOCK BOLT ELECTRICAL ACCESS MAIN SUPPORT COLUMN & PIVOTS INTERNAL SOLENOID LOCK LOWER TORSION SUPPORT ARM ELEVATION ADJUST HEIGHT OF SOLENOID LOCK FOR RELIABLE LOCKING, TO ACHIEVE THIS RELATIONSHIP NOTCH OUT A 3"...
- Page 55 Installation and Maintenance Manual UPPER DRIVE WHEEL DRIVE RAIL OUTLINE OF OPERATOR HOUSING LOWER DRIVE WHEEL S26b INTERNAL SOLENOID LOCK...
-
Page 56: Troubleshooting
Installation and Maintenance Manual Troubleshooting Also review Page 13, Mechanical & Hydraulic Adjustments Trouble With Gate Movement in General: 1. Disengage the operator from the gate and move the gate manually. If the gate does not roll well or is warped, fix the gate before working on the gate operator. - Page 57 Hy-Security distributor. Extremely cold weather is unlikely to seriously affect the speed of the gate, because Hy-Security employs a special grade of hydraulic oil that we call UNIFLOW oil, which maintains a very linear viscosity over a broad range of temperatures. Because of this high quality oil and other design considerations, we rate our operators for service in ambient temperatures of -40F degrees to 130F degrees.
-
Page 58: Maintenance
Installation and Maintenance Manual General Maintenance Hydraulic System Fluid Level: Under normal conditions, hydraulic systems do not consume oil. Before adding any oil, check the system thoroughly for leaks. Remove the bright metal plug in the tank, fill to plug level, then replace plug. - Page 59 Replace Special Notes: *1 Your gate and it’s hardware will require more maintenance than the Hy-Security operator that is moving the gate. A damaged gate or worn hardware may cause operation to appear slow or erratic and will result in excess drive wheel wear. Lubricate the gate hardware more frequently and check for smooth operation by opening the toggle clamping mechanism and then pushing the gate manu- ally.
-
Page 60: Manual Release Mechanism
Installation and Maintenance Manual Use and Adjustment of the Manual Release Mechanism All slide gate series operators come equipped with a toggle handle manual release mechanism to disengage the drive wheels from the drive rail. The manual release is located under the electric control panel and to the right of the hydraulic motors. -
Page 61: Viii.two Part Operators (Battery Types & 333) Battery Dc Systems (Ds, De, Dx) Important Notes About Dc Powered Gates
Hy-Security uses a permanently sealed type battery, which needs no maintenance over its life span. A low voltage-sensing circuit protects the batteries from damage which could be caused by over- discharge. -
Page 62: Wiring & Control Of Dc Operators
Installation and Maintenance Manual Wiring and Control Configuration for DC Operators If this installation is a 24-Volt DC battery type gate operator, there are a few additional steps that must be completed before the system can be functional. Review the installation instructions, step #11 on page 12 and the connection diagram on page 58 (2-battery system) or page 59 (4-battery system). -
Page 63: Plan And Elevation For Dc Power Supply
Installation and Maintenance Manual GATE OPENING GATE PANEL DRIVE UNIT CONCRETE SLAB DRIVE RAIL POWER SUPPLY 8" X 8 " ELECTRICAL ACCESS (2 " FROM CORNER) PLAN VIEW GATE PANEL RIGHT HAND GATE SHOWN. REVERSE ENCLOSURE FOR LEFT HAND INSTALLATION. WHEEL FENCE LINE COVERS... -
Page 64: Battery Connection Diagrams
Installation and Maintenance Manual Battery Connection Diagram 24 VOLT FUSE (5 AMP) LINE VOLTAGE FUSE (15 AMP) (-) LUG A.C.POWER CHARGER TO OPERATOR POWER SWITCH COMPLETE IN PROGRESS TO SMART TOUCH CONTROLLER DC AMPERES (+) LUG POWER BATTERY CHARGER FUSE 12 VOLT BATTERY 12 VOLT... - Page 65 Installation and Maintenance Manual Battery Connection Diagram 24 VOLT FUSE (5 AMP) LINE VOLTAGE FUSE (15 AMP) (-) LUG CONNECT SIX WIRES TO A.C.POWER CHARGER GATE OPERATOR AS TO OPERATOR POWER SWITCH SHOWN. COMPLETE IN PROGRESS TO SMART TOUCH CONTROLLER FOUR 14GA.
-
Page 66: Modular Systems (333 Ms Series)
Installation and Maintenance Manual GATE OPENING GATE PANEL DRIVE UNIT CONCRETE SLAB DRIVE RAIL POWER SUPPLY 8" X 8 " ELECTRICAL ACCESS (2 " FROM CORNER) PLAN VIEW GATE PANEL RIGHT HAND GATE SHOWN. REVERSE ENCLOSURE FOR LEFT HAND INSTALLATION. WHEEL FENCE LINE COVERS... - Page 67 1500 OPEN LIMIT CLOSE LIMIT QUICK STOP VALVE BRAKE VALVES CHECK VALVE (NOT ON 333MS MODEL) NOTICE DIRECTIONAL FILL ONLY WITH HY-SECURITY SOLENOID UNIFLOW HYDRAULIC OIL PART #H004. BEFORE USING OTHER OILS CONSULT VALVE OPERATOR HANDBOOK. MEMBRANE SWITCH FLUID RESERVOIR...
-
Page 68: Appendix Wiring Size Schedules
Installation and Maintenance Manual Wire Size Schedules For 1/2-hp through 5-hp motors Supplying a gate operator with the right electrical service is crucial to the way the performance of the operator the life of its electrical components. If the wire size used is too small, the voltage loss, especially during motor starting, will prevent the motor from attaining its rated horsepower. - Page 69 Installation and Maintenance Manual Wire Size for Voltage Drop Over Distance...
-
Page 70: 444 Operator Components & Footprint
Installation and Maintenance Manual POWER 43.125" NINE SLOTS 3/4 X 2 TYP 2.00" 43.0" 8.00" 5.00" 14.5" 6.50" 8.00" 2.00" 1.25 1.25" 10.0" 10.0" OPERATOR FOOTPRINT SIX ANCHOR BOLTS 1/2" x 6" ARE REQUIRED TO PROPERLY ANCHOR THE CHASSIS BASE AS SHOWN ABOVE. CUTOUTS SHOWN ARE FOR ELECTRICAL FEED. CHASSIS HEIGHT = 43.125"... -
Page 71: Components & Replacement Parts
RESET BUTTON POWER DRIVE WHEELS 4-4 6" TYPE POWER UNIT 8" TYPE BRAKE VALVE MANIFOLD 3-4 HYDRAULIC NOTE: NOT ON MOTORS 222 SS & 222 CF LIMIT RAMP LIMIT SWITCH LIMIT SWITCH WITH CORD UHMW SKID BAR MOTOR HOSE MOUNT FITTING... - Page 72 Installation and Maintenance Manual MSLDU 008 C MFACS 006 020 MSLDU 006 MFALP 006 4 EA MSLDU 009 A MFACS 006 032 MSLDU 008 B MFACS 006 016 2 EA MFAWA 006 MFAAT 006 088 MSLDU 009 MFAIP 006 MSLSP 005 2.5 MSLDU 008 D MFACN 006 018 DRAWN...
- Page 73 Installation and Maintenance Manual Exploded Parts Breakout Power Units are Detailed by Operator Series on next two pages AWOG with Manifold (EX, X1, CX 444 only) Inherent Sensor On/Off Switch - ESWDI 050 3P HPSPS 001 Transformer 75 VA - ETRTR 024 075 Power Supply Electric Motor ESR00016 AC - AC models...
- Page 74 Installation and Maintenance Manual Parts Breakout- Control Box PART NO. 2-10 MEMBRANE SWITCH ESR00016 AC 1 EA. or DC version: ESROOO16 DC 1 EA. ECOTS 7.5 1 EA. 2-11 DISPLAY BOARD ECOTS 005 1 EA. ESWRB 03011PN 1 EA. ESR 00018 SA 1 EA.
- Page 75 Installation and Maintenance Manual Exploded Parts Breakout DC MOTOR AC MOTOR Capacitor Start Switch (1 phase only) (1 phase only) EMOCP 645 774 EMOSS 012 DC Motor Starter ESWMC 075 MERC Electric Motor SS, CF, E, CE DC Electric Motor DS, DE 60 Hz - 1 phase–EMOB6 215 1.0E EMOSO DC6 2.02 3 phase–EMOB6 235 1.0T...
- Page 76 Installation and Maintenance Manual Exploded Parts Breakout AC MOTOR DC MOTOR Capacitor DX Electric Motor Start Switch (1 phase only) EMOSO DC6 2.02 (1 phase only) EMOCP 645 774 444 DX Electric Motor EMOSS 012 EMOSO DC6 4.02 DX Motor Starter ESWMC 075 MERC 444 DX Motor Starter ESWMC 090 MERC...
- Page 77 Installation and Maintenance Manual Parts Breakout - DC Power Supply 2-13 2-10 2-11 2-12 BATTERY CHARGER 15A FUSE 5A FUSE 2-0 222 DS 2-1 222 DX 2-2 444 DX CHARGER 2-14 CIRCUIT BREAKER VENT COMPLETE IN PROGRESS DC AMPERES DISCONNECT SWITCH POWER 2 BATTERY TERMINAL STRIP...
-
Page 78: Limited Warranty
Freight (surface or air) and all other incidental costs are NOT covered by this warranty. There are no obligations or liabilities on the part of Hy-Security Gate Inc. for consequential damages arising out of, or in connection with, the use or performance of this product.
Need help?
Do you have a question about the 222 SS and is the answer not in the manual?
Questions and answers