Asus RT-N56U Quick Start Manual
Extreme performance in style dual-band wireless-n gigabit router
Hide thumbs
Also See for RT-N56U:
- Quick start manual (168 pages) ,
- User manual (72 pages) ,
- Setup & user manual (8 pages)

Related Manuals for Asus RT-N56U


Summary of Contents for Asus RT-N56U
- Page 1 ® RT-N56U Extreme Performance in Style Dual-band Wireless-N Gigabit Router Quick Start Guide...
- Page 2 A7823 / Second Edition / November 2012 English ............................... 4 繁體中文 ............................16 ............................28 簡體中文 Bahasa Indonesia ........................... 40 ไทย ..............................52...
- Page 3 NOTE / 注意 / 注意 / CATATAN / หมายเหต • For more details, refer to the user manual included in the support CD. • 更多資訊,請參考驅動程式與公用程式光碟中的使用手冊。 • 更多信息,請參考驅動程序與應用程序光盤中的用戶手冊。 • Untuk rincian lebih lanjut, lihat panduan pengguna yang disertakan dalam CD dukungan. • ส...
-
Page 4: Package Contents
Warranty card NOTES: • If any of the items is damaged or missing, contact ASUS for technical inquiries and support. Refer to the ASUS Support Hotline list at the back of this guide. • Keep the original packaging material in case you would need future warranty services such as repair or replacement. - Page 5 • Incorrect removal of the USB disk may cause data corruption. • For the list of file system and hard disk partitions that the wireless router supports, visit http://event.asus.com/networks/disksupport • For the list of printers that the wireless router supports, visit...
-
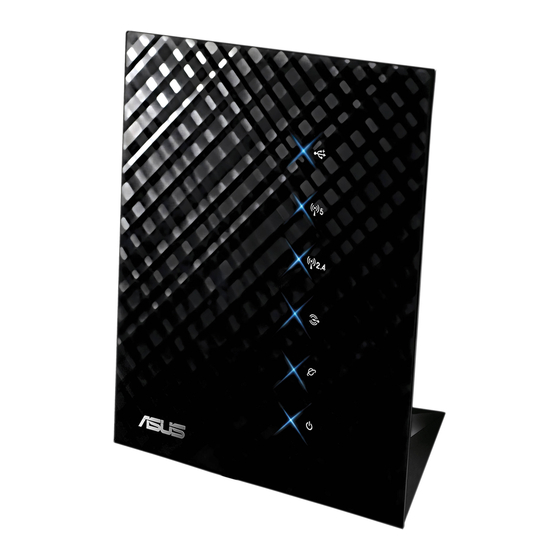
Page 6: Positioning Your Wireless Router
For the best front-to-rear coverage, place the wireless router in an upright position. • For the best up-and-down coverage, place the wireless router in an inclined position. • Always update to the latest firmware. Visit the ASUS website at http://www.asus.com to get the latest firmware updates. -
Page 7: Before You Proceed
Before you proceed 1. Unplug and disconnect the wires/cables from your existing modem setup. WARNING! Ensure that your cable/ADSL modem has been turned off for at least two minutes. a: Unplug the AC adapter from the power outlet and disconnect it from your cable/ADSL modem. - Page 8 c: Using another network cable, connect your modem to your wireless router’s WAN port. d: Insert your modem’s AC adapter to the DC-In port and plug it to a power outlet. 3. Disable some settings on your computer. A. Disable the proxy server, if enabled. B.
-
Page 9: Getting Started
Getting started 1. Configure your wireless settings via the wireless router’s web graphics user inter- face (web GUI). a: Launch your web browser such as Internet Explorer, Firefox, Google Chrome, or Safari. NOTE: If QIS does not launch automatically, follow these steps to manually launch QIS: •... -
Page 10: Frequently Asked Questions (Faqs)
c: Assign the network name (SSID) and security key for your 2.4GHz and 5GHz wireless connection. Click Apply when done. d: Your Internet and wireless settings are displayed. Click Next to continue. e: Read the wireless network connection tutorial. When done, click Finish. NOTE: You can assign a network name with up to 32 characters. - Page 11 3. From the Local Area Network (LAN) Settings screen, untick Use a proxy server for your LAN. 4. Click OK when done. MAC OS 1. From your Safari browser, click Safari > Preferences > Advanced > Change Settings... 2. From the Network screen, deselect FTP Proxy and Web Proxy (HTTP).
- Page 12 3. To obtain the iPv4 IP settings automatically, tick Ob- tain an IP address automatically. 4. Click OK when done. MAC OS 1. Click the Apple icon located on the top left of your screen. 2. Click System Preferences > Network > Config- ure...
- Page 13 C. Disable the dial-up connection, if enabled. Windows® 7 1. Click Start > Internet Explorer to launch the browser. 2. Click Tools > Internet options > Connections tab. 3. Tick Never dial a connection. 4. Click OK when done. NOTE: Refer to your browser's help feature for details on disabling the dial-up connection settings.
- Page 14 Try setting up the wired connection and configuring the wireless encryption again. • Press the Reset button of the wireless router for more than five seconds. • Factory default settings: User name / Password: IP address: SSID: ASUS admin / admin 192.168.1.1...
- Page 15 Where can I find more information about the wireless router? • User Manual in the support CD http://support.asus.com/faq • Online FAQ site: http://support.asus.com/techserv • Technical Support site: • Customer Hotline: Refer to the Support Hotline in this Quick Start Guide...
- Page 16 包裝內容物 RT�N56U ������������ ������������ ��� ��� 電源變壓�������� ��使用�� ��使用�� 驅動程式與公用程式光碟�使用手冊�公用程式� 驅動程式與公用程式光碟�使用手冊�公用程式� ��� ��� 注意:� • �����的�������������的��,請���������� �����的�������������的��,請���������� ������的��,請���������� ����的��,請���������� 請���������� ���������� 術支援。請參考�使用����的��支援��������資訊。 。請參考�使用����的��支援��������資訊。 請參考�使用����的��支援��������資訊。 • ����������������更����使用。 ����������������更����使用。 認識您的無線路由器 USB ��� ��� 2.4GHz ��� ��� LAN 1 ~ 4 ��� � ���...
- Page 17 ������ USB 碟,�入��������ttp�//192.168.1.1�,���� USB 碟,�入��������ttp�//192.168.1.1�,���� 碟,�入��������ttp�//192.168.1.1�,���� �ttp�//192.168.1.1�,���� �,���� 在 網路地圖 ��右�角的 USB ��,���� USB ��,���� ��,���� 移除� ��� ���。 • ����� USB 碟����資���。 ����� USB 碟����資���。 USB 碟����資���。 碟����資���。 • 請��� 請��� �ttp�//eve�t.asus.com/�etworks/disksupport ���������������所支援 的檔案系統與�碟分割區��。 • 請��� 請��� �ttp�//eve�t.asus.com/�etworks/pri�tersupport ���������������所支援的 印表機��。...
- Page 18 請����� 802.11g � 20MHz Wi�Fi �置�2.4GHz 電����置����置�� 802.11g � 20MHz Wi�Fi �置�2.4GHz 電����置����置�� � 20MHz Wi�Fi �置�2.4GHz 電����置����置�� 20MHz Wi�Fi �置�2.4GHz 電����置����置�� �置�2.4GHz 電����置����置�� 2.4GHz 電����置����置�� 電����置����置�� �室內電話�傳����������重型發動機�日光��微波爐�電冰箱與�他工業�置,� 防止訊號干擾�丟�。 • ����佳的前��訊號��,請�����������垂��置。 • ����佳的��下訊號��,請�����������傾斜�置。 • 請��更��������。����入���� 請��更��������。����入���� �ttp�//tw.asus.com ����� ����� �。...
- Page 19 開始設定之前 1. ���機������的��/��,���電源。 ���機������的��/��,���電源。 警� � ! 在�������之前,確認�的�� / A�SL ��機������分�。 ����之前,確認�的�� / A�SL ��機������分�。 ���之前,確認�的�� / A�SL ��機������分�。 ��之前,確認�的�� / A�SL ��機������分�。 �之前,確認�的�� / A�SL ��機������分�。 ��機������分�。 ������分�。 �分�。 分�。 a� �� A� 變壓��������的電源���與�� / A�SL ��機的��。 �� A� 變壓��������的電源���與�� / A�SL ��機的��。 A�...
- Page 20 c� 用另�條������機���������������的 WAN ���。 d� ���機的 A� 電源變壓��������插入電源輸入����i����插�電源。 3. ��電�中的某些設定 ��代理伺服��������。 設定 T�P/�P 自動�� �P 位址。 �. ��撥號��。 注意:�更多資訊請參��������FA�� 。 資訊請參��������FA�� 。 請參��������FA�� 。 �FA�� 。 FA�� 。 � 。...
- Page 21 開始使用 1. 透 過路由器的網頁圖形介面(Web GUI)進行無線設定。 a� �啟�個��瀏覽��������,如 ��ter�et Explorer�Firefox�Safari � Google ��rome。 注意:����設定�����S���自動啟動,請���下��手動�入��� �設定�����S���自動啟動,請���下��手動�入��� 設定�����S���自動啟動,請���下��手動�入��� 定�����S���自動啟動,請���下��手動�入��� ���S���自動啟動,請���下��手動�入��� 入��� ��� �� � ���:� ��:� �:� • 在��瀏覽��������中輸入 �瀏覽��������中輸入 瀏覽��������中輸入 �ttp�//192.168.1.1 �再次�啟��設定�����S�。 �啟��設定�����S�。 ��設定�����S�。 �設定�����S�。 設定�����S�。 定�����S�。 ��S�。 �。 。 • ��代理伺服���������撥號���設定 T�P/�P 自動�� �P 位址。更多資訊請� 伺服���������撥號���設定...
- Page 22 c� 分������SS���與����� 分������SS���與����� SS���與����� �與����� �� 2.4GHz 與 5GHz ����。�� 2.4GHz 與 5GHz ����。�� 與 5GHz ����。�� 5GHz ����。�� ����。�� ��� 套用。 d� ������的��與��設定。� ������的��與��設定。� � 下一步 繼續。 e� ���������程。����� ���������程。����� 完成。 注意:����分��個多�� 32 ��的����。 分��個多�� 32 ��的����。 �個多�� 32 ��的����。 �的����。...
- Page 23 3. 在區����LAN�設定��中�消勾� 為 LAN 使用代理伺服器。 4. ����� 確定。 MA� OS 1. 在 Safari 瀏覽��������中�� �afari > Preferences > 進階 > 變更設定... 2. 在����中�消勾� FTP 代理 與 Web 代理( HTTP)。 3. ����� 現在套用。 注意:�請參考瀏覽��������中的������代理伺服��������的��設定。 ������代理伺服��������的��設定。 ��代理伺服��������的��設定。 伺服��������的��設定。 ��������的��設定。 定。 B. 設定 T�P/�P 自動�� �P 位址 ®...
- Page 24 3. �自動�� �Pv4 �P 設定,勾� 自動獲得 IP 位 址。 4. ����� 確定。 MA� OS 1. ��左�角的蘋果�� 。 2. �� �ystem Preferences > 網路 > 設定... 3. �� T�P/�P 標籤,在設定 �Pv4 下拉式��中��� 使用 DHCP。 4. ����� 現在套用。 注意:�請參考�的作業系統中��與支援��,��更多設定 T�P/�P ��資訊。 業系統中��與支援��,��更多設定 T�P/�P ��資訊。 系統中��與支援��,��更多設定...
- Page 25 �. ��撥號�� ® Wi�dows 1. �� 開始 > Internet Explorer �啟瀏覽��������。 2. �� 工具 > Internet 選項 > 連接 標籤。 3. 勾� 從不進行撥號連線。 4. ����� 確定。 注意:�請參考瀏覽��������的������撥號��。 �. ��所�運作中的��瀏覽��������。 �法�立������。 ���效範圍:� • 請������������置����用���置之�。 請������������置����用���置之�。 • ������設定的變更。 ������設定的變更。 認證��:� • 請使用����的電��������������。 請使用����的電��������������。...
- Page 26 �法搜尋到����������:� • �����按������������的重置�Reset�按鈕�� 5 ���,����重置 �����按������������的重置�Reset�按鈕�� 5 ���,����重置 Reset�按鈕�� 5 ���,����重置 �按鈕�� 5 ���,����重置 5 ���,����重置 ���,����重置 ��ard reset�的動作。 �ard reset�的動作。 �的動作。 • ��������的 SS�� 與加密等設置定。 �法透���������������。 • 請������������到用������到的範圍內。 • ���所使用的������否���到正確的����������。 • ��所使用的�������否符合�所在�區 / 國家所規範的��。 • ��加密設定。 • ���所使用的�� / A�SL ��機�否����正確的���。 •...
- Page 27 哪裡��找到更多的������������資訊? • 驅動程式與公用程式光碟中的使用手冊 驅動程式與公用程式光碟中的使用手冊 • �� FA� �址:� �� FA� �址:� FA� �址:� �址:� �ttp�//support.asus.com/faq • �術支援�址:� �術支援�址:� �ttp�//support.asus.com/tec�serv • ��服���:�請參����使用��的支援�� ��服���:�請參����使用��的支援�� SUPPORT HOTLINE Area Hotline Number Support Availability Languages 0800-093-456 ; Taiwan Traditional Mon. to Fri. Chinese 9:00-12:00 02-81439000...
- Page 28 包裝內容物 RT-N56U ����� ����� 網� 電源適配� �速�用�� 驅動程序與應用程序光盤(用戶手冊、應用程序) ��卡 注意:� • 若以上列出的任何一項配件有損壞或是短缺的情形,請������以��� 請������以��� ������以��� ��以��� 術��。請參考��用����的������列������信息。 ��。請參考��用����的������列������信息。 。請參考��用����的������列������信息。 列������信息。 �����信息。 ��信息。 。 • ����包裝��以������或更�����用。 ����包裝��以������或更�����用。 認識�的����� USB ��� ��� 2.4GHz ��� ��� LAN 1 ~ 4 �� � �� � �...
- Page 29 ������ USB 盤,��網��形��(���p�//192.168.1.1),��在 USB 盤,��網��形��(���p�//192.168.1.1),��在 盤,��網��形��(���p�//192.168.1.1),��在 ���p�//192.168.1.1),��在 ),��在 【網絡地�】��的右上角點擊� USB �����【��� USB】。 USB �����【��� USB】。 �����【��� USB】。 USB】。 】。 • ����� USB 盤��������。 ����� USB 盤��������。 USB 盤��������。 盤��������。 • 請��� 請��� ���p�//eve��.asus.com/�e�works/disksuppor� �取������ 所��的文件系統與�盤分區列�。 • 請��� 請��� ���p�//eve��.asus.com/�e�works/pri��ersuppor� �取������所� �的打印機列�。...
- Page 30 802.11�� 或 20MHz Wi-Fi 設�、2.4GHz 電���設�、 ��設�、 或 20MHz Wi-Fi 設�、2.4GHz 電���設�、 ��設�、 20MHz Wi-Fi 設�、2.4GHz 電���設�、 ��設�、 設�、2.4GHz 電���設�、 ��設�、 2.4GHz 電���設�、 ��設�、 電���設�、 ��設�、 ��設�、 ��設�、 ��室內電話、傳��、重型發動機、日光�、微波爐、電冰箱與�他工業設�, 以防止信號干擾或��。 • ����佳的前-�信號覆蓋,請����垂�放置。 • ����佳的上-下信號覆蓋,請����傾斜放置。 • 請����������件。��以�����網 請����������件。��以�����網 ���p�//www.asus.com.c� �取 �取 ���件。...
- Page 31 開�設置之前 1. ������上���連�的���,��開電源。 ������上���連�的���,��開電源。 警告! 請在�開�纜或���之前,確認�的有� / A�SL ��������� ��������� ���� 過兩分�。 兩分�。 分�。 a� �� A� 適配�的電源��開與有� / A�SL �����的連�。 �� A� 適配�的電源��開與有� / A�SL �����的連�。 A� 適配�的電源��開與有� / A�SL �����的連�。 適配�的電源��開與有� / A�SL �����的連�。 / A�SL �����的連�。 �����的連�。 b�...
- Page 32 c� 用另一根網�������連�������的 WAN 端�。 d� ������的 A� 電源適配�插入電源輸入(��-i�)端��插上電源。 3. ��電�中的某些設置 ��代理服務�。 設置 T�P/�P 自動取� �P 地址。 �. ��撥號連�。 注意:�更多信息請參閱“�見��題�答(FA�) � 。 (FA�) � 。 FA�) � 。 ) � 。 � 。...
- Page 33 開��用 1. 通過���的網��形��(Web GU�de)進行��設置。 a� 打開一個網絡瀏覽�,如 ���er�e� Explorer、Firefox、Safari 或 Goo��le ��rome。 注意:�若網絡設置嚮�(QIS)未能自動啟動,請依照以下步驟手動��網��形 ��形 �形 ��:� • 在�的網絡瀏覽�中輸入 ���p�//192.168.1.1 �再次打開網絡設置嚮� (��S)。 • ��代理服務�、撥號連��設置 T�P/�P 自動取� �P 地址。更多信息請查 閱“�見��題�答�部分的說明,或者�用驅動程序與應用程序光盤中的設 應用程序光盤中的設 用程序光盤中的設 置嚮��取自動診�。 b� �����自動偵測 5 種 �SP 連�類型:�自動取� �P、PPPoE、�定 �P、PPTP 與 L2TP。為�的 �SP 連�類型輸入所�信息。 注意:�...
- Page 34 c� �定網絡��(SS��)與����以 �定網絡��(SS��)與����以 SS��)與����以 )與����以 連� 2.4GHz 與 5GHz ��網絡。� 2.4GHz 與 5GHz ��網絡。� 與 5GHz ��網絡。� 5GHz ��網絡。� ��網絡。� 成�點擊�【應用】。 d� ������的網絡與��設置。點 ������的網絡與��設置。點 擊�【下一步】繼續。 e� 閱���網絡連��程。�成�點擊� 閱���網絡連��程。�成�點擊� 【�成】。 注意:���以�定一個多�� 32 ��的網絡��。 �定一個多�� 32 ��的網絡��。 一個多�� 32 ��的網絡��。 �的網絡��。 的網絡��。 �見��題�答...
- Page 35 3. 在局�網(LAN)設置��中取消勾�“為 LAN �用代理服務��。 4. �成�點擊�【確定】。 MA� OS 1. 在 Safari 瀏覽�中點擊�【Safari】>【Prefere�ces】 >【��】> 更改設置... 2. 在網絡��中取消勾�“FTP 代理�與“Web 代 理(HTTP)�。 3. �成�點擊�【現在應用】。 注意:�請參考瀏覽�中的幫助菜單進行代理服務�的��設置。 置。 B. 設置 T�P/�P 自動取� �P 地址 ® Wi�dows 1. 點擊�【開�】>【控制麵板】>【網絡與 ���er�e�】>【 網絡和共享中�】>【管理網絡連�】。 2. 勾�“���er�e� 協��� 4 (T�P/�Pv4)�,��點擊� 【�性】。...
- Page 36 3. �自動�取 �Pv4 �P 設置,勾�“自動�� �P 地 址�。 4. �成�點擊�【確定】。 MAC OS 1. 點擊�左上角的蘋果�� 。 2. 點擊� 【Sys�em Prefere�ces】 > 【網絡】 > 【設置...】 3. 點擊�【T�P/�P】�籤,在“配置 �Pv4�下拉列� 中��【�用 �H�P】。 4. �成�點擊�【現在應用】。 注意:�請參考�的操作系統中幫助與��功能,�取更多設置 T�P/�P ��信息。...
- Page 37 �. ��撥號連� ® Wi�dows 1. 點擊�【開�】>【���er�e� Explorer】開啟瀏覽�。 2. 點擊�【工具】>【���er�e� �項】>【連�】�籤。 3. 勾�“�不進行撥號連��。 4. �成�點擊�【確定】。 注意:�請參考瀏覽�的幫助菜單進行��撥號連�。 �. ��所有運作中的網絡瀏覽�。 �法�立��網絡連�。 �出有效範�:� • 請����放置�����戶端設�之�。 請����放置�����戶端設�之�。 • ��進行��設置的�更。 ��進行��設置的�更。 認證��題:� • 請�用有�連�的電��連����。 請�用有�連�的電��連����。 • �查網絡��設置。 �查網絡��設置。 • ��以��按�����的重置(Rese�)按鈕�過 5 ���,進行�件重置 ��以��按�����的重置(Rese�)按鈕�過 5 ���,進行�件重置 Rese�)按鈕�過 5 ���,進行�件重置 )按鈕�過...
- Page 38 當 A�SL �����“Li�k�(連�)的�號�續�爍或熄滅,這���法連��� �網 - ����法與 A�SL 網絡�立連�。 • 請確認網��有正確連�。 • 請�有�/AS�L �����的電源����,�等待幾分��,再重��上電源。 • 若 A�SL ������號�續�爍或為熄滅(��OFF)的狀態,請與�的網絡 服務供應商(�SP)��。 忘記網絡��或�碼。 • �著再次通過有�連��設置��的加�動作。 • 按下位������的重置(Rese�)按鈕�過5���,進行�件重置(�ard rese�)的動作。 • 出�初��設置 � 出�初��設置 � 用戶�� / �碼:� / �碼:� �碼:� �P 地址:�192.168.1.1 SS��:�ASUS admi� / admi�...
- Page 39 哪裡�以找到更多的�����信息? • 驅動程序與應用程序光盤中的用戶手冊 驅動程序與應用程序光盤中的用戶手冊 • 在� FA� 網址:� 在� FA� 網址:� FA� 網址:� 網址:� ���p�//suppor�.asus.com/faq • �術��網址:� �術��網址:� ���p�//suppor�.asus.com/�ec�serv • �戶服務��:�8008206655/021-34074610 �戶服務��:�8008206655/021-34074610 SUPPORT HOTLINE Area Hotline Number Support Availability Languages 0800-093-456 ; Taiwan Traditional Mon. to Fri. Chinese 9:00-12:00 02-81439000...
-
Page 40: Isi Kemasan
Isi kemasan RT-N56U Kabel jaringan kapangyarihan adaptor Panduan Ringkas CD Dukungan (Panduan Pengguna/utilitas) Kartu jaminan CATATAN: : Jika salah satu item tersebut rusak atau tidak ada, hubungi peritel. . Fitur perangkat keras LED 2,4GHz 9) Port LAN 1 ~ 4*... - Page 41 USB, lalu klik Eject USB 1 (Lepas USB 1). • Pelepasan disk USB yang tidak benar dapat menyebabkan kerusakan data. • Untuk mengetahui daftar partisi hard disk dan sistem file yang didukung router nirkabel, kunjungi http://event.asus.com/ networks/disksupport • Untuk mengetahui daftar printer yang didukung router nirkabel, kunjungi http://event.asus.com/networks/printersupport...
- Page 42 • Untuk jangkauan depan-belakang terbaik, letakkan router nirkabel dalam posisi tegak lurus. • Untuk jangkauan atas-bawah terbaik, letakkan router nirkabel dalam posisi miring. • Selalu memperbarui ke firmware terkini. Untuk mendapatkan pembaruan firmware terkini, kunjungi situs Web ASUS http://www.asus.com.
- Page 43 Persiapan 1. Melepaskan dan memutus sambungan kabel dari konfigurasi modem yang ada. PERINGATAN Pastikan kabel/modem ADSL telah dinonaktifkan selama minimal dua menit. a: Unplug the AC adapter from the power outlet and disconnect it from your cable/ADSL modem. b: Disconnect the network cable from your cable/ADSL modem. 2.
- Page 44 c: Sambungkan modem ke port WAN router nirkabel menggunakan kabel jaringan. d: Pasang adaptor AC modem ke port DC-In, lalu sambungkan ke stopkontak. 3. Menonaktifkan beberapa pengaturan di komputer. A. Menonaktifkan server proxy, jika sedang diaktifkan. B. Menetapkan pengaturan TCP/IP untuk mengambil alamat IP secara otomatis. C.
- Page 45 Persiapan 1. Konfigurasikan pengaturan nirkabel melalui GUI Web (Web Graphics User Interface). a: Buka browser Web seperti Internet Explorer, Firefox, Google Chrome, atau Safari. Buka browser Web seperti Internet Explorer, Firefox, Google Chrome, atau Safari. Internet Explorer, Firefox, Google Chrome, atau Safari. atau Safari.
- Page 46 c: Tetapkan nama jaringan (SSID) dan kode keamanan untuk sambungan nirkabel 2,4 GHz dan 5 GHz. Klik Apply (Terapkan) ketika selesai. d: Pengaturan Internet dan nirkabel akan ditampilkan. Klik Next (Selanjutnya) untuk melanjutkan. e: Baca petunjuk sambungan jaringan nirkabel. Setelah selesai, klik Finish (Selesai).
- Page 47 3. Dari layar Local Area Network (LAN) Settings, hapus Dari layar Local Area Network (LAN) Settings, hapus Dari layar Local Area Network (LAN) Settings, hapus tanda centang pada Use a proxy server for your LAN (Gunakan server proxy untuk LAN). 4.
- Page 48 3. Untuk mendapatkan pengaturan IP iPv4 secara oto- matis, centang Obtain an IP address automatically (Dapatkan alamat IP secara otomatis). 4. Klik OK setelah selesai. MAC OS 1. Klik ikon Apple yang berada di kiri atas layar. Klik System Preferences (Preferensi Sistem) > 2.
- Page 49 C. Menonaktifkan sambungan dial-up, jika sedang diaktifkan. Windows® 7 Klik Start (Mulai) > Internet Explorer untuk membuka 1. Klik browser Web. 2. Klik tab Tools (Alat) > Internet options (Opsi internet) > Connections (Sambungan). Centang Never dial a connection (Jangan aktifkan 3.
- Page 50 Coba konfigurasikan sambungan berkabel, kemudian konfigurasikan kembali pengaturan enkripsi. • Tekan tombol Atur ulang selama lebih dari lima detik untuk mengatur ulang atau mengembalikan sistem ke pengaturan default pabrik. • Pengaturan default pabrik: Nama pengguna / Sandi: admin / Alamat IP: SSID: ASUS admin 192.168.1.1...
- Page 51 Di mana saya dapat memperoleh informasi lengkap tentang router nirkabel? • Panduan Pengguna dalam CD dukungan http://support.asus.com/faq • Situs tanya jawab online: • Situs Dukungan Teknis: http://support-org.asus.com/ • Hotline Pelanggan: Lihat Hotline Dukungan dalam Panduan Tambahan SUPPORT HOTLINE Area Hotline Number...
- Page 52 สิ ่ ง ต่ า งๆ ในกล่ อ งบรรจุ RT-N56U สายเคเบิ ล เครื อ ข่ า ย อะแดปเตอร์ AC คู ่ ม ื อ เริ ่ ม ต้ น ฉบั บ ย่ อ แผ่ น CD สนั บ สนุ น (คู ่ ม ื อ ผู ้ ใช้ / ยู ท ิ ล ิ ต ี ้ ) ใบรั...
- Page 53 การถอด USB ดิ ส ก์ อ ย่ า งไม่ ถ ู ก ต้ อ ง อาจทำให้ ข ้ อ มู ล เสี ย หายได้ • สำหรั บ รายการของระบบไฟล์ และฮาร์ ด ดิ ส ก์ พ าร์ ต ิ ช ั ่ น ที ่ ไ วร์ เลสเราเตอร์ ส นั บ สนุ น ให้ เ ยี ่ ย มชมที ่ http://event.asus.com/networks/ disksupport •...
- Page 54 ตำแหน่ ง เอี ย ง • อั พ เดตไปเป็ น เฟิ ร ์ ม แวร์ ล ่ า สุ ด เสมอ เยี ่ ย มชมเว็ บ ไซต์ ASUS ที ่ http://www.asus.com เพื ่ อ รั บ อั พ เดตเฟิ ร ์ ม แวร์ ล ่ า สุ ด...
- Page 55 ก่ อ นที ่ จ ะดำเนิ น การ 1. ถอดปลั ๊ ก และตั ด การเชื ่ อ มต่ อ สายไฟ/สายเคเบิ ล จากโมเด็ ม ที ่ ม ี อ ยู ่ ข องคุ ณ คำเตื อ น! ให้ แ น่ ใ จว่ า เคเบิ ล /ADSL โมเด็ ม ของคุ ณ ปิ ด เครื ่ อ งแล้ ว เป็ น เวลาอย่ า งน้ อ ย 2 นาที...
- Page 56 c: ใช้ ส ายเคเบิ ล เครื อ ข่ า ยอี ก เส้ น หนึ ่ ง เชื ่ อ มต่ อ โมเด็ ม ของคุ ณ เข้ า กั บ พอร์ ต WAN ใช้ ส ายเคเบิ ล เครื อ ข่ า ยอี ก เส้ น หนึ ่ ง เชื ่ อ มต่ อ โมเด็ ม ของคุ ณ เข้ า กั บ พอร์ ต WAN ใช้...
- Page 57 เริ ่ ม ต้ น การใช้ ง าน 1. กำหนดค่ า ของการตั ้ ง ค่ า ไร้ ส ายของคุ ณ ผ่ า นระบบติ ด ต่ อ ผู ้ ใ ช้ แ บบกราฟฟิ ก บนเว็ บ (เว็ บ GUI) a: เปิ ด เว็ บ เบราเซอร์ ข องคุ ณ เช่ น I������� E�������, Fi�����, G��g�� C�����, เปิ...
- Page 58 c: กำหนดชื ่ อ เครื อ ข่ า ย (SSID) และคี ย ์ ก ารป้ อ งกั น สำหรั บ การ เชื ่ อ มต่ อ ไร้ ส าย 2.4GHz และ 5GHz ของคุ ณ คลิ ก Apply (นำไปใช้ ) เมื ่ อ เสร็ จ d: การตั...
-
Page 59: Network Connections
3. จากหน้ า จอ L���� A��� N������� (LAN) S���i�g�� จากหน้ า จอ L���� A��� N������� (LAN) S���i�g�� จากหน้ า จอ L���� A��� N������� (LAN) S���i�g�� (การตั ้ ง ค่ า เครื อ ข่ า ยท้ อ งถิ ่ น (LAN)), ลบเครื ่ อ งหมายจาก Use a proxy server for your LAN (ใช้... - Page 60 3. เพื ่ อ รั บ การตั ้ ง ค่ า iPv4 IP โดยอั ต โนมั ต ิ , ทำเครื ่ อ งหมายที ่ Obtain an IP address automatically (รั บ IP แอดเดรสโดยอั ต โนมั ต ิ ) 4. คลิ ก OK (ตกลง) เมื ่ อ ทำเสร็ จ MAC OS 1.
- Page 61 ปิ ด ทำงานการเชื ่ อ มต่ อ แบบโทรเข้ า ถ้ า เปิ ด ทำงานอยู ่ Windows ® 1. คลิ ก Start (เริ ่ ม ) > Internet Explorer (อิ น เทอร์ เ น็ ต เอ็ ก ซ์ พ ลอเรอร์ ) เพื ่ อ เปิ ด เว็ บ เบราเซอร์ 2.
- Page 62 เริ ่ ม ต้ น จากโรงงาน • การตั ้ ง ค่ า เริ ่ ม ต้ น จากโรงงาน: ชื ่ อ ผู ้ ใ ช้ / รหั ส ผ่ า น: ที ่ อ ยู ่ IP: SSID: ASUS �d�i� / �d�i� 192.168.1.1...
- Page 63 สามารถหาข้ อ มู ล เพิ ่ ม เติ ม เกี ่ ย วกั บ ไวร์ เ ลสเราเตอร์ ไ ด้ จ ากที ่ ไ หน? • คู ่ ม ื อ ผู ้ ใ ช้ ใ นแผ่ น CD สนั บ สนุ น • ไซต์ FAQ ออนไลน์ : http://support.asus.com/faq • ไซต์ ส นั บ สนุ น ด้ า นเทคนิ ค : http://support.asus.com/techserv •...
- Page 64 ASUS Recycling/Takeback Services ASUS recycling and takeback programs come from our commitment to the highest stan- dards for protecting our environment. We believe in providing solutions for you to be able to responsibly recycle our products, batteries, other components, as well as the packaging materials.
- Page 65 WARNING! Any changes or modifications not expressly approved by the party responsible for compliance could void the user’s authority to operate the equipment. Prohibition of Co-location This device and its antenna(s) must not be co-located or operating in conjunction with any other antenna or transmitter.
- Page 66 Informations concernant l’exposition aux fréquences radio (RF) La puissance de sortie émise par l’appareil de sans l ASUS est inférieure à la limite d’ exposition aux fréquences radio d’Industry Canada (IC). Utilisez l’appareil de sans l ASUS de...
- Page 67 Ce périphérique a été évalué et démontré conforme aux limites SAR (Speci c Absorption Rate – Taux d’absorption spéci que) d’IC lorsqu’il est installé dans des produits hôtes particuliers qui fonctionnent dans des conditions d’exposition à des appareils portables (les antennes se situent à...
-
Page 68: Networks Global Hotline Information
Networks Global Hotline Information NOTE: For more information, visit the ASUS support site at: http://support.asus.com Support Area Hotline Number Availability Languages Mon. to Fri. Australia 1300-2787-88 English 9:00-18:00 Mon. to Fri. Austria 0043-820240513 German 9:00-18:00 Mon. to Fri. Belgium 0032-78150231... - Page 69 9:00-18:00 Mon. to Fri. 00225-718-033 Poland Polish 9:00-17:00 00225-718-040 8:30-17:30 Mon. to Fri. Portugal 707-500-310 Portuguese 9:00-17:00 Mon. to Fri. +8-800-100-ASUS; Russian/ Russia +7-495-231-1999 English 9:00-18:00 +65-6720-3835 Mon. to Fri. Singapore (Check Repair De- English 11:00-19:00 tail Status Only) -66221701 Mon.
- Page 70 Networks Global Hotline Information Support Area Hotline Number Availability Languages Mon. to Fri. 0041-848111010 German/French 9:00-18:00 Mon. to Fri. Switzerland 0041-848111014 French 9:00-17:45 Mon. to Fri. 0041-848111012 Italian 9:00-17:00 Mon. to Fri. 0800-093-456; Taiwan Traditional Chinese 9:00-12:00; 02-81439000 13:30-18:00 +662-679-8367 Mon.
- Page 71 Manufacturer ASUSTeK Computer Inc. Tel: +886-2-2894-3447 Address: 4F, No. 150, LI-TE RD., PEITOU, TAIPEI 112, TAIWAN Authorised representative ASUS Computer GmbH in Europe Address: HARKORT STR. 21-23, 40880 RATINGEN, GERMANY Authorised distributors in BOGAZICI BIL GISAYAR SAN. VE TIC. A.S.
Need help?
Do you have a question about the RT-N56U and is the answer not in the manual?
Questions and answers