Table of Contents
Advertisement
Quick Links
Page
1
(16)
SERVICE MANUAL
Level 1&2
RX-44
CONFIDENTIAL
Copyright © 2007 NOKIA. All rights reserved.
Transceiver characteristics:
Band:
EGSM: -------------------
WCDMA: ---------------
Display:
LCD: 10.49cm QVGA (4.13") (800 x480 pixel); 65k colors
Camera:
Camera: Integrated VGA Camera
Operating System:
Internet Tablet OS2008 edition: maemo Linux based OS2008
Connections:
Wireless: Bluetooth, WLAN (Wi-Fi), GPS
Connector: Micro USB Connector; AV Connector
Memory:
MicroSD™ & miniSD (max 8GB)
Transceiver with XX-Xx Li-Ion battery pack
Online time
up to 4h
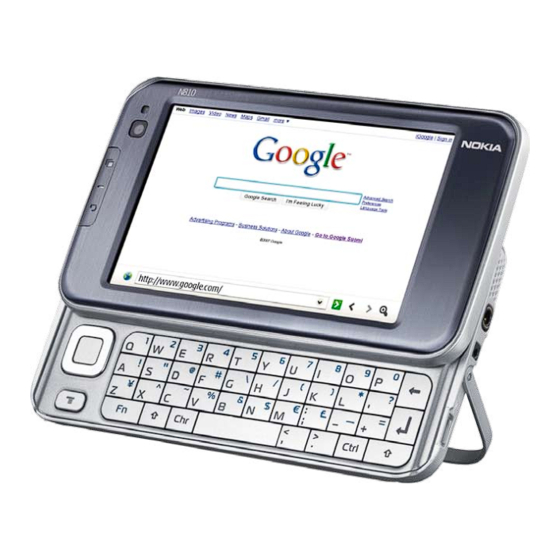
N810 RX-44
Service Manual Level 1&2
Standby
Note
Depends on network
up to 14days
parameters and
phone settings
ISSUE 1
Advertisement
Table of Contents

Related Manuals for Nokia N810 RX-44


Summary of Contents for Nokia N810 RX-44
- Page 1 MicroSD™ & miniSD (max 8GB) Transceiver with XX-Xx Li-Ion battery pack Online time Standby Note Depends on network up to 4h up to 14days parameters and phone settings Page (16) ISSUE 1 CONFIDENTIAL Copyright © 2007 NOKIA. All rights reserved.
-
Page 2: Table Of Contents
COPYRIGHT WARNINGS AND CAUTIONS ESD PROTECTION CARE AND MAINTENANCE BATTERY INFORMATION PRODUCT CONTORLS & OVERVIEW EXPLODED VIEW LEVEL 2 SOLDER COMPONENTS SERVICE DEVICES SW-UPDATE DISASSEMBLY INSTRUCTION ASSEMBLY HINTS Page (16) ISSUE 1 CONFIDENTIAL Copyright © 2007 NOKIA. All rights reserved. -
Page 3: Change History
Approved The purpose of this document is to help NOKIA service levels 1 and 2 workshop technicians to carry out service to NOKIA products. This Service Manual is to be used only by authorized NOKIA service suppliers, and the content of it is confidential. -
Page 4: Warnings And Cautions
5. Ensure all cables and wires are repositioned correctly. ESD PROTECTION Nokia requires that service points have sufficient ESD protection (against static electricity) when servicing the phone. Any product of which the covers are removed must be handled with ESD protection. The SIM card can be replaced without ESD protection if the product is otherwise ready for use. -
Page 5: Care And Maintenance
A phone with a hot or cold battery may temporarily not work, even when the battery is fully charged. Batteries’ performance is particularly limited in temperatures well below freezing. dispose batteries fire! Dispose batteries according local regulations (e.g. recycling). Do not dispose as household waste. Page (16) ISSUE 1 CONFIDENTIAL Copyright © 2007 NOKIA. All rights reserved. -
Page 6: Product Contorls & Overview
N810 RX-44 Service Manual Level 1&2 PRODUCT CONTORLS & OVERVIEW Page (16) ISSUE 1 CONFIDENTIAL Copyright © 2007 NOKIA. All rights reserved. -
Page 7: Exploded View
N810 RX-44 Service Manual Level 1&2 EXPLODED VIEW See corresponding ITEM/CIRCUIT REF in the Spare Parts Service Bulletins on NOL. Page (16) ISSUE 1 CONFIDENTIAL Copyright © 2007 NOKIA. All rights reserved. -
Page 8: Level 2 Solder Components
N810 RX-44 Service Manual Level 1&2 LEVEL 2 SOLDER COMPONENTS Page (16) ISSUE 1 CONFIDENTIAL Copyright © 2007 NOKIA. All rights reserved. -
Page 9: Service Devices
Service Bulletin (SB-011) on NOKIA On- line. Supplier or manufacturer contacts for tool re-order can be found in “Recom- mended service equipment” docu- ment on NOKIA Online. Page (16) ISSUE 1 CONFIDENTIAL Copyright © 2007 NOKIA. All rights reserved. -
Page 10: Sw-Update
To use FLS-5 Flash Dongle you have to follow the user guide inside the sales package. Please check always for the latest version of flash software, which is available on NOKIA Online. Page (16) ISSUE 1 CONFIDENTIAL Copyright © 2007 NOKIA. All rights reserved. -
Page 11: Disassembly Instruction
Service Manual Level 1&2 DISASSEMBLY INSTRUCTION 1. Nokia N810 disassembly 2. You will need the Nokia Standard Toolkit version 2. 3. Unlock and remove the BATTERY COVER. Ensure that no 4. Unlock these 3 clips with the SS-93 battery is still inserted. Also remove the STYLUS. - Page 12 14. After releasing all metal latches, the part can be removed carefully. easily. 15. The QUERTY KEYMAT can be separated. 16. Open the connector of the TOP KEY FLEX ASSEMBLY. Page (16) ISSUE 1 CONFIDENTIAL Copyright © 2007 NOKIA. All rights reserved.
- Page 13 23. Unscrew these Torx Plus size 4 screws in the oder thown. 24. Shift down the SLIDE ASSEMBLY to reach the next screws. Discard these screws. Do not use them again. Also unscrew this screws and discard them. Page (16) ISSUE 1 CONFIDENTIAL Copyright © 2007 NOKIA. All rights reserved.
- Page 14 30. Remove the LCD. 31. Carefully open the connector of the CAMERA MODULE flex. 32. Peel up the MAIN FLEX ASSEMBLY. Once removed, it can not be used again. Page (16) ISSUE 1 CONFIDENTIAL Copyright © 2007 NOKIA. All rights reserved.
- Page 15 N810 RX-44 Service Manual Level 1&2 33. Release the clips of the FRONT FRAME ASSEMBLY carefully. The SLIDE ASSEMBLY can be removed now easily. Page (16) ISSUE 1 CONFIDENTIAL Copyright © 2007 NOKIA. All rights reserved.
-
Page 16: Assembly Hints
8. Place the DECORATION COVER ASSEMBLY, starting with the rear into its guide correctly. Smooth down all clips evenly. clips. Gently push the shown clips into their places. Page (16) ISSUE 1 CONFIDENTIAL Copyright © 2007 NOKIA. All rights reserved.
Need help?
Do you have a question about the N810 RX-44 and is the answer not in the manual?
Questions and answers