Table of Contents
Advertisement
Advertisement
Table of Contents
Troubleshooting

Related Manuals for Avtex W102D


Summary of Contents for Avtex W102D
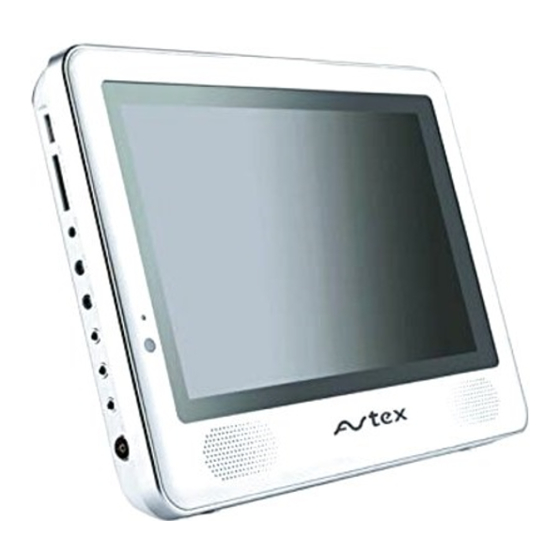
- Page 1 TFT-LCD TV W102D USER MANUAL USER MANUAL READ CAREFULLY BEFORE OPERATION W102D...
-
Page 2: Important Safety Instructions
IMPORTANT SAFETY INSTRUCTIONS TO PREVENT ELECTRICAL SHOCK. CAUTION DO NOT REMOVE THIS COVER. NO USER- SERVICEABLE PARTS INSIDE. RISK OF ELECTRIC SHOCK. REFER SERVICING TO QUALIFIED DO NOT OPEN. SERVICE PERSONNEL. T h i s s y m b o l i n d i c a t e s This symbol indicates d a n g e r o u s v o l t a g e important instructions... - Page 3 IMPORTANT SAFETY INSTRUCTIONS Do not clean the front with keton-type materials (e.g.Acetone ),ethyl alcohol, toluene, ethy lacid, methyl, or chloride-these may damage the panel. Locate your DC adapter near an easily accessible AC outlet. If your LCD TV does not operate normally in particular, if there are any unusual sounds or smells coming from it unplug it immediately and contact an authorized dealer or service center.
-
Page 4: Table Of Contents
CONTENT INSTALLATION Mounting bracket install Headrest bracket installation Can adapter connection Battery pack installation PANEL BUTTON FUNCTIONS Panel control EXTERNAL EQUIPMENT Connecting diagram REMOTE CONTROL HANDSET Remote buttons Battery installation LET'S START Change source operation TV MENU SETUP TV setting Picture Channel edit System... - Page 5 CONTENT DVD FUNCTION SETUP General setup Audio setup Preference setup Video setup Password setup DVB FUNCTION SETUP General setup Video setup DVB-T setup FM OPERATION System TROUBLE SHOOTING TV troubleshooting DVD troubleshooting SPECIFICATIONS Specifications DISPLAY MODE Display mode...
-
Page 7: Installation
INSTALLATION HEADREST BRACKET INSTALLATION Take the backboard and 4 screws from accessories, and lie the host machine flat, with bottom casing facing upwards. According to the direction shown in the figure, make the 4 screw holes in the backboard aim at the 4 in the bottom casing of the host machine, and then use 4 screws to fix the backboard onto the bottom casing of the host machine (shown in the figure 1). -
Page 8: Can Adapter Connection
INSTALLATION When taking out the host machine, press the clasp plate backwards to make the host machine come loose, and then take the host machine with one hand. Figure 3: Clasp plate Install the host machine and headrest bracket onto the car seat, with the effect shown in the figure 4. -
Page 9: Battery Pack Installation
BATTERY PACK BATTERY PACK INSTALLATION 1. Installing battery pack Place this unit to the center of the back, then slide the battery pack to secure it as the direction (figure 2. Use battery If the battery is full, you can use this LCD TV freely. If the battery pack is installed correctly, the indicator on the TV will turn red. - Page 10 BATTERY PACK After battery pack is fully charged, the green indicator is always on ,which mean that the battery pack has been fully charged, so please unplug the power cord. If the indicator has other displays after power-on of the system, it means the battery pack has troubles.
-
Page 11: Panel Button Functions
PANEL BUTTON FUNCTIONS PANEL CONTROL Front panel Indicator( Indicator is red when in standby mode, green when working normally. IR sensor window Top panel STANDBY (To switch from standby mode to power-on mode) SOURCE (Select input source) CH-/+ (Increase or decrease channel number/to move selected menu item) VOL-/+ (Increase or decrease volume/characteristics) SETUP (Enter or exit setup menu) (Play/puase button) -
Page 12: External Equipment
EXTERNAL EQUIPMENT CONNECTING DIAGRAM The left of TV set VIDEO DVD or VCR player VIDEO NOTE You should insert any interconnecting cables BEFORE plugging in the power cord. -
Page 13: Remote Control Handset
REMOTE CONTROL HANDSET REMOTE BUTTONS STANDBY Switches between standby mode and power-on mode. PICTURE Set picture mode: Dynamic, Soft, User, Standard. VOLUME+/- Increases or decreases sound amplitude CHANNEL+/- Steps up/down program numbers. RETURN To swap between a previous program and the current program (only valid in TV mode.) RATIO Switch the picture mode in 4:3 or 16:9. -
Page 14: Battery Installation
REMOTE CONTROL HANDSET (contd) EJECT Disc in/out ,valid in DVD mode. MUTE Sound mute button. Number buttons To select program number. TWO-DIGIT button Switches between one or two-digit program numbers. SOURCE Select input source: TV, DVD, AV, DVB, FM. OK button To confirm a selection/item in menu. -
Page 15: Battery Life
REMOTE CONTROL HANDSET BATTERY INSTALLATION When installing battery , please make the two polarities of battery accord with the two polarities inside the battery case (positive upward, negative downward), as the following figure: CR2025 CR2025 Step 1: Push the button toward left. Step 2: Pull the battery holder out. -
Page 16: Let's Start
LET'S START After the unit has been suitably placed / fixed, on the desk or on your car, and all cords are connected for power, input and output . If your unit is not fixed with the battery pack, connect the adapter to the LCD TV, the unit will go into standby mode, and you can see the indicator get into red. -
Page 17: Tv Menu Setup
TV MENU SETUP This product can store up to 100-channel programs (0 99). You can scan and store all the channels through manual or automatic mode. In TV mode, press [SETUP] button on the remote control or top panel and menu will show as follows: Through pressing [ ] button on the remote control,... -
Page 18: Tv Setting
TV MENU SETUP T V S E T T I N G Select " "and menu will show as follows: TV SETTING CHANNEL COLOR SYSTEM AUTO SOUND SYSTEM FINE TUNE 136.20MHZ MANUAL SEARCH AUTO SEARCH CHANNEL EDIT SELECT ENTER RETURN SETUP Press [ ] button to select item and press [... -
Page 19: Channel Edit
TV MENU SETUP during the searching, you can press [SETUP] button to stop. CHANNEL EDIT TV SETTING CHANNEL SKIP SWAP SELECT RETURN SETUP ADJUST Description Item CHANNEL To select current channel . To select "ON" or "OFF ", you can select " ON " to make current SKIP channel unaccessible while using [CH+/-] button to browse channels. -
Page 20: System
TV MENU SETUP SYSTEM You can setup some system configuration here. Press [ ] to select " " item and press [ ] button to enter the following section: SYSTEM LANGUAGE ENGLISH TRANSPARENCY LEVEL 2 SLEEP RATIO 16 : 9 RESET SELECT ENTER... -
Page 21: Av Setup
AV SETUP If no signal input in TV, AV, the screen will show a similar signal like the following figure. This unit will go into standby mode automatically if there is no signal input for more than 5 minutes. NO SIGNAL 04:50... -
Page 22: Dvd Operation
DVD OPERATION Brief Introduction DVD is well known for its extraordinarily large capacity and outstanding audio-video effects. Its capacity is as high as 4.7-17 GB (approximately 7-26 times the CD capacity).With 500-line horizontal resolution of picture , it brings a new era to the household AV products. Comparison Between DVD and Other Discs Super VCD CDROM... -
Page 23: Features
DVD OPERATION Features This player has employed the new generation DVD decode chip with built-in Dolby Digital decoder which will bring you to a brand-new AV ententainment world. The 2-laser super error-correction mechanism supports CD-R. Brand-new AV Effects Compatible with MPEG4 discs to produce wonderful pictures. 108MHz/12bit video DAC, with more vivid and brilliant pictures. -
Page 24: Compatible Disc Types
DVD OPERATION Compatible Disc Types Sizes Types Recorded Contents 12cm CD-DA Digital audio VIDEO CD Compressed digital audio+compressed digital video 12cm (dynamic picture) DIGITAL VIDEO SVCD: Compressed digital audio+compressed digital video 12cm (dynamic picture) DVD: Compressed digital audio+compressed digital video 12cm (dynamic picture) DVD: Compressed digital audio + compressed digital video(still picture) -
Page 26: Vcd, Svcd Menu Playback
DVD OPERATION VCD, SVCD MENU PLAYBACK SVCD When playing SVCD, VCD2.0 discs with menu playback function, you may enjoy simple menu playback alternation function. You may set menu playback state in the setup menu and select menu playback or sequence playback. For instance, VCD 2.0 disc menu playback. -
Page 27: Select Language/Audio
DVD OPERATION SELECT TRACK TO PLAY DIRECTLY BY NUMBER BUTTONS SVCD 1. Insert disc, after disc reading and normal playback, press number buttons to select track to play directly. If track number is less than 10, press number buttons 1 to 9 to directly select. For instance, select the seventh track: If track number is more than or equal to 10, press [-/- -] button and then number buttons 0 to 9. -
Page 28: Repeat Playback Of Selected Segment
DVD OPERATION REPEAT PLAYBACK MPEG4 SVCD The repeat playback function enables a certain title/chapter/track/disc repeated. 1. Press [REPEAT] button. Each press of REPEAT button may realize different repeat functions. DVD DISC: Title Chapter Repeat Off SVCD, VCD, CD discs: To SVCD, VCD2.0 discs, the repeat function is effective in sequence playback mode; to VCD1.1, CD discs, the repeat function may be directly operated. -
Page 29: Play From The Desired Position
DVD OPERATION FAST PLAYBACK MPEG4 SVCD When playing discs, you may select fast forward or fast backward playback to search a certain point. 1. Press [ ] button and the unit begins fast forward playback. Press [ ] button each time and the disc playback speed switches in the following sequence circularly: 2. -
Page 30: Mpeg4 And Jpeg File Playing
DVD OPERATION Play MPEG4 disc 1. Select track Press [GOTO] button until TV screen displays the following figure. Then press number buttons to input the track. Select 2. Search track time Press [GOTO] button until TV screen displays the following figure. Then press number buttons to input hour, minute and second. - Page 31 DVD OPERATION The strong decoding capability of this unit can decode and play the files with the above formats. In the course of playing, an operation menu will appear and its construction is shown as follows. State window Scroll bar window Display the current state 00:00 00:00 Indicate the current file's position.
- Page 32 DVD OPERATION 2. Play JPEG file After you put an JPEG format file into the unit, it will search disc information and display the operation menu as in the following figure. After selecting JPEG file, the preview window will appear this file's preview image to facilitate you to select.
-
Page 33: Using Usb Devices
CARD READER AND USB OPERATION USAGE OF USB DEVICE AND 3 -IN-1 CARD READER USB refers to Universal Serial Bus. Most of USB devices on the market are USB1.1 or USB2.0. Here are some common types of USB 1.1 devices: Monitors, Communication devices, Audio Human Input Device(HID), Mass storage drives etc. - Page 34 CARD READER AND USB OPERATION NOTES This player can play USB devices and MPEG4 and JPEG files in SD, MMC and MS cards. When reading MPEG files with large size in USB device or media card, pause may appear. If there is no files in USB devices or media card , on-screen appears a empty operation menu to remind you that the device is empty.
-
Page 35: Dvd Function Setup
DVD FUNCTION SETUP GENERAL SETUP General Setup Page TV Display Wide OSD Lang Screen Saver Last Memory Go To General Setup Page 1. TV Display: This item is used to set the output picture ratio of this unit. Optional settings: Normal/PS, Normal/LB, Wide, Wide Squeeze; Default: Wide. 2. -
Page 36: Video Setup
DVD FUNCTION SETUP Dual Mono: Optional settings: Stereo, L-Mono, R-Mono, Mix-Mono ;Default: Stereo Dynamic: Set Dolby digital sound dynamic level, Default: Off 3. Equalizer : Equalizer Page EQ Type None None Rock Bass Boost Super Bass Live Treble Boost Dance Techno Classic Soft... -
Page 37: Preference Setup
DVD FUNCTION SETUP PREFERENCE SETUP Preference Page TV Type Audio Subtitle Disc Menu Parental Country Region Default Go To Preference Page 1. TV Type: To set the output video system of this player. Optional settings: PAL, Auto, NTSC; Default: PAL. 2. -
Page 38: Password Setup
DVD FUNCTION SETUP PASSWORD SETUP Password : This item is used to set a four digital password to enable you to change the parental control ratings. Password Setup Page Password Mode Password Go To Password Setup Page Password Mode: To set whether parental control function need a password, optional setting: On, Off;... -
Page 39: Dvb Function Setup
DVB FUNCTION SETUP Turn on this TV, press [SOURCE] button to change source to DVB, then you can enjoy the rich and colorful contents of Digital Video Broadcast! In DVB mode, press [SETUP] button, then press [ ] button to choose DVB item, the DVB setup menu will be displayed as follow: GENERAL SETUP General Setup Page... -
Page 40: Dvb-T Setup
DVB FUNCTION SETUP DVB-T SETUP DVB- T Setup Page Area Time Zone Parental Age Channel setup Go To DVB - T Setup Page The DVB-T Setup Page is composed of four parts: Area, Time Zone, parental Age, Channel Setup. Note : Press [ ]button to select different item , and press [OK] or [ ] button to enter it. - Page 41 DVB FUNCTION SETUP Auto Scan Connect the antenna to the RF socket on the TV, if the antenna need power supply, please press [ANT. ON/OFF] button to turn on the power for the antenna . Then you can automatically search channels without entering any other information. In the scan process, the scan result will be displayed in the Auto Scan window.
- Page 42 DVB FUNCTION SETUP 2.Select channel using [ ] button , if you don't like this channel press [GREEN] button to delete it . 3.Select channel using [ ] button, press [YELLOW] button to set this channel as a protected one, to from your children to watch the undesied program in it. Note: If you set channel protected, password need to be input in Protect Channel window.
-
Page 43: Fm Operation
FM OPERATION With radio decoder built in , you can enjoy radio programs using this unit. Connect the FM antenna in the accessories to the to the FM socket on the left panel of the TV, change source to FM. Press [SETUP] button and a menu will show as follows: CHANNEL FREQUENCY 101.20MHz... -
Page 44: System
FM OPERATION SYSTEM In FM setup menu, select " ", a FM system menu will be displayed as follows: SYSTEM LANGUAGE ENGLISH TRANSPARENCY LEVEL 3 SLEEP SELECT ENTER RETURN SETUP 1. LANGUAGE Set FM setup menu language. For English, only English. 2. -
Page 45: Tv Troubleshooting
TROUBLESHOOTING Please check for causes of problems in accordance with the following chart before contacting any maintenance personnel. TV TROUBLESHOOTING Symptom Causes and Correction Cannot power on Please make sure the well connecting of power cord Please make sure the well connecting of audio cord No sound Check volume Make sure there is nothing plugged in the headphone jack... -
Page 46: Dvd Troubleshooting
TROUBLESHOOTING DVD TROUBLESHOOTING Symptom Causes Correction 1. Condensation on laser head 1. Switch on power and wait for 1 to 2 hours 2. Disc not properly loaded 2. Make sure label side of the disc facing up Can t play 3. -
Page 47: Specifications
FM antenna Battery pack Lithium rechargeable battery 5000mAH, 7.4V Input connector IEC-Type, IEC 169-2, Female Frequency range (VHF/UHF) 174MHz 858MHz Channel range(VHF/UHF) 7 & 8 Mhz FM frequency range ~108 87.5MHz... -
Page 48: Display Mode
DISPLAY MODE SUPPORTED VIDEO INPUT MODE Format Hor scanning frequency Ver scanning frequency Vert scan type 720X480 31.47 59.94 480P 720X480 15.734 59.94 480i 720X576 31.25 576P 720X576 15.625 576i NOTE Specifications and design are subject to change without notice. - Page 49 ACCESSORIES Please check the following accessories. Remote control and battery User manual Automotive Power socket adapter Power adapter Battery pack (optional) AV cord Headphone Headrest bracket(optional) FM antenna Bag (optional)
Need help?
Do you have a question about the W102D and is the answer not in the manual?
Questions and answers
canisetup channels without the remote
Yes, you may be able to set up channels on the Avtex W102D without the remote by using the buttons on the TV. The manual suggests accessing the setup menu to perform an auto or manual channel scan. If the TV has built-in buttons that allow navigation through the menu, you can try using them to complete the setup. If not, a universal remote with Avtex codes or a replacement remote may be necessary.
This answer is automatically generated