Table of Contents
Advertisement
Quick Links
Advertisement
Table of Contents

Related Manuals for Avtex W150T


Summary of Contents for Avtex W150T
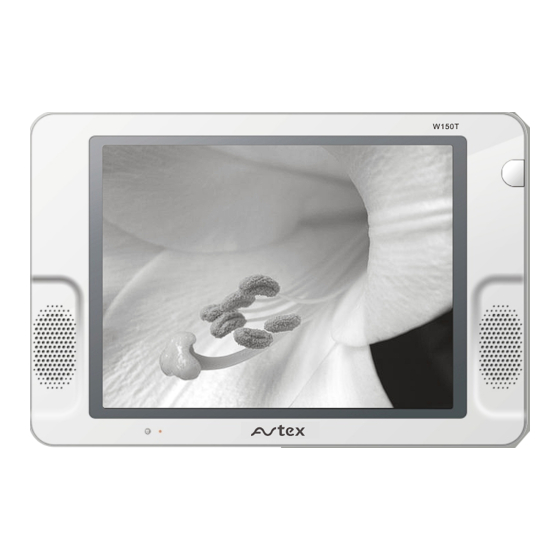
- Page 1 TFT-LCD TV W150T USER MANUAL USER MANUAL READ CAREFULLY BEFORE OPERATION W150T...
-
Page 2: Important Safety Instructions
IMPORTANT SAFETY INSTRUCTIONS TO PREVENT ELECTRICAL SHOCK. CAUTION DO NOT REMOVE THIS COVER. NO USER- SERVICEABLE PARTS INSIDE. RISK OF ELECTRIC SHOCK. REFER SERVICING TO QUALIFIED DO NOT OPEN. SERVICE PERSONNEL. T h i s s y m b o l i n d i c a t e s This symbol indicates d a n g e r o u s v o l t a g e important instructions... - Page 3 IMPORTANT SAFETY INSTRUCTIONS Do not clean the front with keton-type materials (e.g.Acetone ),ethyl alcohol, toluene, ethy lacid, methyl, or chloride-these may damage the panel. Locate your DC adapter near an easily accessible AC outlet. If your LCD TV does not operate normally in particular, if there are any unusual sounds or smells coming from it unplug it immediately and contact an authorized dealer or service center.
-
Page 4: Table Of Contents
CONTENT INSTALLATION Normal installation PANEL BUTTON FUNCTIONS Panel control Rear panel EXTERNAL EQUIPMENT Connecting diagram REMOTE CONTROL HANDSET Remote buttons Battery installation LET'S START Changing source operation TV MENU SETUP Sound Picture TV setup Function TELETEXT FUNCTION Teletext display Page selection Lock Mix mode Zoom in teletext... -
Page 5: Normal Installation
INSTALLATION NORMAL INSTALLATION Hook Ostium M4 10 Screw 1pcs Kickstand Rear viewing of LCD TV 1, Hook the tache (labeled A)of the kickstand onto the plate (labeled C). 2, Tighten the screws ( M4 10) through the ostium (labeled B). 3, Figure shows the finished installation. -
Page 6: Panel Button Functions
PANEL BUTTON FUNCTIONS PANEL CONTROL Front panel IR sensor window Indicator( Indicator is red when in standby mode, green when working normally. Left panel SETUP (Enter or exit setup menu) VOL+/-(Increase or decrease volume) CH+/- (Increase or decrease channel number) SOURCE (Enter to exit source menu) STANDBY (To switch between standby mode and power-on mode) Headphone jack... -
Page 7: Rear Panel
PANEL BUTTON FUNCTIONS REAR PANEL PC IN VGA AUDIO COAXIAL SCART Coaxial digital audio output VGA input terminal PC audio input SCART input terminal 12V DC input terminal R input terminal Composite video/audio input... -
Page 8: External Equipment
EXTERNAL EQUIPMENT CONNECTING DIAGRAM PC IN VGA AUDIO COAXIAL SCART cable Power amplifier (with coaxial digital audio in) DVD or VCR player NOTE You should connect all interconnecting cables BEFORE plugging in the power cord. -
Page 9: Remote Buttons
To increase or decrease program number in TV/DVBmode. NICAM Switch in NICAM,A2 and mono channel (It is effective in TV signal input with NICAM or A2 function). W150T SOUND To select different sound field modes: User, Music, Film, News. HOLD/INFO REVEAL/EPG... -
Page 10: Remote Controller
SCAN Long press the button to start scanning automatically in TV/DVB mode. TEXT/TEXT To enable or disable the function of teletext. W150T MIX/SUBT To display TV and teletext in the same time /Selects the subtitle language in DVB mode. CANCEL/AUDIO To cancel teletext/To change the audio language and sound track in DVB mode. -
Page 11: Battery Installation
REMOTE CONTROLLER BATTERY INSTALLATION Remove the battery cover. Insert two SUM-4(AAA) batteries matching the -/+ polarities of the battery to the -/+ marks inside the battery compartment, as in the following figure: BATTERY LIFE Generally speaking, the battery may be used for one year, but the battery life is also related to the usage times and remote controller operation. -
Page 12: Let's Start
LET'S START After this unit is well fixed on the desk or on the wall, and the cords are well connected for input and output, what you should do next is: Firstly, connect the adapter to the LCD TV, and turn on the power switch then the unit will go into standby mode, you can see the indicator turn red. -
Page 13: Tv Menu Setup
TV MENU SETUP This product can store up to 100-channel programs (0 99). You can scan and store all of the channels through manual or automatic scan mode. In TV mode, press [SETUP] button and the setup menu will show as follows: Pressing [ ] button on the remote control, PICTURE... - Page 14 TV MENU SETUP NOTE " " Means there are more items in this page, you can press [ ] button to select them. Select "BRIGHTNESS " to adjust it, the sub item will show as follows : press [ ] button to adjust the value of brightness. BRIGHTNESS ADJUST SETUP...
-
Page 15: Sound
TV MENU SETUP SOUND Select " "and menu will show as follows: SOUND SOUND MODE USER BALANCE BASS TREBLE NICAM MONO SELECT ENTER RETURN SETUP Press [ ] button to select different items and press [ ] button to adjust them. The following are the descriptions of the sound item. -
Page 16: Tv Setup
TV MENU SETUP T V S E T U P Select " " and TV setup menu will show as follows: TV SETUP TV SETUP CHANNEL SOUND SYSTEM FINE TUNING 40.00MHZ COLOR SYSTEM AUTO SOUND SYSTEM AUTO SEARCH MANUAL SEARCH FINE TUNING 40.00MHZ CHANNEL EDIT... - Page 17 TV MENU SETUP Select "AUTO SEARCH " , the searching menu will show as follows: AUTO SEARCH FOUND: 3 VHF L 112.25MHZ SETUP RETURN The number of programs have found. The current searching frequency Band, 3 Bands in total: "VHF L" ,"VHF H"," UHF". The current searching frequency.
-
Page 18: Function
TV MENU SETUP FUNCTION You can setup system configuration here. Press [ ] to select " " item and press [ ] button to enter the following section: FUNCTION ENGLISH LANGUAGE TRANSPARENCY LEVEL 3 SLEEP RESET SELECT ENTER SETUP RETURN Press [ ] button to select different items and press [ ] button to adjust them. -
Page 20: Teletext Function
TELETEXT FUNCTION ZOOM IN TELETEXT When teletext page shows, you may double zoom in to display this teletext page; Press [SIZE] button to zoom in the upper half part of teletext page; Press [SIZE] button again to enter the under half part of teletext page; Press this button for the third time to return to original display mode. -
Page 21: Av And Scart Setup
AV and SCART SETUP VIDEO SETTING MENU The menu setup of AV/SCART modes is much the same as that of TV mode, except the " " section is invalid and a bit difference in sound mode. It is not repeated here. You can find it in preceding pages. -
Page 22: Vga Setup
VGA SETUP With the VGA mode supported up to 1024*768@75Hz, and speakers built in, you can use this unit as a multimedia PC monitor. When this unit works in VGA mode, the following setup can be done. Press [SETUP] button to enter main section. Press [ ] button to select sections and then press [ ] button or [OK] button to enter. -
Page 23: Sound
VGA SETUP Here shows the color temperature sub menu. COLOR TEMPERATURE COLOR TEMP. NORMAL GREEN BLUE SELECT ADJUST RETURN SETUP Press [ ] button to select item and press [ ] button to adjust the value of the item. Description Item Select color temperature mode :"USER", "NORMAL", "WARM"... -
Page 24: Tv Setup
VGA SETUP M O N I T O R S E T U P Press [ ] button to select " " and press [ /OK] button to enter. MONITOR SETUP PHASE FREQUENCY H-POSITION V-POSITION SELECT ENTER RETURN SETUP Press [ ] button to select different items and press [ ] button to adjust . -
Page 25: Function
VGA SETUP F U N C T I O N Press [ ] button to select " ", and press [ /OK] button to enter. FUNCTION ENGLISH LANGUAGE TRANSPARENCY LEVEL 3 SLEEP RESET SELECT ENTER SETUP RETURN Press [ ] button to select different items and press [ ] button to adjust . -
Page 26: Dvb Function Setup
DVB FUNCTION SETUP Turn on the TV, press [SOURCE] button to change source to DVB, then you can enjoy the rich and colorful contents of Digital Video Broadcast! In DVB mode, press [SETUP] button, then press [ ] button to choose DVB item ,the DVB setup menu will be introduce as follow: GENERAL SETUP General Setup Page... -
Page 27: Dvb-T Setup
DVB FUNCTION SETUP DVB-T SETUP DVB- T Setup Page Area Time Zone Parental Age Antenna Power Channel setup Go To DVB - T Setup Page The DVB-T Setup Page is composed of five parts: Area, Time Zone, parental Age, Antenna power, Channel Setup. - Page 28 DVB FUNCTION SETUP In the scan process, the scan result will be displayed in the Auto Scan window. Press [SCAN] on remote control more than 3 seconds to auto scan. Auto Scan Using the [ ] button to select the Auto Scan item, Status Found Channels Freq: 65000KHz...
-
Page 29: Password Setup
DVB FUNCTION SETUP Reserve Channel If you want to watch a special program on a channel at a later time, you can reserve it. Then a reminding signal will be displayed on screen several minutes before it starts. 002 FlowerGd 4Mbs Channel FlowerGd 4Mbs Program Tenestrial... -
Page 30: Troubleshooting
TROUBLESHOOTING Please check for causes of problems in accordance with the following chart before contacting maintenance personnel. DISPLAY TROUBLESHOOTING Causes and Correction Symptom Check whether the power cord is well connected, and whether this unit is powered on Black screen, power indicator light off Check whether the signal cord of input device is well connected... -
Page 31: Specifications
SCART Power Normal Standby mode Less than Input connector IEC-Type, IEC 169-2, Female Frequency range (VHF/UHF) 174MHz 858MHz Channel range(VHF/UHF) 7 & 8 Mhz W H D... -
Page 32: Display Mode
DISPLAY MODE SUPPORTED PC INPUT MODE Hor scanning frequency Ver scanning frequency Pixel frequency Format Resolution (KHz) (Hz ) (MHz) 640 350 31.5 70.0 25.17 31.5 70.0 720 400 28.32 31.5 60.0 640 480 25.18 37.9 72.0 640 480 31.50 VESA 37.5 75.0... - Page 33 ACCESSORIES Please check the following accessories. Remote control and battery User manual Power adaptor Wall Mount Holder Kit (optional) Kickstand Kit AV cord Automotive Power socket adapter 5195887 V0.0...
Need help?
Do you have a question about the W150T and is the answer not in the manual?
Questions and answers