Table of Contents
Advertisement
Quick Links
Advertisement
Table of Contents

Subscribe to Our Youtube Channel
Related Manuals for Avtex ten Haaft Oyster TV 27


Summary of Contents for Avtex ten Haaft Oyster TV 27
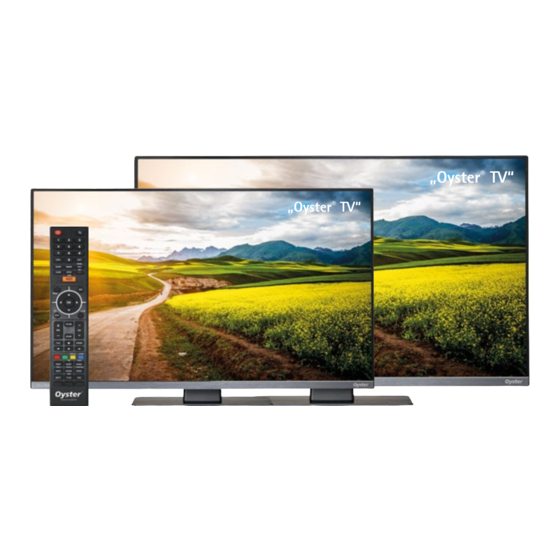
- Page 1 27“ / 32“ Oyster® TV OPERATING INSTRUCTIONS www.ten-haaft.com...
-
Page 2: Table Of Contents
TABLE OF CONTENTS 1. General 1.1 Introduction 1.2 Scope of delivery 1.3 Intended use 1.4 Safety Instructions 2. Control elements 2.1 Remote control 2.2 Interfaces / operation at the device 3. Operation of the Oyster® TV 3.1 Start-up 3.2 General TV settings 3.3 Channel settings and search run DVB-T (digital TV) 3.4 Channel settings and search satellite 3.5 Restore factory programme list... -
Page 3: General
1. GENERAL 2. CONTROL ELEMENTS 1.1 Introduction 2.1 Remote control These instructions describe the function and the operation of the Oyster® TV. Button Function 1.2 Scope of delivery POWER: In standby mode, press this button to start the Oyster® TV with integrated receiver. Oyster®... - Page 4 2. CONTROL ELEMENTS 2. CONTROL ELEMENTS Button Function Button Function Increase volume UP arrow: Navigate upwards in the menu. Decrease volume LEFT arrow: Switch between available options in the menu. Move up one programme RIGHT arrow: Switch between available options in the Move down one programme menu.
-
Page 5: Interfaces / Operation At The Device
2. CONTROL ELEMENTS 2. CONTROL ELEMENTS 2.2 Interfaces / operation at the device Connections and control elements 01) USB 1 connection 02) USB 2 connection 03) CI/CI+ module slot 04) RF antenna connection DVB-T/T2; IEC-socket 06) Satellite input DVB-S/S2; F socket 06) Headphone connection 3.5 mm stereo jack bush 01 02... - Page 6 2. CONTROL ELEMENTS 2. CONTROL ELEMENTS COMMON INTERFACE SLOT SIGNAL INPUTS The common interface (CI+) slot can hold a conditional access module (CAM) with SmartCard that allows you to HDMI / AV use pay-tv programmes and offers. Contact your television provider to obtain further information on contracts The menus for HDMI or AV connections are comparable to those of normal TV reception, except that you cannot and on the modules.
-
Page 7: Operation Of The Oyster® Tv
3. OPERATION OF THE OYSTER® TV 3. OPERATION OF THE OYSTER® TV 3.1 Start-up 3.2 General TV settings Your Oyster® TV is equipped at the factory with the corresponding standard channel list and, if necessary, with The settings menu allows you to set up your television. favourite lists (to create additional favourite lists, see page 28, Editing channels / Creating a favourite list •... - Page 8 3. OPERATION OF THE OYSTER® TV 3. OPERATION OF THE OYSTER® TV Noise reduction AD selection AD stands for “Audio description“. A spoken description of what is happening on the screen. For people with Off / Low / Medium / High severely impaired vision.
- Page 9 3. OPERATION OF THE OYSTER® TV 3. OPERATION OF THE OYSTER® TV ECO MODE TIME menu Low / Medium / High Power saving settings. High = lowest consumption. Blue screen On = If there is no signal, the screen is blue instead of black. Mirror Enable On = Screen content is turned “upside down”.
-
Page 10: Channel Settings And Search Run Dvb-T (Digital Tv)
3. OPERATION OF THE OYSTER® TV 3. OPERATION OF THE OYSTER® TV LOCKING menu 3.3 Channel settings and search run DVB-T (digital TV) Please note: Via DVB-T, you will only ever be able to find the locally broadcast stations of your location. Whether DVB-T reception is possible at all, and whether all the locally available stations are found, always depends on the respective local conditions! After a change of location, it may be necessary to set the channels again. - Page 11 3. OPERATION OF THE OYSTER® TV 3. OPERATION OF THE OYSTER® TV DVB-T manual search With the automatic search, the existing channel list is deleted and recreated each time. If you only want to add a few individual channels, it is better to do this with a manual search. The newly found channels are then automatically appended to the existing list.
-
Page 12: Channel Settings And Search Satellite
3. OPERATION OF THE OYSTER® TV 3. OPERATION OF THE OYSTER® TV 3.4 Channel settings and search satellite - Start the manual search by pressing the button EXIT - If necessary, press the “EXIT” button to exit the menu. If you have not already done so, press the “SOURCE” SOURCE button and switch to the source “Satellite”. - Page 13 3. OPERATION OF THE OYSTER® TV 3. OPERATION OF THE OYSTER® TV At the end of the automatic search, the first channel found appears automatically. Confirm “Normal Scan” with the button . You will then see the following screen: You can then sort the channels found. For more information on sorting channels, see page 28. Alternatively, you can create a list of favourites.
- Page 14 3. OPERATION OF THE OYSTER® TV 3. OPERATION OF THE OYSTER® TV Go to the “Transponder” line and press OK. You can then change the transponder data. You can enter: Now you can narrow down the search even further, if necessary. The frequency - Unicable must remain set to “Off”...
-
Page 15: Restore Factory Programme List
3. OPERATION OF THE OYSTER® TV 3. OPERATION OF THE OYSTER® TV Edit channels / Create list of favourites 3.5 Restore factory programme list Allows you to change the order of the channels and to create a list of favourites. If you have deleted or adversely changed your preset factory programme list, you can easily reload it from the SETUP Press the “SETUP”... -
Page 16: Other Functions
3. OPERATION OF THE OYSTER® TV 3. OPERATION OF THE OYSTER® TV 3.6 Other functions - Then change the search mode to “Preset” TELETEXT (NOT OFFERED BY ALL CHANNELS) Video text is an information system that can be displayed on your television. You can call up the pages listed in the index with the appropriate control buttons. - Page 17 3. OPERATION OF THE OYSTER® TV 3. OPERATION OF THE OYSTER® TV Subtitles Note: Make sure that the selected channel transmits digital text. Please select page 150 of the video text to display subtitles during the normal TV programme. If the broadcast Follow the instructions on the screen.
-
Page 18: Media Player
3. OPERATION OF THE OYSTER® TV 4. MEDIA PLAYER AUDIO 4.1 Media player (media browser) You can select the language and sound track by pressing the button AUDIO Your Oyster® TV supports the playback of various media files which are made available to it via a connected USB flash drive or a compatible USB hard disk. -
Page 19: Appendix
4. MEDIA PLAYER 5. APPENDIX 5.1 Information on environmental protection Then navigate through the file system of your USB device until you find the desired file. You will then see a screen like this: End-of-Life Vehicles Ordinance - ELV The TV is certified and intended for use on motor vehicles as an accessory. Accordingly, dispos- al can be carried out together with the motor vehicle within the scope of the End-of-Life Vehicles Di- rective (European End-of-Life Vehicles Directive ELV, 2000/53/EC;... -
Page 20: Technical Specification Oyster Tv
5. APPENDIX NOTES 5.2 Technical specification Oyster ® ten Haaft TV devices 27” 32” EU energy efficiency class Screen size 27” / 69 cm 32” / 81 cm Annual energy consumption in kWh / 1000h* Power consumption standby / off state W <... - Page 21 ten Haaft GmbH Opening hours Neureutstraße 9 Monday – Friday 08:00 a.m. – 12:00 p.m. 75210 Keltern and from 12:30 p.m. – 4:30 p.m. Germany Telephone: +49 (0) 7231 / 58588-0 Telefax: +49 (0) 7231 / 58588-119 Email: service@ten-haaft.de www.ten-haaft.com Version 04/2023 ·...
Need help?
Do you have a question about the ten Haaft Oyster TV 27 and is the answer not in the manual?
Questions and answers