Barnes & Noble Nook HD User Manual
Hide thumbs
Also See for Nook HD:
- User manual (128 pages) ,
- Quick start manual (10 pages) ,
- User manual (118 pages)
Table of Contents
Advertisement
Quick Links
Download this manual
See also:
User Manual
Advertisement
Table of Contents

Related Manuals for Barnes & Noble Nook HD


Summary of Contents for Barnes & Noble Nook HD
- Page 2 barnesandnoble.com llc, 76 Ninth Avenue, New York, NY 10011 USA. © 2012-2013 barnesandnoble.com llc., Barnes & Noble S.à r.l. or their affiliates. All rights reserved. NOOK® and the NOOK logos are trademarks of barnesandnoble.com llc., Barnes & Noble S.à r.l. or their affiliates. Patent Pending. Screenshots and product images are simulated and for instructional purposes only.
-
Page 3: Table Of Contents
Table of Contents Introduction ..............................9 Contact Us ......................................9 Getting to Know Your NOOK ..............................10 Features of Your NOOK ................................11 Power and Charging ..................................14 Safety and Care ....................................16 Caring for Your NOOK .................................. 17 Gestures ................................ 19 Tap ........................................ - Page 4 Adding Library Items, Bookmarked Web Pages, or Widgets to the Home Screen ..............29 Removing an Item from the Home Screen ............................ 30 Changing the Wallpaper of the Home Screen ..........................30 Configuring the Home Screen ................................ 30 NOOK Profiles .............................. 31 Types of Profiles ....................................
- Page 5 Buying a Book ....................................61 Buying a Single Issue of a Magazine or Newspaper ........................61 Buying a Subscription to a Magazine or Newspaper ........................62 Buying an App ....................................62 Managing Your NOOK Account ..............................62 Using Your Wishlist ..................................63 NOOK Channels ..................................
- Page 6 Customising the General Settings on Your NOOK .................. 90 Opening the General Settings Screen ............................90 Turning PowerSave Mode On or Off ............................90 Configuring the Screen ................................... 90 Configuring Language Settings ................................ 91 Configuring Security Settings ................................93 Configuring the Volume Settings for NOOK Features ......................... 94 Configuring Date and Time Settings ..............................
- Page 7 FEDERAL COMMUNICATIONS COMMISSION (FCC) STATEMENT INFORMATION TO THE USER ..............................108 FCC/IC/CE Radiation Exposure Statement ..........................108 Other Information Related to the Radio ............................. 109 Appendix D: Industry Canada Notice ..................... 110 Appendix E: European Union ........................111 EU Regulatory Conformance ............................... 111 Appendix F: NOOK Terms of Service ....................
-
Page 9: Introduction
This User Guide is designed to help you get the most enjoyment out of your NOOK HD+. NOTE: This User Guide describes the user experience available with NOOK HD+ software 2.2 or later. If your NOOK is running an earlier release, we recommend upgrading before proceeding with the instructions in this guide. -
Page 10: Getting To Know Your Nook
Google Play content, you will need to set up a payment method for a Google Wallet account. Launch the Play Store app for instructions for entering payment method information for a Google Wal- let account. NOOK HD+ User Guide... -
Page 11: Features Of Your Nook
Raise or lower the volume of audio by pressing the upper or lower end of the audio toggle button on the top edge of your NOOK. HD Colour Touchscreen Your NOOK features a high-resolution colour touchscreen for easy navigation and page turns. The touchscreen displays video up to 1080p. NOOK HD+ User Guide... - Page 12 See your NOOK retailer for a list a supported Bluetooth devices. NOTE: Your NOOK can connect to certain Bluetooth headsets, but it does not interpret commands, such as play or pause, from these headsets. NOOK HD+ User Guide...
- Page 13 Speakers Audio speakers are built into the back of your NOOK, as shown below: Speaker NOOK HD+ User Guide...
-
Page 14: Power And Charging
NOTE: If you ignore the window asking you to confirm that you want to power off your NOOK, after several seconds the window disappears and your NOOK resumes whatever it was doing before you pressed the power button. NOOK HD+ User Guide... - Page 15 Bar, which runs along the top of the screen. Once your NOOK has fully charged, unplug the power adapter from the electrical outlet. Unplug the USB cable from your NOOK. Wall Socket Charging Indicator Light 30-pin Cable Power Adapter NOOK HD+ User Guide...
-
Page 16: Safety And Care
Your NOOK is an electrical device. Follow the same basic safety procedures you would follow with any electrical device. When charging your NOOK, use only the custom USB cable and power adapter included with your NOOK. NOOK HD+ User Guide... -
Page 17: Caring For Your Nook
Such damage is not covered by the warranty. Storage applies to temporary locations like the trunk of your car (or other motor vehicle) as well as long-term storage. NOOK HD+ User Guide... - Page 18 You should clean the touchscreen on your NOOK from time to time. Clean the screen with a damp soft cloth, such as a micro-fibre cloth. Micro-fibre cloths are available from Barnes & Noble stores and from partner retailers. Do not use any chemicals to clean the screen. NOOK HD+ User Guide...
-
Page 19: Gestures
For example, if you press and hold on a book cover, your NOOK opens a menu offering you choices of things you can do with that book: open the book, recommend it, lend it, and so on. NOOK HD+ User Guide... -
Page 20: Swipe
You’ll typically swipe to scroll through a long list or collection things, such as the row of books and other items on the Active Shelf. Swiping left or right. Scroll Slide your finger up or down the screen to scroll through any list displaying a scrollbar. A scroll gesture is like a vertical swipe. Scrolling up or down. NOOK HD+ User Guide... -
Page 21: Drag
Pinch your fingers together to shrink an image and zoom out. • Pull your fingers apart to enlarge an image and zoom in. (Pulling your fingers apart this way is sometimes called “pinching out.”) Pinching and zooming. NOOK HD+ User Guide... -
Page 22: Turning On Your Nook For The First Time
Tap on the underlined words and phrases and type in the fields to set up your account. Once you have signed in, you can set up your NOOK Profile. Your NOOK displays a scrollable list of topics such as Cooking & Food, Travel, and Mystery & Suspense. NOOK HD+ User Guide... - Page 23 Your NOOK adds the titles you selected to your Library. That’s it. You’ve registered your NOOK. You’re ready to shop at the NOOK Shop, read your favourite books, maga- zines, and newspapers, play games, and more. NOOK HD+ User Guide...
-
Page 24: Unlocking Your Nook
(To learn more about profiles, see “NOOK Profiles”). Drag a profile’s icon to the lock symbol to unlock your NOOK and display that profile. NOOK HD+ User Guide... -
Page 25: The Status Bar
Home to open configuration settings for the Home screen. • A battery indicator showing the charging status of your battery; for example: • If the outline of the battery shape is nearly empty, your NOOK is nearly out of power. NOOK HD+ User Guide... -
Page 26: The System Bar
An icon (a shopping bag and a clock) for displaying recently viewed items • A Search tool • Either: • An icon (two overlapping squares) for opening the Recent Drawer • An icon (an open book) for returning to your most recent reading material NOOK HD+ User Guide... -
Page 27: The Recent Drawer
Scroll through the settings, and find the tick box labelled Show my Recent Drawer, and tap the box to make the configuration change you want: • To display the Recent Drawer icon, leave the box ticked. • To display the Recent Read icon, leave the box unticked. NOOK HD+ User Guide... -
Page 28: Your Home Screen
Your Home Screen features five panels for holding content. The Active Shelf appears on the centre panel (the third panel from the left), which is the panel that your Home Screen displays by default. To move to another panel, swipe left or right on the background of the Home Screen. NOOK HD+ User Guide... -
Page 29: The Nav Buttons
Your NOOK displays further choices below. If you see a stack of items like books, tap on the stack to display all the items individually in a row. To place an item on the Home Screen, drag it from the shortcuts menu on to the Home Screen. NOOK HD+ User Guide... -
Page 30: Removing An Item From The Home Screen
Use the tick boxes and menu choices to customise the behaviour of the Home Screen. When you have finished making your changes, tap the back arrow icon in the upper left-hand corner of the screen. Your NOOK displays the Home Screen, where your changes should have taken effect. NOOK HD+ User Guide... -
Page 31: Nook Profiles
If you want to add all the content in the NOOK account associated with this device to this new profile’s Library, tap the tick box for adding content. Then tap Next. Your NOOK displays a list of possible interests for the profile. NOOK HD+ User Guide... - Page 32 Password-protect purchases in Shop (require an account password to be entered before completing any purchase in Shop) • Display only Children’s content in Shop • Access My Files in Library • Browse the Web • Reads for Children • Apps for Children NOOK HD+ User Guide...
- Page 33 Tap Update interests to change the interests and channels associated with the profile you are editing. • If you are editing a child profile, tap Change parental controls to change the profile’s access to various types of content. NOOK HD+ User Guide...
- Page 34 Tap Remove this profile to delete the profile from your device. Deleting a Profile You can delete any profile except the primary profile on your NOOK. To delete a profile, follow the steps above for editing a profile and select the option Remove this profile. NOOK HD+ User Guide...
-
Page 35: Assigning Library Items To Profiles
Once you have made your change, tap the Save button at the bottom of the window. If you haven’t made any changes, tap Cancel to close the window. Your NOOK returns you to the Library. NOOK HD+ User Guide... -
Page 36: Searching Your Nook
To select the types of content you want to search, tap the tick boxes next to the items listed on the Search settings screen. Your NOOK will search the type of items you select. Any changes you make take effect right away. NOOK HD+ User Guide... - Page 37 Tap the Clear shortcuts button on the right-hand side of the screen. A dialogue box opens, asking if you really want to clear shortcuts to recently searched items. Tap the Clear shortcuts button in the dialogue box to clear the shortcuts. NOOK HD+ User Guide...
-
Page 38: Your Nook ® Today
Tap the CHANGE LOCATION link in the lower right of the weather area of the Your NOOK Today window. A dialogue box opens. Either: • Type your location and tap OK. • Tap the Guess my location link. NOOK HD+ User Guide... -
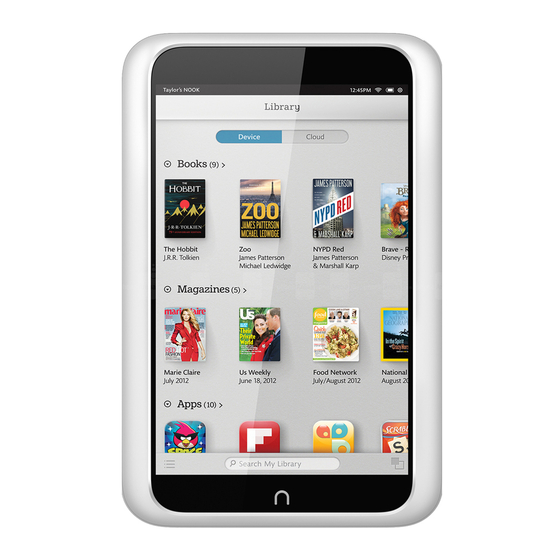
Page 39: Your Library
To save storage space on your NOOK, you can move items from your device to NOOK Cloud, the cloud-based storage service included in your NOOK account. NOTE: You cannot move item that you have sideloaded (transferred from your personal computer) to NOOK Cloud. NOOK HD+ User Guide... -
Page 40: Opening Items In The Library
Type the new name for the shelf. Tap the Save button in the dialogue box. Your NOOK renames the shelf and returns to the window showing the shelf ’s contents. If you have finished making changes to the shelf, tap the Save button. Your NOOK closes the window. NOOK HD+ User Guide... -
Page 41: Moving Content To And From Nook® Cloud
Viewing the Contents of Your NOOK Cloud Storage Area To view your NOOK Cloud storage area, do this: In the System Bar of the Library, tap the Contents icon. A pop-up menu appears. Tap the View Archive menu choice. NOOK HD+ User Guide... -
Page 42: Nook Scrapbook
To see a window with tabbed views of the Table of Contents, Notes, and Bookmarks, tap the Contents icon (a stack of horizontal lines). • To see thumbnail images of all the pages, tap the grid icon. NOOK HD+ User Guide... -
Page 43: Adding A Note To A Scrapbook Page
To remove a page from a scrapbook, do this: Find the page you want to remove in the scrapbook. Press and hold in the centre of the page. A pop-up menu appears. Tap the Remove button. Your NOOK removes the scrapbook page. NOOK HD+ User Guide... -
Page 44: Reading On Your Nook
Tap the Table of Contents tab if it is not already highlighted. Your NOOK displays the Table of Contents for the book. Tap on the chapter or section you want to read next. Your NOOK closes the Reading Tools and displays the page you selected. NOOK HD+ User Guide... - Page 45 Your NOOK opens a Web browser and searches for the word on Wikipedia. When you have finished reading in the browser, you can return to your previous reading by opening the Recent Drawer in the System Bar and tapping on the cover you want. • To close the dictionary window, tap CLOSE. NOOK HD+ User Guide...
-
Page 46: Using Bookmarks
Grey (black text on a grey page) • Butter (dark brown text on a pale yellow page) • Mocha (white text on a greyish brown page) • Sepia (white text on a sepia brown page) • Line Spacing • Single spacing NOOK HD+ User Guide... -
Page 47: Reading A Pdf
When reading a PDF, you can rotate the screen to landscape position and view content in a 2-page format. (You can turn this feature on or off through a tick box on the Reader Settings screen.) NOOK HD+ User Guide... -
Page 48: Reading A Nook Children's Book
• Read by Myself • Read to Me or Read and Play • Read and Record NOTE: The Read to Me and Read and Play buttons appear only on NOOK Children’s books with narration or activities. NOOK HD+ User Guide... - Page 49 NOOK Book. In Read by Myself mode, the picture book will not play an audio track or play any ani- mations. You can trigger activities, if available, by tapping the white star when it appears at the top of the screen. NOOK HD+ User Guide...
- Page 50 The NOOK Children’s book will play the audio track by default if you open the front cover of one of these books. Choosing Read to Me in this NOOK Children’s book will play the audio track automatically as you turn pages. NOOK HD+ User Guide...
- Page 51 Pages with activities display an Activ- ity button with a white star at the top of the page. Tap the Activity button to start or stop the activity. The front cover of a Read and Play book. NOOK HD+ User Guide...
- Page 52 To exit the recording at any time, tap the Done button (the button with a blue tick) in the lower left- hand corner of the screen. To continue recording, swipe or tap to turn to the next page and tap Record. Continue recording and turning pages until you have finished the book. NOOK HD+ User Guide...
- Page 53 Your NOOK opens to the first page of the book and plays your recording of that page. Swipe or tap to turn the page. Continue turning pages and listening your recording until you have finished the book. NOOK HD+ User Guide...
- Page 54 If you tapped Delete Recording, a dialogue box opens, asking you to confirm you want to delete the recording. Tap Yes to delete the recording. Next to the title My recordings, tap the word Done when you have finished editing or deleting recordings. NOOK HD+ User Guide...
-
Page 55: Reading A Nook Comics Book
To jump to a page that has been bookmarked, tap on the page where it is listed in Bookmarks list. To clear the list of bookmarks, tap the Clear all bookmarks button at the bottom of the bookmarks list. NOOK HD+ User Guide... -
Page 56: Reading A Magazine
Toggle between Magazine View and ArticleView To view a page without the Reader Tools and thumbnail images, tap in the centre of the current page or tap on the thumbnail of the page you want to read next. NOOK HD+ User Guide... - Page 57 Bookmarks list. To clear the list of bookmarks, tap the Clear all bookmarks button at the bottom of the bookmarks list. The picture below describes the tools available in Magazine View. NOOK HD+ User Guide...
- Page 58 Tap on the title of the next article you want to read. You can also move from article to article by swiping right or left. To return to reading in Magazine View, tap the Magazine View button at the bottom of the screen. NOOK HD+ User Guide...
-
Page 59: Reading A Newspaper
• Search: A search tool for finding words or phrases in the issue you’re reading. Bookmarking Pages You can bookmark a page in a newspaper article by tapping in the upper right-hand corner of the page. NOOK HD+ User Guide... -
Page 60: Shopping On Your Nook
When the NOOK Shop search engine displays its results, tap on the item you’re interested in to see more details. If the search engine finds more entries than will fit on the screen, scroll through the search engine results by dragging your finger up or down. NOOK HD+ User Guide... -
Page 61: Buying A Book
Tap the Confirm button to confirm your purchase. Once you have confirmed your purchase, your NOOK downloads the issue. The Confirm button changes to a button labelled Read. Tap the Read button to begin reading the issue. NOOK HD+ User Guide... -
Page 62: Buying A Subscription To A Magazine Or Newspaper
To configure your account, do this: Tap the gear icon in the Status Bar to open the Quick Settings window. In the Quick Settings window, tap All Settings. In the Settings window, tap Applications in the left-hand column. NOOK HD+ User Guide... -
Page 63: Using Your Wishlist
Channels ® NOOK Channels collect books and other contents based on a common style or interest. To view a list of NOOK Channels and their book recommendations, tap the NOOK Channels link in the NOOK Shop. NOOK HD+ User Guide... -
Page 64: Using Apps
NOTE: To be able to edit Microsoft Office documents on your NOOK, upgrade OfficeSuite Lite to OfficeSuite Pro. To upgrade, either tap the Edit button at the top of the screen in OfficeSuite Lite or buy Offic- eSuite Pro in the NOOK Store. NOOK HD+ User Guide... -
Page 65: Google Apps
To turn this feature on, open the Settings screens, tap Location Services, and tap the tickbox labelled Google’s location service. To make use of location data in search, tap the Location & Google search tickbox on the Location Services screen. NOOK HD+ User Guide... - Page 66 The Apps screen in the Library looks like this. NOOK HD+ User Guide...
-
Page 67: Using The Chrome Browser
Using the Chrome Browser NOTE: As of NOOK software release 2.1, Chrome is the built-in browser on NOOK HD and NOOK ND+. NOTE: Chrome is available to all profiles that have been given Web access. Other Google Play apps are avail- able only to the primary profile on your NOOK by default. -
Page 68: Using Nook ® Email
Your NOOK offers you two ways of setting up an email account. You can enter simply your email address and a pass- word and let your NOOK automatically configure your account with those credentials, or you can manually configure the account yourself. NOOK HD+ User Guide... - Page 69 NOTE: SSL, which stands for Secure Socket Layer, is a widely-used technology for encrypting Internet so it can- not be intercepted or tampered with. To accept all SSL certificates from email servers, tick the box labelled Accept all SSL certificates. NOOK HD+ User Guide...
-
Page 70: Adding An Account
Once the tick box is ticked, tap the Delete icon (a trash can) in the upper right-hand corner of the screen. A dialogue box appears, asking you to confirm that you want to delete the account. Tap OK. NOOK HD+ User Guide... -
Page 71: Using Nook ® Friends
In addition to the NOOK Friends nav bar, the NOOK Friends app features buttons for issuing NOOK Friends invita- tions and for listing all your NOOK Friends. We’ll describe all these buttons and features in turn. NOOK HD+ User Guide... -
Page 72: Friends' Activities
To learn more about a book, periodical, or app mentioned in these activities, tap its cover or icon. To purchase an item, tap the button listing the item’s price and then tap Confirm to complete your purchase. NOOK HD+ User Guide... -
Page 73: Nook Friends
Enter the Forename, Surname, and Email address of the person you would like to invite to become your NOOK Friend. Tap Save. The NOOK Friends app sends an invitation to the person whose email address you entered in the invitation form. NOOK HD+ User Guide... - Page 74 NOOK Friends lists them in the Friends view, rather than in the Sent Invitations section of the Pending page. To cancel an invitation that you have sent but that the recipient has not accepted, tap the Cancel button next to the name of the person you invited. NOOK HD+ User Guide...
-
Page 75: Lending And Borrowing Books
Any book eligible for lending has a LendMe badge on its cover. • If your Library includes any books eligible to be lent out, they will appear on the shelf of lendable books in the LendMe section of your Library. NOOK HD+ User Guide... - Page 76 To make your entire list of books invisible to friends, leave this box unticked. If you have made your books visible, you can still hide individual books. Tap the Show/Hide toggle beside any book title you wish to hide. NOOK HD+ User Guide...
- Page 77 All Settings. In your Library, press and hold on the cover of the book you want to lend. Books are eligible for lending if they have a LendMe badge on their cover. A pop-up menu opens. NOOK HD+ User Guide...
-
Page 78: Borrowing A Book
Simply tap in the centre of a page to open the Reading Tools, tap on the flag at the right end of the page slider to open a page of extras, and then tap on the Buy button to purchase the book using your NOOK account. NOOK HD+ User Guide... -
Page 79: About Me
Tap the About Me tab at the top of the NOOK Friends app to display the About Me page. This page is a summary of information about you as a NOOK Friend. The profile includes this information: • Your name NOOK HD+ User Guide... - Page 80 The number of NOOK Friends you have • The number of NOOK books you own • The number of books you have recommended • A scrollable list of your NOOK Friends activities (recommendations, shared quotes, etc.) shared publicly through Facebook or Twitter NOOK HD+ User Guide...
-
Page 81: Using Bluetooth
If you have turned Bluetooth on and your NOOK detects one or more supported Bluetooth devices nearby, it lists the devices on the Wireless & Bluetooth settings screen. Tap on the device you want to pair your NOOK with. NOOK HD+ User Guide... -
Page 82: Using The Quick Settings Window
NOTE: When you open the Quick Settings window from the Home Screen, the window includes a shortcut link to the Home settings screen. When opened from the Shop, it includes a shortcut link to the Shop settings screen. NOOK HD+ User Guide... -
Page 83: Configuring The Home Screen
On the right-hand side of the screen, your NOOK displays a list of NOOK features. Tap Home in the list of NOOK features. Your NOOK displays the Home Screen settings window. The Home settings screen looks like this: The Home settings screen. NOOK HD+ User Guide... -
Page 84: Configuring The Quick Corner
Your choices are: no issues, one issue, two issues, three issues, and all issues that have been published since your subscription began. By default, your NOOK displays one issue of each publication. To change the number of issues of a publication that will be displayed on the Active Shelf or Inbox, do this: NOOK HD+ User Guide... - Page 85 A window opens, offering you a choice of how many issues should be displayed on your Home Screen. The window looks like this: The subscription issue configuration for newspapers. Tap the choice you want from the following: none, 1, 2, 3, or all. The window closes. Your choice takes effect right away. NOOK HD+ User Guide...
-
Page 86: Using The Accessibility Reader And Other Accessibility Features
Tap the gear icon in the Status Bar to open the Quick Settings window. In the Quick Settings window, tap All Settings. On the Settings screen, tap the Accessibility menu choice in the left-hand column. Make the configuration changes you want to make: NOOK HD+ User Guide... -
Page 87: The Nook Accessibility Reader
When it reaches the end of a page, the Reader will turn the page automatically and continue reading. The reading continues until you tap once anywhere on the screen. This single tap returns the Reader to Manual mode. NOOK HD+ User Guide... -
Page 88: Getting Started With The Nook Accessibility Reader
Reader automatically returns to Manual mode once the menu item’s action is complete. For selections that require further user interaction and some means to indicate completion (for example, selecting a different speech rate), a two-finger double tap completes the action and returns the Accessibility Reader to Manual mode. NOOK HD+ User Guide... - Page 89 Upon entering Menu mode, the Reader displays a menu over the current text and announces the current menu item. To return to Manual mode from Menu mode without performing any of the available actions, simply double-tap with two fingers. NOOK HD+ User Guide...
-
Page 90: Customising The General Settings On Your Nook
Like the Quick Settings window, the General settings screen includes a slider for adjusting the brightness of the screen. To make the screen brighter, drag the slider to the right. To make it dimmer, drag the slider to the left. Your adjustment takes effect right away. NOOK HD+ User Guide... -
Page 91: Configuring Language Settings
To change the setting, tap Language. A new window opens, listing your choices. • English (United Kingdom) • English (United States) Once you have made your selection, your NOOK returns you to the General settings screen. NOOK HD+ User Guide... - Page 92 Your NOOK adds the word to the dictionary. It also displays the word in a list under the Add button. To remove a word you have added to the dictionary, return to the Add screen and tap the X next to the word you want to remove. NOOK HD+ User Guide...
-
Page 93: Configuring Security Settings
Tap the Set Passcode button. A window with a keypad opens. Enter the sequence you want to use as your passcode. Tap the Continue button. Re-enter the passcode to confirm it. Tap Continue again. You have set up your passcode. NOOK HD+ User Guide... -
Page 94: Configuring The Volume Settings For Nook Features
To return to a 24-hour format, tap the Use 24-hour format toggle switch so it reads ON. Changing the Date Format By default your NOOK displays the date in a format commonly used in the country you specified when you regis- tered your NOOK. To change the date format, do this: NOOK HD+ User Guide... -
Page 95: Configuring Notifications
NOTE: Turning All Notifications off does not prevent your NOOK from automatically receiving and installing software updates. It simply stops your NOOK from posting notifications about the updates. NOTE: These notification controls are device-specific. They do not affect the display of notifications on any other NOOKs you have. NOOK HD+ User Guide... -
Page 96: Updating The Software On Your Nook
Tap the button labelled Check for updates. Your NOOK checks to see if new software is available. If new software is available and you want to install it as soon as possible, tap the Install update button. NOOK HD+ User Guide... -
Page 97: Using A Microsd Memory Card
SD card. • If a card has been formatted with a FAT32 file system on a device other than a NOOK HD or NOOK HD+, your NOOK supports files as long as they are less than 4 GB. -
Page 98: Installing A Memory Card
The lid pulls straight out. Two flexible bands keep it attached to your NOOK. Opening the microSD slot on the bottom edge of your NOOK. Hold the memory card gently between your thumb and forefinger, logo-side up. Gently guide the card into the slot. NOOK HD+ User Guide... - Page 99 Your NOOK displays a warning that formatting the memory card will erase its contents. Tap the Format Now button again to confirm that you want to format the memory card. Your NOOK formats the card with the exFAT file system. NOOK HD+ User Guide...
-
Page 100: Removing A Memory Card
With the tip of your finger, push in the memory card, then release it. The card will pop partly out. Slide the card the rest of the way out of the slot. Remove it, and push the lid back into place. NOOK HD+ User Guide... -
Page 101: Hdmi Output
You can connect your NOOK to an HDMI-compliant TV using the optional NOOK HDTV Adapter Kit, which is available from NOOK retailers. Using the HDTV Adapter Kit, you can transmit content from your NOOK to an HDMI TV while also charging your NOOK. NOOK HD+ User Guide... -
Page 102: Appendix A: Nook Uk Limited Warranty
To make a warranty claim or arrange for the return of your NOOK pursuant to the NOOK TERMS OF SERVICE, you must contact NOOK Customer Service. You may find the appropriate NOOK Customer Service contact infor- mation and telephone number at the NOOK web site: NOOK.co.uk. NOOK HD+ User Guide... - Page 103 If your NOOK is replaced during the Warranty Period, it will be covered by this Limited Warranty for a period of one (1) year for the remainder of the original Warranty Period or ninety (90) days from the date of delivery of the replaced NOOK, whichever is longer. NOOK HD+ User Guide...
- Page 104 CIAL, INCIDENTAL, PUNITIVE OR OTHER INDIRECT DAMAGES ARISING FROM, RELATING TO OR CON- NECTED WITH YOUR PURCHASE OR USE OF YOUR NOOK, INCLUDING, WITHOUT LIMITATION, LOST PROFITS, LOST REVENUE OR LOST DATA, REGARDLESS OF THE CAUSE OF ACTION ON WHICH THE NOOK HD+ User Guide...
- Page 105 This Limited Warranty shall be governed by and construed in accordance with the laws of Luxembourg-City, Grand- Duchy of Luxembourg , although the laws of your country or jurisdiction may apply to any tort claims and any claims under any consumer protection statutes, as provided under applicable law. NOOK HD+ User Guide...
-
Page 106: Appendix B: Trademarks And Copyrights
Trebuchet is a trademark of Microsoft Corporation which is registered in the U.S. Patent and Trademark Office and certain other jurisdictions. Contains iType™ from Monotype Imaging, Inc. iType is a trademark of Monotype Imaging, Inc. NOOK HD+ User Guide... -
Page 107: Google
Spotify and the Spotify logo are registered trademarks of the Spotify Group. Wi-Fi Wi-Fi and Wi-Fi Alliance are registered trademarks of the Wi-Fi Alliance. Additional Information Additional copyright, trademark, and other notices may be found in the NOOK™ Terms of Service: http://www.NOOK.co.uk/legal/eula NOOK HD+ User Guide... -
Page 108: Appendix C: Fcc Notices
RF Energy under the recommendations of the International Commission on Non-Ionising Radiation Protection (ICNIRP). The tests are performed in positions and locations as required by the FCC, IC and The Council of the European Union for each model. NOOK HD+ User Guide... -
Page 109: Other Information Related To The Radio
“Electronic Equipment”. • For information about wireless configuration settings, see “Configuring Wireless Settings”. • Use only the custom, shielded 30-pin USB cable provided with your NOOK when connecting your NOOK to a personal computer. NOOK HD+ User Guide... -
Page 110: Appendix D: Industry Canada Notice
(2) l’utilisateur du dispositif doit étre prêt à accepter tout brouillage radioélectrique reçu, même si ce brouillage est susceptible de compromettre le fonctionnement du dispositif. Cet appareil numérique de la classe B est conforme à la norme NMB-003 du Canada. NOOK HD+ User Guide... -
Page 111: Appendix E: European Union
When this product reaches end of life, please take it to a collection point designated by the appropriate local authori- ties. Recycling this product properly will help protect human health and the environment. The battery in your device should only be replaced by an approved service provider. Please consult your retailer for the particulars. NOOK HD+ User Guide... -
Page 112: Appendix F: Nook ® Terms Of Service
Appendix F: NOOK Terms of Service ® The NOOK Terms of Service are located here: ® http://www.NOOK.co.uk/legal/eula NOOK HD+ User Guide... -
Page 113: Glossary
A scrollable list of recently accessed items. To open the Recent Drawer, tap the icon with two overlapping squares in the lower right-hand corner of the System Bar. Scrapbook An eBook that you create by copying pages from magazines. NOOK HD+ User Guide... -
Page 114: System Bar
Drawer. The configuration of the System Bar changes from application to application. Your NOOK® Today Weather, book recommendations, and other topical content delivered to your Home Screen daily. Widget A special application that you can install on the Home Screen. NOOK HD+ User Guide...
Need help?
Do you have a question about the Nook HD and is the answer not in the manual?
Questions and answers