Table of Contents
Advertisement
Advertisement
Table of Contents

Related Manuals for LifeCore Fitness LC-R99


Summary of Contents for LifeCore Fitness LC-R99
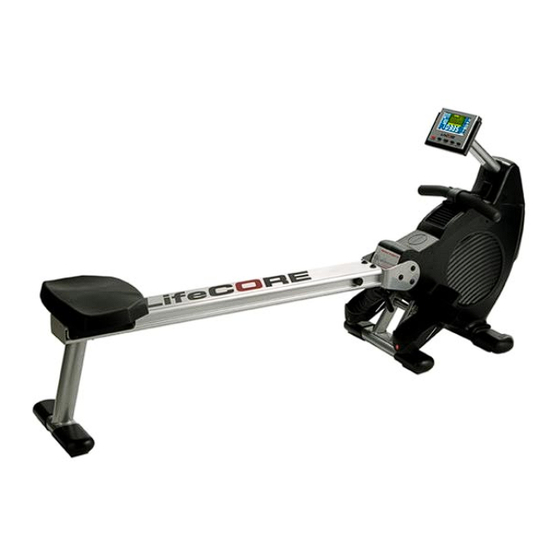
- Page 1 User’s Product Manual LifeCore LC-R99 Rower...
-
Page 2: Introduction
Should you have any questions, please contact us. Your feedback and ideas about your experience with LifeCore are also very important to us. Write to us at: LifeCore Fitness Inc. 2575 Pioneer Ave. Suite 101 Vista, CA 92081 We wish you lots of success and fun while training! Purchaser’s Reference Information... -
Page 3: Table Of Contents
Table of Contents Introduction……………………………………………………………………………………..... Purchaser’s Reference Information …………………………………………………………………. Table of Contents……………………………………………………………………………………… Safety instructions and Warnings……………………………………………………………………. Assembly Instructions.………………………………………………………………………………… Getting Started ………………………………………………………………………………………… Setting Up Your Rower ………………………………………………………………………………. Correct Rowing Guide ………………………………………………………………………………... Console Operation Instructions ……………………………………………………………………… Calculating Target Heart Rate ………………………………………………………………………. Care and Maintenance ………………………………………………………………………………. Warranty Card…………………………………………………………………………………………. -
Page 4: Safety Instructions And Warnings
Safety Instructions & Warnings The R99 Rower is designed and manufactured to meet or exceed all domestic and international safety standards. However, certain precautions need to be followed when operating any exercise equipment. General safety instructions: 1. It is important to consult your physician before any exercise program. 2. -
Page 5: Assembly Instructions
Assembly Instruction Step 1: Step 4: Clear a big enough working space before Extract the Rear Bracket (009) unpacking your R99 Rower. Step 2: Open the carton as shown in the diagram below. Note: To protect the Rower while assembling, we suggest keeping the protective packing material until it is assembled completely. - Page 6 Step 7: Step 9: a) Reverse the Aluminum Beam Extrusion Assemble the Stabilizer Tube-Middle (006) and (001) to the rear. Main Frame (002) with 2 bolts (304) and 4 b) Assemble the Leg and Stabilizer (007) and washers (405), 2 nuts (205). the Aluminum Beam Extrusion (001) with 4 bolts (300) and 4 washers (401).
- Page 7 Step 11: Step 12: a) Remove 6 bolts (300) and 6 washers (401). Connect the AC adapter (715) into the main b) Assemble the Aluminum Beam Extrusion power socket. (001) with the same 6 bolts and washers, then tighten firmly. c) Press the pop pins on the sides to connect the computer arm cables to the computer.
-
Page 8: Getting Started
Getting Started Folding and Unfolding the Rower Your Rower can be folded and unfolded in a matter of seconds. It is very important you understand the operation of the Clamp Knob – Lock Pin for folding and unfolding your Rower. Clamp Knob –... - Page 9 Transportation and Storage Your Rower has transportation wheels located at the front. This enables you to easily move the Rower from room to room. Dot not attempt to transport the Rower without the Clamp Knob firmly tightened. From the folded position, grasp the Rear Leg of the Rower and tilt the machine until the wheels are engaged with the floor.
-
Page 10: Setting Up Your Rower
Setting Up Your Rower Getting on Safely 1) Straddle the Aluminum Beam. 2) Correctly position the Seat beneath you. 3) Sit down taking care that the Seat has not moved. Computer Angle Adjustment The Computer and Computer Arm are designed to rotate and pivot giving you full adjustment to almost any height and angle. - Page 11 Air Vent Adjustment The Rower flywheel fan generates an air flow that can be directed with the adjustable air vent. 1) Rotate The Air Vent Control Knob to adjust the air flow direction. 2) To stop all air flow, rotate the Air Vent Control Knob fully down. Handle Bar Holder When you have finished your workout remember to store the Handle Bar into the Handle Bar Holder as shown in the diagrams below.
-
Page 12: Correct Rowing Guide
Foot Strap Release Releasing the Foot Strap is made easy with the quick release tab. 1) Lift the Foot Strap Buckle Release Tab with your thumb as shown in the diagram below. Correct Rowing Guide Pulling the Body to the Handle Fault At the finish, the user, instead of pulling the handle to the body;... - Page 13 Flying Elbows Fault The user’s elbows are sticking out from the body at the finish and the handle is at chest level. Solution Draw the handle to the body. The wrists are flat and the elbows pass close to the body. Elbows extend behind the body as the handle is drawn to the waist.
-
Page 14: Console Operation Instructions
Console Operation Instructions Please read the console operation instruction thoroughly and get familiar with the console layout. Practice using this console before you start in order to get a better understanding of the functions. Below is the console layout and detailed operation instructions. This product is powered by (4) “C”... - Page 15 There are also 8 rows of LCD representing 16 levels of resistance. Each row represents 2 levels of resistance. There is also level display on the left & right sides of dot matrix profile window to display the resistance level. The appropriated row of LCD will light up when you adjust the resistance level. Data display windows: There are 6 data display windows displaying Time &...
- Page 16 Note: Display sleep mode: If no key is pressed, no RPM or pulse is detected for 4 minutes while power is ON, the console will shut down and enter “power save mode” to save power. To resume, simply press a key or pedal again. KEYS: There are 5 function keys for program operation.
- Page 17 PROGRAMS User profile: Before picking a program to start; it’s recommended to set up your user profile first. It will ensure workout data calculation is more accurate and future workouts are more convenient. There are 4 user spaces for saving user profiles: U1 – U4; user information will be saved permanently unless user changes it.
- Page 18 Note: After program is selected, you can press START/STOP anytime to jump start the program with preset value. The console will use default values or previous entered value to start the program. Manual program: When the SELECT Dial is rotated during category selection mode and Manual indicator is lit &...
- Page 19 After you selected a desired profile; the next step is selecting a profile difficulty level. The dot matrix profile window will display the profile and big data window will light up appropriated level; rotate the SELECT Dial to adjust the level and ENTER to confirm. After level entry, time window will flash with 0:00 or last entered time for adjustment.
- Page 20 the value and ENTER to confirm. The range of watt is 10 – 350 and can only be adjusted in decimals of 5. After watt entry, time window will flash with 0:00 or last entered time for adjustment. After time entry, the program set up is now completed;...
- Page 21 After pulse entry, time window will flash with 0:00 or last entered time for adjustment. After time entry, the program set up is now completed. Press START/STOP to begin this program. 90%; 75% & 55% max heart rate program: These programs will calculate your target heart rate with your entered age & the percentage automatically based on user profile;...
-
Page 22: Calculating Target Heart Rate
Calculating Target Heart Rate Your target heart rate, the intensity needed to improve cardiovascular fitness, depends primarily on your age and not your state of fitness. It is calculated as a percentage of your maximum heart rate, estimated as 220 minus your age. It is most effective to train at your target heart rate between 60% and 85% of your maximum heart rate;... -
Page 23: Care And Maintenance
Care and Maintenance Your Rower is made of the highest quality materials. It is important that you take care of your Rower on a regular basis. 1. Your Rower is for indoor use only and should not be used or stored in damp areas. Wipe all perspiration from your Rower after each use. -
Page 24: Warranty Card
Any labor cost above the amount allocated by LifeCore is the responsibility of the original purchaser. If a product is shipped, delivered or transported to an area that is not a LifeCore Fitness Inc’s distribution area or is out of a serviceable area, it is the purchaser’s sole responsibility to find service and pay for any fees associated with servicing of a product out of LifeCore Fitness distribution or serviceable area. - Page 25 ATTACHED WARRANTY CARD WITHIN (10) DAYS OF PURCHASE TO REGISTER YOUR PRODUCT WITH LIFECORE FITNESS. THANK YOU FOR YOUR BUSINESS! PLEASE MAIL WARRANTY CARD TO: LIFECORE FITNESS, INC, 2575 Pioneer Ave. Suite 101. Vista, CA 92081. Phone (760)599-4555, Fax (760) 946-7602 or register online at lifecorefitness.com, Customer...
- Page 26 Customer Service Toll Free (888) 815-5559 Mon-Friday 7:30 - 5:30 PT Service@lifecorefitness.com Lifecore Fitness Inc. 2575 Pioneer Ave. Suite 101 Vista, CA 92081 Visit our website for assembly videos: www.lifecorefitness.com Page | 25...
Need help?
Do you have a question about the LC-R99 and is the answer not in the manual?
Questions and answers