Table of Contents
Advertisement
Advertisement
Table of Contents

Subscribe to Our Youtube Channel
Related Manuals for Dazon Raider-Classic 150


Summary of Contents for Dazon Raider-Classic 150
- Page 2 Raider-Classic 150 (Oil-cooled&Internal Gearbox): Service Manual (single/ double-seat) EEC Version;3.0 Feb..2005 FOREWORD This service manual has been specially prepared to provide all the necessary information for the proper maintenance and repair of the RAIDER CLASSIC 150 (EEC-approved for on-road use).
-
Page 3: Table Of Contents
Raider-Classic 150 (Oil-cooled&Internal Gearbox): Service Manual (single/ double-seat) EEC Version;3.0 Feb..2005 CONTENTS 1. General Information -------------------------------------------------------------------------------------4 2. Periodic Maintenance and Tune-up Procedures -----------------------------------9 3. Engine --------------------------------------------------------------------------------------13 3.1. -------------------------------------------------------------------------------16 Cylinder 3.2 Crank Connecting Rod Mechanism--------------------------------------------17 3.3 Crankcase &Crankshaft----------------------------------------------------------20 3.4 Valve Mechanism-------------------------------------------------------------------23 3.5 Camshaft-----------------------------------------------------------------------------25... -
Page 4: General Information
Raider-Classic 150 (Oil-cooled&Internal Gearbox): Service Manual (single/ double-seat) EEC Version;3.0 Feb..2005 General Information 1.1 Model Identification 1.1.1 Frame Number The frame number or VIN is stamped under the seat on the frame cross member and stuck behind the seat. 1.1.2 Engine Number The engine number is located on the lower front left side of the engine case. -
Page 5: Specifications
Raider-Classic 150 (Oil-cooled&Internal Gearbox): Service Manual (single/ double-seat) EEC Version;3.0 Feb..2005 1.4 Specifications DIMENSIONS SINGLE-SEAT / DOUBLE-SEAT Overall Length 2330mm / 2300mm Overall Width 1310mm / 1460mm Overall Height 1425mm / 1425mm Wheelbase 1475mm / 1520mm Ground Clearance 200mm Accord with GMVR A01-01 Statutory Plate&... - Page 6 Raider-Classic 150 (Oil-cooled&Internal Gearbox): Service Manual (single/ double-seat) EEC Version;3.0 Feb..2005 Top Speed 60kmph Tachometer 33~40km/h (meter scale: 40km/h) Turning Radius 3.5m Acceleration Noise Level ¡ Ü 80dB(A) Horn DL80-90 12V 3A 105dB, 93<dB (A) <112 Headlight 12V 35W/35W Headlight High Beam Intensity Accord with laws &...
-
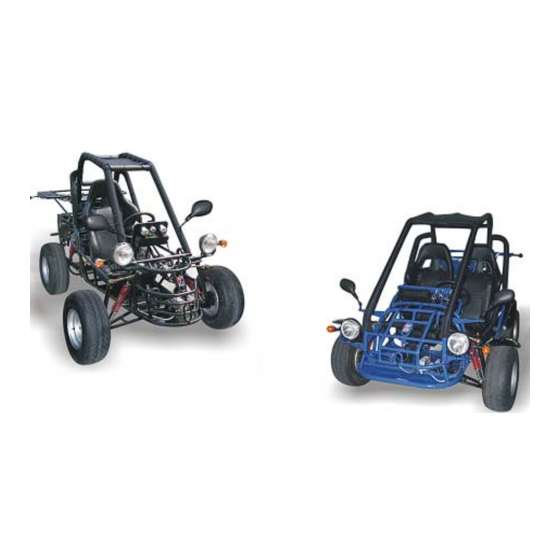
Page 7: Location Of Parts
Raider-Classic 150 (Oil-cooled&Internal Gearbox): Service Manual (single/ double-seat) EEC Version;3.0 Feb..2005 1.5 Location of Parts Double-seat:... - Page 8 Raider-Classic 150 (Oil-cooled&Internal Gearbox): Service Manual (single/ double-seat) EEC Version;3.0 Feb..2005 Awning Seat Single-seat: Roll bar Steering wheel Safety belt Control panel Rear rack Rearview mirror Headlight Turning light Rear wheel Front wheel Brake pedal Throttle pedal Front shock absorber...
-
Page 9: Periodic Maintenance And Tune-Up Procedures
Raider-Classic 150 (Oil-cooled&Internal Gearbox): Service Manual (single/ double-seat) EEC Version;3.0 Feb..2005 2. Periodic Maintenance and Tune –up Procedures 2.1 Periodical Checks and Services The maintenance intervals in the following table are based upon average riding conditions. Riding in unusually dusty areas requires more frequent services. - Page 10 Raider-Classic 150 (Oil-cooled&Internal Gearbox): Service Manual (single/ double-seat) EEC Version;3.0 Feb..2005 d) Inspect the spark plug gap (in general, it should be about 0.6 - 0.7 mm.); e) When the carbon accumulation and wear of the spark plug are too serious, replace the spark plug with a new one of the same specification.
- Page 11 Raider-Classic 150 (Oil-cooled&Internal Gearbox): Service Manual (single/ double-seat) EEC Version;3.0 Feb..2005 2.2.5 Nuts and Bolts in Chassis Inspect the nuts and bolts in the chassis during the first week and every month thereafter. The nuts and bolts become loose normally after use, please check for the looseness regularly.
- Page 12 Raider-Classic 150 (Oil-cooled&Internal Gearbox): Service Manual (single/ double-seat) EEC Version;3.0 Feb..2005 2.2.9 Engine Oil Inspect the engine oil before every riding and replace it monthly. a. Remove the drain plug from the left side bottom of the engine, and drain out the left oil into an oil pan for disposal;...
-
Page 13: Engine
Raider-Classic 150 (Oil-cooled&Internal Gearbox): Service Manual (single/ double-seat) EEC Version;3.0 Feb..2005 3. Engine Troubleshooting for Failure in Starting Engine... - Page 14 Raider-Classic 150 (Oil-cooled&Internal Gearbox): Service Manual (single/ double-seat) EEC Version;3.0 Feb..2005...
- Page 15 Raider-Classic 150 (Oil-cooled&Internal Gearbox): Service Manual (single/ double-seat) EEC Version;3.0 Feb..2005 Troubleshooting for Failure in Starting Carburetor Reason Analysis: After the tryout, the carburetor has been exposed in the air for a long period, so that a layer of mucous membrane has formed and blocked the main jet. As a result, the oil can’t flow smoothly and the engine starting becomes difficult, or the engine stops soon after...
-
Page 16: Cylinder
Raider-Classic 150 (Oil-cooled&Internal Gearbox): Service Manual (single/ double-seat) EEC Version;3.0 Feb..2005 3.1 Cylinder 3.1.1 Cylinder Removal The removal can be done on the vehicle body. a) Remove the cylinder head; b) Remove the cylinder; c) Remove the cylinder gasket and bolts;... -
Page 17: Crank Connecting Rod Mechanism
Raider-Classic 150 (Oil-cooled&Internal Gearbox): Service Manual (single/ double-seat) EEC Version;3.0 Feb..2005 If the wear is too severe and cannot be reworked, a new cylinder should be installed. Cylinder bore 57.4mm Cylindricality 0.05mm Circularity 0.05mm 3.2 Crank Connecting Rod Mechanism 3.2.1 Piston Set... - Page 18 Raider-Classic 150 (Oil-cooled&Internal Gearbox): Service Manual (single/ double-seat) EEC Version;3.0 Feb..2005 3.2.3 Inspection of Connecting Rod End a) Put the piston ring and bearing into the connecting rod end; inspect the tightness degree of the piston pin in connecting rod end.
- Page 19 Raider-Classic 150 (Oil-cooled&Internal Gearbox): Service Manual (single/ double-seat) EEC Version;3.0 Feb..2005 3.2.6 Crank Connecting Rod Set The connecting rod is the component that links the piston and crank. The picture shows the structure and assembly relations of the crank connecting rod component.
-
Page 20: Crankcase &Crankshaft
Raider-Classic 150 (Oil-cooled&Internal Gearbox): Service Manual (single/ double-seat) EEC Version;3.0 Feb..2005 3.3 Crankcase and Crankshaft 3.3.1 Removal a) Remove the engine, cylinder cover, cylinder and piston one by one. b) Remove the drive plate, driven plate, AC generator, starting motor and oil pump. - Page 21 Raider-Classic 150 (Oil-cooled&Internal Gearbox): Service Manual (single/ double-seat) EEC Version;3.0 Feb..2005 h) Remove the crankshaft from the crankcase; Take out the cam chain. i) Clean up the gasket on the crankcase joint face; Pay attention not to damage the joint face.
- Page 22 Raider-Classic 150 (Oil-cooled&Internal Gearbox): Service Manual (single/ double-seat) EEC Version;3.0 Feb..2005 Service 0.10mm (A = 90) limit 0.10mm (B = 105) e) Examine if there is any looseness or unusual sound when the crank journal bearing turns; If there is, the whole set should be replaced.
-
Page 23: Valve Mechanism
Raider-Classic 150 (Oil-cooled&Internal Gearbox): Service Manual (single/ double-seat) EEC Version;3.0 Feb..2005 e) Mount the starting driven gear. f) Mount the cam chain tensioner; Mount the new O-ring on the cam chain tensioner bolt; Apply some oil on the O-ring; Tighten the cam chain tensioner bolt. - Page 24 Raider-Classic 150 (Oil-cooled&Internal Gearbox): Service Manual (single/ double-seat) EEC Version;3.0 Feb..2005 15 Valve Spring Holder, Outer 16 Guide Pipe, Valve 17 Spark Plug 18 Intake Port 19 Cylinder 20 Washer 21Chain Adjustor 3.4.1 General Introduction The four-stroke engine completes its four strokes with one piston stroke. The four strokes: Intake stroke, Compression stroke, Expansion stroke, and Exhaust stroke.
-
Page 25: Camshaft
Raider-Classic 150 (Oil-cooled&Internal Gearbox): Service Manual (single/ double-seat) EEC Version;3.0 Feb..2005 Sometimes when tightening the lock nuts, it will change the clearance. So it must be rechecked for the proper clearance. Valve clearance 0.06~0.07 mm 3.5 Camshaft The camshaft is a main driving unit of the valve train. There are the air inlet cam, the exhaust cam, and the cam journal on the shaft. - Page 26 Raider-Classic 150 (Oil-cooled&Internal Gearbox): Service Manual (single/ double-seat) EEC Version;3.0 Feb..2005 f) Remove the camshaft holder and dowel pin; Remove the cam chain wheel from the cam chain, and remove the camshaft. 3.5.2 Inspection a) Inspect the camshaft bearings for play. If there is any play, replace the whole set;...
-
Page 27: Rocker Arm& Rocker Shaft
Raider-Classic 150 (Oil-cooled&Internal Gearbox): Service Manual (single/ double-seat) EEC Version;3.0 Feb..2005 e) Replace the valve cover gasket; Mount the cover. The valve cover gasket must be mounted properly in the groove. f) Tighten the valve cover-positioning bolt 3.6 Rocker Arm and Rockshaft 3.6.1 Removal... -
Page 28: Valve &Valve Spring
Raider-Classic 150 (Oil-cooled&Internal Gearbox): Service Manual (single/ double-seat) EEC Version;3.0 Feb..2005 The operational principle of the tensioner is as shown in the picture. As for the adjustment of the cam chain tensioner, turning clockwise is tightening, and turning anticlockwise is loosening. -
Page 29: Valve Guide
Raider-Classic 150 (Oil-cooled&Internal Gearbox): Service Manual (single/ double-seat) EEC Version;3.0 Feb..2005 b) After applying oil on the valve stem, mount it into the valve guide. c) Mount the inner and outer valve springs; Mount the valve lock with a spring compressor. -
Page 30: Valve Seat
Raider-Classic 150 (Oil-cooled&Internal Gearbox): Service Manual (single/ double-seat) EEC Version;3.0 Feb..2005 3.8.3 Replacement a) Heat the cylinder head to 100 – 150 ºC. The cylinder head must be wholly and quickly heated to the specific degree, and can’t be heated partly; otherwise it'll cause the cylinder head distortion. - Page 31 Raider-Classic 150 (Oil-cooled&Internal Gearbox): Service Manual (single/ double-seat) EEC Version;3.0 Feb..2005 The valve seat-grinding cutter is the customized trimming tool for the valve seat, and it has three cutting angles: 32º, 45º, and 60º. While trimming, press the valve seat-grinding cutter to make the rotary motion with 40 - 50N force.
- Page 32 Raider-Classic 150 (Oil-cooled&Internal Gearbox): Service Manual (single/ double-seat) EEC Version;3.0 Feb..2005 b) If the contact position is too high, then cut out some of the upper part of the valve seat with a 32º grinding cutter to reduce the working face of the valve seat; if the contact position is too low, then cut out some of the lower part of the valve seat with a 60º...
-
Page 33: Lubrication System
Raider-Classic 150 (Oil-cooled&Internal Gearbox): Service Manual (single/ double-seat) EEC Version;3.0 Feb..2005 3.10 Lubrication System 3.10.1 General Introduction The picture shows the functional diagram of the lubrication system. After the lubrication oil crosses the filter screen, it is pumped by the rotator oil pump; some of the oil goes into the big end of the connecting rod, and splashes on the cylinder wall and the small end of the connecting rod;... - Page 34 Raider-Classic 150 (Oil-cooled&Internal Gearbox): Service Manual (single/ double-seat) EEC Version;3.0 Feb..2005 e) Install the oil filter screen and screen cover, and tighten them. e) Supply the specified oil to the specified level. Disassembling Replacing level 1.0 L 0.8 L Start the engine and run for several minutes in the idle position to make sure there is no oil leakage.
- Page 35 Raider-Classic 150 (Oil-cooled&Internal Gearbox): Service Manual (single/ double-seat) EEC Version;3.0 Feb..2005 f) Remove the screws, and disassemble the oil pump. Oil Pump Inspection a) Inspect the clearance between the oil pump body and outer rotator. Service limit: 0.12 mm b) Inspect the clearance between the inner rotor and outer rotor.
- Page 36 Raider-Classic 150 (Oil-cooled&Internal Gearbox): Service Manual (single/ double-seat) EEC Version;3.0 Feb..2005 c) Tighten the oil pump plate screws; After assembling, gently turn the oil pump shaft, and make sure the oil pump can turn smoothly. Oil Pump Installation a) Install the oil pump on the crankcase.
-
Page 37: Fuel Supply System
Raider-Classic 150 (Oil-cooled&Internal Gearbox): Service Manual (single/ double-seat) EEC Version;3.0 Feb..2005 3.11 Fuel Supply System 3.11.1 Carburetor Idling Adjustment Air Adjusting Screw Adjustment Step one: Turn on the air adjusting screw in, then turn out by the prescribed number of turns;... -
Page 38: Automatic Side Starter
Raider-Classic 150 (Oil-cooled&Internal Gearbox): Service Manual (single/ double-seat) EEC Version;3.0 Feb..2005 Remove the carburetor; Remove the vacuum cover bolt and vacuum cover. Notice: Move slowly to prevent the spring from ejecting. g) Take out the spring, the vacuum membrane and the plunger;... -
Page 39: Float Chamber
Raider-Classic 150 (Oil-cooled&Internal Gearbox): Service Manual (single/ double-seat) EEC Version;3.0 Feb..2005 e) Remove the auto side starter cover, positioning bolts and pieces; Remove the auto side starter; Inspect the auto side starting valve and fuel injection needle for wear. Inspect the O-ring for wear. -
Page 40: Air Cut Valve
Raider-Classic 150 (Oil-cooled&Internal Gearbox): Service Manual (single/ double-seat) EEC Version;3.0 Feb..2005 3.13.4 Carburetor Installation Reverse the removal procedure for installation. After installing, make sure that all carburetor linkages and cables are in correct position, and the carburetor is in idle position. -
Page 41: Air Check Valve
Raider-Classic 150 (Oil-cooled&Internal Gearbox): Service Manual (single/ double-seat) EEC Version;3.0 Feb..2005 The bottom side of the vacuum membrane should be aligned with the carburetor, and the topside should be aligned with the vacuum membrane. 3.15 Air Check Valve The air check valve starts working under 50km/h, impels the second air inlet to burn, and reduce the CO displacement. - Page 42 Raider-Classic 150 (Oil-cooled&Internal Gearbox): Service Manual (single/ double-seat) EEC Version;3.0 Feb..2005 Armature Inspection a) Inspect the armature surface for uneven wear or damages or burn; When where are metal fines attached to the gap of the armature surface, use a cleaning cloth to remove them.
- Page 43 Raider-Classic 150 (Oil-cooled&Internal Gearbox): Service Manual (single/ double-seat) EEC Version;3.0 Feb..2005 e) Inspect the needle bearing in the carbon brush base; it should be able to move smoothly with no play. Before installing, apply a little grease on the groove of the rotary retaining spring on the idler shaft.
-
Page 44: Reduction Mechanism
Raider-Classic 150 (Oil-cooled&Internal Gearbox): Service Manual (single/ double-seat) EEC Version;3.0 Feb..2005 Make sure the starter motor case is free of metal particles, because it is magnetic. Before installing the starter motor on the vehicle after assembling it, first connect the lead wires and inspect if the motor runs normally. -
Page 45: Engaging Mechanism
Raider-Classic 150 (Oil-cooled&Internal Gearbox): Service Manual (single/ double-seat) EEC Version;3.0 Feb..2005 10. Clamp 20. Screw 3.17.2 Reduction Gear Inspection a) Remove the starting clutch. Remove the reduction gear to inspect its wearing degree. b) Measure the inner diameter of the reduction gear. - Page 46 Raider-Classic 150 (Oil-cooled&Internal Gearbox): Service Manual (single/ double-seat) EEC Version;3.0 Feb..2005 b) Inspect the condition of the needle bearing. It should be replaced if there is any damage. c) Inspect if there is any abrasion or damage on the contact surface between the outer clutch component and roller;...
- Page 47 Raider-Classic 150 (Oil-cooled&Internal Gearbox): Service Manual (single/ double-seat) EEC Version;3.0 Feb..2005 e) Align the groove of the woodruff key on the crank, and install the starting clutch. Apply some oil on the reduction gear and reduction gear shaft, and then install them.
-
Page 48: Belt Driven Ctv Mechanism
Raider-Classic 150 (Oil-cooled&Internal Gearbox): Service Manual (single/ double-seat) EEC Version;3.0 Feb..2005 d) Inspect if the start button is conductive; at this time, remove the starting relay inlet line (the green/yellow line. e) Connect the yellow/red line with the ground wire, and press the start button. It should be conductive between the yellow/red line and the ground wire;... - Page 49 Raider-Classic 150 (Oil-cooled&Internal Gearbox): Service Manual (single/ double-seat) EEC Version;3.0 Feb..2005 When the diameter of the driving belt pulley changes form small to big, proportionally the diameter of the driven belt pulley changes from big to small (because the perimeter of the driven belt is constant).
- Page 50 Raider-Classic 150 (Oil-cooled&Internal Gearbox): Service Manual (single/ double-seat) EEC Version;3.0 Feb..2005 The picture shows the structure of the driven belt pulley. The clutch showed in the picture is the automatic dry centrifugal weight clutch. Clutch Assembly 3.19.2 Drive Belt Pulley Removal a) Remove the left crankcase air pipe lock bolt;...
- Page 51 Raider-Classic 150 (Oil-cooled&Internal Gearbox): Service Manual (single/ double-seat) EEC Version;3.0 Feb..2005 e) Remove the centrifugal rollers. Inspection a) Inspect if there is any abrasion or damage on the centrifugal roller; Measure the outer diameter of the centrifugal roller. b) Measure the inner diameter of the Service limit 17.0mm...
- Page 52 Raider-Classic 150 (Oil-cooled&Internal Gearbox): Service Manual (single/ double-seat) EEC Version;3.0 Feb..2005 d) Install the movable drive plate on the crankshaft. e) Enlarge the driven plate belt groove, and mount on the driven belt; Mount the other end of the driven belt on the drive plate hub.
- Page 53 Raider-Classic 150 (Oil-cooled&Internal Gearbox): Service Manual (single/ double-seat) EEC Version;3.0 Feb..2005 b) Measure the inner diameter of the clutch friction plate. Service limit 125.5mm b) Inspect if there is any abrasion or damage on the clutch centrifugal weight friction piece.
- Page 54 Raider-Classic 150 (Oil-cooled&Internal Gearbox): Service Manual (single/ double-seat) EEC Version;3.0 Feb..2005 c) Install the connecting piece, circlip and bottom plate. d) Reverse the removal procedure for installation. When assembling the clutch and driven plate, you must use a clutch spring compressor;...
- Page 55 Raider-Classic 150 (Oil-cooled&Internal Gearbox): Service Manual (single/ double-seat) EEC Version;3.0 Feb..2005 b) Inspect if there is any abrasion or damage on the driven plate; Measure the outer diameter of the driven plate pulley hub. Service limit 33.94mm c) Inspect if there is any abrasion or damage on the movable driven plate;...
- Page 56 Raider-Classic 150 (Oil-cooled&Internal Gearbox): Service Manual (single/ double-seat) EEC Version;3.0 Feb..2005 h) Drive the new needle bearing into with its mark upwards. Use the special tool. i) Apply some grease around the bearing. Installation a) Remove the grease on the driven plate;...
-
Page 57: Rear Transmission Mechanism
Raider-Classic 150 (Oil-cooled&Internal Gearbox): Service Manual (single/ double-seat) EEC Version;3.0 Feb..2005 c) See the drive pulley removal and installation procedure for the replacement. 3.20 Rear Transmission Mechanism 3.20.1 General Information The structure of the rear transmission mechanism is shown in the following picture. - Page 58 Raider-Classic 150 (Oil-cooled&Internal Gearbox): Service Manual (single/ double-seat) EEC Version;3.0 Feb..2005 3.20.2 Transmission Case Oil Inspection When inspecting the oil level of the transmission case, stay the vehicle on the flat ground and keep the body level. a) Inspect if there is oil leakage around the transmission case.
- Page 59 Raider-Classic 150 (Oil-cooled&Internal Gearbox): Service Manual (single/ double-seat) EEC Version;3.0 Feb..2005 d) Remove the center shaft comp. and idle gear comp.; Idle gear comp. Center gear comp. e) Remove the nut M5 and bolt M5*25; Nut M5. Bolt M5*25 f) Remove the fork comp. and rear gear shaft comp..
- Page 60 Raider-Classic 150 (Oil-cooled&Internal Gearbox): Service Manual (single/ double-seat) EEC Version;3.0 Feb..2005 c) Remove the other 3 bearings; d) Assemble the new bearings; e) Install the driven belt pulley shaft on the left Driven belt crankcase; pulley shaft Left Crankcase f) Assemble the oil seal;...
- Page 61 Raider-Classic 150 (Oil-cooled&Internal Gearbox): Service Manual (single/ double-seat) EEC Version;3.0 Feb..2005 Check and Service a) Every time before driving, check if the forward gear and backward gear/reverse gear can work agilely and smoothly; b) For the safety of traveling, the vehicle must be in the parking state when the reverse gear is working.
-
Page 62: Electric System
Raider-Classic 150 (Oil-cooled&Internal Gearbox): Service Manual (single/ double-seat) EEC Version;3.0 Feb..2005 4. Electric System 4.1 Inspection of Charging System 4.1.1 Electric Leakage Test a) Turn the main switch to the "OFF" position. b) Disconnect the negative ground wire from the battery. - Page 63 Raider-Classic 150 (Oil-cooled&Internal Gearbox): Service Manual (single/ double-seat) EEC Version;3.0 Feb..2005 a) Disconnect the negative battery lead wire; b) Disconnect the positive battery; The disconnecting order can’t be reversed. When disconnecting the positive cable, don’t touch the body of the vehicle with the removal tool;...
-
Page 64: Primary Coil
Raider-Classic 150 (Oil-cooled&Internal Gearbox): Service Manual (single/ double-seat) EEC Version;3.0 Feb..2005 Charging Time Normal 5-10 hours Fast 30 minutes Charging Result Open-circuit voltage >=12.8V 4.3 Primary Coil 4.3.1 Structure The picture shows structure of a common generator. 1. Cooling fan 2. -
Page 65: Generator
Raider-Classic 150 (Oil-cooled&Internal Gearbox): Service Manual (single/ double-seat) EEC Version;3.0 Feb..2005 4.4 Generator 4.4.1 Generator Removal a) Remove the cooling fan cover bolt and screw; Remove the cooling fan cover; Remove the cooling fan bolt and cooling fan. b) Hold the flywheel with a universal holding wrench; at the same time, remove the flywheel nut. -
Page 66: Regulator-Rectifier
Raider-Classic 150 (Oil-cooled&Internal Gearbox): Service Manual (single/ double-seat) EEC Version;3.0 Feb..2005 4.5 Regulator –Rectifier 4.5.1 Inspection of Main Wiring-Sub Electric Circuit Condition Take the voltage regulate rectifier inspection procedure by two steps: First inspect the main wiring—sub electric circuit condition, and then inspect the voltage regulator. -
Page 67: Resistor
Raider-Classic 150 (Oil-cooled&Internal Gearbox): Service Manual (single/ double-seat) EEC Version;3.0 Feb..2005 G (Green) ∞ 5 - 100 KΩ ∞ 4.5.2 Inspection of Regular -Rectifier When the main wiring—sub electric circuit condition is normal, inspect the regulator- rectifier. a) Inspect if the regulator- rectifier plug contacts well. - Page 68 Raider-Classic 150 (Oil-cooled&Internal Gearbox): Service Manual (single/ double-seat) EEC Version;3.0 Feb..2005 a) Remove the ignition timing hole cover (or remove the fan cover). b) Rotate the generator rotor, and align the “F” mark on the motor with the crankcase timing ignition mark.
- Page 69 Raider-Classic 150 (Oil-cooled&Internal Gearbox): Service Manual (single/ double-seat) EEC Version;3.0 Feb..2005 b) Remove the 4-core and 2-core connector of the CDI component; Connect the positive end of the multimeter with the ignition charging coil (the black/red wire end) of the 2-core connector, and connect the negative end with the ground wire end (the green end) of the 4-core connector;...
-
Page 70: Ignition Coil
Raider-Classic 150 (Oil-cooled&Internal Gearbox): Service Manual (single/ double-seat) EEC Version;3.0 Feb..2005 Standard value 4-300Ω(20 ) ¡ æ 4.7.6 CDI Component Inspection It is similar with the regulator inspection. The CDI component inspection is also divided into two steps: first, inspect every wiring, winding or coil connected with CDI;... -
Page 71: Spark Plug
Raider-Classic 150 (Oil-cooled&Internal Gearbox): Service Manual (single/ double-seat) EEC Version;3.0 Feb..2005 If the resistance value is ∞, the coil is bad and should be replaced. 4.8.4 Secondary Ignition Coil Inspection a) Install the spark plug cap, and measure the resistance value of the secondary ignition coil;... -
Page 72: Chassis
Raider-Classic 150 (Oil-cooled&Internal Gearbox): Service Manual (single/ double-seat) EEC Version;3.0 Feb..2005 5. Chassis 5.1 Rear Axle Removal a) Disassemble the rear Wheel. b) Remove the cotter pins on the rear wheel axle nut. c) Remove the axle nut. d) Block up the rear end of the machine. -
Page 73: Front Wheel Replacement
Raider-Classic 150 (Oil-cooled&Internal Gearbox): Service Manual (single/ double-seat) EEC Version;3.0 Feb..2005 5.3 Front & Rear Shocks The front and rear shocks are oil dampened units. They are non-re-build able. If any oil seepage is noticed, the shock should be replaced. -
Page 74: Steering Shaft
Raider-Classic 150 (Oil-cooled&Internal Gearbox): Service Manual (single/ double-seat) EEC Version;3.0 Feb..2005 d) Apply an ample amount of grease to the bearing and reinstall it with a bearing tool, making sure that they go in straight; If the bearing isn’t straight, damages to the hubs can occur. - Page 75 Raider-Classic 150 (Oil-cooled&Internal Gearbox): Service Manual (single/ double-seat) EEC Version;3.0 Feb..2005 Replace if any wear is present. c) Before installation, apply enough grease on the throttle and brake pedal in order to make them swing more flexibly. A-Arms 5.11 a) Grease the nipples of the upper & lower a-arms on the front wheel periodically.
- Page 76 Raider-Classic 150 (Oil-cooled&Internal Gearbox): Service Manual (single/ double-seat) EEC Version;3.0 Feb..2005 b) Remove the protective boot and apply some grease. c) Check the tie rod ends periodically for tightness at their adjusting nuts. d) Always use a new cotter pin after the removal.
-
Page 77: Front Wheel Alignment
Raider-Classic 150 (Oil-cooled&Internal Gearbox): Service Manual (single/ double-seat) EEC Version;3.0 Feb..2005 c) It is advisable to replace the spark plug at least once a year to insure the easy starting and good engine performance. 5.17 Front Wheel Alignment a) The front wheels should be "toed-in" from 1/8" to 1/4"; for the proper toe-in dimension, Dimension A should be 1/8"-1/4"longer than Dimension B. - Page 78 Raider-Classic 150 (Oil-cooled&Internal Gearbox): Service Manual (single/ double-seat) EEC Version;3.0 Feb..2005...
-
Page 79: Wiring Diagram
Raider-Classic 150 (Oil-cooled&Internal Gearbox): Service Manual (single/ double-seat) EEC Version;3.0 Feb..2005 6. Wiring Diagram...
Need help?
Do you have a question about the Raider-Classic 150 and is the answer not in the manual?
Questions and answers