Table of Contents
Advertisement
Advertisement
Table of Contents

Related Manuals for Yamaha SR125'99 3MW-AE3


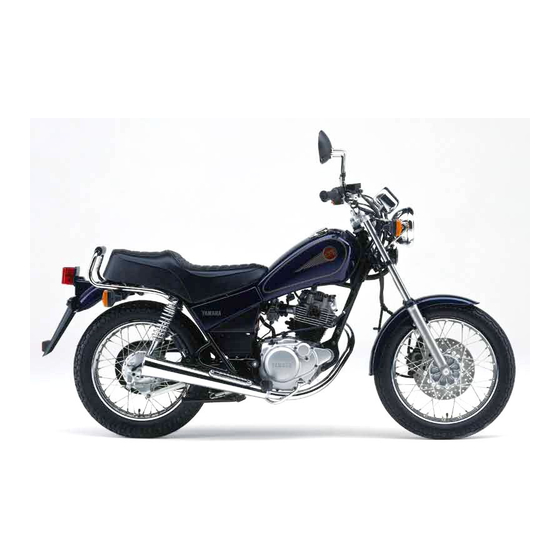
Summary of Contents for Yamaha SR125'99 3MW-AE3
- Page 3 SR125 SERVICE MANUAL: 3MW-AE1 SR125 SUPPLEMENTARY SERVICE MANUAL: 3MW-AE2 SR125 ’99 SUPPLEMENTARY SERVICE MANUAL 1998 by Yamaha Motor Co., Ltd. First Edition, October 1998 Any reproduction or unauthorized use without the written permission of Yamaha Motor Co., Ltd. is expressly...
-
Page 4: Important Information
It is not possible to include all the knowledge of a mechanic in one manual, so it is assumed that anyone who uses this book to perform maintenance and repairs on Yamaha mo- torcycles has a basic understanding of the mechanical ideas and the procedures of motorcycle repair. -
Page 5: How To Use This Manual
YP002000 HOW TO USE THIS MANUAL MANUAL ORGANIZATION This manual consists of chapters for the main categories of subjects. (See “Illustrated symbols”) 1st title 1 : This is the title of the chapter with its symbol on the upper right corner of each page. 2nd title 2 : This title indicates the section of the chapter and only appears on the first page of each section. - Page 6 EB003000 ILLUSTRATED SYMBOLS Illustrated symbols 1 to 9 are designed as SPEC thumb tabs to indicate the chapter’s number INFO and content. 1 General information 2 Specifications INSP 3 Periodic inspection and adjustment 4 Engine 5 Cooling system 6 Carburetion COOL CARB 7 Chassis...
-
Page 7: Table Of Contents
CONTENTS GENERAL SPECIFICATIONS GENERAL SPECIFICATIONS ....... . MAINTENANCE SPECIFICATIONS ......ENGINE . -
Page 9: General Specifications General Specifications
SPEC GENERAL SPECIFICATIONS SPECIFICATIONS GENERAL SPECIFICATIONS Model SR125 Model code: 3MW8 Dimensions: Overall height 1,100 mm Chassis: Caster angle 26.75_ Trail 90 mm Wheel travel: Rear wheel travel 76 mm Bulb wattage quantity: Headlight 12 V 60 W/55 W Auxiliary light 12 V 4 W Tail/brake light 12 V 5 W/21 W... -
Page 10: Maintenance Specifications
SPEC MAINTENANCE SPECIFICATIONS MAINTENANCE SPECIFICATIONS ENGINE Item Standard Limit Cam chain: Cam chain type/No. of links DID 25SH/104 ENDLESS Cam chain adjustment Automatic Carburetor: Engine idle speed 1,300 – 1,400 rpm CHASSIS Item Standard Limit Steering system: Steering bearing type Angular bearing Front suspension: Fork spring free length... -
Page 11: Tightening Torques
SPEC MAINTENANCE SPECIFICATIONS TIGHTENING TORQUES ENGINE Tightening Thread torque Part to be tightened Part name Q’ty Remarks size size mSkg Timing chain tensioner bolt Bolt Timing drain tensioner cap bolt Bolt CHASSIS Tightening torque Part to be tightened Thread size Remarks mSkg Handle crown and front fork... -
Page 12: Cable Routing
SPEC CABLE ROUTING CABLE ROUTING Speed meter cable Wireharness A Faster the handlebar switch lead Handlebar switch lead (left) Horn lead (left and right) front brake switch Main switch lead Headlight earth lead lead clutch switch lead to the Front brake switch lead Auxilialy light lead handlebar with a band. - Page 13 SPEC CABLE ROUTING Flasher relay Clutch cable guide A Align the clamp to the white tape Clamp Right handlebar switch lead on the wireharness. Wireharness Front brake switch lead B Route the brake hose through High tension cord Clutch switch lead the brake hose holder.
- Page 14 SPEC CABLE ROUTING E Clamp the clutch cable to the down tube of the frame. F Cover the sack to the couplers. –6–...
- Page 15 SPEC CABLE ROUTING Pick up coil lead Battery negative lead A Fasten the junction to the wire- Neutral switch lead Starter motor lead harness with a band and cut the C.D.I unit Rectifier/ Regulator end of band. (except for ignition Rear flasher lead (right) Starter relay coil lead and earth lead.)
- Page 16 SPEC CABLE ROUTING D Route the leads inside the frame H Route the brake hose through bracket. the brake hose holder. E Clamp the starter relay lead rec- I Clamp the speed meter cable to tifier / regulator lead and side- the under bracket and through stand switch lead.
-
Page 17: Checking And Adjusting The Steering Head
INSP CHECKING AND ADJUSTING THE STEERING HEAD EB304130 CHECKING AND ADJUSTING THE STEER- ING HEAD 1. Stand the motorcycle on a level surface. WARNING Securely support the motorcycle so that there is no danger of it falling over. NOTE: Place the motorcycle on a suitable stand so that the front wheel is elevated. - Page 18 INSP CHECKING AND ADJUSTING THE STEERING HEAD 6.Adjust: S steering head a. Remove the lock washer 1 , the upper ring nut 2 , and the rubber washer 3 . b. Loosen the lower ring nut 4 and then tighten it to specification with a ring nut wrench 5 .
-
Page 19: Cylinder Head
CYLINDER HEAD CYLINDER HEAD 22 Nm (2.2 mSkg) 20 Nm (2.0 mSkg) 60 Nm (6.0 mSkg) 10 Nm (1.0 mSkg) Order Job name/Part name Q’ty Remarks Cylinder head removal Remove the parts in order. Timing chain tensioner assembly Cam sprocket/Timing chain Refer to “CYLINDER HEAD Ignition coil REMOVAL/INSTALLATION”... -
Page 20: Checking The Timing Chain Tensioner
CYLINDER HEAD EB401430 CHECKING THE TIMING CHAIN TENSIONER 1. Check: S timing chain tensioner Cracks/damage/rough movement ! Re- place. a. Lightly press the timing chain tensioner rod into the timing chain tensioner housing by hand. NOTE: While pressing the timing chain tensioner rod, wind it clockwise with a thin screwdriver 1 until it stops. - Page 21 CYLINDER HEAD 3. Install: S Cam sprocket S Timing chain Installing steps: S Turn the crank shaft counterclockwise until the slit 1 matches the stationary pointer 2 . S Align the dowel pin 3 on the camshaft with the stationary pointer 4 on the cylinder head. S Align the “I”...
- Page 22 CYLINDER HEAD WARNING Always use a new gasket. Timing chain tensioner bolt 10 Nm (1.0 mSkg) d. Remove the screwdriver, make sure that the timing chain tensioner rod releases, and tighten the cap bolt to the specified torque. Cap bolt 10 Nm (1.0 mSkg) 6.
-
Page 23: Steering
CHAS STEERING STEERING UNDER BRACKET 110 Nm (1.1 mSkg) 1st step: 38 Nm (3.8 mkg) 2nd step: 4m (0.4 mkg) Order Job name/Part name Q’ty Remarks Under bracket removal Remove the parts in order. Front fork Refer to “FRONT FORK” section. Handlebar Refer to “HANDLEBAR”... - Page 24 CHAS STEERING 110 Nm (1.1 mSkg) 1st step: 38 Nm (3.8 mkg) 2nd step: 4m (0.4 mkg) Order Job name/Part name Q’ty Remarks Under bracket Bearing inner race Upper bearing Refer to “STEERING REMOVAL/ Bearing outer race INSTALLATION” section. Lower bearing Bearing inner race Dust seal Bearing outer race...
-
Page 25: '99 Sr125 Wiring Diagram
’99 SR125 WIRING DIAGRAM C.D.I magneto Rectifier / Regulator Starter relay Battery Fuse Main switch Thermo switch Heater unit Handlebar switches (right) Engine stop switch Starter switch C.D.I unit Ignition coil Spark plug Clutch switch Sidestand switch Neutral relay Speedometer Neutral indicator light Turn indicator light Hi-beam indicator light...
Need help?
Do you have a question about the SR125'99 3MW-AE3 and is the answer not in the manual?
Questions and answers