Table of Contents
Advertisement
Available languages
Available languages
Quick Links
Download this manual
See also:
Service Manual
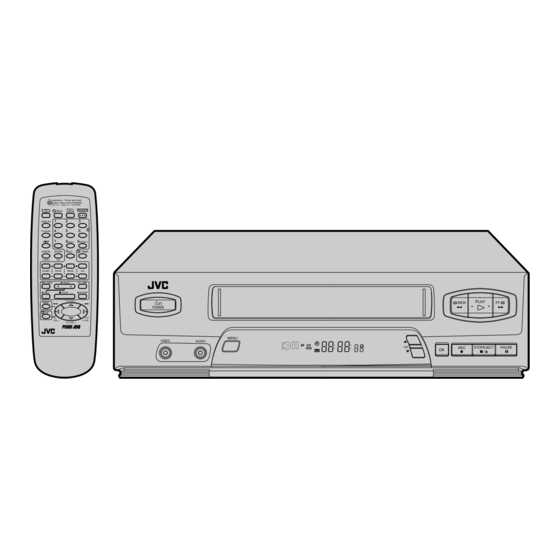
VIDEOGRABADOR
VIDEO CASSETTE RECORDER
HR-J4006UM
TV operation – Press and hold
TV button, then press POWER,
TV CH +/–, VOL +/–, TV/VCR
PROG.
POWER
TV
1
PROG.
CHECK
1
2
3
DISPLAY
2
4
5
6
TV/VCR
7
8
9
DAILY
WEEKLY
0
AUX
4
TIMER
CANCEL
ENTER
C.RESET
OSD
START
STOP
DATE
CH
•• REW
PLAY
FF ••
REC
STOP
PAUSE
TV CH +
MENU
POWER
3
OK
TV
TV
VOL –
+ VOL
TV CH –
PUSH JOG
VIDEO
INSTRUCCIONES
INSTRUCTIONS
MENU
AUDIO
SP
VCR
MANUAL DE
PLAY
REW
FF
CH
REC
STOP/EJECT
PAUSE
OK
LPT0237-001A
Advertisement
Chapters
Table of Contents

Related Manuals for JVC HR-J4006UM


Summary of Contents for JVC HR-J4006UM
- Page 1 VIDEOGRABADOR VIDEO CASSETTE RECORDER HR-J4006UM TV operation – Press and hold TV button, then press POWER, TV CH +/–, VOL +/–, TV/VCR PROG. POWER PROG. CHECK DISPLAY TV/VCR DAILY WEEKLY TIMER CANCEL ENTER C.RESET START STOP DATE •• REW PLAY FF ••...
- Page 2 Estimado cliente: Le agradecemos la adquisición del videograbador VHS de JVC. Antes de utilizarlo, lea la información y las precauciones de seguridad contenidas en este página para utilizar su nuevo videograbador con seguridad. PRECAUCIONES ADVERTENCIA: ALTA TENSION EN EL INTERIOR...
-
Page 3: Table Of Contents
Temporizador SP EP automático ... 25 Temporizador automático ... 25 Grabación instantánea por temporizador (ITR) ... 26 DICION Edición en otro VCR ... 27 Edición desde una videocámara u otro VCR ... 28 REGUNTAS Y RESPUESTAS Reproducción ... 29 Grabación ... 29 Grabación por temporizador ... -
Page 4: Nstalacion De Su Nuevo Vcr
Asegúrese de conectar el enchufe de alimentación a un tomacorriente de CA antes de colocar la pila de litio, de lo contrario la vida de servicio de la pila se reducirá drásticamente. INSTALACION DE SU NUEVO VCR Antena o cable Cable coaxial Alimentador plano Transformador de adaptación... - Page 5 Vaya a las páginas 6, 7 para efectuar "Plug & Play". NOTAS: El canal del VCR es el canal del TV que indicará las señales de audio y video provenientes del VCR. El conmutador CH3- CH4 del VCR en la parte trasera del VCR ajusta el canal del VCR en CH3 o CH4.
-
Page 6: Justes Iniciales
Antes de comenzar... Conecte el cable de la antena del TV en el jack ANT. IN en el VCR y enchufe el cable de alimentación en el tomacorriente de CA. Conecte la alimentación del TV y seleccione el canal 3 ó... - Page 7 "FIN DE EXPLORACION". Si aparece indicado en pantalla "SEÑAL NO DETECTADA", asegúrese de que el cable de la antena esté conectado correctamente al VCR y presione OK o PUSH JOG ajuste automático de canal otra vez.
-
Page 8: Idioma
VCR (o el modo AV). •• MENU Este VCR le ofrece la opción de ver los mensajes en pantalla en, español o inglés (no se incluyen los mensajes superpuestos en la imagen del TV). Seleccione el idioma deseado empleando este procedimiento. -
Page 9: Reloj
Reloj Conecte la alimentación de TV y seleccione el canal 3 ó 4 del VCR (o el modo AV). •• MENU Para efectuar correcciones Presione OK o PUSH JOG hasta que el item que desea cambiar destelle, luego presione CH 5 ∞ o PUSH JOG % fi. -
Page 10: Sintonizador
•• MENU INFORMACION El VCR detecta la banda, TV o CABLE y selecciona la banda correcta automáticamente durante el ajuste automático de canal. La banda seleccionada será indicada en el lado derecho de BANDA en la pantalla de ajuste del sintonizador. -
Page 11: Adición U Omisión De Un Canal
•• •• MENU Adición u omisión de un canal ACCESO A LA PANTALLA DEL MENU PRINCIPAL Presione MENU. ACCESO A LA PANTALLA DE AJUSTE DEL SINTONIZADOR Mueva la barra iluminada (flecha) a "AJUSTE DE SINTONIZADOR" presionando CH 5 ∞ o PUSH JOG % fi, y después presione OK o PUSH JOG ACCESO A LA PANTALLA DE AJUSTE MANUAL DE... -
Page 12: Sencillas
Asegúrese de que el lado con la ventanilla esté hacia arriba y el lado con la etiqueta trasera esté hacia usted, mientras que la flecha en el frente del cassette esté apuntando hacia el VCR. No aplique presión excesiva para insertarlo. La alimentación del VCR se conecta automáticamente. -
Page 13: Grabación Sencilla
ENTER o no). Si emplea la conexión RF, presionando el botón TV/VCR, seleccione el modo VCR para ver un programa a ser grabado. AJUSTE DE LA VELOCIDAD DE LA CINTA Presione SP/EP para ajustar la velocidad de grabación. -
Page 14: Funciones De Reproducción
Funciones de reproducción •• FUNCIONES DE REPRODUCCION Y GRABACION Reproducción de imagen fija/ cuadro por cuadro Para continuar con la reproducción normal, presione PLAY. Cámara lenta/cámara lenta hacia atrás •• PAUSE Para continuar con la reproducción normal presione PLAY. Búsqueda de velocidad varia- PUSH JOG ble/reproducción hacia atrás Para continuar con la reproducción normal presione PLAY. -
Page 15: Búsqueda De Alta Velocidad
AJUSTE MANUAL DE SEGUI- MIENTO Presione CH5 o ∞ en el panel frontal del VCR o en el control remoto. Presione rápidamente para el ajuste fino o manténgalo presionado para lograr el ajuste aproxima- do. -
Page 16: Repetición De Reproducción
•• MENU Memoria de próxima función La memoria de próxima función "le indica" al VCR qué hacer después de rebobinar. Antes de continuar asegúrese de que el VCR está en el modo de parada. a– Para activación automática de la reproducción después de rebobinar una cinta... -
Page 17: Control De Imagen
Activando el estabilizador de video usted puede corregir las fluctuaciones verticales de la imagen cuando reproduce una grabación EP inestable que fue efectuada en otro VCR. Cuando coloca esta función en "SI", la fluctuación vertical será automáticamente corregida. *El ajuste por falta es "NO". -
Page 18: Superposición
Presione OSD otra vez para borrar la pantalla. La indicación de RECORD/PAUSE permanece visualizada en la pantalla. La indicación superpuesta en la pantalla del TV le indica lo que el VCR está haciendo. Canal sintonizado o modo AUX(iliar) Cuando se cambia de canal, el nuevo canal aparece indicado en la pantalla durante 5 segundos. -
Page 19: Grabación De Un Programa Mientras Mira Otro
Si utiliza la conexión AV ( p. 4) para ver la salida del VCR, cambie el modo de entrada del TV de AV a TV. SELECCION DEL CANAL QUE DESEA MIRAR Utilice el selector de canales del TV para sintonizar el canal que desea mirar. -
Page 20: Sistema De Imagen B.e.s.t
FUNCIONES DE REPRODUCCION Y GRABACION (cont.) Sistema de imagen B.E.S.T. Conecte la alimentación de TV y seleccione el canal 3 ó 4 del VCR (o el modo AV). •• MENU La función B.E.S.T. (Biconditional Equalized Signal Tracking= Seguimiento Bicondicional Ecualizado de Señal) verifica la condición de la cinta durante la reproducción y grabación y... -
Page 21: Grabación
•• Reproducción El VCR juzga la calidad de la cinta una vez que usted inicia la reproducción. Efectúe los pasos 1 y 2 de la página 12 ("Reproducción sencilla") antes de continuar. INICIO DE LA REPRODUC- CION Presione PLAY. El VCR ajusta la calidad de imagen de reproduc- ción basándose en la... -
Page 22: Temporizador
CASSETTE Asegúrese de que la lengüeta de protección contra borrado esté intacta. De lo contrario cubra el orificio con cinta adhesiva y coloque el cassette en el VCR. Se conectará la alimentación del VCR y el contador es automáticamente reposicionado. - Page 23 El canal a ser grabado debe ser seleccionado en la caja de cable. (El canal de la caja de cable es el canal del VCR que muestra los canales recibidos por la caja de cable.) AJUSTE DE LA VELOCIDAD DE LA CINTA Presione SP/EP para ajustar la velocidad de la cinta.
-
Page 24: Verificación, Cancelación Y Revisión De Programas
SP/EP CANCEL START+/– •• MENU GRABACION POR TEMPORIZADOR (cont.) Verificación, cancelación y revisión de programas POWER TIMER Para cancelar o revisar un progra- •• ma ... PUSH JOG DESACTIVACION DEL TEMPORIZADOR Presione TIMER y después presione POWER. ACCESO A LA PANTALLA DE AJUSTE DE PROGRAMA Presione PROG. -
Page 25: Temporizador Sp Ep Automático
VUELTA A LA PANTALLA NORMAL Presione MENU. NOTAS: Si usted ha programado el VCR para grabar por temporizador 2 o más programas, el segundo programa y los siguientes pueden no entrar en la cinta si usted colocó el modo de temporizador SP EP automático en "SI". -
Page 26: Grabación Instantánea Por Temporizador (Itr)
Este es un método fácil que le permite grabar desde 30 minutos a 6 horas (seleccionable en incrementos de 30 minutos), y que desconecta su VCR después de que la grabación haya termina- INICIO DE LA GRABACION Presione REC en el panel frontal. -
Page 27: Dicion
Cable de Audio/Video (no suministrado) Entrada de video Grabador Usted puede usar su VCR como reproductor y otro VCR como grabador. CONEXIONES Conecte el cable de AV a los conectores VIDEO OUT y AUDIO OUT de su VCR y los conectores VIDEO IN y AUDIO IN de otro VCR. -
Page 28: Edición Desde Una Videocámara U Otro Vcr
AUDIO OUT L de la misma al conector AUDIO IN de su VCR. COLOCACION DE UN CASSETTE Coloque el cassette a ser grabado dentro de su VCR y el cassette a reproducir dentro de la videocámara o del VCR como reproductor. AJUSTE DEL MODO DE ENTRADA DEL GRABADOR Presione la tecla NUMBER "0"... -
Page 29: Preguntas Y Respuestas
P. Además de evitar las grabaciones ¿cuál es el efecto que produce el extraer la lengüeta de protección? R. Inhabilita el marcado de códigos de índice. P. Algunas veces durante la búsqueda de índice el VCR no encuentra el programa que quiero mirar. ¿Por qué? R. -
Page 30: Ocalizacion Y Reparacion De Averias
Antes de solicitar el servicio por causa de un problema, utilice esta tabla para ver si puede repararlo usted mismo. Los pequeños problemas son a menudo fáciles de corregir, y esto puede ahorrarle el trabajo de enviar su VCR para reparación. -
Page 31: Grabación Por Temporizador
ATENCION Este VCR contiene microcomputadores. El ruido o interferencia externa pueden hacer que el microcomputador falle. Si el VCR no funciona correctamente desconecte la alimentación y desenchufe el cable de alimentación del tomacorriente de CA. Espere unos momentos y conecte otra vez la alimentación. -
Page 32: Ndice
VISTA FRONTAL POWER VIDEO AUDIO 1 Botón de alimentación [POWER 2 Abertura para colocación del cassette 3 Botón de rebobinado [REW] ( 4 Botón de reproducción [PLAY] ( 5 Botón de avance rápido [FF] ( 6 Conectores de entrada de VIDEO/AUDIO p. -
Page 33: Vista Trasera
6 Conector de salida de RF [RF OUT] ( 2 Indicadores de la velocidad de la cinta ( 3 Indicador de modo de temporización ( 4 Indicador de modo de VCR ( 5 Marca "cassette colocado" 6 Indicación de canal ["F-1" para modo AUX] Indicación del contador... -
Page 34: Control Remoto
TV mientras mantiene presionado el botón TV. "Operación de los TV de JVC" abajo. Este control remoto transmite solamente las señales del código A; no es aplicable a las señales del código B. -
Page 35: Specificaciones
La acumulación de suciedad y otras partículas sobres las cabezas de video puede hacer que la imagen reproducida sea borrosa o inestable. En caso de que ocurra este problema, asegúrese de ponerse en contacto con su agente JVC más cercano. -
Page 36: How To Use This Instruction
Dear Customer, Thank you for purchasing the JVC VHS video cassette recorder. Before use, please read the safety information and precautions contained on this page to ensure safe use of your new VCR. CAUTIONS WARNING: DANGEROUS VOLTAGE INSIDE WARNING: TO PREVENT FIRE OR SHOCK HAZARD, DO NOT EXPOSE THIS UNIT TO RAIN OR MOISTURE. - Page 37 Auto SP EP Timer ... 25 Auto Timer ... 25 Instant Timer Recording (ITR) ... 26 DITING Edit To Another VCR ... 27 Edit From A Camcorder Or Another VCR ... 28 UESTIONS AND ANSWERS Playback ... 29 Recording ... 29 Timer Recording ... 29 ROUBLESHOOTING Power ...
-
Page 38: Nstalling Your New Vcr
300 ohm terminal Installing/Removing the lithium battery Make sure that the power plug is connected to an AC outlet and turn off the VCR power. Open the battery cover while pressing the release tab as illustrated. Insert a lithium battery with the plus (+) side up and push it... -
Page 39: Check Contents
If RF connection to TV is used, when switching from VCR to TV mode and from TV to VCR it may be necessary to issue a CH UP and then CH DOWN on TV to obtain a good quality picture. -
Page 40: Plug & Play
Before starting... Connect the TV antenna cable to the ANT. IN jack on the VCR and plug the power cord into the AC outlet. Turn on the TV and select the VCR channel 3 or 4 (or AV mode). ••... - Page 41 "SCAN COMPLETED" will be displayed on the screen. If "NO SIGNAL" is displayed on the screen, make sure that the antenna cable is connected to the VCR properly and press OK or PUSH JOG Channel Set again.
-
Page 42: Select Language
Language Turn on the TV and select the VCR channel 3 or 4 (or AV mode). •• MENU This VCR offers you the choice to view on-screen messages in Spanish or English (not including messages superimposed on the TV picture). Select the desired language using this procedure. The default setting is "SPANISH". -
Page 43: Clock
Clock Turn on the TV and select the VCR channel 3 or 4 (or AV mode). •• MENU POWER •• PUSH JOG To Make Corrections Press OK or PUSH JOG blinks, then press CH 5 ∞ or PUSH JOG %fi. -
Page 44: Tuner
Tuner Turn on the TV and select the VCR channel 3 or 4 (or AV mode). •• MENU INFORMATION The VCR detects the band (TV or CATV) and selects the correct band automatically during Auto Channel Set. The selected band will be displayed on the right side of "BAND"... -
Page 45: Add Or Delete A Channel
•• •• MENU Add Or Delete A Channel ACCESS MAIN MENU SCREEN Press MENU. ACCESS TUNER SET SCREEN Move the highlight bar (arrow) to "TUNER SET" by pressing CH5∞ or PUSH JOG%fi, then press OK or PUSH JOG ACCESS MANUAL CHANNEL SET SCREEN Move the highlight bar (arrow) to "MANUAL... -
Page 46: Simple Playback
Simple Playback Turn on the TV and select the VCR channel 3 or 4 (or AV mode). •• REW (Rewind) SIMPLE PLAYBACK AND RECORDING INFORMATION This video recorder is equipped with SQPB (S-VHS QUASI PLAYBACK) that lets you watch tapes recorded in the S-VHS format with regular VHS resolution. -
Page 47: Simple Recording
Simple Recording Turn on the TV and select the VCR channel 3 or 4 (or AV mode). SP/EP ENTER •• PLAY NUMBER •• PAUSE Recording Resume Function If there is a power outage during recording (or Instant Timer Recording or timer recording), the recording will resume automatically when power is restored to the VCR. -
Page 48: Features
Playback Features •• PLAYBACK AND RECORDING FEATURES Still Picture/Frame-By- Frame Playback To resume normal playback, press PLAY. Slow Motion/Reverse Slow Motion •• PAUSE To resume normal playback, press PLAY. PUSH JOG Variable-Speed Search/ Reverse Motion Playback To resume normal playback, press PLAY. PAUSE DURING PLAYBACK Press PAUSE. -
Page 49: High-Speed Search
Pause. Manual tracking is possible during hands-free slow-motion. During hands-free slow-motion playback, simply press CH 5 or ∞ on the VCR's front panel or remote to adjust tracking. START SEARCH While the tape is stopped, press PUSH JOG (™... -
Page 50: Repeat Playback
It may take a few seconds for the Tape Position Indicator to be displayed. Next-Function Memory The Next Function Memory “tells” the VCR what to do after rewinding. Before continuing, ensure that the VCR is in stop mode. a– For Automatic Start Of Playback After Tape Rewind . . . -
Page 51: Picture Control
By activating the Video Stabilizer you can correct vertical vibrations in the picture when playing back unstable recordings that were made on another VCR. When this function is set to "ON", vertical vibration will be automatically corrected. *The default setting is "OFF". -
Page 52: Superimpose
Press OSD again to clear the display. The RECORD/PAUSE indication is left displayed on the screen. The superimposed indication on the TV screen tells you what the VCR is doing. Tuned-in channel or AUX(iliary) mode When the channel is changed, the new... -
Page 53: Recording Features
Time •• ENGAGE TV MODE During recording... Press TV/VCR. The VCR's VCR indicator goes out. (If you are using the RF connection ( the output from your VCR, the TV broadcast being recorded disappears.) If you are using the AV connection ( the output from your VCR, change the TV's input mode from AV to TV. -
Page 54: Picture System
B.E.S.T. Picture System Turn on the TV and select the VCR channel 3 or 4 (or AV mode). •• MENU PLAYBACK AND RECORDING FEATURES (cont.) The B.E.S.T. (Biconditional Equalized Signal Tracking) checks the condition of the tape during recording and playback, and compensates for poor reproduction to provide the best quality recording and playback pictures. -
Page 55: Start Recording
•• Playback The VCR assesses the quality of the tape once you start playback. Perform steps 1 and 2 on page 12 ("Simple Playback") before continuing. START PLAYBACK Press PLAY. The VCR adjusts the playback picture quality based on the quality of the tape in use. -
Page 56: Express Timer Programming
Express Timer Programming Turn on the TV and select the VCR channel 3 or 4 (or AV mode). START+/– •• You can directly program the VCR’s timer to record up to 8 shows, as far as a year in advance. Remember, the clock must be set before you can program the timer ( ••... - Page 57 To disengage the timer before recording starts, press TIMER again. Pressing once more re-engages it. In case of a power failure after programming, the VCR’s memory backup keeps your selections for approximately 10 minutes. Programs that start after midnight must have the next day’s date.
-
Page 58: Check, Cancel And Revise Programs
SP/EP CANCEL START+/– •• MENU Check, Cancel And Revise Programs POWER TIMER To Cancel Or Revise A Program... •• PUSH JOG TIMER RECORDING (cont.) DISENGAGE TIMER Press TIMER, then press POWER. ACCESS PROGRAM CHECK SCREEN Press PROG. CHECK. PR START 8:00P 2 10:00A 3 11:30P... -
Page 59: Auto Sp Ep Timer
SELECT WITH (5,∞) AND (OK) PRESS (MENU) TO END NOTE: For safety, when "AUTO TIMER" is set to "OFF", all other VCR functions are disabled while the Timer mode is engaged. To disengage the timer, press TIMER . ACCESS MAIN MENU SCREEN Press MENU. -
Page 60: Instant Timer Recording (Itr)
REC to extend the time. Each press extends recording time by 30 minutes. NOTES: You can only perform ITR using the REC button on the VCR's front panel. After you set the ITR time, the previous display reappears. To check the remaining time, press REC once during record- ing and the remaining time will be displayed for about 5 seconds. -
Page 61: Diting
VIDEO OUT Audio/Video Cable (not supplied) VIDEO IN Recorder You can use your VCR as the player and another VCR as the recorder. MAKE CONNECTIONS Connect an AV cable between your VCR's VIDEO OUT and AUDIO OUT connectors and another VCR’s VIDEO IN and AUDIO IN connectors. -
Page 62: Edit From A Camcorder Or Another Vcr
VIDEO OUT Camcorder AUDIO OUT Another VCR Player •• You can use a camcorder or another VCR as the player and your VCR as the recorder. Your VCR •• EDITING (cont.) MAKE CONNECTIONS Connect an AV cable between the camcorder’s or the playback VCR's VIDEO OUT and AUDIO OUT connectors and your VCR’s VIDEO IN and AUDIO IN... -
Page 63: Uestions And Answers
Q. What happens if the end of the tape is reached during playback or search? A. The tape is automatically rewound to the beginning. Q. Can the VCR indefinitely remain in the still mode? A. No. It stops automatically after 5 minutes to protect the heads. -
Page 64: Roubleshooting
Before requesting service for a problem, use this chart and see if you can repair the trouble yourself. Small problems are often easily corrected, and this can save you the trouble of sending your VCR off for repair. POWER SYMPTOM 1. -
Page 65: Timer Recording
AC supply. Wait for a while and then plug the power back in. Eject and check the condition of the cassette. If everything appears normal resume operating the VCR as usual. -
Page 66: Ndex
FRONT VIEW POWER VIDEO AUDIO 1 Power Button ( pg. 6) 2 Cassette Loading Slot 3 Rewind [REW] Button ( 4 PLAY Button ( pg. 12) 5 Fast-Forward [FF] Button ( 6 VIDEO/AUDIO Input Connectors ( 7 MENU Button ( pg. -
Page 67: Rear View
5 VIDEO/AUDIO Output Connectors ( pg. 4) 6 RF OUT Connector ( 2 Tape Speed Indicators ( 3 Timer Mode Indicator ( 4 VCR Mode Indicator ( 5 “Cassette Loaded” Mark 6 Channel Display ["F-1" for AUX mode] Counter Display Clock Display ANT. -
Page 68: Remote Control
TV CH – PUSH JOG Buttons with a small dot on the left side of the name can also be used to operate your JVC TV while holding down the TV button. "Operating JVC TVs" below. This remote control transmits A code signals only; it is not applicable to B code signals. -
Page 69: Specifications
VCR’s power turned on for a few hours to let the moisture dry. **ABOUT HEAD CLEANING Accumulation of dirt and other particles on the video heads may cause the playback picture to become blurred or interrupted. Be sure to contact your nearest JVC dealer if such troubles occur. - Page 70 MEMO...
- Page 71 MEMO...
- Page 72 VICTOR COMPANY OF JAPAN, LIMITED Printed in Malaysia COPYRIGHT © 1999 VICTOR COMPANY OF JAPAN, LTD. 0499IYV...
Need help?
Do you have a question about the HR-J4006UM and is the answer not in the manual?
Questions and answers