Table of Contents
Advertisement
Quick Links
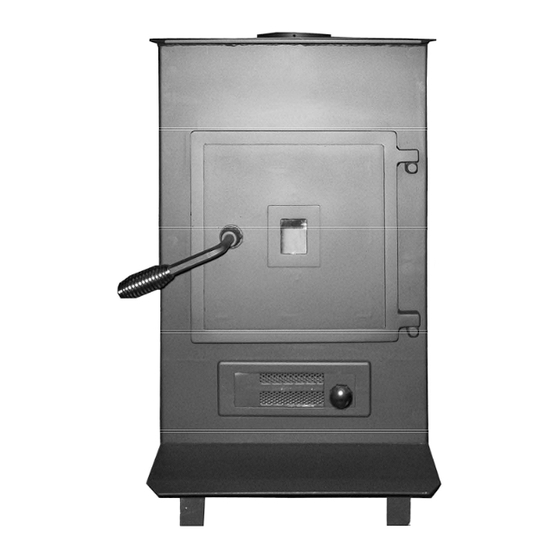
LITTLE JOHN
EPA EXEMPT PER METHOD 28
FEATURES
PREPARATIONS
INSTALLATION
OPERATION
MAINTENANCE
SAFETY
NOTICE:
IF THIS HEATER IS NOT PROPERLY INSTALLED, A HOUSE FIRE MAY RESULT.
FOR YOUR SAFETY, FOLLOW THE INSTALLATION INSTRUCTIONS. CONTACT
THE AUTHORITY HAVE JURISDICTION
( SUCH AS MUNICIPAL BUILDING
DEPARTMENT,
FIRE
DEPARTMENT,
FIRE
PREVENTION BUREAU, AND
INSURANCE COMPANY etc.) CONSULT
BEFORE
INSTALLATION
TO
DETERMINE THE NEED TO OBTAIN A PERMIT. KEEP THESE INSTRUCTIONS
FOR FUTURE USE.
TESTED TO UL1482 AND LISTED BY:
ITS/WARNOCK HERSEY, MIDDLETON, WI
MANUFACTURED BY NEW BUCK CORPORATION
200 ETHAN ALLEN DRIVE, PO BOX 69
SPRUCE PINE, N.C. 28777
REVISED January 2013
www.BuckStove.com
Advertisement
Table of Contents

Related Manuals for New Buck Corporation LITTLE JOHN


Summary of Contents for New Buck Corporation LITTLE JOHN
- Page 1 DETERMINE THE NEED TO OBTAIN A PERMIT. KEEP THESE INSTRUCTIONS FOR FUTURE USE. TESTED TO UL1482 AND LISTED BY: ITS/WARNOCK HERSEY, MIDDLETON, WI MANUFACTURED BY NEW BUCK CORPORATION 200 ETHAN ALLEN DRIVE, PO BOX 69 SPRUCE PINE, N.C. 28777 REVISED January 2013...
-
Page 3: Table Of Contents
TABLE OF CONTENTS Installation Instructions….…….…………...………………………………………….…………2 Important Instructions..………..……………………………………………….……………...3-5 Possible Tools……………………………………………………………………………………5 Floor Protection..………………………………………………………………………..……….6 Preparing The Stove For Installation..……………..…………………………………………….7 Preparing The Room Heater location…………………………………………………………….8 How To Locate Chimney Exit, and Installation…………………………………………………9 SECTION’S: A. Residential Installation Vertical Exit Using 6”Single Wall Pipe /Listed 2100° UL 103 HT chimney without close clearance shields…………………………………..………………..…...….10 B. -
Page 4: Installation Instructions
INSTALLATION, OPERATION, AND MAINTENANCE INSTRUCTIONS READ THESE RULES, AND THE INSTRUCTIONS CAREFULLY WARNING THIS UNIT GENERATES A LOT OF HEAT, SO TREAT THE UNIT WITH CARE. “HOT WHILE IN OPERATION!” “KEEP CHILDREN, CLOTHING AND FURNITURE AWAY.” “CONTACT MAY CAUSE SKIN BURNS.” ... -
Page 5: Important Instructions
YOUR STOVE DOSE NOT CREATE THE DRAFT. THE CHIMNEY DOSE NOTE: YOUR CHIMNEY OR FLUE MUST BE CORRECTLY SIZED. A CHIMNEY OR FLUE THAT IS TOO SMALL OR LARGE IN DIAMETER, OR TOO SHORT, CAN CAUSE YOUR STOVE TO SPILL SMOKE WHEN THE DOOR IS OPENED. ... - Page 6 NOTE: UNIT PAINTED WITH SPECIALLY FORMULATED HIGH TEMPERATURE PAINT THAT CURES DURING THE FIRST TWO OR THREE FIRINGS. YOU MAY NOTICE A SLIGHT SMOKING EFFECT AND AN ODOR OF BURNING PAINT WHEN YOU BUILD THE FIRST FIRES. THIS IS NORMAL AND IS NOT A CAUSE FOR ALARM. IN SOME CASES, THESE FUMES WILL ACTIVATE A SMOKE ALARM.
-
Page 7: Possible Tools
DISPOSAL OF ASHES—PLACE ASHES IN A METAL CONTAINER WITH A TIGHT LID. KEEP THE CLOSED CONTAINER ON A NONCOMBUSTIBLE MATERIALS. KEEP THE ASHES IN THE CLOSED CONTAINER UNTIL ALL CINDERS HAVE THOROUGHLY COOLED. THE ASHES MY BE BURIED IN THE GROUND OR PICKED UP BY A REFUSE COLLECTOR. -
Page 8: Floor Protection
Floor Protection: Floor protection must be 3/8” minimum thickness non-combustible material or equivalent. When installing freestanding heater ,a floor protector must be used. Must have minimum R- value of 2.4 . How to use alternate materials and how to calculate equivalent thickness An easy means of determining if a proposed alternate floor protector meets requirements listed in the appliance manual is to follow this procedure: 1. -
Page 9: Preparing The Stove For Installation
RESIDENTIAL FREESTANDING INSTALLATION Select an installation location that will give the best airflow from the heater to the remainder of the home. PREPARING THE STOVE FOR INSTALLATION 1. Remove any items from within the firebox. Spread a dropcloth on the floor behind the heater. -
Page 10: Preparing The Room Heater Location
PREPARING THE ROOM HEATER LOCATION 1. Select an installation location that will give the best airflow from the heater to the remainder of the home. 2. Place the protective floor pad in position. 3. Place the unit on the pad making sure the minimum clearance specifications are met. 4. -
Page 11: How To Locate Chimney Exit, And Installation
HOW TO LOCATE CHIMNEY EXIT, AND INSTALLATION Residential Installation, and Alcove: Vertical Exit using (6" Single Wall minimum 24 ga. blued or black pipe, or 6” DVL Close Clearance pipe and any Listed 2100° UL 103 HT. chimney). With and, without close clearance shields. -
Page 12: Without Close Clearance Shields
SECTION A. Vertical exit using (6" Single Wall minimum 24 ga. blued or black pipe, and any listed 2100° UL 103 HT. TYPE Chimney). Without close clearance shields. Figure 2 Figure 3 BACK WALL BACK WALL CONTEMPORARY CAP LISTED 2100° UL 103 HT TYP. -
Page 13: With Close Clearance Shields
SECTION B. Vertical exit using (6" Single Wall minimum 24 ga. blued or black pipe, and any listed 2100° UL 103 HT. TYPE Chimney). With close clearance shields. Figure 4 Figure 5 BACK WALL BACK WALL CONTEMPORARY CAP LISTED 2100° UL 103 HT TYP. -
Page 14: With Close Clearance Shields
SECTION C. Vertical exit using 6" DVL Close Clearance pipe, and any listed 2100° UL 103 HT. TYPE Chimney). With close clearance shields. Figure 6 Figure 7 BACK WALL BACK WALL CONTEMPORARY CAP LISTED 2100° UL 103 HT TYP. CHIMNEY CAULK STORM COLLAR DO NOT OBSTRUCT... -
Page 15: With Close Clearance Shields
SECTION D. Vertical Alcove exit using 6" DVL Close Clearance pipe, and any listed 2100° UL 103 HT. TYPE Chimney). With close clearance shields. BACK WALL Connect with (3) sheet metal screws or rivets to connector collar on heater. CLOSE CLEARANCE SHIELD Figure 8... -
Page 16: Connection Of Chimney Connector To Masonry Chimney Through A Combustible Wall
SECTION E. CONNECTION OF CHIMNEY CONNECTOR TO MASONRY CHIMNEY THROUGH COMBUSTIBLE WALL There is five allowable options of connecting a chimney connector to a masonry chimney by passing through a combustible wall. The NFPA Standard 211 allows the following wall pass-through systems. (Use one of the options 1 through 5 Option. - Page 17 Option Use a solid insulated listed factory-built chimney length having an inside diameter of 6” and having 1” or more of solid insulation. There must be at lest a 9” air space between the outer wall of the chimney length and any combustible materials.
- Page 18 Option Use a 8” inside diameter solid insulated listed factory-built chimney length which has !’ or more of solid insulation. The minimum length of this chimney section shall be 12” and will serve as a pass-through for the 6” diameter chimney connector. There must be at lest a 12” air space between the outer wall of the chimney section and any compatible materials.
-
Page 19: Vertical Wall Exit Using 6"Single Wall Pipe And Elbow/Listed 2100° Ul 103 Ht Chimney And T-Box Assembly Without Close Clearance Shields
SECTION F. Vertical wall exit using (6" Single Wall minimum 24 ga. blued or black pipe , with elbow, and any listed 2100° UL 103 HT. TYPE Chimney and Listed 2100° UL HT. T-Box assembly). Without close clearance shields. BACK WALL BACK WALL Figure 14 10”... -
Page 20: Vertical Wall Exit Using 6"Single Wall Pipe And Elbow/Listed 2100° Ul 103 Ht Chimney And T-Box Assembly With Close Clearance Shields
SECTION G. Vertical wall exit using (6" Single Wall minimum 24 ga. blued or black pipe , with elbow, and any listed 2100° UL 103 HT. TYPE Chimney and Listed 2100° UL HT. T-Box assembly). With close clearance shields. BACK WALL BACK WALL Figure 16 10”... -
Page 21: Vertical Wall Exit Using Dvl Close Clearance Pipe And Elbow /Listed 2100° Ul 103 Ht Chimney And T-Box Assembly With Close Cleaarance Shields
SECTION H. Vertical wall exit using (6” DVL Close Clearance pipe with elbow, and any listed 2100° UL 103 HT. TYPE Chimney and Listed 2100° UL HT. T-Box assembly). With close clearance shields. BACK WALL BACK WALL Figure 18 10” 15”... -
Page 22: Installation Of (Optional) Close Clearance Shields
LIL JOHN INSTALLATION OF (OPTIONAL) MOTOR AIR CHANNEL, AND CLOSE CLEARANCE SHIELDS 1. Take the (OPTIONAL) MOTOR AIR CHAN- (OPTIONAL) DAMPER HANDLE NEL Kit #MALJMCHAN) and remove DAMPER HANDLE from kit and attach to the top of stoves damper bar with bend facing inwards towards stoves flue, secure with the 1/4”... -
Page 23: Installation Of (Optional) Fan Blower Assembly
LIL JOHN INSTALLATION OF (OPTIONAL) FAN BLOWER ASSEMBLY 1. Take the fan blower assembly out of container Kit #MALJ715. Facing rear of unit place blower assembly at rear bottom of unit back. Make sure the blower snout is inserted into bottom of motor air channel opening with fan blower assembly brackets up against the motor air channel. -
Page 24: Final Check
ROOF CEILING COLLAR 3 SHEET METAL SCREWS OR RIVETS Figure 25 FINAL CHECK 1. Recheck the specified clearances. 2. Remove all foreign material from the firebox area. 3. Open the primary air draft. 4. Plug the power cord into a 115V AC outlet when using with optional motor. 5. -
Page 25: Operation
NOTE: THE FUELING DOOR MUST REMAIN CLOSED DURING OPERATION NOTE: If the optional blower is being used on the Model LITTLE JOHN. Your stove is equipped with a automatic thermostat. When the stove gets hot enough, the thermostat will activate the room air blower. -
Page 26: Inspection And Maintenance
Inspection, Maintenance, and Cleaning of Chimney and Chimney Connector. A. “Creosote - Formation and Need for Removal - When wood is burned slowly, it produces tar and other organic vapors, which combine with expelled moisture to form creosote. The creosote vapors condense in the relatively cool chimney flue of a slow-burning fire. -
Page 27: Troubleshooting
TROUBLESHOOTING PROBLEM POSSIBLE CAUSE SOLUTION 1. Sluggish Heater 1. Obstruction in Chimney 1. Check for and remove obstruction 2. Flue clean out 2. Close and seal flue clean out door. 3. Wet or unseasoned wood 3. Burn dried natural being burned seasoned hard wood 4. - Page 28 PROBLEM POSSIBLE CAUSE SOLUTION 2. High fuel consumption 1. Improper regulation of 1. (a) Close inlet air control draft or inlet air as much as possible to maintain desired heat output. (b) Check gaskets, reinstall fiberglass gasketing round door 2. Improper door fitting 2.
-
Page 29: Limited Warranty
(NBC) "LIMITED WARRANTY" FOR THE BUCK STOVE PLEASE READ THIS WARRANTY CAREFULLY PRODUCTS COVERED This warranty covers your Stove, so long as it is owned by the original purchaser, including optional and standard accessories purchased at the same time, subject to terms, limitations, and conditions herein set out. - Page 31 If for any reason you are dissatisfied with the suggested procedures, you may contact us in writing at: New Buck Corporation Customer Service Department P. O. Box 69 Spruce Pine, NC 28777 CONDITIONS AND EXCLUSIONS A. Replacement of parts may be in the form of new or fully reconditioned parts, at NBC's option.
Need help?
Do you have a question about the LITTLE JOHN and is the answer not in the manual?
Questions and answers