JVC NX-PS1 Instructions Manual
Compact component system
Hide thumbs
Also See for NX-PS1:
- Instructions manual (18 pages) ,
- Instructions manual (45 pages) ,
- Instructions manual (27 pages)
Table of Contents
Advertisement
Available languages
Available languages
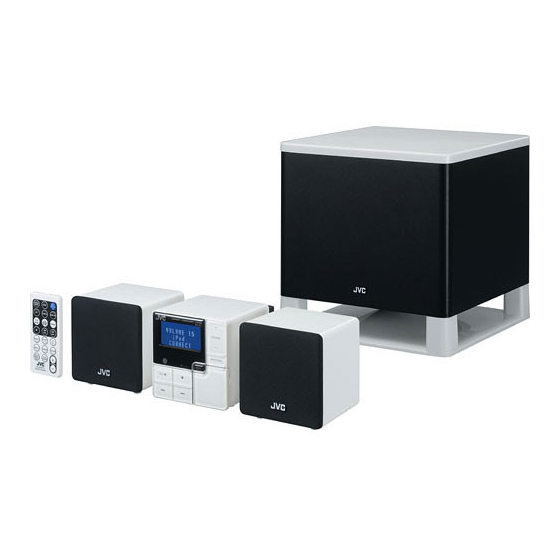
COMPACT COMPONENT SYSTEM
SYSTEME DE COMPOSANTS COMPACT
NX-PS1
—Consists of CA-NXPS1, SP-NXPS1F and SP-NXPS1W
—Composée du CA-NXPS1, SP-NXPS1F et du SP-NXPS1W
COMPACT COMPONENT SYSTEM
NX-PS1
STANDBY
SP-NXPS1F
CA-NXPS1
INSTRUCTIONS
MANUEL D'INSTRUCTIONS
VOLUME
FUNCTION
SP-NXPS1F
SP-NXPS1W
LVT1633-002A
[C]
Advertisement
Chapters
Table of Contents

Subscribe to Our Youtube Channel
Related Manuals for JVC NX-PS1


Summary of Contents for JVC NX-PS1
- Page 1 COMPACT COMPONENT SYSTEM SYSTEME DE COMPOSANTS COMPACT NX-PS1 —Consists of CA-NXPS1, SP-NXPS1F and SP-NXPS1W —Composée du CA-NXPS1, SP-NXPS1F et du SP-NXPS1W SP-NXPS1F COMPACT COMPONENT SYSTEM NX-PS1 VOLUME FUNCTION STANDBY CA-NXPS1 SP-NXPS1F INSTRUCTIONS MANUEL D’INSTRUCTIONS SP-NXPS1W LVT1633-002A...
- Page 2 Warnings, Cautions and Others Mises en garde, précautions et indications diverses (For U.S.A.) CAUTION: REFER SERVICING TO QUALIFIED SERVICE PERSONNEL. (For U.S.A.) WARNING: TO REDUCE THE RISK OF FIRE OR ELECTRIC SHOCK, DO NOT EXPOSE THIS APPLIANCE TO RAIN OR MOISTURE. CAUTION RISK OF ELECTRIC SHOCK DO NOT OPEN...
- Page 4 Consult the dealer or an experienced radio/TV technician for help. (For U.S.A.) CAUTION Changes or modifications not approved by JVC could void the user’s authority to operate the equipment. (For U.S.A.) For the main unit: Declaration of Conformity...
- Page 5 Caution: Proper Ventilation To avoid risk of electric shock and fire, and to prevent damage, locate the apparatus as follows: 1. Front: No obstructions and open spacing. 2. Sides/ Top/ Back: No obstructions should be placed in the areas shown by the dimensions below. 3.
-
Page 6: Table Of Contents
Introduction ... 2 Precautions ...2 Getting Started ... 3 Connection ...5 Basic Operations ... 7 Unit ...7 Remote Control ...9 Setting the Clock and Daily Timer ... 11 Setting the Clock ...11 Setting the Daily Timer ...11 Playing Back from iPod ... 13 To Connect iPod ...13 Basic Operations ...14 Playing Back from USB mass storage class... -
Page 7: Introduction
Thank you for purchasing a JVC product. Please read all instructions carefully before operation, to ensure your complete understanding and to obtain the best possible performance from the unit. Precautions Installation • Install in a place which is level, dry and neither too hot nor too cold–between 5°C and 35°C. -
Page 8: Getting Started
Getting Started Supplied Accessories After unpacking, check to be sure that you have all the following items. The number in parentheses indicates the quantity of each piece supplied. • Remote control (1) • Lithium coin battery CR2025 (1) (The battery has been installed when shipped from the factory.) •... - Page 9 Warning • Store the battery in a place where children cannot reach. If a child accidentally swallows the battery, consult a doctor immediately. • Do not recharge, short, disassemble or heat the battery or dispose of it in a fire. Doing any of these things may cause the battery to give off heat, crack, or start a fire.
-
Page 10: Connection
Connection Do not connect the AC power cord until all other connections have been made. To a wall outlet Plug the AC power cord only after all connections are complete. USB AUDIO terminal AC power iPod terminal cord AC adaptor AC adaptor Main speaker Unit... -
Page 11: To Connect The Speaker Cords
To connect the speaker cords Make sure the unit, main speakers, and subwoofer are connected correctly and firmly. When connecting the speaker cords, match the polarity of the speaker terminals: white cord to (+) and white cord with black stripe to (-). NOTES •... -
Page 12: Basic Operations
USB MEMORY FUNCTION USB AUDIO Turns on or off (standby) the power. Operates music. See “Playing Back from iPod” (P.13). See “Playing Back from USB” (P.15). COMPACT COMPONENT SYSTEM NX-PS1 VOLUME FUNCTION STANDBY MEMORY PHONES AUX jack Using Headphones Be sure to turn down the volume before connecting or wearing the headphones. -
Page 13: Display Information
Display Information Symbols Lights when Random Play mode is activated in USB Memory mode. (P.17) Lights when Repeat mode is activated in USB Memory mode. (P.17) ALL/ Displays an selected EQ setting. (P.10) FLAT/ROCK/POP/ JAZZ/CLAS(CLASSIC) Lights when the USB mass storage class device is connected and the USB MEMORY mode is selected. -
Page 14: Remote Control
Remote Control Sleep timer Adjust the tone FADE MUTING button Operating on the Remote Control Buttons Turns on or off (standby) the power Changes the display information. USB MEMORY mode : Clock display ⇔ File information Other mode : Clock display ⇔ Source information Changes source to iPod. - Page 15 To dim the display—DIMMER Press while the System is turned on. “DIMMER ON” appears. • To cancel this function, press DIMMER/ECO again. “DIMMER OFF” appears. To set the ECO mode. In ECO mode, the dispaly goes off and the least power is consumed. Press While the System is turned off.
-
Page 16: Setting The Clock And Daily Timer
Setting the Clock and Daily Timer Setting the Clock • To go back to the previous step, press CANCEL. • If there is a power failure, the clock loses the setting and is reset to “AM12:00”. You need to set the clock again. - Page 17 To cancel the Daily Timer Select the current timer settings mode. To turn on the Daily Timer again (Turn on a timer setting you have made beforehand.) Select the current timer settings mode. icon disappears. icon appears on the display.
-
Page 18: Playing Back From Ipod
Playing Back from iPod This system is equipped with an iPod terminal on the rear panel. You can connect your iPod to this terminal and enjoy the sound from your iPod. Compatible iPod types: iPod nano 1G/2G/4G iPod mini iPod (4th Generation) 20G/40G iPod photo (4th Generation) 20G/30G/40G/60G iPod video (5th Generation) 30G/60G If the iPod does not play correctly, please update your iPod software to the latest version. -
Page 19: Basic Operations
For information on operating the iPod, see the iPod instruction manual. • JVC is not responsible for any loss of or damage to iPod that might result from the use of this product. -
Page 20: Playing Back From Usb Mass Storage Class Device
Playing Back from USB mass storage class device This System is equipped with a USB MEMORY terminal on the front panel. You can connect a USB mass storage class device such as a USB flash memory device, Digital Audio Player (DAP), etc. - Page 21 Start playback. • To exit from the Number select mode, press CANCEL. NOTES • You cannot send any data to your USB mass storage class device from this System. • Always set volume to the minimum level when connecting or disconnecting the other equipment. •...
-
Page 22: Playing Back From The Pc
Repeat Play Press repeatedly before you start playback to specify the repeat mode as follows: Repeats the current track. Repeats all tracks. Repeats all tracks in the current group. Cancel Start playback. Random Play RND appears on the display before you start playback. •... -
Page 23: To Playback Sounds On The Pc
Connect the System to the PC using a USB cable (not supplied). (rear panel) USB cable (not supplied) • Use “USB series A plug to B plug” cable. The USB drivers are installed automatically. NOTE • Always set volume to the minimum level when connecting or disconnecting the other equipment. To playback sounds on the PC Refer to the manuals supplied with the media player application installed on the PC. -
Page 24: Playing Back From Other Equipment
Playing Back from Other Equipment To connect other equipment By using a stereo mini plug cord (not supplied), you can connect other equipment with analog audio output jacks, such as Digital Audio Player, a TV, etc. Stereo mini plug cord (not supplied) (front panel) •... -
Page 25: Troubleshooting
Troubleshooting If you are having a problem with your System, check this list for a possible solution before calling for service. General: Power does not come on. Power plug is not inserted securely. Plug in securely. Adjustments or settings are suddenly canceled before you finish. There is a time limit. -
Page 26: Specifications
Power handling Capacity 30 W Impedance Frequency Range Sound pressure level Dimensions Mass Accessories See page 3 Power Specifications NX-PS1 (System) Power Requirements Power Consumption AC Adaptor (AA-R2401) INPUT OUTPUT CA-NXPS1 (Main Unit) Power Requirements Design and specifications are subject to change with- out notice. - Page 27 Table des matières Introduction ... 2 Précautions ...2 Préparation ... 3 Branchement ...5 Opérations de base ... 7 Appareil ...7 Télécommande ...9 Réglage de l'horloge et de la minuterie de réveil ... 11 Réglage de l'horloge ...11 Réglage de la minuterie de réveil ...11 Lecture à...
-
Page 28: Introduction
Merci d'avoir fait l'acquisition d'un produit JVC. Veuillez lire attentivement toutes les instructions avant d’utiliser cet appareil, afin d'être certain d'en comprendre parfaitement le fonctionnement et de bénéficier ainsi de performances optimales. Précautions Installation • Installez l’appareil dans un endroit plat, sec et tempéré, avec des température comprises entre 5°C et 35°C. -
Page 29: Préparation
Accessoires fournis Après avoir ouvert l’emballage, vérifiez que les éléments suivants sont présents. Le nombre entre parenthèses indique la quantité fournie pour chaque élément. • Télécommande (1) • Pile bouton au lithium CR2025 (1) (La pile a été installée en usine.) •... - Page 30 Avertissement • Rangez la pile dans un endroit hors de portée des enfants. Si un enfant avale accidentellement la pile, consultez immédiatement un médecin. • Ne rechargez pas la pile, ne la soumettez pas à un court circuit, ne la démontez pas, ne la faites pas chauffer et ne la jetez pas au feu.
-
Page 31: Branchement
Branchement Ne branchez le cordon d'alimentation CA qu'après avoir fait toutes les autres branchements. Vers une prise de courant Ne branchez le cordon d'alimentation CA qu'après avoir fait tous les autres branchements. Borne USB AUDIO Cordon Borne iPod d'alimentation Adaptateur Adaptateur CA Enceinte Câble d’enceinte (1,5 m) - Page 32 Pour raccorder les câbles d'enceintes Vérifiez que l'appareil, les enceintes principales et le subwoofer sont raccordés correctement. Lors de la connexion des câbles d’enceintes, branchez les fils en respectant les polarités indiquées sur les bornes d’enceintes : câble blanc sur (+) et câble blanc avec trait noir sur (–). REMARQUES •...
-
Page 33: Opérations De Base
Met en marche/arrête (met en veille) l'appareil. Commande la lecture de la musique. Voir “Lecture à partir d'un iPod” (P.13). Voir “Lecture à partir d'un appareil de stockage de masse USB” (P.15). COMPACT COMPONENT SYSTEM NX-PS1 VOLUME FUNCTION STANDBY MEMORY... -
Page 34: Informations Affichées À L'écran
Informations affichées à l'écran Symboles S'allume lorsque le mode de lecture aléatoire est activé en mode USB Memory. (P.17) S'allume lorsque le mode de lecture répétée est activé en mode USB Memory. ALL/ (P.17) Affiche le réglage EQ sélectionné. (P.10) FLAT/ROCK/POP/ JAZZ/CLAS (CLASSIQUE) -
Page 35: Télécommande
Télécommande Minuterie d'arrêt Réglage de la tonalité Bouton FADE MUTING Utilisation de la télécommande Touches Met en marche ou arrête (met en veille) l'appareil Change les informations de l'affichage. Mode USB MEMORY : Affichage de l'horloge ⇔ Informations sur le fichier Autre mode : Affichage de l'horloge ⇔... - Page 36 Pour réduire l'intensité lumineuse de l'affichage—DIMMER Appuyez sur la touche lorsque l'appareil est en marche. “DIMMER ON” apparaît. • Pour annuler cette fonction, appuyez à nouveau sur DIMMER/ECO. “DIMMER OFF” apparaît. Pour régler le mode ECO. En mode ECO, l'affichage s'éteint, consommant ainsi le minimum d'énergie. Appuyez sur la touche lorsque l'appareil est arrêté.
-
Page 37: Réglage De L'horloge Et De La Minuterie De Réveil
Réglage de l'horloge et de la minuterie de réveil Réglage de l'horloge • Pour repasser à l'étape précédente, appuyez sur CANCEL. • En cas de panne de courant, les réglages de l'horloge sont perdus et elle est réglée sur “AM12:00”. Vous devez régler à... - Page 38 Pour annuler la minuterie de réveil Sélectionnez le mode de réglage actuel de la minuterie. L'icône Pour activer à nouveau la minuterie de réveil (Activer un réglage de minuterie précédemment effectué.) Sélectionnez le mode de réglage actuel de la minuterie. L'icône disparaît.
-
Page 39: Lecture À Partir D'un Ipod
Lecture à partir d'un iPod Cet appareil est équipé d'une borne iPod située sur le panneau arrière. Vous pouvez connecter votre iPod sur cette borne et écouter la musique stockée sur votre iPod. Types d'iPod compatibles : iPod nano 1 Go/2 Go/4 Go iPod mini iPod (4ème génération) 20 Go/40 Go iPod photo (4ème génération) 20 Go/30 Go/40 Go/60 Go... -
Page 40: Opérations De Base
Pour plus d'informations sur le fonctionnement de l'iPod, reportez-vous au manuel d'instructions de l'iPod. • JVC n'est responsable d'aucune perte ni dommages infligés à votre iPod suite à l'utilisation de ce produit. • Lorsque vous connectez votre iPod au câble, veillez à ce qu'il soit enfoncé à fond. -
Page 41: Lecture À Partir D'un Appareil De Stockage De Masse Usb
Lecture à partir d'un appareil de stockage de masse USB Cet appareil est équipé d'une borne USB MEMORY sur le panneau avant. Vous pouvez connecter sur ce système un appareil de stockage de masse USB de type mémoire flash USB, Digital Audio Player (DAP), etc. - Page 42 Lancez la lecture. • Pour quitter le mode de sélection de numéro, appuyez sur CANCEL. REMARQUES • Vous ne pouvez transférer aucune donnée du système à l'appareil de stockage de masse USB. • Réglez toujours le volume au minimum lorsque vous connectez ou déconnectez l'autre matériel. •...
-
Page 43: Lecture À Partir Du Pc
Lecture répétée Appuyez plusieurs fois sur la touche avant de lancer la lecture pour spécifier le mode de répétition de la façon suivante : Répète la piste en cours. Répète toutes les pistes. Répète toutes les pistes du groupe en cours. Annuler Lancez la lecture. -
Page 44: Pour Écouter La Musique Stockée Sur Votre Pc
Connectez l'appareil au PC à l'aide d'un câble USB (non fourni). (panneau arrière) Câble USB (non fourni) • Utilisez un câble “USB série prise A vers prise B”. Les pilotes USB sont installés automatiquement. REMARQUE • Réglez toujours le volume au minimum lorsque vous connectez ou déconnectez l'autre matériel. Pour écouter la musique stockée sur votre PC Reportez-vous aux manuels fournis avec l'application de lecture de médias installée sur le PC. -
Page 45: Lecture À Partir D'autre Matériel
Lecture à partir d'autre matériel Pour connecter d'autre matériel À l'aide d'un cordon stéréo avec mini-fiche (non fourni), vous pouvez connecter un autre type de matériel (lecteur audio numérique, téléviseur, etc.) avec des prises jack audio analogiques. Cordon stéréo avec mini-fiche (non fourni) (panneau avant) •... -
Page 46: Dépannage
En cas de problème avec votre appareil, consultez cette liste afin de trouver une éventuelle solution, avant d'appeler le service après-vente. Problèmes de type générique : Impossible d'allumer l'appareil. La prise de courant n'est pas enfoncée à fond. Enfoncez-la à fond. Les réglages sont brusquement annulés avant que vous ayez terminé. -
Page 47: Spécifications
Impédance Plage de fréquences Niveau sonore Dimensions Poids Accessoires Voir page 3 Spécifications d'alimentation NX-PS1 (système) Alimentation requise Consommation électrique 19 W (en marche) Adaptateur CA (AA-R2401) ENTRÉE SORTIE CA-NXPS1 (unité principale) Alimentation requise La conception et les spécifications sont sujettes à... - Page 48 EN, FR © 2006 Victor Company of Japan, Limited 0906NSMCREBET...
Need help?
Do you have a question about the NX-PS1 and is the answer not in the manual?
Questions and answers