
Related Manuals for JVC CA-NXG9


Summary of Contents for JVC CA-NXG9
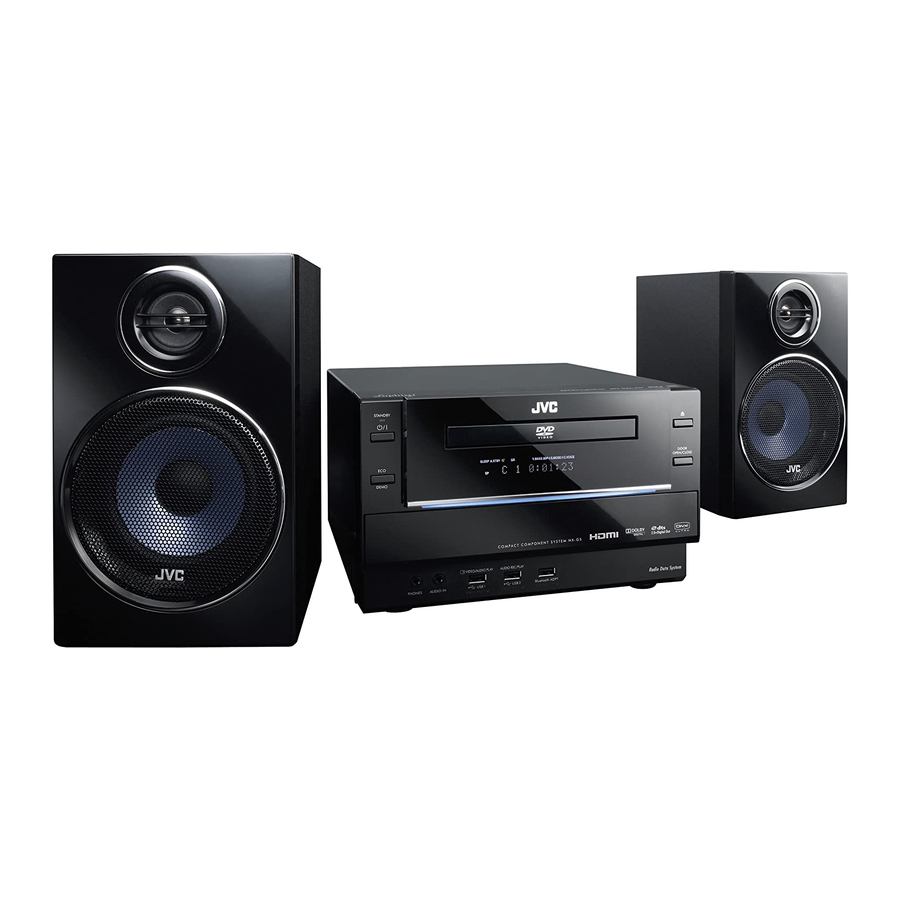
- Page 1 COMPACT COMPONENT SYSTEM CA-NXG9 NX-G5 —Consists of CA-NXG5 and SP-NXG5 (CA-NXG9) (CA-NXG9) INSTRUCTIONS GVT0260-001A [US/UN/UB/UG/UX/A/UW]...
- Page 2 REVISION INFORMATION COMPACT COMPONENT SYSTEM NX-G9A, NX-G9US, NX-G9UY, NX-G9UG, NX-G9UN, NX-G7A, NX-G7US, NX-G7UG, NX-G7UN, NX-G5US, NX-G5UG, NX-G5UN, NX-G3A, NX-G3US, NX-G3UB, NX-G3UG, NX-G3UN, NX-G3UH, NX-G9EE, NX-G9UX, NX-G9UH, NX-G7EE, NX-G7UF, NX-G7UX, NX-G5E, NX-G5A, NX-G5UB, NX-G5UT, NX-G5UX, NX-G5UH, NX-G3UP, NX-G3UT, NX-G3UX ■ OVERVIEW Add NX-G9EE, NX-G9UX, NX-G9UH, NX-G7EE, NX-G7UF, NX-G7UX, NX-G5E, NX-G5A, NX-G5UB, NX-G5UT, NX-G5UX, NX-G5UH, NX-G3UP, NX-G3UT and NX-G3UX.
- Page 3 No.MB685<Rev.001> No.MB685<Rev.002> Description 29 - CA-NXG5 (E) 522 kHz - 1 629 kHz 57 General / CA-NXG9 General / CA-NXG9 (NX-G9) 68 - CA-NXG5 (E) 40 W (at operation) / 12 W (at standby)/ 1.0 W or less (at ECO...
-
Page 4: Parts List
PARTS LIST MODEL No. LIST Model No.No.MB685<Rev.002> NX-G3A NX-G3UB NX-G3UG NX-G3UH NX-G3UN NX-G3UP NX-G3US NX-G3UT NX-G3UX NX-G5A NX-G5E NX-G5UB NX-G5UG NX-G5UH NX-G5UN NX-G5US NX-G5UT NX-G5UX NX-G7A NX-G7EE NX-G7UF NX-G7UG NX-G7UN NX-G7US NX-G7UX NX-G9A NX-G9EE NX-G9UG NX-G9UH NX-G9UN NX-G9US NX-G9UX NX-G9UY General assembly [M1] Part No. - Page 5 Part No. ! Symbol or Part Name Description Qty Models <Rev.001> <Rev.002> M1 30 ------------ GV30349-026A SPACER (Addition) 2 01,02,03,04,05,06,07,08,09,0A,0B,0C,0D,0E, 0F,10,11,12,13,14,15,16,17,18,19,1A,1B,1C, 1D,1E,1F,20,21 M1 30 GV30349-026A ------------ SPACER (Deletion) 2 01,02,03,04,05,0A,0B,0C,0D,0E,0F,10,11,12 M1 30 GV40846-001A ------------ SPECIAL (Deletion) 1 06,07,08,09 SPACER M1 31 ------------ QYSDSF2608ZA TAP SCREW (Addition) 2 01,02,03,04,05,06,07,08,09,0A,0B,0C,0D,0E,...
- Page 6 Part No. ! Symbol or Part Name Description Qty Models <Rev.001> <Rev.002> M1 59 ------------ GV10430-021A REAR (Addition) 1 17 PANEL M1 59 ------------ GV10430-029A REAR (Addition) 1 18 PANEL M1 59 ------------ GV10430-010A REAR (Addition) 1 19 PANEL M1 59 ------------ GV10430-012A REAR (Addition)
- Page 7 Electrical parts list Primary board NX-G9A,US,UY,UG,UN/NX-G7A,US,UG,UN [01] Part No. Symbol Part Name Description Models <Rev.001> <Rev.002> 01 Q170 ------------ KRC111S-X TRANSISTOR (Addition) 1 13,14,15,16,17,18 01 C114 ------------ NDC31HJ-331X C CAPACITOR (Addition) 1 13,14,15,16,17,18 01 C2700 ------------ QETN1AM-477Z E CAPACITOR (Addition) 1 13,14,15,16,17,18 01 C2702 ------------...
- Page 8 Part No. Symbol or Part Name Description Models <Rev.001> <Rev.002> 02 R2025 ------------ NRSA63J-393X MG RESISTOR (Addition) 1 19 02 R2305 ------------ NRSA63J-222X MG RESISTOR (Addition) 1 19 02 R2306 ------------ NRSA63J-152X MG RESISTOR (Addition) 1 19 02 R2307 ------------ NRSA63J-123X MG RESISTOR (Addition) 1 19...
- Page 9 Warnings, Cautions and Others CAUTION IMPORTANT FOR LASER PRODUCTS button in any position does not 1. CLASS 1 LASER PRODUCT disconnect the mains line. 2. CAUTION: Do not open the top cover or Disconnect the mains plug to shut the power off cabinet.
- Page 10 2. Sides/Top/ Back: No obstructions should be placed in the areas shown by the dimensions below. 3. Bottom: Place on the level surface. Maintain an adequate air path for ventilation by placing on a stand with a height of 10 cm or more. Front view Side view CA-NXG9 SP-NXG5 CA-NXG5 SP-NXG5 CA-NXG5 CA-NXG9...
- Page 11 Introduction Thank you for purchasing a JVC product. Please read all instructions carefully before operation, to ensure your complete understanding and to obtain the best possible performance from the System. Others Precautions Should any metallic object or liquid fall into the...
-
Page 12: Table Of Contents
Creating a Soothing Tone for Your Ear Enjoying Karaoke (only for CA-NXG9) ..44 —MY SOUND ......16 Creating 3-Dimensional Sound Field Singing Along (Karaoke) . -
Page 13: Playable Disc/File Types
Playable Disc/File Types About color system This System accommodates both NTSC and PAL system and can play back discs/files recorded in either system. To change the color system, see page 7. Note on Region Code DVD players and DVDs have their own Region Code COMPACT numbers. -
Page 14: Connections
AC plug, use the supplied audio component Before plugging in, confirm AC plug adapter (not supplied See page 6. the position of the voltage for Australia, Hong Kong and selector. See page 6. the Middle East). * The illustration above is for CA-NXG9. - Page 15 Speakers When connecting the speaker cords, match the polarity To assemble the AM loop antenna of the speaker terminals. CA-NXG9: Main speakers: blue to (+) and black to (–) Subwoofer: red to (+) and black to (–) NX-G5: blue to (+) and black to (–)
-
Page 16: Preparing The Remote Control
OUTPUT terminal is transmitted only when “DVD/ CD” or “USB1” is selected as the source. HDMI cable (not supplied) Use an HDMI cable of less than Voltage selector (only for CA-NXG9) 2 m. • This operation is not required for Saudi Arabian models and Australian models. -
Page 17: Changing The Color System And Scanning Mode
From the digital audio player From the USB mass storage class device From the Bluetooth adapter See page 38. To the microphones (only for CA-NXG9) See page 44. When connecting a USB mass storage class device When connecting a digital audio player... -
Page 18: Display Indicators
V.MASK HQ SP LP HIGH Bluetooth HDMI SLEEP indicator Karaoke operation indicators (only for CA-NXG9) • Lights when the Sleep Timer is activated. (See (See page 44.) page 21.) • K.Scoring: lights when Karaoke Scoring is activated; flashes when Karaoke Scoring is in use. -
Page 19: Daily Operations-Playback
Adjust the volume. You can adjust the volume level from “VOLUME Main unit MIN” (level 0) to “VOLUME MAX” (level 31). DOOR OPEN/CLOSE On the remote: On the main unit: CA-NXG9: NX-G5: 4, ¢, 7, 8, 3... -
Page 20: Listening To The Radio
To turn off (standby) the System Listening to the Radio The STANDBY lamp on the main To select the AM tuner interval unit lights in red. • A small amount of power is spacing always consumed even while on Some countries space AM stations 9 kHz apart, and standby. -
Page 21: Playing Back A Disc/Usb Mass Storage Class Device
To tune in to a station Store the station. While FM or AM is selected... 2 sec STORED To tune in to a preset station Frequency starts changing on the display. When a station (frequency) with sufficient signal Select the band (FM or AM). strength is tuned in, the frequency stops changing. - Page 22 To connect a USB mass storage class device On-screen guide icons • For connecting a USB mass storage class device, see • During playback, the following icons may appear on page 7. the TV: • Always set volume level to the minimum level when At the beginning of a scene containing connecting or disconnecting a USB mass storage multi-angle views.
- Page 23 To select a chapter/track/file To locate a particular portion • This does not function for JPEG files. • To select a number, see For “DVD/CD” and “USB1”: “How to select a number” While playing... on page 10. • For MP3/WMA/WAV/MPEG-1/MPEG-2/ASF/ DivX files, the search speed and indications on the TV are different from those above.
-
Page 24: Playing Back A Digital Audio Player
Start the Title Search. To move to the next or previous page of the current menu: “SEARCH...” appears on the display while searching. Moves to the next page. Moves to the previous page. When a track or group is found, playback starts. •... -
Page 25: Sound & Other Adjustments
You can obtain a balanced bass V.BASS SOUND sound. MODE No sound effect. Adjusting the Subwoofer Level —SUBWOOFER LEVEL You can adjust the subwoofer level from level 1 to level Main unit • This function is available only on CA-NXG9. -
Page 26: Creating A Soothing Tone For Your Ear-My Sound
Creating a Soothing Tone for Memorize the measurements. Your Ear—MY SOUND For “DVD/CD” and “USB1”: The sound tone you can hear is different in individuals. MY SOUND creates an appropriate equalization pattern for your listening condition. Each time you hear a test tone, press the button. You hear 5 test tones from the speakers. -
Page 27: Creating 3-Dimensional Sound Field
Making Dialogues Clear To select the preset MY SOUND —Clear Voice For “DVD/CD” and “USB1”: Clear Voice works for multi-channel software which contains a center channel signal and for 2-channel software with 3D Phonic activated. C.VOICE ON • This does not function for DivX file. C.VOICE OFF Creating 3-Dimensional Sound Field —3D Phonic... -
Page 28: Creating Your Own Sound Modes
Creating Your Own Sound Modes Finish the adjustment. —User Mode You can adjust the preset Sound Modes to create your own Sound Modes which suit your taste. The changed settings can be stored as the USER1, USER2 and USER3 Modes. Select one of the User Modes to store your Select one of the preset Sound Modes. -
Page 29: Presetting Automatic Dvd
Presetting Automatic DVD Sound Setting the ECO (Ecology) Mode Increase Level Setting the ECO mode allows you to reduce power consumption by turning the display off while on DVD sound is sometimes recorded at a lower level than standby. other discs and sources. You can set the increase level •... -
Page 30: Setting The Clock
To adjust the picture tone Setting the Clock Select “USER1” or “USER2.” Without setting the built-in clock, you cannot use Daily Timer or Recording Timer (see page 54). • Follow steps 1 and 2 explained in “To select a • To exit the clock settings, press CLOCK/TIMER preset picture tone.”... -
Page 31: Turning Off The Power Automatically
• Changing the source to “TUNER FM,” “TUNER To check the current clock time during playback AM,” or “AUDIO IN” temporarily deactivates Auto • The information displayed and its order vary with Standby. the source. To cancel this function, press and hold A.STBY (while Ex.: While playing a disc... -
Page 32: Unique Video Disc/File Operations
Unique Video Disc/File Operations Selecting the Audio Track Remote control For DivX files/DVD Video: While playing back a chapter/file containing several audio languages, you can select the language to listen to. For DVD-VR/SVCD/VCD: While playing back a track, you can select the audio channel to listen to. •... -
Page 33: Selecting The Subtitle Language
While playing an SVCD... Selecting the Subtitle Language For DivX files/DVD Video: While playing back a chapter/file containing subtitles in different languages, you can select the subtitle language to display on the For DVD-VR: While playing, you can turn the subtitles on or off. - Page 34 Frame-by-frame playback To replay the previous scenes (One-Touch Replay) • This function is used only while playing DVD Video/ DVD-VR/SVCD/VCD. • This function is only used while playing DVD Video/ DVD-VR. Display the still picture. While playing..The playback position moves back about 10 seconds before the current position (only within the same title Advance the still picture frame by frame.
-
Page 35: Advanced Playback Operations
Start playback. PLAY MODE 4, ¢ Playback starts in the order you have programmed. REPEAT, DVD/CD REPEAT A-B (CA-NXG9) For “USB 2”: REPEAT (NX-G5) SHIFT Select files you want for Program Play REPEAT A-B using the number buttons. (NX-G5) •... -
Page 36: Playing At Random-Random Play
Before starting playback, activate Random To skip: To pause: To stop: Play. For “DVD/CD”: To release, press 3. Canceled For “USB2”: To check the programmed contents PROGRAM RANDOM Before or after playback... GROUP RNDM In the programmed Canceled GROUP order. RANDOM Plays all the tracks/chapters In the reverse order. -
Page 37: Playing Repeatedly
DVDs. While playing a Play List... While playing (without PBC for SVCD/ REPEAT CHAP REPEAT PL VCD), select the start point (A). REPEAT OFF CA-NXG9: For MPEG-1/MPEG-2/ASF/DivX/MP3/WMA/WAV files: While playing or before playback... REPEAT TRK REPEAT GRP (while holding...) REPEAT OFF... -
Page 38: Recording Operations
Recording Operations Before You Start Recording Remote control • It may be unlawful to record or play back copyrighted material without the consent of the copyright owner. REC MODE • The recording level is not affected by the volume. • When Mic Mixing is activated, both the music and your singing is recorded in analog. -
Page 39: Setting Up The Recording Modes
To select recording speed Setting up the Recording Modes Only for Audio CDs: Select the recording speed. Before recording, select recording modes correctly. Preparation: REC SPEED ENCODE Select “DVD/CD,” “FM,” “AM,” or “AUDIO IN” as the source. REC TIME (Canceled) To select file format Select the file format (MP3 or WMA) for recorded files. -
Page 40: Recording From A Disc
• If “FORM GR?” is selected, the System will Recording from a Disc automatically create the new group. You can record sound from a disc onto the USB device • You can also give title to the new group before connected to the USB 2 terminal. -
Page 41: Recording From The Radio/External Equipment
Recording from the Radio/External Start recording. Equipment • See page 65 for more information about the warning messages shown on the display. • For AUDIO IN: Start playback on the connected Preparation: equipment after pressing USB REC. Recording • Connect a recordable USB device to the USB 2 starts automatically when sound signal is terminal. -
Page 42: Editing Operations
Editing Operations You can edit files on a USB device connected to the USB 2 terminal. Remote control • You cannot edit the group “GROUP1” (root) and the group “MUSIC.” CHARA Giving (Editing) Titles to Tracks TITLE/EDIT or Groups You can give titles to the tracks and groups (up to 64 Number characters) in the USB device. - Page 43 How to enter titles Enter a title. Character type Select the character type. GROUPX Ex.: When editing a group title (upper case) (lower case) • For entering a title, see “How to enter titles” on the next column. (number) Finish the procedure. Enter a character.
-
Page 44: Making A New Group
Available Characters Making a New Group Uppercase Lowercase Numerical You can make a new empty group in the USB device. Button character character character • An empty group can be used for recording or (Space) , ! , # , $ , % , & , ’, editing. -
Page 45: Moving A Track
Select a destination group. Moving a Track You can move a track in the USB device into another group. • To go back to the previous step, press CANCEL while holding SHIFT. • To quit editing, press TITLE/EDIT. (while holding...) Start playing back the track you want to move. -
Page 46: Erasing A Track
Confirm your selection. Erasing a Track You can erase tracks on the USB device. • Once tracks are erased, you cannot restore them. OK? ENTER • To go back to the previous step, press CANCEL while holding SHIFT. • To quit editing, press TITLE/EDIT. Start and stop playback of the USB device. -
Page 47: Erasing All Tracks And Groups
Select the group you want to erase. Erasing All Tracks and Groups You can erase all tracks and groups in the USB device. • When you erase all tracks in the USB device, files other than music are also erased. •... -
Page 48: Bluetooth® Operations
Victor Company of Japan, Limited (JVC) is under license. Other trademarks and trade • You can register up to five devices for Bluetooth names are those of their respective owners. -
Page 49: Listening To Bluetooth Audio Player
Listening to the Bluetooth audio player Only “SYS INFO?” and “CANCEL?” can be selected when a Bluetooth device is connected to the System. Select “Bluetooth” as the source. Listening to Bluetooth Audio Player RECEIVE ? CANCEL ? Pairing • See “What is pairing?” on page 38. PAIRING? SELECT DV ? Select “Bluetooth”... -
Page 50: Listening To Music Using Bluetooth Headphones
To turn off the sound from the Bluetooth audio Listening to Music Using Bluetooth player temporarily Headphones Press Bluetooth SETTING repeatedly to select “CANCEL?”, then press ENTER/SET. Pairing To resume the sound, press Bluetooth SETTING repeatedly to select “RECEIVE?”, then press ENTER/ •... - Page 51 Listening to music through Bluetooth Select the set of headphones you want to headphone register. Select a source on the System. Enter the PIN code of the headphones on Prepare the headphones ready to receive the System. the sound from the System. •...
-
Page 52: Changing The Bluetooth Settings
To turn off the sound of the headphones and use Changing the Bluetooth Settings the speakers of the System To change the name of a registered device 2 sec 2 sec To change the name of a Bluetooth audio player: Bt OFF To change the name of a set of Bluetooth headphones:... - Page 53 To delete the registration of a device Select a setting. Delete the registration if you no longer use a device. • This setting is common for Bluetooth audio players and Bluetooth headphones. HIGH RECEIVE ? NORMAL CANCEL ? (SEND ?) PAIRING? SELECT DV ? (SEARCH DV ?)
-
Page 54: On-Screen Operations
On-Screen Operations Remote control TIME 0:00:58 TRACK 3 TOTAL 1:25:58 RANDOM TITLE CHAP TIME TIME MPEG-1/MPEG-2/ASF/DivX files on a disc Number buttons CHAP TOTAL TIME 00:00:58 1:25:58 FILE MPEG-1/MPEG-2/ASF/DivX files in a USB mass storage class device ENTER/SET TOTAL TIME 00:00:58 1:25:58 CHAP 1 Disc/source... - Page 55 To operate using the On-screen Bar To change the time information Ex.: Selecting a subtitle (French) for DVD Video You can change the time information on the on-screen bar and the display on the main unit. While “DVD/CD” is selected as the source... While playing, display the entire on-screen Display the entire on-screen bar.
- Page 56 Select the repeat mode you want. Select the start point (A). Repeats a desired portion (see the Dolby D TITLE 2 TITLE next column). DVD-VIDEO 3/2.1ch TIME TIME CHAP. Repeats the current title. TITLE* Repeats the disc (not applicable Select the end point (B). for DVD) or programmed track.
-
Page 57: Control Screen Operations
Confirm your entry. Control Screen Operations You can search for and play the desired items through The System starts playing the disc the control screen for DVD-VR and MP3/WMA/ from the selected playing time. WAV/JPEG/MPEG-1/MPEG-2/ASF/DivX files. Control screen for DVD-VR The control screen is superimposed onto the TV screen when you call up Original Program (PG) or Play List Chapter Search... - Page 58 = Highlight bar (current selection) To select an item in the list and start playback ~ File list • If different types of playable files (audio/still picture/ moving picture) are recorded on a disc or USB mass storage class device, select a file type to play (see page 12).
-
Page 59: Timer Operations
Timer Operations How Daily Timer works Remote control Once the Daily Timer has been set, the timer indicator ( ) is lit on the display. Daily Timer is activated at the same time everyday until the timer is turned off manually (see “To turn on or off the Daily AUDIO Timer”... - Page 60 To cancel the Daily Timer Set the timer as you like. Repeat the procedure for the following settings Select “DAILY.” until finished. (while holding...) 1 Set the hour then the minute for on-time. 2 Set the hour then the minute for off-time. Recording Timer Daily Timer 3 Select the playback source—“DISC,”...
-
Page 61: Setting The Recording Timer
Turn off the System (on standby), if you Setting the Recording Timer have set the timer with the System turned • Finish the timer setting at least 2 minutes before the on-time. • Recorded files are stored into • To exit the timer settings, press CLOCK/TIMER the group “Timer.”... -
Page 62: Setup Menu Operations
You can change the settings of the System. • The Setup Menu can be used only when “DVD/CD” ENTER/SET or “USB1” is selected as the source. Press SET UP while playback is stopped. SET UP LANGUAGE (CA-NXG9) MENU LANGUAGE ENGLISH AUDIO LANGUAGE ENGLISH SUBTITLE ON SCREEN LANGUAGE ENGLISH Press 3 (or 2) to select the menu. - Page 63 Menu Item Contents SCREEN SAVER You can set the screen saver function (ON or OFF). If no operation is done for about 5 minutes, the TV screen dims. You can select the file type to play on the disc and “USB1.” FILE TYPE AUDIO: To play MP3/WMA/WAV files.
-
Page 64: Additional Information
Additional Information Learning More about This System Playing Back a Disc/USB Mass Storage Class Device: JVC bears no responsibility for any loss of data in Connections the USB mass storage class device while using this (see pages 4 to 7) System. - Page 65 • This function also affects the sound through the * <.mod> is an extension code used for the headphones. MPEG-2 files recorded by JVC Everio camcorders. The MPEG-2 files with the <.mod> extension code cannot be played back if HD format is used or its maximum bit rate is more than 2 Mbps.
-
Page 66: Karaoke Program Play
Creating a Soothing Tone for Your Ear —MY SOUND: Giving (Editing) Titles to Tracks or Groups: • MY SOUND setup is prohibited for certain file • When a track is recorded, a title is automatically format. given to the track. When you want to give a new title to the track, delete the old title, then enter your •... -
Page 67: Operating Jvc's Tvs Using The Remote Control
“SUBTITLE” is not recorded, the original language is used as the initial language. PICTURE menu—MONITOR TYPE: You can use the remote control to operate JVC’s TVs. • Even if “4:3 PS” is selected, the screen size may Turn on/off TV. -
Page 68: Initial Settings
Maintenance Unable to operate the System from the remote control. To get the best performance of the System, keep your ] The path between the remote control and the discs and mechanism clean. remote sensor on the System is blocked. Handling Discs ] The batteries are exhausted. - Page 69 MP3, WMA, WAV, JPEG, MPEG-1, MPEG-2, ASF or DivX Bluetooth Operations files are not played back. Sound of a Bluetooth audio player does not come ] The disc or the USB mass storage class device may out of the speakers. (The Bluetooth indicator is on.) contain different types of files (ex.
-
Page 70: Display Messages For Recording Or Editing Operations
] Change the SOUND QLTY setting to “NORMAL” • Manufactured under license from Dolby (see page 43). Laboratories. “Dolby” and the double-D symbol are trademarks of Dolby Laboratories. Timer Operations • “DTS” is a registered trademark of DTS, Inc. and “DTS2.0+Digital Out” is a trademark of Daily Timer does not work. -
Page 71: Optical Digital Out Signals
Optical Digital Out Signals DIGITAL AUDIO OUTPUT Output Signals STREAM/PCM DOLBY DIGITAL/PCM PCM ONLY Playback disc/file with 48 kHz, 16/20/24 bit DVD Video 48 kHz, 16 bit Linear PCM* Linear PCM with 96 kHz, Linear PCM 48 kHz, 16 bit Linear PCM with Dolby Digital 48 kHz, 16 bit Dolby Digital bitstream... -
Page 72: Specifications
Dynamic range: 80 dB Specifications Horizontal resolution: 500 lines Wow and flutter: Immeasurable Amplifier section—CA-NXG9/CA-NXG5 (NX-G5) USB section Output Power: CA-NXG9: Playable files: MAIN SPEAKERS 180 W (90 W + 90 W) at 3 Ω USB1: MP3/WMA/WAV/JPEG/MPEG-1/ MPEG-2/ASF/DivX format (10% THD) SUBWOOFER 160 W at 4 Ω... -
Page 73: Parts Index
Parts Index Remote control 5∞2 3 DVD LEVEL SHIFT CA-NXG9 NX-G5 ENTER/SET Press and hold together with FADE another button MUTING when you want to FILE TYPE use the function printed in green. 4, ¢ FM/AM/ AUDIO IN SLEEP 1, ¡... - Page 74 For CA-NXG9: Mains (AC) Line Instruction (not applicable for Europe, U.S.A., Canada, and U.K.) CAUTION for mains (AC) line (Excluding Saudi Arabian model and Australian model) BEFORE PLUGGING IN, do check that your mains (AC) line voltage corresponds with the position of the voltage selector switch provided on the outside of this equipment and, if different, reset the voltage selector switch, to prevent from a damage or risk of fire/electric shock.
Need help?
Do you have a question about the CA-NXG9 and is the answer not in the manual?
Questions and answers