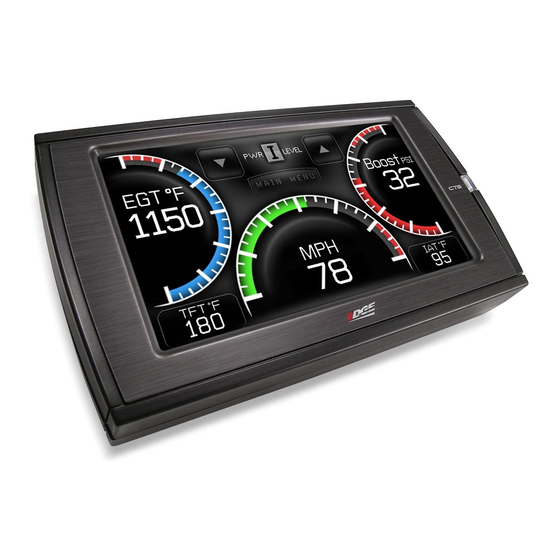
Edge Products CS Quick Install Manual
Hide thumbs
Also See for CS:
- User manual (64 pages) ,
- Quick install manual (2 pages) ,
- User manual (60 pages)
Table of Contents
Advertisement
Quick Links
Download this manual
See also:
User Manual
CS/CTS QUICK INSTALL INSTRUCTIONS
Step 1:
Locate the OBDII Port
Supplied Items
Suggested Tools
The OBDII port is a 16-pin connector like the illustration be-
1.
CS or CTS Device
•
Flat head screwdriver
low.
2.
Arkon Windshield Mount
3.
OBDII Cable
4.
Mini USB Cable
5.
CD
6.
Alcohol Wipe
7.
Zip Tie Packet
1
2
3
4
5
6
7
OBDII LOCATIONS
Step 2:
Connect/Route the OBDII Cable
Remove the panel on the
side of the dashboard to
provide access to route
the OBDII cable from the
OBDII port up to the top
of the dash.
OBDII PORT
*On some vehicles you may also
need to remove the panel directly
The OBDII port is located un-
under the steering wheel.
der the dash below
the steering wheel.
The OBDII port is
placed in different
locations under the
Once you've removed
dash for different
the necessary panels,
applications; refer to
connect the OBDII
the OBDII port loca-
cable to the OBDII
tion drawing (left) to
port, and route the
help you locate your
cable under the dash,
OBDII port.
out the side panel, up be-
tween the door seal trim
*
07 + Ford Superduty OBDII
and the edge of the dash.
port is located on the left side
Tuck the cable back as far
*Note: Leave 6-10"
of the wheel instead of the right.
of cable exposed on
as you can as you route it
top of the dash so you
*
up to the dash.
94-97 Ford Powerstroke OBDII port
have room to posi-
is located on the passenger side below
tion the device.
and to the left of the glove box.
Step 3:
Position the Device
Step 4:
Before you attach the suc-
tion cup portion of the
Position the device
mount to the window
and the mount on
the windshield in the
attach it to the device.
desired location.
Insert the tabs on the
Pay attention to
mount into the slots on
the back of the device and
where the suction
slide up (CTS) or to
cup will mount on the
the side (CS) until it
windshield.
stops.
*The mounting tabs are a tight
fit by design to maintain
a solid connection.
Once you've identified
the suction cup position
on the windshield, use
the supplied alcohol wipe
to thoroughly clean the
area. After you've wiped
the area clean, let it dry
for 2-3 minutes.
Connect the Mount and OBDII Cable
Step 5:
Position and Lock the Device on theWindshield
Once the alcohol has dried
you're ready to attach the
mount to the wind-
shield.
You'll notice that the mount has
a locking tab. This tab creates the
suction that will lock the mount
to the windshield. Make sure
the lock is in the "Unlocked"
position. Position the
mount where you've
cleaned the windshield,
press firmly, and push the tab to the
"Locked" position.
Next, insert the connector on the end
of the OBDII cable into the 16-pin
Once you've locked the mount to
connector on the back of the device
the windshield, use the adjustment
(this is easier if done prior to mount-
knobs to fine tune the viewing angle
ing the device on the window). The
and height of the the CTS/CS device.
connector only fits one way so be
sure that the locking tab is on the
bottom.
Note: The device will power on
automatically when it detects your
vehicle has started. If you wish to
power up the device without starting
your vehicle, ensure the key is in the
run position and touch the screen
(CTS) or a button (CS).
UNLOCKED
LOCKED
VERTICAL ADJ.
KNOB
This knob will allow you
to adjust the viewing
angle and height of the
device up or down.
VARIABLE ANGLE ADJ
KNOB
This knob will allow you to
adjust the viewing angle of
the device in both horizontal
and vertical fashions. Use
it to fine tune your viewing
angle.
Advertisement
Table of Contents

Subscribe to Our Youtube Channel
Summary of Contents for Edge Products CS
- Page 1 KNOB ing the device on the window). The on the windshield, use tion drawing (left) to and height of the the CTS/CS device. port, and route the connector only fits one way so be This knob will allow you the supplied alcohol wipe...
- Page 2 (Juice/Attitude only) The backdown indicator light will illuminate (yellow) pricing please visit in the folder packet that came with your CS or CTS package. For additional questions when the Juice module is decreasing power added by the device while exceeding a backdown limit. The light not found in the User Guide you can call: will contain one of the following characters;...


Need help?
Do you have a question about the CS and is the answer not in the manual?
Questions and answers