Philips Selecon Operation Manual
Hide thumbs
Also See for Selecon:
- User manual (40 pages) ,
- Operation manual (13 pages) ,
- Operation manual (6 pages)
Advertisement
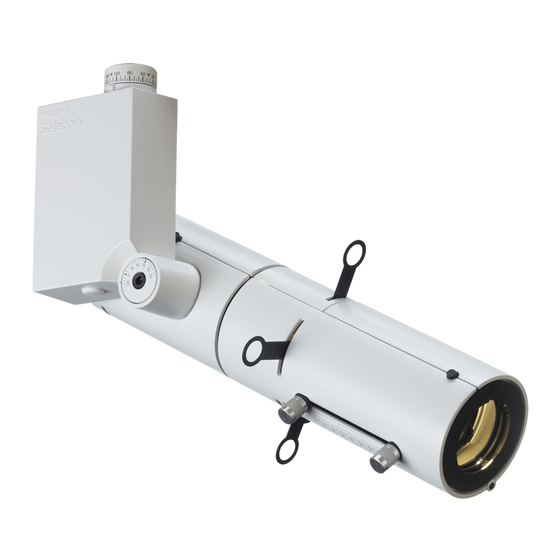
Philips Selecon Display Profile - CDM
**OPERATION MANUAL**
THIS INFORMATION IS DESIGNED TO PROVIDE YOU WITH THE INFORMATION
YOU NEED IMMEDIATELY UPON DELIVERY OF YOUR NEW LUMINAIRE.
If you require further assistance please contact your Philips Selecon dealer. www.seleconlight.com/distributors
KEY OPERATING POINTS AND FEATURES
A: Pan lock.
B: Tilt lock.
C: Lamp lid latch.
D: Shutter lock.
E: Four beam masking shutters.
F: Pattern rotation / alignment.
G: Lens lid locking latch. Open this to insert
colour frames and accessories.
H: Colour frame and accessory holder.
I: Lens focus knobs.
J: Lens tube rotation lock.
K: Lamp socket.
L: Lamp peak / flat adjustment.
M: Pattern holder.
LAMPING UP
20W CDM -Tm Philips Mini Master lamp - PGJ5 base
35W CDM -Tm Philips Mini Master lamp - PGJ5 base
The Philips Selecon Display Profile is supplied with the recommended lamp. Carefully read the manufacturers instructions for
safe lamp handling / use and disposal of used lamps. Replace with the recommended lamp only. Spares are available from
your Selecon dealer: www.seleconlight.com/distributors
To insert the lamp, push in the lid locking latch on the lamp housing and open the lid. Insert the lamp into the lamp base.
The Philips Selecon Display Profile has a built-in ballast to convert from your local voltage to the voltage required by the
lamp. Once you have installed the lamp your luminaire should be ready for use.
Recommendation to 'Burn-In' CDM-Tm Lamps
Due to colour shifts in new CDM-Tm lamps we recommend that these lamps are run continuously for a minimum „burn-in‟
period of 20hrs prior to final installation.
WARRANTY REGISTRATION:
Take full advantage of the Philips Selecon service commitment and
your new luminaires quickly and easily online
CDM Version 1: NOV 2011
www.seleconlight.com/warrantyreg
© 2011 Philips Selecon All Rights Reserved
register all
for full after-sales support.
Advertisement
Table of Contents

Subscribe to Our Youtube Channel
Related Manuals for Philips Selecon


Summary of Contents for Philips Selecon
- Page 1 To insert the lamp, push in the lid locking latch on the lamp housing and open the lid. Insert the lamp into the lamp base. The Philips Selecon Display Profile has a built-in ballast to convert from your local voltage to the voltage required by the lamp.
- Page 2 SAFETY AND MAINTENANCE Keep your Philips Selecon Display Profile in top condition and performing at its best by cleaning it regularly with a soft cloth. The above is the only maintenance task that can be safely carried out by non approved personnel.
Need help?
Do you have a question about the Selecon and is the answer not in the manual?
Questions and answers