Advertisement
artisan
artisan
u
u
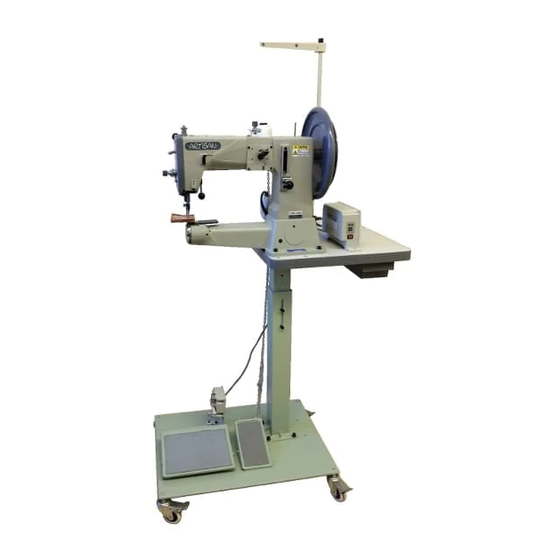
TORO-3200
TORO-3200
with Ped 500
Adjustable
with Ped 520
Pedestal Motor
Adjustable
Drive
Pedestal Motor
TORO-3200 U
Drive
with U Table
Adjustable
Motor Drive
TORO-3200
BT
Bench Top
Self Contained
Transportable
Heavy Duty Stitcher
TORO-4000
LA-25
with Ped-600
TORO-3000
Adjustable
Pedestal Motor Drive
TORO-4000 R
with Ped 500
Adjustable
with Ped 500
Pedestal Motor
Adjustable
Drive
Pedestal Motor Drive
TORO
-
3000, TORO
-
3200
TORO
-
3000, TORO
-
3200
TORO 4000
TORO 4000
and
Series
and
Series
INSTRUCTION & SPARE PARTS MANUAL
2014.07
Advertisement
Table of Contents

Related Manuals for artisan Toro-3200


Summary of Contents for artisan Toro-3200
- Page 1 TORO-3200 TORO-3200 with Ped 500 Adjustable with Ped 520 Pedestal Motor Adjustable Drive Pedestal Motor TORO-3200 U Drive with U Table Adjustable Motor Drive TORO-3200 Bench Top Self Contained Transportable Heavy Duty Stitcher TORO-4000 LA-25 with Ped-600 TORO-3000...
-
Page 2: Table Of Contents
28, 29, 33. KNEE LIFTER COMPONENTS ADDITIONAL INSTRUCTIONS FOR TORO-3200 BT and TORO 4000 BT Located on Pages 33 and 35 We Strive to Continuously Improve our Machinery. Specifications and features are constantly being updated. Your New TORO Stitcher may look slightly different then as shown in this pamphlet. -
Page 3: Specifications
Switch on the Servo Motor and check for the over in a counter-clockwise rotation. LED light to illuminate. Your Artisan TORO machine is normally set up Always switch off the motor when finished with an SR-2 speed reducer/transmission to sewing. Never leave the motor running controll your stitching speeds and to add while away from the machine. - Page 4 TORO-3000 and 4000 was thoroughly lubricated at our factory. However please re-lubricate the machine before putting the new stitcher into service. The TORO-3000 and 4000 requires lubrication at the above points on a regular basis. Artisan recommends that the machine is oiled about every 7 to 12 hours of actual usage.
- Page 5 SWITCH OFF THE MOTOR BEFORE REMOVING OR INSERTING A NEEDLE Artisan recommends that you use only “SCHMETZ” brand Needles. For Leather use size; 794 D, 794 S, 794 LR For Canvas, Nylon and Fabrics use size: 794 Turn the hand wheel counter-clockwise and raise the needle bar to its highest position.
- Page 6 1. Pull approximately 3 to 4 inches of thread off the bobbin and insert the new bobbin into the bobbin case so that when turning the bobbin turns counter-clockwise. 2. Pass the thread through the slot (A) of the bobbin case and pull the thread until the thread passes under the bobbin thread tension adjusting spring and rests in the groove as pictured.
- Page 7 To Adjust the Stitch Length 1. Turn the adjuster nut (1) counter-clockwise and push the handle in a downward direction for a longer stitch length. 1. For a shorter stitch length raise the handle and then turn the adjuster nut (1) to lock in the handle.
- Page 8 The standard height of the presser foot regulator from the casting to the top of the regulator screw is about 5/8” to 3/4”. The Feed Dog used in artisan models For Leather Stitching: TORO-3000, 3200 & 4000 R is smooth, without teeth so not to damage your leather.
-
Page 9: Thread Tension
Needle Needle Shuttle Hook Guard Point Shuttle Hook Race Carrier Frame Shuttle Hook Assembly Shuttle Hook with Bobbin Case Driver A. Complete Oscillating Shuttle Hook Assembly with Bobbin Case. B. Shuttle Hook Point. C. Bobbin Thread Tension Adjusting Screw. D. Bobbin Thread Tension Adjusting Locking Set Screw. - Page 10 Shuttle Hook Point Needle Guard Shuttle Hook Needle Point Needle Shuttle Hook Point Guard to the Needle Relationship Shuttle Hook as viewed from behind Race the needle on the rear left side, and from left to right. Shuttle Hook Point Shuttle Hook Point to the Needle Relationship Shuttle Hook...
-
Page 11: Walking Foot Height Adjustment
WALKING FOOT HEIGHT ADJUSTMENT To Adjust the height of the walking feet: 1. Loosen the nut (6) and move the lever (7) up to Decrease the walking foot height. (B) 2. Move the lever (7) down in slotted bracket to Increase the walking foot height. (A) 3. - Page 12 Adjusting the Needle to Shuttle Position 1. Loosen the small Allen head screw Hand Wheel Then lightly snug the screw. Side Loosen the two 6 mm Allen head screws 3. With the stitch length lever set to the “0” position, turn the hand wheel in a counter-clockwise rotation and place the needle bar to the “Bottom-Dead-Center”...
- Page 14 794 (D or S) NM 200, 25 Needle The above adjustments are for stitching normal fabrics and do not apply to stitching heavy leathers for the TORO-3000 or 4000 R. Leather machines are specially adjusted for each application. The standard adjustments are only a starting point.
- Page 15 The needle has overheated, lost temper or is Inferior quality needles cause problems. dull or worn out. 8. Replace poor quality thread with RICE or Artisan Excessive thread fraying or wear. “Premium Performance Leather Stitching Thread” from Artisan Sewing Supplies. 888 838 1408 3.
- Page 16 “Blanket Set” for stitching on other than leather. artisan strongly recommends replacing your needle every 8 to 10 hours of actual stitching! Leather Point Needles are like “knives”. They get dull and require replacement.
-
Page 17: Spare Parts List
Spare Parts List artisan TORO-3000, TORO-3200 TORO-4000... -
Page 18: Frame And Cover Components
1. FRAME AND COVER COMPONENTS... -
Page 19: Main Shaft Components
2. MAIN SHAFT COMPONENTS... - Page 20 Page 20.
-
Page 22: Presser Bar Components
4. PRESSER BAR COMPONENTS... - Page 23 OUTSIDE PRESSER FOOT WITH TEETH FOR FABRICS 43423 Center Grover Leather Presser Foot 43424 Left Side Leather Presser Foot 43425 Right Side Leather Presser Foot 43426 Double Toe Leather Presser Foot 43405 Double Toe Presser Foot with Teeth for Fabric or Webbing (aka Blanket) 43406 Center Presser Foot with Teeth for Fabric or Webbing (aka Blanket) 43424S...
-
Page 26: Hook Driving Shaft Components
6. Hook Driving Shaft Components Shuttle Hook Parts A. GS 184 Locking Set Screw. B. GS 164 Thread Tension Adjusting Screw. C. GW 113 Thread Tension Spring. D. GW 114 Bobbin Push-out Spring. E. GN 115 Bobbin Case Body. GN 112 Shuttle Body. - Page 27 OSCILLATING SHUTTLE HOOK SPACER...
- Page 30 8. BOBBIN WINDER AND THREAD GUIDE COMPONENTS...
-
Page 32: Knee Lifter Components
9. KNEE LIFTER COMPONENTS Ref No. Part No. D E S C R I P T I O N AMT. 4710340100 Presser Bar Lifting Link B-1342-591-000 Presser Bar Lifting Return Spring 210-62500 Presser Bar Lifting Bar 211-56005-3000 Side Connecting Lever Bar 211-56005-3200 “... - Page 33 Installation: Presser Foot Lifting Handle TORO-3200 BT TORO-3000, TORO-3200, TORO-4000...
- Page 34 TORO-3200 BT and TORO-4000 BT...
- Page 36 TORO-3000, 3200 and 4000 T HREADING Insert the thread through the upper wire thread guide (A), then around the top tension (auxiliary tension) in a clockwise rotation between the 2 disks, one revolution and back up to the same wire thread guide (A).
Need help?
Do you have a question about the Toro-3200 and is the answer not in the manual?
Questions and answers