Peg-Perego PRIMO VIAGGIO 4-35 Owner's Manual
Hide thumbs
Also See for PRIMO VIAGGIO 4-35:
- Owner's manual (112 pages) ,
- Owner's manual (112 pages) ,
- Quick start manual (4 pages)
Table of Contents
Advertisement
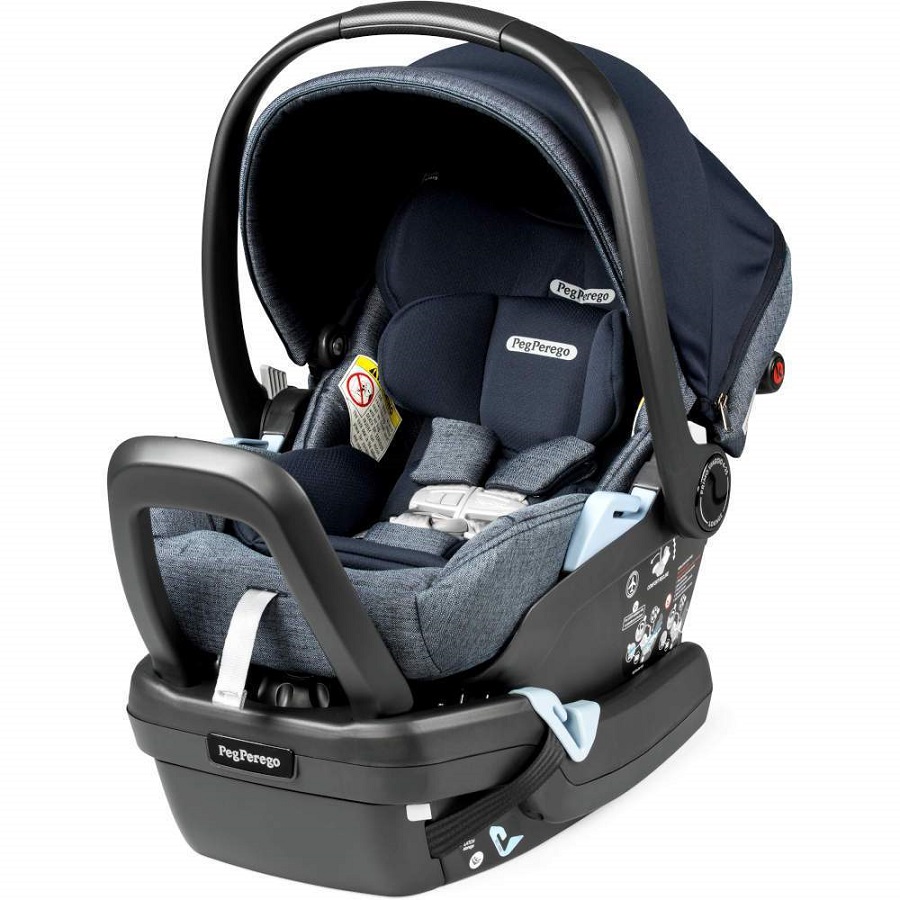
PRIMO VIAGGIO 4 . 35
WARNING:
Do not install or use this child restraint
until you read and understand all
instructions in this manual. To avoid
serious injuries to your baby, follow the
instructions carefully and be sure to buckle
your baby using the 5-point harness.
O W N E R ' S
M A N U A L
Child Requirements:
Weight limits: 4 - 35 lbs (1.8 - 15.8 kg)
Maximum height: 32 inches (81.3 cm)
USA
Instructions for use EN
FIUS1403I205
Advertisement
Table of Contents

Related Manuals for Peg-Perego PRIMO VIAGGIO 4-35


Summary of Contents for Peg-Perego PRIMO VIAGGIO 4-35
- Page 1 Instructions for use EN FIUS1403I205 PRIMO VIAGGIO 4 . 35 O W N E R ’ S M A N U A L WARNING: Child Requirements: Weight limits: 4 - 35 lbs (1.8 - 15.8 kg) Do not install or use this child restraint Maximum height: 32 inches (81.3 cm) until you read and understand all instructions in this manual.
-
Page 2: Table Of Contents
Table of Contents Before You Start page 3 Installing the Base with different Types of Seat Belts page 31 Customer Service/Registration Form page 4 Installing the Car Seat on the Base page 32 Safety Rules page 5 Installing the Car Seat without the Base page 34 Your Car Seat page 8 Installing the Car Seat with different Types of Seat... -
Page 3: Before You Start
Before You Start 1 Please read this manual carefully. Keep this manual in the rear compartment of your child car seat. 2 Review car seat parts and read through instructions. Read and understand the labels and all the instructions before using this car seat. 3 Fill in and return the registration form (see page 4). -
Page 4: Customer Service
Customer Service Registration Form Important! Child restraints could be Call Peg Perego USA Customer Service at recalled for safety reasons. You must 1-800-671-1701 (toll free) for information register this restraint to be reached in about repairs or spare parts. If any part a recall. -
Page 5: Safety Rules
Safety Rules WARNING • This car seat meets or exceeds all applicable Federal Motor Vehicle Safety Standard 213 requirements for use in motor vehicles and aircraft. • Read all instructions before use of the child carrier. Keep instructions for future reference in the dedicated pocket located refer to your vehicle owner’s manual for in the rear compartment of this car seat. - Page 6 Safety Rules WARNING get a new unit. Call customer service at 1-800-671-1701 (toll free) for more information. • NEVER leave the child unattended. • Do not use this carrier if it is broken or • Always buckle your baby into the car damaged.
- Page 7 Safety Rules WARNING If the seat reclines too much, your baby can be injured or ejected from the seat. If the seat is too upright, it can cause • Use only with children who weigh your baby to have breathing problems, between 4 and 35 pounds (1.8 and 15.8 which could lead to injury or death.
-
Page 8: Your Car Seat
Your Car Seat HOOD 5 POINT HARNESS SYSTEM Shoulder pads Chest clip Harness latch plate Harness buckle FRONT BACK Seat handle Side Impact Head protection Harness shoulder straps First stage cushion Waist anchors Splitter plate Second stage cushion Harness adjuster button Harness adjuster strap - 8 -... - Page 9 Your Car Seat Energy absorbing Expanded Polystyrene (EPS) foam lined shell and headrest for added impact protection. Release lever Sliding harness plate Harness plate button Rear compartment door - 9 -...
-
Page 10: Your Car Seat Base
Your Car Seat Base Anti rebound bar Angle adjuster knob Integrated Right Tight locko clip Rear latches Color coded belt slots Level indicator Front latches Latch strap UAS connector - 10 -... - Page 11 Travel System Seat Chassis /Strollers: . Booklet . Book . Book Plus . Book Pop-Up . Switch Four . Duette . Triplette Base - 11 -...
-
Page 12: Serial Numbers
Serial Numbers Open the rear compartment door to read the product identity label as shown in the picture. The label carries the following information: product name, production date and serial number, which identify your product uniquely. Every buckle and harness used on Primo Viaggio 4 . -
Page 13: Assembly Before First Use
Assembly before first use Primo Viaggio 4 . 35 is almost ready for use. Disconnect the car seat from the base following instructions at page 25. Snap fit the anti-rebound bar into the base as shown in the picture. Check that the bar is properly installed by pulling on top of it trying to detach the bar from the base. -
Page 14: Installation Instructions
Installation Instructions Peg Perego Primo Viaggio 4 . 35 is certified for use with or without the base. Use of the base is highly recommended because it makes installation easier and therefore safer. Unlatch the seat from the base following instructions at page 25, then re-latch and repeat this operation until you are familiar with this important feature. -
Page 15: Latch System Overview
LATCH SYSTEM overview Primo Viaggio 4 . 35 is equipped with latch connectors on the base (refer to page 26 for latch operation). Latches must be connected to your vehicle latch anchors located at the junction of the seat and backrest in your vehicle seat. There are at least two anchors for each seating position and they are spaced by about 11"... -
Page 16: Vehicle Seat Belt Overview
Vehicle seat belt overview VEHICLE SEATBELTS: this child seat is designed to be installed with vehicle belts. There are many different vehicle belt designs. Unfortunately, some may be unsuitable for a safe installation of Primo Viaggio 4 . 35. Please read carefully the pages below. Check your vehicle owner’s manual or call Peg Perego Customer Service @ 1-800-671- 1701 for additional help. - Page 17 Vehicle seat belt overview ALR mode is activated by extending the retractor all the way out until a "click" is heard, next let the seat belt (webbing) retract into the retractor to the desired length and stop the belt at that point. The retractor locks and will not let the belt lengthen at that point (only retract).
- Page 18 Vehicle seat belt overview Lap/shoulder belt (3-point) with Switchable Locking Retractor (ELR —> ALR) and free sliding latch plate. This type of seat belt has a latch plate that moves freely along the belt. To activate ALR for child restraint installation, some vehicle models may require to pull the belt all the way out;...
- Page 19 Vehicle seat belt overview Lap/shoulder belt (3-point) with Emergency Locking Retractor (ELR) and with a locking latch plate. This type of belt can be adjusted by pulling/ releasing the strap at the latch plate adjuster. Please refer to your vehicle owner’s manual for details.
- Page 20 Vehicle seat belt overview Lap/shoulder belt (3-point) with Emergency Locking Retractor (ELR) and free sliding latch plate. This type of seat belt has a latch plate that moves freely along the belt; it will only lock in an emergency (sudden stop or crash). For installation of Primo Viaggio 4 .
- Page 21 Vehicle seat belt overview Lap belt (2-point) with a locking latch plate. This type of belt can be adjusted by pulling/releasing the strap tail at the latch plate. Some vehicles may have seatbelts with large rigid buckles. These designs may cause the installation to be troublesome and affect stability of the child restraint during normal use.
- Page 22 Vehicle seat belt overview Lap belt (2-point) with Switchable Locking Retractor (ELR --> ALR). This type of seat belt has a latch plate that is sewn to the end of the belt. To activate ALR retractor for child seats installation, some vehicle models may require to pull the belt all the way through;...
- Page 23 Non compatible seatbelt designs or seating positions WARNING: do not use Primo Viaggio 2. Side facing seats. 4 . 35 with the following vehicle belt design: 1. Lap/motorized shoulder belts. Belts mounted on the door. 3. Rear facing seats. 4. Rotating seats unless tray can be locked in forward facing direction.
-
Page 24: Installing The Base
Installing the Base When using Primo Viaggio 4 . 35 with its base, first install the base, and then install the car seat on the base. Important! Read your vehicle manual for instructions on where to best install a child car seat in your vehicle. -
Page 25: How To Level The Base In The Vehicle
How to level the base in the vehicle Take the car seat off the base. Rotate the handle in the upright position by pressing the buttons on the side of the handle (a). Place your hand on the top of the seat back and pull up on the release lever with your fingers. -
Page 26: How To Install The Base Using The Latch System
How to install the Base using the LATCH SYSTEM Open the lockoff clip as shown in the picture (a). Remove the two anchor latches from their housings. The latches are on the side of the base. Remove the adjuster from its support, loosen the latch strap by pressing on the gray button and pulling the strap as shown (b). - Page 27 How to install the Base using the LATCH SYSTEM Keep the lockoff clip open and make sure that the latch strap is threaded flat through the base (f ). Tighten the base against the seat by pulling the free end of the latch strap;...
- Page 28 How to install the Base using the LATCH SYSTEM Close the Right Tight lockoff clip by pressing the lever as shown in the picture with an audible click (h). Now check the level indicator again. It is divided in 3 areas that give the proper backrest angle depending on the weight of your child.
- Page 29 How to install the Base using your VEHICLE SEAT BELT Important! Not all the seat belts work in the same way. To make sure that the child car seat is properly installed using your seat belts, read your vehicle owner’s manual. It will suggest proper installation of a child car seat.
- Page 30 How to install the Base using your VEHICLE SEAT BELT Thread the lap portion of the belt through the slots on the base (c) and lock the latch plate into the buckle as shown (d). Press down on the base with your body weight and pull the shoulder strap as shown (e).
-
Page 31: Installing The Base With Different Types Of Seat Belts
Installing the Base with different Types of Seat Belts Different Types Belts Lap belts with Emergency Locking Retractors (ELR), Automatic Locking Retractors (ALR), and Switching Locking Retractors (SLR) look as shown (a). Consult your vehicle owner's manual to determine which style you have. Lap belts with locking latch plates look as shown (b). -
Page 32: Installing The Car Seat On The Base
Installing the Car Seat on the Base Now that you have installed the base in your vehicle, you are ready to install the car seat on the base. Holding the car seat by the handle, align it over the base and press it rear facing on the base until you hear the click (a). -
Page 33: Installing Car Seat On Base
Installing the Car Seat on the Base It is recommended to adjust the handle so that it rests at the top edge of the car seat as shown. To rotate the handle, press the squared buttons (located on each side of the handle where it attaches to the seat) and rotate it to the recommended position (b). -
Page 34: Installing The Car Seat Without The Base
Installing the Car Seat without the Base Important! The base is designed to avoid consumer misuse by reducing the number of times the seat must be anchored to your vehicle. Please, use and install Primo Viaggio 4 . 35 without the base only if needed. Make sure that your vehicle is parked on level ground when you install the base. - Page 35 Installing the Car Seat without the Base Thread the lap belt through the slots on the handle and lock the latch plate into the buckle as shown (c). Pull the shoulder portion of the belt around the back of the seat (d). Thread the shoulder belt into the slot in the back of the seat and pull it to tighten the restraint againts the vehicle seat (e).
- Page 36 Installing the Car Seat with different Types of Seat Belts Different Types Belts Lap belts with Emergency Locking Retractors (ELR), Automatic Locking Retractors (ALR), and Switching Locking Retractors (SLR) look as shown (a). Consult your vehicle owner's manual to determine which style you have. Lap belts with locking latch plates look as shown (b).
-
Page 37: Use Of A Locking Clip
Use of a Locking Clip Installation of Primo Viaggio 4 . 35 without base follows the same rules as with base regarding the availability of different types of vehicle seat belts. Important! For different types of seat belts, please refer to page 16 and on. Primo Viaggio 4 . -
Page 38: How To Buckle Your Baby Into The Car Seat
How to buckle your baby into the Car Seat This restraint uses a 5-point harness system to secure your baby into the car seat. Undo the chest clip, pressing the button on the clip and pulling apart as shown (a). Undo the latch plates, pressing the red button and pulling the latches up (b). - Page 39 How to buckle your baby into the Car Seat Lay the shoulder straps to the side to make room for your baby; use the side bands to keep the harness open as shown in the picture (d). Put your baby in the car seat with the bottom and back flat against the child restraint.
- Page 40 How to buckle your baby into the Car Seat Adjust the chest clip to the arm pit level. To tighten the harness, pull the adjuster strap at the bottom of the seat until the strap is snug. Tuck the loose end of the adjuster strap under the seat padding.
- Page 41 How to buckle your baby into the Car Seat To loosen the harness, press and hold the harness adjuster button inside the slot located at your baby’s feet, and pull the top harness as shown (i). Important! A snug strap should not allow any slack.
- Page 42 How to buckle your baby into the Car Seat Important! In winter time do not fasten the child in the car seat wearing bulky clothes or placing extra blankets between the body and the harness. This will result in a poor belt installation that may have severe consequences in case of a collision.
-
Page 43: How To Raise Or Lower The Shoulder Straps
How to raise or lower the Shoulder Straps Primo Viaggio 4 . 35 is fitted with a sliding harness plate to make strap adjustment easy and safe. Removing the shoulder straps and threading through slots is not required on this seat. To access the harness plate open the rear comportment door (a). - Page 44 How to raise or lower the Shoulder Straps The correct height of the side protection panel is when the shoulder strap slots are located just below shoulder level (green area), as shown in the picture (d). Make sure belts are not in the red area. Important! This restraint is designed for childs up to 32 inches (81.3 cm) in length.
-
Page 45: Dual Cushion System
Dual Cushion System Primo Viaggio 4 . 35 is equipped with a dual stage cushion system consisting of a first stage (1) and a second stage cushion (2). If your baby is very tiny, cushion 1 can be used in conjunction with cushion 2 as shown (a). -
Page 46: Using The Car Seat Outside The Vehicle
Using the Car Seat outside the Vehicle This unit can be used as an infant carrier. The special shell shape is designed for rocking your baby. To rock your baby, move the handle into the up position as shown (a). To prevent rocking, lock the handle behind the backrest (b). - Page 47 Using the Car Seat outside the Vehicle The hood provides shade for your baby (c). To attach the hood, push the hood latches into the slots on the seat shell as shown (d). Secure the elastic fasteners to the shell as shown in the picture. To open the hood, pull the frame until it clicks open.
- Page 48 Using the Car Seat outside the Vehicle Carrying handle for the base. Warning! Do not lift with the seat attached to the base. Warning! Do not use as a means of transporting a child. - 48 -...
-
Page 49: Using Car Seat On Aircraft
How to Use the Car Seat on Aircraft This unit is certified for aircraft use. Position the restraint on the seat, adjust the handle in the forward most position as shown. Any other position may injure your baby in an accident. To move the handle, press the gray buttons on the sides of the handle at the same time and push the handle. -
Page 50: Cleaning And Maintenance
Cleaning and Maintenance MAINTENANCE OF THE PADDING This unit needs minimal maintenance. Brush the fabric parts to remove dust. Keep all moving parts clean. To wash this upholstery, follow the instructions written on the product label Clean the plastic parts often with a (see below). -
Page 51: Cover Removal
How to wash the chair padding - Cover removal Open the harness following procedure at page 38 (a). Remove stage 1 cushion: undo the buttons located on the side of the top part as shown in the picture (b). Remove stage 2 cushion simply pulling it away from the crotch strap (c). - Page 52 How to wash the chair padding - Cover removal Turn the seat upside down and remove the shoulder belts from the splitter plate (e). Slip the side belts through the slots in the cover (f ). Undo the elastic bands under the handle as shown in the picture (g) and remove the seat cover starting from the crotch strap (h).
- Page 53 How to wash the chair padding - Cover removal Remove the seat cover and the head panel cover as shown in the sequence (i,j). Important! the shell and the head panel are fully lined with EPS. Pay attention when the covers are removed in order to avoid breaking these parts.
- Page 54 How to wash the chair padding - Refitting Slide the padding on (a) following the sequence, as shown: - slide the cover on from the top (1) - allow the head panel to pass entirely through the large opening (2) - then slide the cover under the plastic panel of the headrest (3).
- Page 55 How to wash the chair padding - Refitting Insert the stage 2 cushion back in place through the crotch slot (i). If you need to put the stage 1 cushion back in place make sure to fasten the side buttons as shown in the picture (j). To attach the hood, push the hood latch into the slot on the seat shell as shown (k).
-
Page 56: Replacement Parts
Replacement Parts 1) BCA435NA* 2) BRI435US* 3) BSA435US* 4) ASPI0157NFGR 5) MUCI0143GR 6) BSP435NA* 7) IAKADJBA00USNF NOTE: Spare parts available in different colors* to be specified when ordering. NOTE: A Tether is not a component of a rear facing only car seat. - 56 -... - Page 57 ES_Español EN_English declaración de conformidad Declaration of conformity Product name Denominación del producto PRIMO VIAGGIO 4 . 35 PRIMO VIAGGIO 4 . 35 Código de identi cación del producto Product reference number MPV03* MPV03* Normativas de referencia (origen) Reference Standards (origin) FMVSS 571-213 (USA) FMVSS 571-213 (USA) Declaration of conformity...
Need help?
Do you have a question about the PRIMO VIAGGIO 4-35 and is the answer not in the manual?
Questions and answers