Table of Contents
Advertisement
Quick Links
Advertisement
Table of Contents

Related Manuals for Rain Bird SMRT-Y


Summary of Contents for Rain Bird SMRT-Y
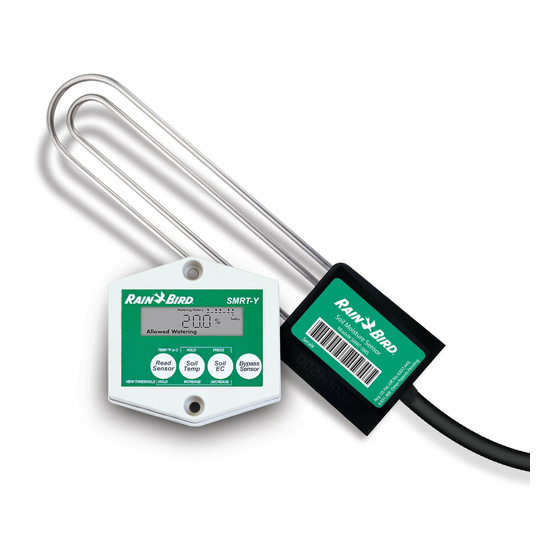
- Page 1 SMRT-Y Soil Moisture Sensor User Manual Manual del usuario Guide de l’utilisateur...
- Page 2 ....p. 1 ... . . p. 31 ... . . p. 61...
-
Page 3: Table Of Contents
Preparation ���������������������������������������������������������� 4 Threshold ������������������������������������������������23 SMRT-SMS Soil Moisture Sensor Field Capacity Method �������������������������������������23 Installation �����������������������������������������������7 Automatic Moisture Threshold Method ��������23 SMRT-Y User Interface Installation: ��������13 System Setup ������������������������������������������24 Overview ������������������������������������������������������������13 Recommended Follow-up �������������������������������24 Detailed Procedure �������������������������������������������13 Optional wiring for Xeriscape or flower SMRT-Y Operation �����������������������������������17... -
Page 4: Introduction
Introduction Congratulations on your purchase of the Rain Bird SMRT-Y Soil Moisture Sensor kit, utilizing the the most advanced technology available on the market. You have joined those interested in conserving water, Earth’s most important resource, while optimizing the root health of your turf and trees. -
Page 5: How It Works
If the water content in the soil is below the threshold when your controller begins its cycle, the SMRT-Y allows the controller and its irrigation programs to operate normally. The connection will be maintained for the entire watering cycle and for 30 minutes thereafter. -
Page 6: Preparation
4. Choose a full sun turf zone for the sensor installation (see Figure 1 & 2). 5. From the homeowner or maintenance contractor, determine and record the most frequent watering intervals and run times that have been used in past peak season settings. SMRT-Y Soil Moisture Sensor... - Page 7 Too shady Low point Too shady (trees, house, etc���) Too shady Heavy foot Figure 1 traffic Sensor Location Selection SMRT-Y Soil Moisture Sensor...
- Page 8 Too close to walkway� Susceptable to over- Too shady spray from car wash and potential foot traffic Separated by walkway Too close to tree Figure 2 Unacceptable Sensor Locations SMRT-Y Soil Moisture Sensor...
-
Page 9: Smrt-Sms Soil Moisture Sensor
Make sure that the selected wire is the zone wire and not the ‘common’ wire. NOTE: Avoid selecting a zone which powers more than one solenoid. The green wire from the SMRT-Y user interface must be connected to a zone which activates a single valve solenoid. SMRT-Y Soil Moisture Sensor... - Page 10 Pack loose soil firmly around the sensor rods to a depth of about ½ inch. Then pull the sod back over the sensor and pack it down firmly. 18" 18" Figure 3 SMRT-Y Soil Moisture Sensor...
- Page 11 Figure 4 SMRT-Y Soil Moisture Sensor...
- Page 12 White sensor wire extension to the common wire in the valve box. Make sure all valves in the valve box share the same common connection with the White sensor wire (see Figure 5). Use grease caps for all connections after confirming proper system operation (see wiring diagram included in your kit). SMRT-Y Soil Moisture Sensor...
- Page 13 Wires to Controller Wires to Sensor Controller Zone Wire Sensor Red Wire Controller Common Wire Sensor White Wire Solenoid Valve Solenoid Valve Sensor Black Wire Figure 5 Valve Box Connections SMRT-Y Soil Moisture Sensor...
- Page 14 • A 7 inch round Valve Box (Rain Bird item #VB-7RND) • Grease Caps or equivalent waterproof connectors (Rain Bird direct bury connector #DBTWC25) • Use 18 AWG direct burial polyethylene insulated wire (or equivalent) for splicing and burial 8. Finally, pour a five gallon bucket of water slowly over the sensor installation area.
-
Page 15: Smrt-Y User Interface Installation
Red SMRT-Y wire. Connect the Green SMRT-Y wire to the terminal from where the zone wire was removed. Connect the Orange SMRT-Y wire to the 24 volt AC ‘hot spot’ or transformer terminal (see Figure 8). - Page 16 2. Connect the Orange wire from the SMRT-Y Be sure to connect the correct 24V terminal to one of the 24 VAC terminals on your controller. In order to determine which of 24V 24V the 24V terminals to connect the Orange...
- Page 17 SMRT-Y. Figure 9 3. Connect the wire or wires you disconnected from the ‘COM’ terminal to the White wire from the SMRT-Y cable using a wire nut (see 24V 24V Figure 9). 4. Disconnect the target zone wire identified and marked earlier (zone #1 in figure 10).
- Page 18 24V 24V the marked zone wire was originally connected (see Figure 11). 6. Turn on the controller and allow the SMRT-Y user interface to take a soil moisture reading. The reading should appear in the display after 4-5 seconds. If the reading is zero the wiring to the sensor is not correct and will need to be reviewed and corrected.
-
Page 19: Smrt-Y Operation
SMRT-Y Operation Take a Moisture Reading The SMRT-Y displays the last moisture reading (taken every 10 minutes). To take a current moisture reading, press Read Sensor. The display will show “- - -“ then, display the current moisture. TEMP . ºF or C... -
Page 20: View Soil Temperature
Change Temperature Format To change from degree Fahrenheit to Celsius, hold Soil Temp and toggle Soil EC. TEMP . ºF or C HOLD PRESS Read Soil Soil Bypass Sensor Temp Sensor VIEW THRESHOLD HOLD INCREASE DECREASE HOLD SMRT-Y Soil Moisture Sensor... -
Page 21: View Soil Ec
Sensor The “BYPASS SENSOR” icon on the display will slowly turn on and off. VIEW THRESHOLD HOLD INCREASE DECREASE While in this mode, actions from your controller will not be inhibited by the SMRT-Y user interface. SMRT-Y Soil Moisture Sensor... -
Page 22: Watering History
Watering History The SMRT-Y user interface displays the past 7 watering attempts. If the SMRT-Y allowed watering, a drop is displayed. If the system was suspended, it will be blank. ‘Today’ indicates the most current watering cycle. The history updates 30 minutes after each cycle. -
Page 23: Setting The Watering Schedule
After you have measured the Field Capacity of your soil (see next page), you can use the chart to find watering times for your zones. You will need to know the type of sprinkler heads installed and their precipitation rates. SMRT-Y Soil Moisture Sensor... - Page 24 Capacity and your moisture threshold is 28%, your total run time is 23 minutes. Set your controller to irrigate a total of 23 minutes, using a soak cycle with a maximum ‘on’ time of 7 minutes and a minimum ‘soak’ time of 25 minutes. SMRT-Y Soil Moisture Sensor...
-
Page 25: Threshold
Watering Allowed mode will start blinking. VIEW THRESHOLD HOLD INCREASE DECREASE When your controller attempts to irrigate the following HOLD HOLD morning, the SMRT-Y will take a measurement and automatically set your moisture threshold to 80% of Field Capacity. SMRT-Y Soil Moisture Sensor... -
Page 26: System Setup
1. The watering moisture threshold is determined during the auto-set period. Sometime after the first controller run, press the ‘Read Sensor’ button on the SMRT-Y user interface to view the watering moisture threshold. The displayed number is the moisture level in the root zone that will permit irrigation. -
Page 27: Optional Wiring For Xeriscape Or Flower
2. Loosen the screw that connects such zone wire to your controller. 3. Strip the wires and connect the Blue wire from the SMRT-Y user interface to the same terminal as the zone wire. NOTE: There will now be two wires connected to this terminal; a Blue wire going to the SMRT-Y user interface and a zone wire going to the valve. -
Page 28: Special Notes
2. You can use this Soil Moisture Sensor with installations running multiple stations or valves simultaneously. 3. This SMRT-Y Soil Moisture Sensor can be used with a Rain Bird Rain Sensor (part number: RSDBEX). The system will operate as follows: •... - Page 29 SMS Cover Figure 12 SMRT-Y Soil Moisture Sensor...
-
Page 30: Troubleshooting
The sensor is disconnected. Verify if Rain Sensor is activated. Review the SENSOR “00” INSTALLATION section. · Check all connections to the sensor and from the SMRT-Y user interface to your controller. · · The system is not Your controller is not set. - Page 31 The device must be the object of an appropriate, selective removal procedure in order to recuperate it. Your cooperation will contribute to the respect for the environment and the protection of our natural resources. SMRT-Y Soil Moisture Sensor...
- Page 32 Accessories Division 6991 Southpoint Road Tucson, AZ 85756 www.rainbird.com © 2009 Rain Bird Corporation ® Registered trademark of Rain Bird Corporation ® Marca registrada de Rain Bird Corporation ® Marque commerciale déposée de Rain Bird Corporation 05/09 P/N: 177627 Rev. B...
Need help?
Do you have a question about the SMRT-Y and is the answer not in the manual?
Questions and answers