Table of Contents
Advertisement
Quick Links
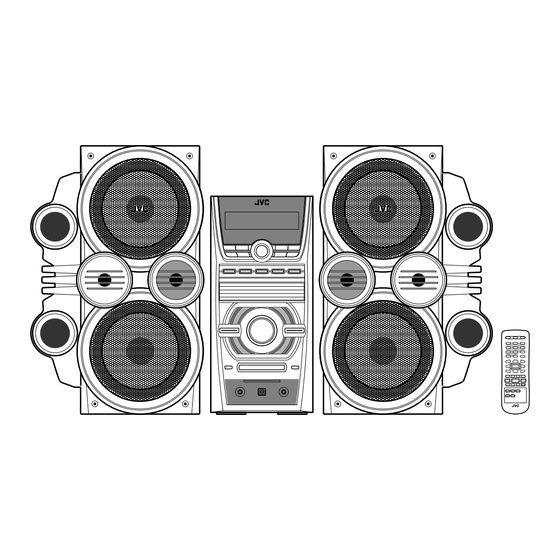
COMPACT COMPONENT SYSTEM
HX-C6
SP-HXC6
—Consists of CA-HXC6 and SP-HXC6
CA-HXC6
INSTRUCTIONS
SP-HXC6
For Customer Use:
Enter below the Model No. and Serial
No. which are located either on the rear,
bottom or side of the cabinet. Retain this
information for future reference.
Model No.
Serial No.
LVT1350-001A
[J]
Advertisement
Table of Contents

Related Manuals for JVC CA-HXC6


Summary of Contents for JVC CA-HXC6
- Page 1 COMPACT COMPONENT SYSTEM HX-C6 SP-HXC6 INSTRUCTIONS —Consists of CA-HXC6 and SP-HXC6 CA-HXC6 SP-HXC6 For Customer Use: Enter below the Model No. and Serial No. which are located either on the rear, bottom or side of the cabinet. Retain this information for future reference.
- Page 2 Consult the dealer or an experienced radio/TV technician for help. CAUTION Changes or modifications not approved by JVC could void the user’s authority to operate the equipment. For the main unit: Declaration of Conformity...
- Page 3 Note to CATV system installer: This reminder is provided to call the CATV system installer’s attention to Section 820-40 of the NEC which provides guidelines for proper grounding and, in particular, specifies that the cable ground shall be connected to the grounding system of the building, as close to the point of cable entry as practical.
-
Page 4: Introduction
Precautions Installation • Install in a place which is level, dry and neither too hot nor too cold—between 5°C and 35°C. • Install the System in a location with adequate ventilation to prevent internal heat buildup in the System. DO NOT install the System in a location near heat sources, or in a place subject to direct sunlight, excessive dust or vibration. -
Page 5: Table Of Contents
Contents Introduction ...1 Precautions...1 How to Read This Manual ...1 Getting Started ...3 Step 1: Unpack...3 Step 2: Prepare the Remote Control...3 Step 3: Hook Up...4 Before Operating the System ...6 Parts Index ...6 Daily Operations—Playback...8 Listening to the Radio...9 Playing Back a Disc ...10 Playing Back from the PC...12 Daily Operations—Sound and Other... -
Page 6: Getting Started
Step 1 :Unpack the package and check the accessories. Step 2 : Prepare the remote control. Step 3 : Hook up the components such as AM/FM antennas, the speakers, etc. Finally plug the AC power cord. Now you can operate this System. Getting Started Step : Unpack... -
Page 7: Step 3: Hook Up
Do not connect the power cord until all other connections have been made. Step : Hook Up If you need more detailed information, see page 5. Illustrations of the input/output terminals below are typical examples. When you connect other components, refer also to their manuals since the terminal names actually printed on the rear vary among the components. - Page 8 Do not connect the power cord until all other connections have been made. To connect the AM loop antenna cords • Connect black cord to the terminal, and the while cord to the other terminal. 1 Hold 2 Insert • If the AM loop antenna wire or speaker cords are covered with vinyl, remove the vinyl to expose the tip of the antenna by twisting the vinyl.
-
Page 9: Before Operating The System
Before Operating the System Parts Index Refer to the pages to see how to use the buttons and controls. Remote control 14, 16, 18, 19 9, 11, 14, 16, 19 Main unit Remote sensor 8, 10 8, 19 Standby lamp 10, 14, 16, 17 10, 17 8, 13... - Page 10 The indications on the display teach you a lot of things while you are operating the System. Before operating the System, be familiar with when and how the indicator illuminates on the display. Display Window Indications on the main display •...
-
Page 11: Daily Operations-Playback
Daily Operations In this manual, the operation using the remote control is mainly explained; however, you can use the buttons and controls on the main unit if they have the same (or similar) name and marks. 10 keys (1–10,+10) ¡/¢ REPEAT PROGRAM DISC 1–... -
Page 12: Listening To The Radio
To save the power consumption while on standby—Eco mode While on standby... Canceled The display illumination (including the display demonstration) disappears. Listening to the Radio To select the band (FM/AM) To tune in to a station While FM or AM is selected... sec. -
Page 13: Playing Back A Disc
Playing Back a Disc This System can play back the following discs—regular CD and CD-R/RW (recorded in the audio CD format and in the ISO 9660 format for MP3 files). To insert discs Main Unit ONLY • When using an 8 cm disc, place it on the inner circle of the disc tray. - Page 14 To select a track • See the right column for an MP3 disc. While playing a disc... Increases the track numbers. Decreases the track numbers. To locate a particular portion While playing a disc, press and hold the button until the portion you want is reached.
-
Page 15: Playing Back From The Pc
Playing Back from the PC This System is equipped with a USB terminal on the front panel. You can connect your PC to this terminal and enjoy sound reproduced through your PC. When you connect your PC for the first time, follow the procedure below. -
Page 16: Adjustments
Daily Operations Remote Control CLOCK /TIMER CANCEL RHYTHM AX SOUND MODE FADE MUTING Main unit BEEP SUBWOOFER LEVEL + VOLUME +/– SOUND MODE SURROUND MODE SUBWOOFER LEVEL – RHYTHM AX —Sound and Other Adjustments Adjusting the Volume The volume level can be adjusted in 32 steps (VOL MIN, VOL 1 –... -
Page 17: Selecting The Sound Modes
Selecting the Sound Modes You can select one of the preset Sound Modes. Remote control: ROCK CLASSIC (Canceled) Main unit: ROCK (Canceled) ROCK Boosts low and high frequency. Good for vocal music. CLASSIC Good for classical music. Selecting the Surround Modes You can select one of the Surround Modes to create being- there feeling in your room. -
Page 18: Advanced Disc Operations
Advanced Disc Operations Remote Control 10 keys (1–10,+10) CANCEL ¢/4 REPEAT PROGRAM DISC 1 – 5 Main unit Programming the Playing Order —Program Play You can arrange the playing order of the tracks (up to 32 tracks) before you start playback. •... -
Page 19: Playing At Random-Random Play
To pause: To stop: To release it, press the button The System exits from again. Program Play. To skip: To check the programmed contents While the PROGRAM indicator lights on the display and before playback... in the programmed order. in the reverse order. To modify the program While the PROGRAM indicator lights on the display and before playback... -
Page 20: Repeating Playback-Repeat Play
Repeating Playback—Repeat Play You can repeat playback. • Repeat Play and Random Play cannot be used at the same time. Before playback or while playing... DISC* DISC* REPEAT ALL DISC REPEAT * See page 10. Repeat mode indicators Ex.: When One Disc Repeat (“REPEAT 1 DISC”) is selected. -
Page 21: Timer Operations
Remote Control SLEEP CLOCK /TIMER CANCEL Main unit STANDBY/ON Timer Operations Turning Off the Power Automatically With Sleep Timer, you can fall asleep to music. While the System is turned on... STANDBY/ON SLEEP 10 (Canceled) ¢ To check the time remaining until the shut-off time Setting the Daily Timer Using Daily Timer, you can wake up with your favorite song. - Page 22 Set the hour then minute for on-time. Set the hour then minute for off-time. Select the playback source—“TUNER FM,” “TUNER AM,” “CD,” “AUX,” or “USB.” Ex.: When “TUNER FM” is selected. 1 Select a preset station for “TUNER FM” and “TUNER AM.”...
-
Page 23: Daily Operations—Sound And Other Adjustments
Additional Information Learning More about This System Daily Operations—Playback (see pages 8 to 12) Listening to the Radio: ¡ • When you repeatedly press step by step. • If you store a new station into an occupied preset number, the previously stored station in that number will be erased. -
Page 24: Maintenance
Maintenance To get the best performance of the System, keep your discs clean. Handling discs • Remove the disc from its case by holding it at the edge while pressing the center hole lightly. • Do not touch the shiny surface of the disc, or bend the disc. •... -
Page 25: Specifications
Specifications Amplifier section—CA-HXC6 Output Power: SUB WOOFER: 170 W per channel, min. RMS, driven into 6 Ω at 63 Hz with no more than 10% total harmonic distortion. MAIN SPEAKER: 80 W per channel, min. RMS, driven into 4 Ω at 1 kHz with no more than 10% total harmonic distortion. - Page 28 © 2005 Victor Company of Japan, Limited 0305TMMMDWSAM...
Need help?
Do you have a question about the CA-HXC6 and is the answer not in the manual?
Questions and answers