Table of Contents

Related Manuals for JHS8 JHS-A006


Summary of Contents for JHS8 JHS-A006
-
Page 1: Owner S Manual
JHS8 TRADING COMPANY Owner s Manual Portable Air Conditioner Model No: JHS-A006 It is important that you read these instructions before using your new purchase and we strongly recommend that you keep them in a safe place for future reference. -
Page 2: Table Of Contents
Table of Contents Safety Instructions …………………………………………………………… 1-2 Specifications ……………………………………………………………………3 …………………………………………………4 U nit B od y A nd A ccessories ……………………………………………………………………5 A ccessories Wind ow K it Panel Installation ………………………………………………6 Control Panel ……………………………………………………………………7 Remote Control ……………………………………………………………. . . 8-10 Water D rainage ………………………………………………………………11 M aintenance ………………... -
Page 3: Safety Instructions
Safety Instructions IMPORTANT! The unit is designed for indoor operation. The unit is not designed to cool server rooms, sun rooms, or a room generating constant high levels of heat. Rating: This unit must be connected to a 2 2 0 -2 4 0 V ~ /50Hz grounded outlet. The installation must be in accordance with regulations of the country where the unit is used. - Page 4 Safety Instructions Do not use your air conditioner: If the power cable wires When small children may On a slope or uneven Close to a heat source are frayed or cut be left unattended surface This products is not made If there is a risk of liquid Inside unit exposed to the In a permanent very humid...
-
Page 5: Specifications
Specifi cations JHS-A006 Cooling Capacity 12000BTU/h Heating Capacity Cooling 142 W / 6.0 A Power Consumption / Current Moisture Removal in Cooling mod 37 L /day Power Supply 2 2 0 -2 4 0 V ~ / 5 0 H z i r f º... -
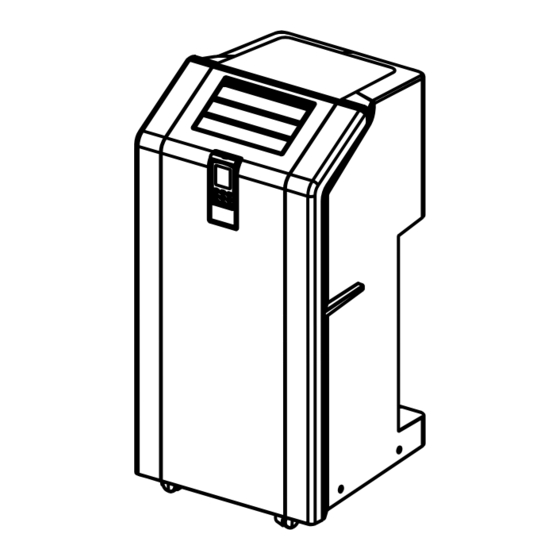
Page 6: Unit Body And Accessories
Unit Body and Accessories E VA Filter Heat-Output Handle CON Filter Castor E VA Air-outlet Back Panel Control Panel Remote Control Front Panel... -
Page 7: A Ccessories
Unit Body and Accessories Accessories Activ e Carbon F ilter F ilter F rame ( O ptional) Exhaust P ipe O uter Exhaust Connector Water T ray Window K nit P anel... -
Page 8: Wind Ow K It Panel Installation
Window Kit Panel Installation Unit Body and Accessories Window K nit P anel P anel I n order to achiev e optimum ef f iciency, exhaust pipe and window kit panel must be used to output the heat air out of room as f ollowing: O uter Exhaust Connector Exhaust P ipe I nstallation M ethods :... -
Page 9: Control Panel
Connect the outer exhaust connector to window kit panel. M ake sure the air in exhaust pipe can run smoothly. T he exhaust pipe can be stretched to 5 0 0 mm~ 1 5 0 0 mm, which is designed based on the machine test data. -
Page 10: Remote Control
Unit Body and Accessories Remote Control Sudden power- of f happens during machine running, ma in base panel will hold the machine status bef ore power- of f in memory, af ter machine re- start, it will recov er the unit status in memory. Remote control can be used when it put on its machine position or put it out of machine . - Page 11 I ER nder U nit- O f f status, set T I M ER f or U nit- O n as f ollowing : P ress T I M ER f or the f irst time, T imer Hour indictor f or U nit- O n f lashes , then adjust U P / D O WN to setting Hour –...
- Page 12 D O W N : P ress this key to adjust the setting data of temperature, time and U P / timer as f ollowing U nder COO L / HEAT mode, press UP / D O WN to adjust the temperature setting data f rom 18 C ~3 2 C ,each press makes 1 C up/down.
-
Page 13: Water D Rainage
Unit Body and Accessories Water Drainage W hen internal water-tank is full, water-draining motor works abnormally. 10 minutes later ,U nit= - off automatically and water-full indicator turns on . After empty the water-tank, press P O W E R to re= - start the machine. W ater-drainage as following : P ower-off the power-supply and pull-out power cord . -
Page 14: M Aintenance
Unit Body and Accessories Maintenance B efore water-drainage, please power-off the unit and pull-out the power-plug firstly. P lease use a soft damp cloth to clean the unit. Don’ t use chemical agents, such as benzene, alcohol, gasoline and soon; otherwise the machine surface will be damaged, or even the machine itself. -
Page 15: Troubleshooting
Troubleshooting Never try to repair or dismantle the air condition yourself. Incompetent repairs result in loss of warranty and can endanger the user and the property. No power supply. Make sure the Connect to a functioning outlet and switch on. The air green light on the plug is lit.
Need help?
Do you have a question about the JHS-A006 and is the answer not in the manual?
Questions and answers