Advertisement
Thank you for choosing super quality air conditioner. Please be sure to
Thank you for choosing super quality air conditioner. Please be sure to
read this user's manual carefully before using the machine. Any problem, please
read this user's manual carefully before using the machine. Any problem, please
contact the professional service for help.
contact the professional service for help.
JHS8 Electrical (Australia) Pty Ltd
JHS8 Electrical (Australia) Pty Ltd
User's Manual
User's Manual
Portable Air Conditioner
Portable Air Conditioner
Model No: JHS-A001
Model No: JHS-A001D
Advertisement
Table of Contents

Related Manuals for JHS8 JHS-A001D


Summary of Contents for JHS8 JHS-A001D
- Page 1 JHS8 Electrical (Australia) Pty Ltd JHS8 Electrical (Australia) Pty Ltd User’s Manual User’s Manual Portable Air Conditioner Portable Air Conditioner Model No: JHS-A001D Model No: JHS-A001 Thank you for choosing super quality air conditioner. Please be sure to Thank you for choosing super quality air conditioner. Please be sure to read this user’s manual carefully before using the machine.
-
Page 2: Table Of Contents
CONTENTS IMPORTANT SAFEGUARDS…................3 PLACEMENT AND INSTALLATION…...............4 PARTS NAME….......................7 CONTROL PANEL…....................8 REMOTE CONTROL…..................9 OPERATION METHODS…..................9 WATER DRAINAGE…..................11 MAINTENANCE…....................12 TROUBLE SHOOTING…..................13... -
Page 3: Important Safeguards
IMPORTANT SAFEGUARDS Please read following safeguards carefully before using the machine: ·This machine just for domestic use, please don’t use it in any other places. ·Please use this machine indoor not outdoor, and place it in a dry environment. ·Don’t use the machine when any damage in power cord, plug or machine itself. Any damage, please contact professional serviceman for help. -
Page 4: Placement And Installation
Note : ·Place the machine on flat ground, and keep it far from around things at least 50cm. ·Make sure the socket can be reached from machine location. ·Keep the machine stand upright so that compressor can work well. ·Don’t run the machine near to gasoline or any other flammable liquids. ·Make sure free access of air-inlet and air-outlet. - Page 5 Installation ·Spin slide bar connector into exhaust hose first, then spin the exhaust hose into exhaust connector (counter-clockwise) . · Put slide bar connector into adjustable slide bar, adjust window open width in order slide bar match window well, and the length of slide bar is adjustable. (fig.2) (fig.2) Installation Errors ·Free access of exhaust pipe is important, installation errors will bring bad influence of...
- Page 6 How to fix the screw of adjustable slide bar 1. Disassemble the screw,washer and nut. 2. Separate 2 pieces of the slide bar and insert the screw into the hole. 3. Assemble the slide bar. 4. Tighten the washer and nut.
-
Page 7: Parts Name
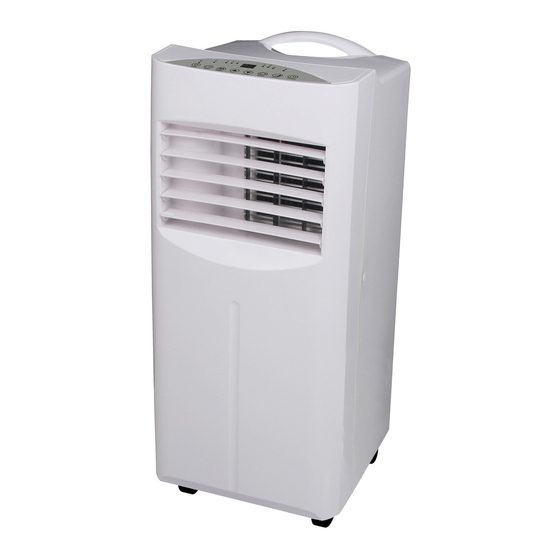
Parts Name Front side(fig.5) 1. Handle 2. Control Panel 3. Air-outlet 4. Fan blade 5. Castor fig.5 Back Side(fig.6) 6. Filter frame upper 7. Exhaust Connector 8. Filter frame lower 9. Rubber plug 10. Plug cap 11.Power Cord fig.6 Check packing accessories, read user’s manual to get how to use them. (fig.7) (fig.7) 1. -
Page 8: Control Panel
Control Panel 1. POWER: press this key to turn on/off machine. After machine turns on, default value is cooling mode with low fan speed. 2. MODE: after machine turns on, press this key to select cooling, dehumidifying , fan and heating mode 3. -
Page 9: Remote Control
Remote Control 1. Power 2. Timer 3. Down 4. Mode 5. Up 7. Sleeping 8. Swing Operation Methods Cooling mode ·After machine turns on, default value is cooling mode with 22℃ and low fan speed. ·Press “ MODE” to select cooling mode, cooling mode indictor turns on . ·Press “... - Page 10 Note: When heating mode works, if don’t want to empty the water-tank under this mode, please connect a water-drainage-pipe to remove the water out continuously Fan mode ·Press “ MODE” to select fan mode, fan mode indicator turns on . ·Press “SPEED”...
-
Page 11: Water Drainage
Water Drainage This machine with auto-water-evaporating system. Condensed-water cycle to cool down the condenser, which will not only improve cooling efficiency, but also save energy. · If inner water tank is full, “W.F” indicator will flashed on the screen , machine enter into standby mode, buzzer shouts , compressor stops and all keys is invalid till machine recovers to be normal . -
Page 12: Maintenance
Maintenance Note: in order to avoid electric shocks, please power-off the machine and pull out plug before maintenances or repairs. Cleaning ·Please pull out plug before cleaning . ·Use soft semi-dry cloth to clean the machine. Don’t use chemical agents, such as benzene, alcohol, gasoline and so on ;... -
Page 13: Trouble Shooting
Trouble Shooting Please contact professional serviceman without delay in following situation Trouble Cause Solution Power off Power on Machine cannot water-full indicator turns on Drain water out work Direct sunlight Draw the curtains Machine Door and windows are open , Close the door and windows, move out many heat sources in the room .
Need help?
Do you have a question about the JHS-A001D and is the answer not in the manual?
Questions and answers
Warranty Replacement for JHS Portable AC15000BTU?