Advertisement
Service
Zusätzlich erforder-
Manual
liche Unterlagen
für den
MCD 36
Komplettservice:
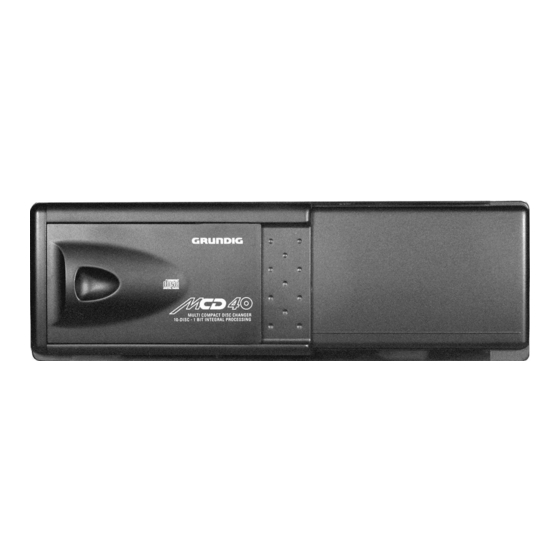
MCD 40
Additionally
required Service
Sach-Nr./Part No.
Manuals for the
72010-748.30
Complete Service:
MCD 36
(9.18335-8151 / G.HF 2800)
MCD 40
(75.1118-1051 / G.HF 2900)
(9.18337-8151 / G.HF 0400)
Änderungen vorbehalten
Subject to alteration
SERVICE MANUAL
Service
Manual
Sicherheit
Safety
Sach-Nr./Part No.
72010-800.00
Printed in Germany
VK 231 0396
MCD 36
MCD 40
Service Manual Sach-Nr.
Service Manual Part No.
72010-748.30
Advertisement
Table of Contents

Subscribe to Our Youtube Channel
Related Manuals for Grundig MCD 36


Summary of Contents for Grundig MCD 36
- Page 1 SERVICE MANUAL Service Service Zusätzlich erforder- Manual liche Unterlagen Manual für den MCD 36 Komplettservice: Sicherheit MCD 40 Safety Additionally required Service Sach-Nr./Part No. Sach-Nr./Part No. Manuals for the 72010-748.30 72010-800.00 Complete Service: MCD 36 MCD 40 MCD 36 (9.18335-8151 / G.HF 2800) MCD 40 (75.1118-1051 / G.HF 2900)
-
Page 2: Technical Data
Weigth approx................2kg Abmessungen (MCD 36) 25 x 6,4 x 16cm, (MCD 40) 25 x 8,1 x 16cm Dimensions ... (MCD 36) 25 x 6.4 x 16cm, (MCD 40) 25 x 8.1 x 16cm 1 - 2 GRUNDIG Service... -
Page 3: Disassembly Instructions
MCD 36 / MCD 40 Allgemeiner Teil / General Section Ausbauhinweise Disassembly Instructions 1. Ausbau des Gehäuses (MCD 36) Fig. 1 1. Disassembling the Cabinet (MCD 36) Fig. 1 1a. Gehäuseoberteil abnehmen 1a. Removing the Upper Part of the Cabinet - 9 Schrauben A herausdrehen. - Page 4 - Hauptplatte "Main PCB" ausbauen (Pkt. 2). - Remove the "Main PCB" (para 2). - Schrauben C136 (2 Schrauben bei MCD 36, 4 Schrauben bei - Undo the screws C136 (MCD 36: 2 screws, MCD 40: 4 screws, MCD 40, Fig. 3) herausdrehen. Fig. 3).
- Page 5 MCD 36 / MCD 40 Allgemeiner Teil / General Section CD-PCB FLEXPRINT LASER PICK- UP Fig. 6 Fig. 7 7. Ausbau der Leiterplatte "CD-PCB" 7. Removing the "CD-PCB" - Gehäuse ausbauen (Pkt. 1) - Remove the cabinet (para 1) - 2 Schrauben C72 und Schraube C73 herausdrehen (Fig. 6).
- Page 6 Allgemeiner Teil / General Section MCD 36 / MCD 40 10. Ausbau der Laufwerkmechanik (MCD 40) 10. Removing the Drive Mechanism (MCD 40) - Gehäuse ausbauen (Pkt. 1). - Remove the cabinet (para 1). - 4 Schrauben C136 herausdrehen und Blende C134 abnehmen - Undo 4 screws C136 and remove the mechanical panel C134 (Fig.
-
Page 7: Grundig Service 1
MCD 36 / MCD 40 Allgemeiner Teil / General Section Steuerungsablauf (Mechanik) Flowchart of Control Operation (Mechanics) MAGAZINE IN MAG IN ELV (LIFT) + ELV { ELV (LIFT) – ELV | LOAD + LOAD { LOAD – LOAD | LOAD OUT... -
Page 8: Adjustment
Abgleich / Adjustment MCD 36 / MCD 40 Abgleich Meßgeräte: Autosuper, DC-Voltmeter, Test-CD (Sach-Nr. 72008-376.00). Abgleich Vorbereitung Abgleichvorgang ± Tracking offset DC-Voltmeter an die Meßpunkte "VR" und "TE" anschlie- +10mV 3mV mit dem Regler SVR651 einstellen. ßen (– = VR, + = TE). -
Page 9: Block Diagram
MCD 36 / MCD 40 Schaltpläne und Platinenabbildungen / Circuit Diagrams and Layout of PCBs MCD 36 / MCD 40 Schaltpläne und Platinenabbildungen / Circuit Diagrams and Layout of PCBs Schaltpläne und Platinenabbildungen Schaltbild / Circuit Diagram Circuit Diagrams and Layout of PCBs... - Page 10 Schaltpläne und Platinenabbildungen / Circuit Diagrams and Layout of PCBs MCD 36 / MCD 40 Schaltpläne und Platinenabbildungen / Circuit Diagrams and Layout of PCBs MCD 36 / MCD 40 Schaltbild / Circuit Diagram (1) Hauptplatte / Main PCB CONNECT PCB BATT.
- Page 11 MCD 36 / MCD 40 Schaltpläne und Platinenabbildungen / Circuit Diagrams and Layout of PCBs MCD 36 / MCD 40 Schaltpläne und Platinenabbildungen / Circuit Diagrams and Layout of PCBs Schaltbild / Circuit Diagram (2) Hauptplatte / Main PCB TRACKING...
- Page 12 Schaltpläne und Platinenabbildungen / Circuit Diagrams and Layout of PCBs MCD 36 / MCD 40 Schaltpläne und Platinenabbildungen / Circuit Diagrams and Layout of PCBs MCD 36 / MCD 40 Leiterplatten / PCBs Bestückungsseite INSIDE Component side LOAD MOTOR Lötseite Solder side MAIN P.C.B.
-
Page 13: Ic Block Diagrams
MCD 36 / MCD 40 Schaltpläne und Platinenabbildungen / Circuit Diagrams and Layout of PCBs IC Blockdiagramme IC Block Diagrams IC601 LC78620E CIRCUIT OPERATION DESCRIPTION LC78620E GRUNDIG Service 3 - 9... - Page 14 Schaltpläne und Platinenabbildungen / Circuit Diagrams and Layout of PCBs MCD 36 / MCD 40 IC650 LA9230MS CIRCUIT OPERATION DESCRIPTION LA9230MS 3 - 10 GRUNDIG Service...
- Page 15 MCD 36 / MCD 40 Schaltpläne und Platinenabbildungen / Circuit Diagrams and Layout of PCBs IC801 LC66358B CIRCUIT OPERATION DESCRIPTION LC66358B GRUNDIG Service 3 - 11...
- Page 16 Schaltpläne und Platinenabbildungen / Circuit Diagrams and Layout of PCBs MCD 36 / MCD 40 IC651 BA6999FB IC850 LB1644 IC701/702 NJM4558M IC803 PST9138N IC802 S8054HN 3 - 12 GRUNDIG Service...
- Page 17 75952-041.74 TRANS.UN 2215 D 801 8309-720-067 Z DIODE 6,8 B 0,5W Q 703 75952-041.74 TRANS.UN 2215 12 / 95 MCD 36 D 802 75952-041.68 DIODE DSB 010 Q 801 75952-041.93 TRANS.2 SC 2812 L 6 D 803 75952-041.68 DIODE DSB 010 Q 802 75987-459.61...
- Page 18 Explosionszeichnungen und Ersatzteilliste / Exploded Views and Spare Parts List MCD 36 MCD 36 4 - 2 GRUNDIG Service...
- Page 19 POS. SACHNUMMER BEZEICHNUNG POS. SACHNUMMER BEZEICHNUNG Ersatzteilliste POS. PART NUMBER DESCRIPTION POS. PART NUMBER DESCRIPTION Spare Parts List D 502 75952-022.06 DIODE DCC 010 Q 700 75952-041.93 TRANS.2 SC 2812 L 6 D 503 75953-506.23 DIODE DCA 010 Q 701 75952-041.42 TRANS.2 SA 1341 TA 32700 #...
- Page 20 Explosionszeichnungen und Ersatzteilliste / Exploded Views and Spare Parts List MCD 40 MCD 40 Änderungen vorbehalten Printed in Germany Service Manual Sach-Nr. Subject to alteration VK 231 0396 Service Manual Part No. 72010-748.30...
Need help?
Do you have a question about the MCD 36 and is the answer not in the manual?
Questions and answers