peoplenet TABLET & BLU.2 Quick Reference Manual
Hide thumbs
Also See for TABLET & BLU.2:
- Quick reference manual (20 pages) ,
- Installation manual (23 pages)
Table of Contents
Advertisement
US Headquarters
Canada
PeopleNet
PeopleNet Canada
4400 Baker Road
1100 Burloak Dr.
Minnetonka, MN 55343-8684
Burlington, Ontario L 7L 6B2
USA
Canada
PeopleNet TABLET, eDriver Logs and OnBoard Event Recording are registered
trademarks of PeopleNet. CoPilot Truck is a trademark of ALK Technologies,
Inc. Pro-TREAD In-Cab is a trademark of ITI Corporation and Pro-TREAD. TripPak
SCANNING is a trademark of ACS Expedited Solutions. ©2013 PeopleNet.
All rights reserved. This information is subject to change without notice.
Printed in U.S.A. 4/13
D-011-0504-AA
Contact
(888) 346-3486
(952) 908-6129 Fax
Suite 300
•
info @ peoplenetonline.com
www.peoplenetonline.com
TABLET
& BLU.2
®
QUICK REFERENCE GUIDE
PeopleNet Customer Support
888-346-3486
Advertisement
Table of Contents

Related Manuals for peoplenet TABLET & BLU.2


Summary of Contents for peoplenet TABLET & BLU.2
- Page 1 Canada www.peoplenetonline.com PeopleNet TABLET, eDriver Logs and OnBoard Event Recording are registered trademarks of PeopleNet. CoPilot Truck is a trademark of ALK Technologies, Inc. Pro-TREAD In-Cab is a trademark of ITI Corporation and Pro-TREAD. TripPak PeopleNet Customer Support SCANNING is a trademark of ACS Expedited Solutions. ©2013 PeopleNet.
-
Page 2: Table Of Contents
TABLE OF CONTENTS TABLE OF CONTENTS OVERVIEW SIGNATURE CAPTURE (TABLET) ......26 ................4 Status Icons ................5 USING THE BAR CODE SCANNER (TABLET) ..TABLET Docking Station LEDs ..........5 IN-CAB PRINTING & PDF VIEWING (TABLET) ..Soft Keyboard .................5 TABLET Keypad Buttons ............6 ENGINE DATA .............. -
Page 3: Overview
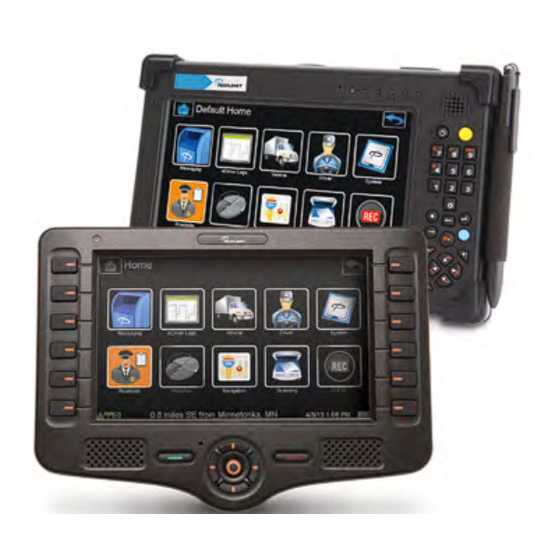
OVERVIEW OVERVIEW STATUS ICONS Satellite Communications GPS Signal Present Active No GPS Signal Available No OBC Communication Cellular Present New Message Notification (flashing during data call) Wi-Fi Network is in Range No Cellular Available Failed Data Call TABLET DOCKING STATION LEDs 1st LED: Power LED Home Button The Home button brings you back to the On –... -
Page 4: Blu.2 Device Buttons
OPERATION Button some buttons (see Function Button requirements below). Left: Top Button Disabled Blue Button Returns display to PeopleNet Left: Second Button Disabled or Return to application, when 3rd party application ICAP Button is running (e.g. In-Cab Scanning, ITI Left: Third Button Disabled Training, or Navigation). -
Page 5: Using The Display
In addition, an Un-docked Movement Alarm will be immediately sent to the PeopleNet Fleet Manager by the Onboard Computer, indicating TABLET is not docked while ACTION BAR the vehicle is moving. -
Page 6: Custom Fleet Home Setup
4. Select SHORTCUTS from the list on the left and press vehicle is moving. Safe Mode is activated by the fleet administrator the RIGHT ARROW to add them to your custom Fleet who configures the unit from the PeopleNet Fleet Manager Home screen. and sets the parameters for use. -
Page 7: Edriver Logs
SAFE MODE SAFE MODE eDRIVER LOGS SAFE MODE MESSAGING ® If the driver utilizes eDriver Logs, Drive Time Available, For additional hands-free safety in the cab, play messages from On-Duty Time Available, Cycle Time Available, and Off-Duty Safe Mode while driving. (PC) for Personal Conveyance will be visible in Safe Mode. -
Page 8: Drivers & Users
DRIVERS & USERS DRIVERS & USERS CHANGING CURRENT DRIVERS The Current Driver is the user that is associated with the engine data collected, including miles driven. NOTE: Change Current Driver will appear only if there are two For vehicles using eDriver Logs, determination of the Current drivers logged in and you are a non-eDriver logs user. -
Page 9: Logging Out
DRIVERS & USERS MESSAGES LOGGING OUT 1. To view the Inbox, select MESSAGING on the Home screen then select INBOX on the Messaging screen. 1. Select the LOGOUT shortcut in the Driver menu to display the Logout screen. The Active User will be displayed as the logout recipient. -
Page 10: Sending A New Message
MESSAGES MESSAGES SENDING A NEW MESSAGE • The short cut buttons at the bottom of the screen allow the driver to: 1. Create a new email by either selecting the PLAY/PAUSE a message using CREATE EMAIL short cut on the Messaging ¡... -
Page 11: Sending A Form
MESSAGES MESSAGES SENDING A FORM 5. Press the SEND button. NOTE: The SEND button functions when all required fields 1. Create a new form by either selecting the have been completed. CREATE FORM short cut on the Messaging screen or by selecting the FORM short cut 6. -
Page 12: Hot Keys
MESSAGES MESSAGES NOTE: 4. Enter the CONTACT’S NAME AND EMAIL ADDRESS, The Hot Keys short cut will not appear if Hot Keys have then press SUBMIT. not been configured by the fleet administrator. 3. The Hot Keys screen shows the names of forms that have been assigned to certain function keys. -
Page 13: Image Capture (Tablet)
IMAGE CAPTURE IMAGE CAPTURE (TABLET) (TABLET) USING THE CAMERA 5. Click SAVE to add the image to the form. A thumbnail picture of the image will appear in the image capture field on the form. NOTE: Image Capture is only available with TABLET. Forms can contain image capture fields to attach pictures in the form. -
Page 14: Signature Capture (Tablet)
IMAGE CAPTURE SIGNATURE CAPTURE (TABLET) (TABLET) 3. All photo images on the external USB device will be displayed. 2. Enter the signature and click the OK button to save the image to the form. 4. Highlight the desired image to import to the form and click the OK button. -
Page 15: In-Cab Printing & Pdf Viewing (Tablet)
USING THE BAR CODE SCANNER ENGINE DATA (TABLET) 1. Place the cursor on a data entry field. View real-time engine performance information for a trip, leg or any report duration from the Engine Data screen. 2. Click the YELLOW button on TABLET 1. -
Page 16: Onboard Event Recording (Oer)
ENGINE DATA ENGINE DATA Option 1: Recording Events (manual trigger) SHORT IDLE: The amount of time you have idled less than the company goal (hours : minutes). 1. Select the OER short cut from the Home screen. SHORT IDLE %: Percentage of time spent in short idle. NO. -
Page 17: System Diagnostics
SYSTEM DIAGNOSTICS SYSTEM DIAGNOSTICS System diagnostics displays the information relating to the 2. Press SERVICES to access troubleshooting options for Onboard Computer (OBC) and the display. the display and In-Cab Scanning, Training, and Navigation. 1. Select the SETTINGS shortcut from the System menu 3. -
Page 18: Workflow Routing With In-Cab Navigation
To start the trip prior to the appointed start time, press IN-CAB NAVIGATION the START button from the Trips screen. PeopleNet provides routing functionality with Automated Workflow to subscribers of In-Cab Navigation in partnership with Telogis NaviGo or ALK CoPilot Truck. This is made ™... -
Page 19: Connecting To A Wi-Fi Network
CONNECTING TO A WI-FI NETWORK BROWSING THE INTERNET Wi-Fi must be enabled through the PFM before you begin You must be connected to a Wi-Fi hotspot that has Internet these steps. connectivity before you can browse the Internet. 1. Select the WI-FI SETUP shortcut from the System menu. 1. -
Page 20: Device Training Videos
1. Select WHERE TO? on the NaviGo menu screen. DEVICE TRAINING VIDEOS 1. Select DEVICE TRAINING from the Driver menu to view the PeopleNet device training videos. 2. The list of available training videos will be displayed. 2. Select LOCATION SEARCH to search for a new location. -
Page 21: In-Cab Navigation (Navigo)
IN-CAB NAVIGATION IN-CAB NAVIGATION In Partnership with NaviGo In Partnership with NaviGo ™ ™ 5. Select POINTS OF INTEREST from the NaviGo menu screen Preview Route Button to search by category, such as restaurants or truck stops. Safety View Button Next maneuver indicator and distance from current location. -
Page 22: Safety View
IN-CAB NAVIGATION IN-CAB NAVIGATION In Partnership with NaviGo In Partnership with CoPilot Truck ™ ™ SAFETY VIEW 1. Select NAVIGATION from the Home screen. NOTE: In-Cab Navigation in partnership with ALK CoPilot 1. Press the SAFETY VIEW button on the Navigation View Truck is an optional service. -
Page 23: In-Cab Navigation (Copilot Truck)
IN-CAB NAVIGATION IN-CAB NAVIGATION In Partnership with CoPilot Truck In Partnership with CoPilot Truck ™ ™ PREVIEW ROUTE 5. Select GO to accept the suggested route, or 1. Select MY ROUTE from the CoPilot Truck menu and select the PREVIEW camera icon to preview your route. 6. -
Page 24: In-Cab Training
2. Enter the DRIVER ID associated with your Pro-TREAD login. NOTE: Contact your fleet manager for Driver ID assignment. PeopleNet Customer Support does not have access 6. Select the LESSON to play from the menu. to this information. 7. From the lesson you can PLAY, PAUSE, go BACK, and 3. -
Page 25: In-Cab Scanning
IN-CAB SCANNING IN-CAB SCANNING In Partnership with TripPak SCANNING In Partnership with TripPak SCANNING ™ ™ To access In-Cab Scanning: 1. Plug the TRIPPAK SCANNING SCANNER DEVICE in the display’s USB port. 2. Select the SCANNING shortcut from the Home screen to access TripPak scanning. - Page 26 IN-CAB SCANNING IN-CAB SCANNING In Partnership with TripPak SCANNING In Partnership with TripPak SCANNING ™ ™ 10. The application will provide a PENDING status until TripPak confirms that the transaction has been successfully received, and a reference number provided. 6. Repeat STEPS #5 AND #6 for each document for the stop location.
Need help?
Do you have a question about the TABLET & BLU.2 and is the answer not in the manual?
Questions and answers