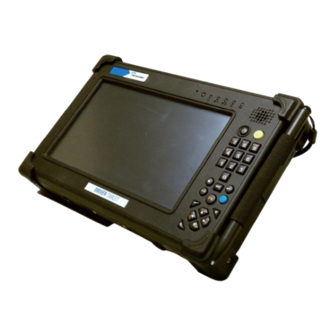
Summary of Contents for peoplenet TABLET
- Page 1 Optional Image PeopleNet TABLET Installation Guide Version 1.1 A guide for new TABLET & new OBC installations. (Refer to the PeopleNet TABLET Upgrade Guide if upgrading from classic OBC to TABLET.)
- Page 2 Date Completed Initial Draft – Pete L. 12/06/2010 Potential Candidate – Matt H. 1/10/11 Release Candidate – Matt H. 1/13/11 Updated Tablet Photo-Josh 2/3/11 PeopleNet TABLET is a trademark of PeopleNet Communications Corporation. © 2010 PeopleNet Communications. All rights reserved.
-
Page 3: Table Of Contents
TABLET Installation ......................12 Mounting the TABLET Dock ..................... 12 DC-DC Installation ......................13 Connecting the DC-DC Power Supply to the PeopleNet System ..........13 Mounting the DC-DC Power Supply ..................14 Connecting Power to the DC-DC Power Supply ............... 15 Plugging in TABLET Dock, Keyboard, and Speaker .............. -
Page 4: Table Of Figures
......16 IGURE ONNECTION WITH LECTRICAL APE AND 10: M ..............22 IGURE OUNTED ABLET RACKET 11: M ........... 22 IGURE OUNTED ABLET EVICE EYBOARD 12: M ..........23 IGURE OUNTED ABLET EVICE RONT © 2010 PeopleNet Communications. All rights reserved. -
Page 5: Before You Begin
Before You Begin An inventory of documentation and hardware before you install a new TABLET. -
Page 6: Peoplenet System Installation Manual
PeopleNet System Installation Manual PeopleNet System Installation Manual You need to complete some of the procedures in the PeopleNet Installation Manual before proceeding with this guide. These include the following three procedures: Mounting the g3 onboard computer (OBC) • Mounting and connecting antennas •... -
Page 7: Tablet Dock Install Kit
TABLET Dock Install Kit TABLET Dock Install Kit Part #: M-010-0256 The TABLET Dock Install Kit contains the following items pictured in Figure 3. Part Description Part # TABLET Dock H-053-0503 TABLET Interface Cable L-016-0510 “L” Support Brace H-050-0110 8-32 x 1” PH PAN... -
Page 8: Dc-Dc Power Supply Kit
In addition to the parts listed above and shown in Figure 4, you will need the following parts: Additional Parts Zip ties to secure excess cabling 4 screws to mount the power supply 1 butt connector to attach the fuse holder Electrical tape © 2010 PeopleNet Communications. All rights reserved. -
Page 9: Speaker Kit (Optional Equipment)
Speaker Kit (Optional equipment) Speaker Kit (Optional equipment) The Speaker Kit includes the following items pictured in figure 5. Part Description Part # Speaker H-040-0501 Speaker Mounting Bracket Thumb Screws Figure 5: Speaker Kit (Optional) © 2010 PeopleNet Communications. All rights reserved. -
Page 11: Installation
Installation Installation instructions for TABLET and related hardware. -
Page 12: Tablet Installation
4. Verify that both the “L” Support Brace and the TABLET Dock are securely mounted. 5. Place the TABLET into the TABLET Dock. 6. Lock the TABLET in place with the locking mechanism on the top of the TABLET Dock. The TABLET Dock is now mounted. -
Page 13: Dc-Dc Installation
Connecting the DC-DC Power Supply to the PeopleNet System 1. Locate the two blue barrel connectors; one from the Main Cable (for explanation, refer to the PeopleNet Installation Manual), and one from the TABLET Interface Cable. 2. Plug both connectors into their corresponding connectors on the DC-DC Power Supply. -
Page 14: Mounting The Dc-Dc Power Supply
The case of the DC-DC Power Supply is connected directly to ground. Do NOT allow it to come into contact with any power sources. The supplied 15 Amp fuse will not protect against this condition. © 2010 PeopleNet Communications. All rights reserved. -
Page 15: Connecting Power To The Dc-Dc Power Supply
3. Secure the black, grounding wire and silver, shielding wire to a secure, reliable ground. 4. Verify that you are ready to power up the TABLET. 5. Insert the 15 Amp ATC fuse into the fuse holder. © 2010 PeopleNet Communications. All rights reserved. -
Page 16: Plugging In Tablet Dock, Keyboard, And Speaker
DC-DC Installation Plugging in TABLET Dock, Keyboard, and Speaker 1. Connect the male 12 pin connector on the TABLET Interface cable to the back of the TABLET Dock. Figure 8: TABLET Dock connections 2. Connect the USB keyboard to either USB pigtail on the TABLET Dock a. -
Page 17: Firmware Download
Firmware Download Process for updating the g3 OBC firmware. -
Page 18: G3 Firmware Download Process
This process updates the g3 firmware to be compatible with the TABLET. 1. Insert the provided fuses to power up TABLET and the g3. If the onboard computer (OBC) has the correct code, TABLET will move directly to Process •... -
Page 19: Synchronization
Synchronization Process for activating the TABLET and the OBC. -
Page 20: Tablet-Obc Synchronization Process
You are prompted with “Is this a new installation?” 2. If the g3/OBC is brand new, select “Yes”. a. If the g3/OBC is currently active in the PFM(PeopleNet Feet Manager), select “No” 3. Enter your Installer Number and press the Tab key. -
Page 21: Installation Examples
Installation Examples Pictures from a successful installation. -
Page 22: Three Views Of A Tablet Installation
Three Views of a Tablet Installation Three Views of a Tablet Installation Figure 10: Mounted Tablet Bracket Figure 11: Mounted Tablet Device; No Keyboard © 2010 PeopleNet Communications. All rights reserved. -
Page 23: Figure 12: Mounted Tabletd
Three Views of a Tablet Installation Figure 12: Mounted Tablet Device; Front View © 2010 PeopleNet Communications. All rights reserved. -
Page 25: Still Have Questions
Still Have Questions? If you still have questions or want additional training, please take advantage of the additional resources in this section. -
Page 26: Peoplenet University
There are two ways to access PeopleNet University: 1. Click on the PeopleNet University icon on the main page when logging into the PFM. The page is always available in the PFM by clicking the Refresh button for your web browser.


Need help?
Do you have a question about the TABLET and is the answer not in the manual?
Questions and answers