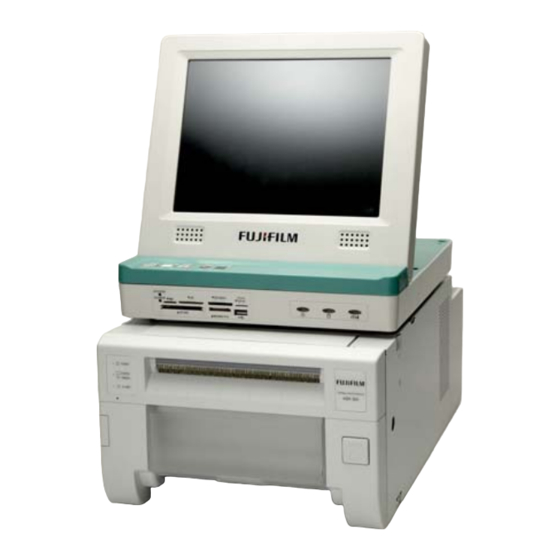
FujiFilm ASK-300 Quick Manual
Dye-sublimation compact kiosk system quick print station
Hide thumbs
Also See for ASK-300:
- Operation manual (60 pages) ,
- Quick start manual (9 pages) ,
- Information (3 pages)
Table of Contents
Advertisement
Quick Links
for FUJIFILM Dye-sublimation Compact Kiosk System
This "First Step Guide" is important. Please read this guide when initially setting the system.
Please see manuals of each product for detail operation.
【Necessary Items】
-Thermal photo printer "FUJIFILM ASK-300": with OPERATION MANUAL/DETAILED MANUAL
-Set of ink ribbon and paper for ASK-300 :6 x 4 inch for RK-CF800, 5 x 3.5 inch for RL-CF900,
-Photo Kiosk "FUJIFILM DPC Portable" and User Manual/Service Manual
Note:The service application "order-it portable" has already been installed to kiosk along with "Manual order-it portable".
-Two power cables for each set *Not included in the standard package.
-USB cable (Connector: A to B) *Not included in the standard package.
【Optional Items】
-Wireless module (Bluetooth & Wireless LAN) * When installing this module, consult your technical representative.
-DVD/CD player (external USB device for reading only)
-Wall mount bracket
-Receipt printer (external USB device) *This device is not manufacture's option. You can purchase it from your area.
(EPSON TM-T70 is recommended by FUJIFILM.)
order-it portable version:
V8.4.5 or later
First Step Guide
Quick Print Station
5 x 7 inch for R2L-CF460, 6 x 8 inch for R68-CF400
* You can print two of 6 x 4 inch images on one sheet, but when you order
with an odd number, a half of 6 x 8 inch ribbon will be wasted.
< Contents >
1.
1-1.
Printer
1-2.
Paper and ink ribbon
1-3.
PC
2.
3.
3-1.
USB cable
3-2.
3-3.
Wireless module(manufacture's option)
3-4.
DVD/CD player(manufacture's option)
3-5.
Receipt Printer(not manufacture's option)
4.
4-1.
First setting
4-2.
4-3.
(Language, Country, Currency, Password, Price)
4-4.
(Bluetooth, DVD/CD player, Receipt printer)
5.
6.
Fourth Edition
November 2011
Ref. No. PP3-B1381E4
Advertisement
Table of Contents

Related Manuals for FujiFilm ASK-300


Summary of Contents for FujiFilm ASK-300
- Page 1 -Thermal photo printer “FUJIFILM ASK-300”: with OPERATION MANUAL/DETAILED MANUAL -Set of ink ribbon and paper for ASK-300 :6 x 4 inch for RK-CF800, 5 x 3.5 inch for RL-CF900, 5 x 7 inch for R2L-CF460, 6 x 8 inch for R68-CF400 * You can print two of 6 x 4 inch images on one sheet, but when you order with an odd number, a half of 6 x 8 inch ribbon will be wasted.
- Page 2 1. Unpacking and confirming item 1-1. Printer 1-1-1. Unpack the printer box and take the printer out as described below. - 1 -...
- Page 3 1-1-2. Remove the protective tapes and sheets as described below. 1-2. Paper and ink ribbon Open the box of the paper and ink ribbon set, and take out each roll of paper and ink ribbon. 1-3. PC 1-3-1. Open the box of PC and take out the PC and the accessory box. 1-3-2.
- Page 4 2. Printer setting 2-1. Setting the paper and ink ribbon to the printer - 3 -...
- Page 5 3. PC setting and printer connection 3-1. USB cable Connect between PC and printer with the USB cable. NOTE The USB ports on the PC are for the printer and other device. You can connect 4 printers (max).If you want to make network with several PCs, please see “order-it” manual(chapter 5.) which is in Windows desktop for more details.
- Page 6 3-3-2. Rotate the screws to loosen the angle stand. 3-3-3. Take off the bottom cover with angle stand. To avoid injuring hands, do not put down the panel when cover is opened. 3-3-4. Take the Wireless module and cables from the box, and connect one end of the cable to the Wireless module.
- Page 7 3-3-6. Tighten the screws as shown below. 3-3-7. Using a screwdriver to poke out the two holes for Wireless module terminals. Do not hit the HDD inside with the screwdriver. 3-3-8. Insert the cables into the two antenna holes in the rear panel. 3-3-9.
- Page 8 3-3-10. Connect the antennas with the antenna cables. 3-3-11. Place the Wireless cables on the edge of the motherboard. 3-3-12. Close the bottom cover with angle stand. 3-3-13. Tighten the six screws shown below to complete the installation of the Wireless module. 3-4.
- Page 9 3-5. Receipt Printer (not manufacture’s option) If you have “Receipt Printer” option, connect the USB cable of printer to DPC Portable and turn on the power of printer. You have to install the driver to PC according to the manual of printer. - 8 -...
- Page 10 4. Application setting *Please see the order-it manual in the it-Manuals folder on Desktop for details of the application. 4-1. First setting 1) In a newly delivered DPC Portable, the [Choose a language] screen appears at the start. 2) Select the default language and press [Continue]. 4-2.
- Page 11 Order Approval: Print orders instantly Price: 0 External S/N of ASK-300: [blank] (Please input at ”Detect new printers”) If necessary, change the default settings in the above [assist-it] main screen. It seems that almost every shop will change “Default Language”, "Country”, ”Currency", "Price", "ID Photo format".
- Page 12 4-3-1. Default Language/Country/Currency 4-3-1-1. After pressing the [Edit the kiosk identification data] button in the main menu the following screen is displayed: The kiosk identification data comprise some basic information which is needed for the processing and printing of orders. Please see “order-it” manual which is in Windows desktop for more details. 'Default Language' sets the default language that is used by the order-it application after start-up.
- Page 13 It shall be understood that the ‘Currency ID’ must be correct. Otherwise the contents of the shopping cart, the receipt screen and receipts will likewise not be correct. Please be careful when changing the currency setting. After having pressed the [OK] button you will be asked whether you really want to currency.
- Page 14 4-3-2-1. Photo prints The ‘Photo prints’ setup is a two-step process. 4-3-2-1-1. Change the Product Group Name The first screen shows the initial name which is used for the ‘Photo Prints’ product group. If you want you can change this name by just tapping into the text box. After this action an onscreen keyboard screen appears which permits to change the name and to deactivate or activate the whole product group.
- Page 15 After having made the desired modifications leave this screen by pressing the [OK] button. Changes of the articles are shown in the article list: 4-3-2-2. ID Photo format If you want to use the other regulation of ID, you can set new design in “ID Photo Print” menu in the “Configure Print(print formats, articles and prices)”.
- Page 16 Second step: Press the [New ID photo pattern] button. As a result the particular screen for the creation of ID photo patterns appears. 4-3-2-2-3. The creation of ID photo patterns a) ID photo name This is the name which has been assigned to the given pattern. Be advised to use a unique name. Otherwise an existing article with the same name will be overwritten.
- Page 17 d) Alignment The alignment of the ID photos is based on the orientation of a normal print. There are three options available: ‘Horizontal Alignment’, ‘Vertical Alignment’ and ‘Best Fit’. Horizontal alignment means that the ID photos are oriented as in the following example: Vertical alignment means that the ID photos are oriented as for instance in the following example: Finally the Best Fit option means that either the horizontal or the vertical alignment is selected depending upon which alignment variant delivers more ID photos on the print.
- Page 18 If you uncheck the ‘Active’ check boxes, you can directly deactivate particular articles. A deactivated article is not shown within the available articles and for this reason is not offered by the kiosk. Additionally, you can edit the properties of every particular article. Proceed as follows: First, select the desired article and press the [Edit article] button: In the ‘Edit article’...
- Page 19 4-3-2-3. Greeting card prints Again, the setup of greeting cards prints is a variation of the previous article definition process. 4-3-2. Change the Product Group Name The first screen shows the initial name which is used for the ‘Greeting card prints’ article group. If you want you can change this name by just tapping into the text box.
- Page 20 Note that the templates in the Greeting card templates list comply with the aspect ratio of the currently selected print format. If, to cite an example, the currently selected print format is 4x6 only templates with an aspect ratio of 2 to 3 are figuring in the templates list. It can happen that no predefined templates are available for special print formats.
- Page 21 4-3-5. Edit Greeting Card Prints Articles The edit screen shows a list of all greeting card prints articles which have been defined. If you uncheck the ‘Active’ check boxes you can directly deactivate particular articles. A deactivated article is not shown within the available articles and for this reason is not offered by the kiosk. Additionally, you can edit the properties of every particular article.
- Page 22 4-3-3. Completion Complete the setup of the articles by pressing the [Continue]. assist-it will return to the main menu. 4-4. Option setting 4-4-1. Wireless module If you have set wireless module to DPC Portable, you need to set “order-it” in order to use the device. 4-4-1-1.
- Page 23 Otherwise, the Bluetooth icon is not shown in the data media selection screen so that it is not possible to send images via Bluetooth. Note: Bluetooth is disabled by default. If you use several DPCs, you need to set unique “Kiosk ID” to each DPCs by pressing [Edit the kiosk identification data] in the [assist-it] main menu.
- Page 24 Otherwise, the DVD icon is not shown in the data media selection screen so that it is not possible to read images from CDs and DVDs. Note: the CD/DVD check box is only displayed if a CD or DVD drive is attached to the kiosk. 4-4-3.
- Page 25 By default the option 'Print date on receipt' should be activated in order to print the current date on the receipt. The default title of the receipt is ‘Fujicolor’ in the first line and ‘order-it’ in the second line. If another text is entered in the text fields 'First row on the receipt print' and 'Second row on the receipt print' the inserted text will be used instead.
- Page 26 5. Test printing Take the following steps to print a test sheet using the order-it application. 5-1. In the first screen, touch anywhere to start. 5-2. In the second screen, press [Photos]. * If [ID photo] is pressed, select a layout and crop a face from one image if necessary. * If [Frames] is pressed, select a frame and set your image on it.
- Page 27 5-5. In the fifth screen, press the shooting date of image(s), and then press [Continue]. 5-6. In the sixth screen, select images and press [Continue] (* in case of [Single selection]). Once an image is pressed, the number of print “1” is displayed. If the image is pressed again, the number decreases to “0”.
- Page 28 5-9. In the ninth screen, enter your name or telephone number and press [Continue]. 5-10. In the tenth screen, eject the media card and press [Continue]. 5-11. In the eleventh screen, to complete the order, press [OK]. 6. Troubleshooting If you found any problems, check the following countermeasures. 6-1.
- Page 29 6-5. When you cannot recognize the serial number of printer ASK-300 has two serial numbers. One is internal USB serial number and the other one is external serial number(which is displayed at the model label of printer. But “order-it” cannot recognize this number automatically.).
- Page 30 6-5-5. Press [Printer] tab and [1D LUT]. 6-5-6. Adjust Red, Green and Blue by slide bar. Once you press [Ok], 1D LUT file will be created and the color of print will be changed. If you press [Clear 1D file], the 1D LUT file will be deleted.
- Page 31 補正カーブ1 6-5-7. Click [Start], and click the “order-it portable” icon on Windows desktop to restart the order-it application. - 30 -...
- Page 32 FUJIFILM Corporation 7-3, Akasaka 9-chome, Minato-ku, Tokyo 107-0052, Japan Ref.No. PP3-B1381E4 - 31 -...
Need help?
Do you have a question about the ASK-300 and is the answer not in the manual?
Questions and answers