Table of Contents
Advertisement
Quick Links
Download this manual
See also:
User Manual
Advertisement
Table of Contents

Subscribe to Our Youtube Channel
Related Manuals for O2 Xda Guide


Summary of Contents for O2 Xda Guide
- Page 1 Quick Start Guide Xda Guide We’re better, connected...
- Page 2 Welcome to the ø Xda Guide Use this booklet to get your Xda Guide up and running fast. We’re better, connected...
-
Page 3: Table Of Contents
Connecting to a computer Installing the battery Installing a microSD™ card Synching your Xda Guide with your computer Charging the battery Copying files to your Xda Guide Assembling the in-car holder Synching music files Get connected Listening to music Resetting your Xda Guide... -
Page 4: Your New Xda Guide
Your new Xda Guide What’s in the box? Xda Guide handset Battery Power adaptor Screen protector Wired stereo headset USB cable Pouch In-car holder Car charger 1GB MicroSD™ card... -
Page 5: Quick Start Guide
Quick Start Guide Quick Start Guide Xda Guide We’re better, connected Getting Started CD Xda Guide All rights reserved. Portions © 2008 Microsoft Corporation Getting Started Disc Includes: Windows Mobile software Microsoft® ActiveSync® 4.5 (for XP) Windows Mobile Device Center (for Vista) Microsoft®... -
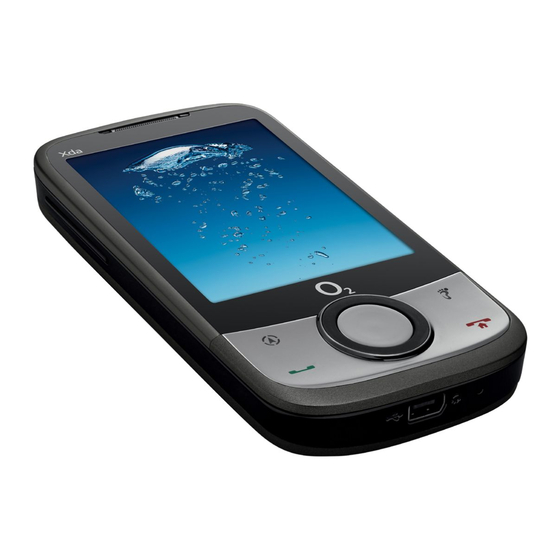
Page 6: Tour Of The Xda Guide
Tour of your ø Xda Guide Earpiece Notification LED receiver LCD Touch Screen HTC Footprints Talk / Send End Key Navigation Key with Enter button LED indicator status Green – Battery is fully-charged Flashing green – SMS, MMS or email reminders Amber –... - Page 7 3.2 Megapixel Camera Power Speaker Microphone Back Cover Sync Connector Strap Holder...
- Page 8 Stylus Volume Up Volume Down...
-
Page 9: Inserting Your Sim Card
Inserting your sim card Before you start using your Xda Guide you’ll need to insert your sim card. This contains your mobile phone number. Make sure the Xda Guide is turned off. Remove the back cover by using your thumb or finger to lift it from the bottom. -
Page 10: Installing A Microsd™ Card
Using a microSD card gives you additional memory to store anything you want. We’ve included one with your Xda Guide which contains map data for the CoPilot® (Sat Nav) application, but you can use the available space on it to store other things, such as photos and music files. -
Page 11: Charging The Battery
The battery in the Xda Guide should be partially charged, but you’ll need to charge it properly before you start using it. Plug the USB connector of the AC adapter into the slot on your Xda Guide. Plug the AC adapter into an electrical outlet. -
Page 12: Assembling The In-Car Holder
Assembling the in-car holder Match the two tabs on the base with the slots on the cradle and slide it firmly down until the tabs click into place. Installing the in-car holder in your vehicle Place the suction pad on a smooth surface, such as the windscreen, and push the lever so that the suction pad attaches itself firmly. - Page 13 NaviPanel opens automatically so you can use the GPS. To remove the Xda Guide from the holder use your thumb to push the top edge of the cradle up slightly and with your fingers, push the Xda Guide, through the...
-
Page 14: Switching On
Switching on Once you’ve inserted your sim card and fully charged the battery, you’re ready to switch on your Xda Guide. Press the power button. A Quick Start Wizard takes you through the calibration of the screen and sets up the timezone, date, time and password. -
Page 15: Connection Settings
Setting up your data connection settings After your Xda Guide restarts, you’ll be asked if you want to automatically set up its data connections. This means the Xda Guide will set up your 3G/GPRS and data for you. To automatically set up your data connection settings 1. -
Page 16: The Touchflo™ Home Screen
The TouchFLO™ home Screen The TouchFLO screen is the Xda Guide home screen and from here you can access functions such as contacts, messaging, email, music and internet. Touch the icon on the screen to open the next window. - Page 17 The rest of this Quick Start Guide will show you how to use some of the home screen tabs. For a more complete explanation of all the tabs go to the Full User Manual which you’ll find on the Getting Started CD that comes with your Xda Guide.
-
Page 18: Making The First Call
TALK/SEND Press the button again to dial the number. Tip: When on a call, use the volume button on the side of the Xda Guide to turn it up or down. Checking for missed calls If you’ve missed a call the will show in the title bar and on the home screen. -
Page 19: Typing Text
Typing text When you need to enter text you’ve got a choice of three keypads. Choose between them by tapping the in the taskbar. Full QWERTY Compact QWERTY Phone keypad keypad keypad Tap the keys to type text. Remember if you’re not using the full QWERTY keypad you may need to tap a key more than once to choose the letter you need. -
Page 20: Basic Settings
Basic settings Ring tone TALK/SEND Menu and Options. Press to open the phone screen and then tap Ring Tone list choose the ring tone you want and tap OK. From the Alarm Clock Select the Home tab and tap the time display. Alarms Tap the tab. - Page 21 Phone profile Profiles let you choose how you’re alerted to an incoming call. Settings tab and tap Sounds. On the home screen, slide to the Choose from: Normal, Vibrate, Silent or Automatic. Automatic means that any calls received during appointments you’ve put in your Calendar will vibrate only.
- Page 22 Device lock Turning on the device lock means that you’ll need to enter a password to unlock your Xda Guide if it hasn’t been used for a while. On the home screen slide to the Settings tab and tap settings.
- Page 23 On the Advanced tab, you can set the length of time before the backlight and screen of your Xda Guide turns off. You will find settings for both battery and external power. Once you have selected your power saving settings, tap OK.
-
Page 24: Adding Favourite Contacts
Xda Guide’s memory. Start Programs Manager. Menu Select All, then tap Menu Save to Contacts. If you have contacts saved on both the sim card and your Xda Guide’s memory they will show up twice on your contacts list. - Page 25 To select favourite contacts People On the home screen slide to the tab. Touch an empty slot on the screen and then select the contact you want. Select the phone number or email address to attach to your favourite contact. Tip: If there’s no picture linked to the contact, the next screen allows you to select or take a picture of the contact.
-
Page 26: Sending A Text Message
Sending a text message On the home screen slide to the Messages tab and tap Enter the mobile phone number you want to send to into the field. Tip: If you tap you can choose a number from your contact list. Type your message and then tap Send. -
Page 27: Htc Footprints
HTC Footprints™ HTC Footprints provides a way to take photos and record and share information on places you’ve been. To take a photo and add local information: FOOTPRINTS Press the button. To take the photo point the camera and press the ENTER button. - Page 28 To find somewhere you’ve been Your location photos are organised in categories so you can find them again. Once you’ve found the one you want you can use your GPS software to find the location details again or call the number you’ve attached to the photo. On the home screen slide to the Footprints tab and tap Footprints.
- Page 29 The Xda Guide is pre-loaded with maps of Ireland and the UK. To purchase additional www.copilotlive.com/o2 maps, please visit If there’s a GPS position displayed you can view it in Google Maps by tapping To play any recording attached to the photo tap For more details on using HTC Footprints application go to the Finding and Recording Places section of the Full User Manual.
-
Page 30: Using Wi-Fi
Using Wi-Fi If you’ve got access to a wireless network you can use Wi-Fi to connect your Xda Guide to the internet. On the home screen slide to the Settings tab and tap Communications. The names of any detected networks will be listed, select the one you want to connect... -
Page 31: Setting Up An Internet Email Account
Next. When your Xda Guide has found the settings for your email account, tap Next. Tip: If the settings are not found on your Xda Guide, it’ll connect to the internet to try and find them. Your name Account display name... - Page 32 To send an email On the home screen select the Mail tab and tap the email account you want to use. to create a new email. Type in the email address. Type mail and tap Send.
-
Page 33: Mobile Internet
Mobile internet Opera Mobile lets you browse the internet from your Xda Guide and has a special YouTube™ viewer. On the home screen slide to the Internet tab and tap Browser. Tap the address bar, type in the web address and tap . -
Page 34: Bluetooth
To connect your Xda Guide with a Bluetooth stereo headset: Make sure the headset is turned on, close enough to your Xda Guide and ‘visible’. Check the headset’s user manual to find out how to put it in ‘visible’ mode. - Page 35 When accepted, the name of the device is shown on screen, and you can then edit and change this name if you want. Tick the boxes of the services you want to use from the new device and tap Finish. For more details about Bluetooth go to the ‘Bluetooth’...
-
Page 36: Appointments
Appointments The Calendar of your Xda Guide keeps track of your appointments. To enter an appointment Home tab and tap Calendar. On the home screen select the On the Calendar screen tap Menu Appointment. Type in the appointment details and tap OK. -
Page 37: Things To Do
Things to do To create a to-do list Tap Start, Programs and Tasks. Tap here to add a new task. On the Tasks screen tap ENTER Type in your task and tap the key. Tip: You can also tap outside the text box when you’ve finished typing. -
Page 38: Taking Photos And Shooting Videos
Taking a photo On the home screen slide to the Photos and Videos tab and tap The screen will switch to landscape mode. Aim your Xda Guide at the subject. ENTER Press the button to take a photo. Shooting video... -
Page 39: Viewing Photos And Videos
Viewing photos and videos On the home screen slide to the Photos and Videos tab. Flip through your photos and videos by swiping your finger up or down on the centre screen. Tap a photo or video to view it in full screen mode. When viewing photos Use finger strokes to control your view of the image. - Page 40 Swipe your finger Swipe your finger clockwise to zoom in. anti-clockwise to zoom out.
- Page 41 When playing video Tap the screen to show the playback controls. You can also use the Album to view photos and videos. Tap Start, Programs Album (or tap Album at the bottom left of the screen in the Photos and Videos tab.
-
Page 42: Connecting To A Computer
Select ActiveSync when you need to synchronise information and files between your Xda Guide and your PC. Disk Drive This is only available when you’ve got a microSD card in your Xda Guide. This lets you quickly transfer files between the storage card and your PC. -
Page 43: Internet Sharing
Internet Sharing Use your Xda Guide as a modem for your PC to connect to the internet. For further information please refer to the Full User Manual. - Page 44 Xda Guide and your PC go to the ‘Synchronising Information With Your Computer’ section of the Full User Manual. The software needed to sync your Xda Guide and your PC will depend on the operating system your computer uses. You will need either Microsoft ActiveSync® 4.5 (or later) for Windows XP or Windows Mobile®...
- Page 45 To synchronise with a PC using Windows XP Install Microsoft ActiveSync® 4.5 on your PC from the Getting Started CD. Connect your Xda Guide to your PC using the USB cable and the Synchronisation Setup Wizard will start automatically. Click Next.
-
Page 46: Copying Files To Your Xda Guide
Copying files to your Xda Guide To copy files from a PC to a microSD card in your Xda Guide. Connect the Xda Guide to your PC using the USB cable. Vista users click File Management Browse the contents of your device Windows Mobile®... -
Page 47: Synching Music Files
Open Windows Media® Player on your PC and then connect your Xda Guide using the USB cable. In the Device Setup dialogue box, enter the name of your Xda Guide and click Finish. On the left panel of Windows Media® Player, right click the name of your Xda Guide and Set Up Sync. -
Page 48: Listening To Music
Listening to music On the home screen slide to the Music tab. Browse the albums and songs loaded on your Xda Guide by swiping up or down the screen. Touch to play a track. For details about the music tab go to the TouchFLO section of the Full User Manual. -
Page 49: Resetting Your Xda Guide
Resetting your Xda Guide If your Xda Guide seems slow or unresponsive, you can perform a soft reset to shut down all programs and restart. Soft reset: Pull out the stylus. Remove the back cover. RESET Use the tip of the stylus to press the red button just below the microSD card slot. -
Page 50: Help And Troubleshooting
Help and troubleshooting Help online For help with using or setting up your Xda Guide, visit our dedicated Xda web site at o2.co.uk/xda Talk to us ø will be able to help if you have any general questions about your Xda Guide, questions about charges on your account or activation of ø... - Page 52 Telefónica O2 UK Limited, 260 Bath Road, Slough, Berks, SL1 4DX. Registered in England No.1743099. Registered office as above. © Telefónica O2 UK Limited 2008. Correct at time of going to press (02/09). O2CN815N 5954VCCP02/09 02/10...
Need help?
Do you have a question about the Xda Guide and is the answer not in the manual?
Questions and answers