
Related Manuals for Simrad EQ42


Summary of Contents for Simrad EQ42
- Page 1 M A N U A L M A N U A L M A N U A L M A N U A L SIMRAD EQ42/50/52 Echosounder 183-0300-202 English 02244.30...
-
Page 3: Table Of Contents
8.1.2 Processor, 41 8.1.3 Receiver/transmitter, 41 3. Position menu 8.1.4 Transducer, 41 3.1 Position display, 15 8.2 How the EQ42/50/52 works, 42 8.2.1 Transducer beamwidth, 43 8.2.2 Effects of the vessel’s 4. Navigation menu speed, 44 4.1 Highway display, 17 4.2 Navigation setup, 17... - Page 4 9.7.2 Determining the position for the transducers, 63 9.8 Preventive maintenance, 65 9.9 Repair and service, 65 9.10 Troubleshooting, 66 9.11 Specifications, 67 Appendix A Glossary of terms, 69 Index, 73 CE Declaration International warranty, 77 List of Simrad distributors...
-
Page 5: Introduction And System Familiarization
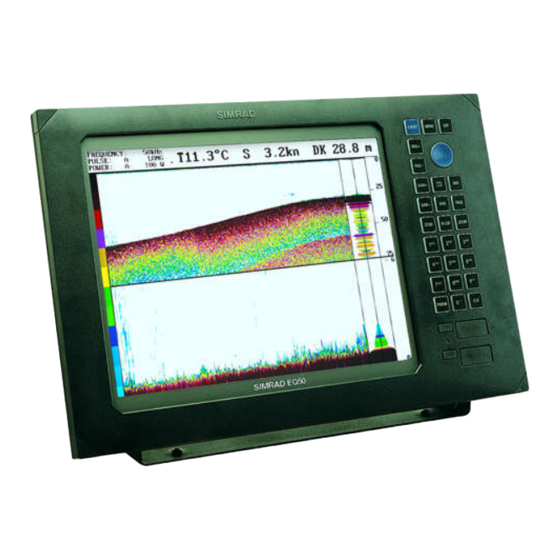
Echosounder and Fishfinder. Great care has been taken to create this innovative video sounder … both in design and performance. The EQ42/50/52 MKII is a unique new slim-line product in the Simrad Marine Line, and is available with a 10” ATFT (EQ42), 14” TFT (EQ50), or 15”... -
Page 6: Safety Summary
9.8 Preventive maintenance, 9.9 Repair and service, and 9.10 Troubleshooting. If your EQXX requires servicing or repair, call your authorized SIMRAD dealer. Power source, fuse and power cable Check that the DC power supplied to the unit is within the range of 10 to 32 volts. -
Page 7: Page And Window System
EQ42/50/52 Fundamentals & initial start-up Chapter 2 2.1 Fundamentals of the PAGE and WINdow system The EQXX Echosounder has a multi-function screen data presentation system. You can choose to have a full screen, or a screen divided into e.g. an echo display and two data/echo displays, etc. - Page 8 EQ42/50/52 Fundamentals & initial start-up Chapter 2 As many as 4 screen combinations or full screens can be saved in four pages. [PAGE] Press the key to toggle between the PAGE] four pages, or hold the [ key depressed to start a rotation of the four pages.
- Page 9 EQ42/50/52 Fundamentals & initial start-up Chapter 2 What you do now will determine POSITION which WINdow the display you are about to select will appear in. _1_ Position [WIN] Press the key repeatedly to scroll through the window system. [WIN]...
-
Page 10: Key Functions
EQ42/50/52 Fundamentals & initial start-up Chapter 2 2.2 Key functions A description of the key functions is available at the start-up display in the Quick guide. Some of the key functions are general and can be applied at any time, other key functions are related to a certain menu(s) and can only be applied when in the appropriate menu. -
Page 11: Menu Bar
EQ42/50/52 Fundamentals & initial start-up Chapter 2 Hotkey to Echo 1 i.e. jumps to window on the screen with Echo 1 ECHO A-SCP display; if none: inserts Echo 1 in active window. From active ECHO display: Toggles A-SCOPE on/off. The alpha-numeric keys inserts and selects data in data displays. -
Page 12: Menu Layout
EQ42/50/52 Fundamentals & initial start-up Chapter 2 call forward, or use the cursor key to highlight the function and press [ENT]. If you want to switch to a different menu, use the cursor key to move to the adjacent menu. -
Page 13: Initial Start-Up
EQ42/50/52 Fundamentals & initial start-up Chapter 2 always appear in a pop-up window. Which means that it will not take the place of another display, and it will not mess up the pre-set displays on the screen. And once you have confirmed the changes, or just want to exit the display, the display will disappear from the screen, as you have no further use for it. -
Page 14: Turn Power Off
EQ42/50/52 Fundamentals & initial start-up Chapter 2 2.6 Turn power off Call up INFO window, and… Press and hold until screen turns black The EQXX is now turned off. All data and setups are saved and stored in the internal memory and, of course, will be available next time the... -
Page 15: Position Menu
EQ42/50/52 Position menu Chapter 3 3. Position menu - see section 3.1. _1_ Position 3.1 Position display To present a position will require that the echosounder is connected to a navigator. MENU Call up the menu bar, and… 1, 1... - Page 16 EQ42/50/52 Position menu Chapter 3 water speed, and – course and bearing can be set to either magnetic or true. Open for change Move cursor to the value you want to change [CLR] Press to reset log Toggle between available values, change time and date...
-
Page 17: Navigation Menu
EQ42/50/52 Navigation menu Chapter 4 4. Navigation menu _1_ Highway 4.1 Highway display MENU Call up the menu bar, and… 2, 1 load highway display To present any information in the EQXX highway display will require that a navigator is connected via the NMEA input port. - Page 18 EQ42/50/52 Navigation menu Chapter 4 Highway display Nautical C359 ° ° ° ° X0.011 S 8.2 miles indi- cation on B314 ° ° ° ° D 17.3 V 7.4 horizontal lines indi- 0.04nm 0.04nm cates how many nautical 0.02nm 0.02nm...
-
Page 19: Operation Of The Eq40/50/52
Operation of the EQ /50/52 Chapter 5 5. ECHOSOUNDER MENU ECHO _1_ Echo 50kHz - see section 5.1. _2_ Echo 200kHz - see section 5.1. _3_ Bottom expansion 50kHz - see section 5.2. _4_ Bottom expansion 200kHz - see section 5.2. _5_ VRM expansion 50kHz - see section 5.3. - Page 20 Operation of the EQ /50/52 Chapter 5 This is the basic presentation mode (standard display) for observing fish schools and seabed. Some surface noise may appear just below the transmission line. FREQUENCY: 50kHz T *.*°C S 0.0kn DK 5.0 m PULSE: SHORT Transmission...
-
Page 21: Bottom Expansion
Operation of the EQ /50/52 Chapter 5 5.2 Bottom expansion The advanced bottom lock and expansion feature ensures a reliable depth readout and provides a compressed standard display in the upper 1/2 of the display. The bottom area can be magnified for better separation of echoes. -
Page 22: Vrm Expansion
Operation of the EQ /50/52 Chapter 5 5.3 VRM expansion This feature will provide an expanded view of the area near the Variable Range Marker which will give a better separation of echoes. The actual size of the expansion window can be adjusted in the Setup display for 38kHz/50kHz/200kHz. -
Page 23: A-Scope
Operation of the EQ /50/52 Chapter 5 5.4 A-scope The amplitude scope which appears in the right side of the echo display, can be turned on and off. The readout indicates the precise amplitude or strength of the last received ping (sounding), which often can be used for determining individual species of fish or hardness of the bottom. -
Page 24: Variable Range Marker
Operation of the EQ /50/52 Chapter 5 5.5 Variable range marker From active echo display: Gain direct access to the Variable Range Marker function Move the variable range marker up/down with cursor key Adjust the range by means of the +/- keys [VRM] With variable range marker active, press to bring up the VRM... - Page 25 Operation of the EQ /50/52 Chapter 5 Call Setup for Depth display Setup for Depth: 0 → → → → Scale for depth: 100 m Color for depth: 0 → → → → 20 °C Scale for temperature: Color for temperature: Interval of screen: TIME Time interval:...
-
Page 26: Echosounder Setup
‘Echosounder setup’ display Echosounder setup: Select transducers: Use the TYPE PORT cursor key to Transducer 1: Simrad Combi C50/200 ECHO2 move cursor BEAM ANGLE DEPTH around in the Transducer 1: 12/07° 00.0 m display, and... - Page 27 Operation of the EQ /50/52 Chapter 5 Do not connect transducers containing speed log sensor e.g. Airmar triducer B744V to ECHO2 port, as this will cause the 1kW pulses to be connected directly to the speed sensor and thereby damage the electronics beyond repair! DEPTH BELOW SURFACE, DEPTH BELOW “Display”...
-
Page 28: Presentation Setup
Operation of the EQ /50/52 Chapter 5 “Demo mode” - the echosounder will function as though a transducer was connected, but all data presented in the displays will be simulated. [ENT] Confirm entry with The system will not accept an illegal combination of transducers and will block from confirming changes to the setup display before the combination is right. -
Page 29: Miscellaneous Menu
(feature prepared for future DSC VHF) To receive a DSC Alarm and Message from VHF will require that the echosounder is connected to a compatible Simrad VHF radio- telephone. The message from the VHF will appear in a pop-up window together with an acoustic alarm. - Page 30 EQ42/50/52 Miscellaneous menu Chapter 6...
-
Page 31: Speed Alarm, Units & Language
EQ42/50/52 SETUP menu Chapter 7 7. SETUP MENU SETUP _1_ Speed alarm, units & language - see section 7.1. _2_ NMEA interface - see section 7.2. _3_ Alarm output - see section 7.3. _4_ Decca lanes - see section 7.4. - Page 32 EQ42/50/52 SETUP menu Chapter 7 Confirm entry, or… MENU exit function without making any changes Log speed sensor – set to ON, the position display will show water speed from external log sensor (via ECHO1 port). - with NMEA sentence VHW set to ON, the readout will show water speed from external water speed instrument (via NMEA port).
-
Page 33: Interface Setup Nmea
EQ42/50/52 SETUP menu Chapter 7 7.2 Interface setup, NMEA The EQXX has two in/out ports, which can be set individually to NMEA0183. For general interfacing we recommend NMEA2, as the NMEA1 port is both an NMEA port and the port for interfacing to the dual station. -
Page 34: Interface Setup
EQ42/50/52 SETUP menu Chapter 7 Interface setup: INPUT Port: NMEA1 – NMEA0183. NMEA2 – NMEA0183 Sentence String Status NMEA Water data: Water temperature: Water speed: Heading data: Heading: Position data: Position: Course: Speed: Navigation data: Navigation (APB, RMB and XTE):... - Page 35 EQ42/50/52 SETUP menu Chapter 7 Interface setup: OUTPUT Port: NMEA1 – NMEA0183. NMEA2 – NMEA0183 Sentence String NMEA1 NMEA2 Water data: Water temperature: Water speed and heading: Depth below keel: Depth below surface: Depth below transducer: Depth: Waypoint data: Waypoint location:...
-
Page 36: Alarm Output
EQ42/50/52 SETUP menu Chapter 7 7.4 Decca lanes To present a position will require that the echosounder is connected to a navigator. MENU Call up the menu bar, and… load decca chain display Leaf through the available chains – see below. -
Page 37: Loran C
EQ42/50/52 SETUP menu Chapter 7 7.5 Loran C To present a position will require that the echosounder is connected to a navigator. MENU Call up the menu bar, and… load Loran C chain display Leaf through chain numbers – see below. -
Page 38: Display Color
EQ42/50/52 SETUP menu Chapter 7 7.6 Display color MENU Call up the menu bar, and… press to call up the Palette setup display Palette setup: Name: Text: Background: Data cursor: Frame/fill in pop-up window: Active frame: Inactive frame: Menu text:... -
Page 39: Factory Settings
EQ42/50/52 SETUP menu Chapter 7 Alphanumeric names: First select the key with the desired letter, then you can either repeat the keystrokes, which will toggle between e.g. A, B, C, 1, or once you have selected one letter you can go back and forth in the alphabet by means of the +/- keys. - Page 40 EQ42/50/52 SETUP menu Chapter 7 To activate one of the functions in the “Factory presets” display, please follow the instructions in the display, or exit without making any [MENU]. changes by pressing Attempting to make any type of change from this display will first of all generate a WARNING display that you are about to7 erase some or all data/settings.
-
Page 41: Parts Of An Echosounder
EQ42/50/52 Principles of operation Chapter 8 8.1 Parts of an echosounder An echosounder is composed of a display screen, processor, and receiver/ transmitter unit which in the case of the EQXX, are housed in one unit. Connected to this unit by a shielded cable is the transducer which is mounted horizontally on the bottom of the hull or on the transom. -
Page 42: How The Eq42/50/52 Works
Shielded cables connect the transducer with the echosounder. 8.2 How the EQ42/50/52 MKII works When the EQXX is turned on, the processor begins to send electrical pulses to the transducer. -
Page 43: Transducer Beamwidth
EQ42/50/52 Principles of operation Chapter 8 8.2.1 Transducer beamwidth The transducer mounted to the hull of your vessel serves as both a “speaker” when transmitting, and as a “microphone” when the echosounder is receiving. Similar to the way a flashlight focuses light, most of the sound from your transducer is focused downwards with a smaller amount going out to the sides. -
Page 44: Effects Of The Vessel's Speed
EQ42/50/52 Principles of operation Chapter 8 The center of the sound beam is the most intense, then as you move out towards the sides of the sound beam there is a point where the intensity of the sound is half what it was in the center. The distance moved is the “beamwidth”. -
Page 45: Installation Notes
EQ42/50/52 Installation and service Chapter 9 9. Installation notes For a number of reasons, all user-related decisions, setups, etc. should be noted in these two pages as they occur. This information may be helpful if your unit has been updated with new software, reset or in for service. - Page 46 EQ42/50/52 Installation and service Chapter 9 Other important settings (continued):...
-
Page 47: Installation Of Eq42
EQ42/50/52 Installation and service Chapter 9 9.1 Installation of EQ42 Echosounder The EQ42 can be flat or bracket mounted – overhead, bulkhead or console. 1 1 (0.4 ) 5 2 (2.1 ) 3 12 (1 2 .3 ) 3 54 (1 3 .9 ) 3 65 (1 4 .4 ) - Page 48 EQ42/50/52 Installation and service Chapter 9 Flush mounted EQ42: Removable corners, example. See template for instructions: 3 3 7 (1 3 .3 ) 3 4 7 (1 3 .7 ) 3 5 3 (1 3 .9 ) 3 6 5 (1 4 .4 )
-
Page 49: Installation Of Eq50
EQ42/50/52 Installation and service Chapter 9 9.2 Installation of EQ50 Echosounder The EQ50 can be flat or bracket mounted – overhead*, bulkhead* or console. 7 4 (2.9 ) 1 16 (4 .6) 3 76 (1 4.8 ) 4 19 (1 6.5 ) 4 45 (1 7.5 ) - Page 50 EQ42/50/52 Installation and service Chapter 9 Flush mounted EQ50: Removable corners, example: See template for instructions: 4 1 3 (1 6 .3 ) 4 2 3 (1 6 .7 ) 4 3 3 (1 7 .0 ) 4 4 5 (1 7 .5 )
-
Page 51: Installation Of Eq52
EQ42/50/52 Installation and service Chapter 9 9.3 Installation of EQ52 Echosounder The EQ52 can be flat or bracket mounted – overhead*, bulkhead* or console. 88.8 (3.5) 131.6 (5.2) 391.6 (15.4) 433.9 (17) 460 (18.1) * Overhead and bulkhead mounting is only possible if using a distance piece. - Page 52 EQ42/50/52 Installation and service Chapter 9 Flush mounted EQ52: Removable corners, example: See template for instructions: 42 7 .9 (1 6 .8 ) 43 7 .9 (1 7 .2 ) 44 8 (1 7.6 ) 46 0 (1 8.1 )
-
Page 53: Place Of Installation Of Display Unit
The units with the same model numbers are identical in size e.g. DS42 and EQ42, so the same installation guides can be used when performing the installation. When choosing a dual station, the unit does not have to match the main unit in size, as all the mentioned units are compatible. -
Page 54: Operation Of Ds42/50
EQ42/50/52 Installation and service Chapter 9 The connection cable between the dual station and the main unit is a special pair- twisted cable of 15 meters (not extendable), which consists of the following wires: 104.3002.023 9.5.1 Operation of DS40/42/50/52 remote control The main unit and the dual station operate in parallel. -
Page 55: Electrical Connections
EQ42/50/52 Installation and service Chapter 9 9.6 Electrical connections (connectors, seen from solder side) The PWR receptacle will accommodate either 3 or 4 (2) pin connectors, depending on model and version. PWR (power) AN T W I N D AL AR M... -
Page 56: Power Supply Connections
“ECHO1” or/and “ECHO2” on the rear of the cabinet and turn the plug’s coupling ring clockwise until it clicks into locked position The EQXX must be turned off while connecting/disconnecting the transducer cables. Recommended connection and setup of Simrad supplied transducers: Transducer type Port Echosounder setup... - Page 57 EQ42/50/52 Installation and service Chapter 9 Transducer connections: EQ40/50 internal connections Transceiver Transceiver 38/200 kHz 50/200 kHz ECHO1 ECHO2 Combi transducer 38 and 200, or 50 and 200 kHz Single frequency Single frequency 50 or 200 kHz 38 or 200 kHz...
-
Page 58: Nmea0183 Interface
EQ42/50/52 Installation and service Chapter 9 9.6.4 NMEA0183 interface connections NMEA0183 interface connections are made to the receptacle marked “NMEA1” or NMEA2” on the rear of the cabinet – turn the plug’s coupling ring clockwise until it stops. The EQXX must be turned off while connecting/disconnecting the interface cables. -
Page 59: Basic Transducer And Cable Information
75 ohms, and the transducer, which is 185 to 425 ohms. See section 5.7 Echosounder setup for correct setting for the transducer selected. The EQXX’s transmitter is designed to match Simrad 1kW 75 ohms high performance transducers described in section 9.7.1 Transducers. Warning! Transducers containing speed log sensor e.g. -
Page 60: Transducers
EQ42/50/52 Installation and service Chapter 9 9.7.1 Transducers (optional) Simrad Combi-transducers C50/200 or C38/200 124.5 >File:50200.cdr< Combi C50/200 or C38/200 combines two transducers and a temperature sensor in one housing. It has a streamlined shape, designed for mounting onto the hull. - Page 61 EQ42/50/52 Installation and service Chapter 9 Airmar P319 Thru-hull mount (not for use in wood hulls) Frequency: 50/200 kHz Beamwidth: 45° / 15° Cable length: 10m (32’) Depth information. Reference No.179.0401.002 (P319) Housing: reinforced plastic Reference No.179.0401.003 (B117) Housing: bronze...
- Page 62 EQ42/50/52 Installation and service Chapter 9 Airmar SS505 Thru-hull stem mount Ref. No. 179.0401.011 Accommodates hull thickness: Optional fairing. Min. no fairing 6 mm (1/4”) Max. with fairing 83 mm (3 ¼”) Frequency: 50/200 kHz Beamwidth: 45° / 15° Cable length: 10m (32’) Depth information.
-
Page 63: Determining The Position For The Transducers
EQ42/50/52 Installation and service Chapter 9 Airmar B744V Thru-hull triducer Frequency: 50/200 kHz Beamwidth: 45° / 15° Cable length: 10m (32’) Speed, temperature + depth information. Ref. No.179.0401.009 (B744V) Housing: bronze Do not connect to ECHO2 port. 9.7.2 Determining the position for the transducers... - Page 64 EQ42/50/52 Installation and service Chapter 9 It is of profound importance for good performance of the EQXX that the water flowing over the transducer be free of bubbles and aeration. If the transducer face is clean but the performance degrades with increasing vessel speed, then aeration of the water flowing under the transducer may be the cause of the poor performance.
-
Page 65: Preventive Maintenance
If the EQXX requires servicing or repair, call your authorized SIMRAD dealer, but first check section 9.10 Troubleshooting. Spare parts – fuses may be bought from a chandlery or a marine supply store. If you require a SIMRAD part, please contact your authorized dealer. -
Page 66: Troubleshooting
EQ42/50/52 Installation and service Chapter 9 9.10 Troubleshooting For all fault finding, first check that the supply voltage is between 10 – 32 V dc. Symptom Check Remedy No picture on display Check that the unit is Press [PWR] key on keypad. -
Page 67: Specifications
General data Power supply: 12 & 24 Vdc (max.10-32 Vdc) 25 Watts. Dimensions: - EQ42: H:220 (8.8”) x L:365 (14.6”) x D:75 (3”) mm. - EQ50: H:300 (12”) x L: 445 (17.8”) x D: 90 (3.6”) mm. - EQ52: H:330 (13”) x L: 460 (18.1”) x D: 95 (3.7”) mm. - Page 68 Temperature: Transducer or NMEA. Speed: Transducer or NMEA. Dual frequency transducers Simrad C38/200, 1kW high performance combi transducer 38 and 200kHz, 13x21° and 7° beams. Simrad C50/200, 1kW high performance combi transducer 50 and 200kHz, 10x16° and 7° beams. Airmar B250-22, 1kW combi transducer 50 and 200kHz, 19° and 6° beams.
-
Page 69: Appendix A Glossary Of Terms
EQ42/50/52 Glossary of terms Appendix A Glossary of terms Alarms – can be set to sound a “beep” if the echosounder detects a target above (shallower than) a minimum alarm depth or below (deeper than) a maximum alarm depth. The EQXX allows you to set the alarm depths and to enable or disable both the minimum and maximum depth alarms. - Page 70 EQ42/50/52 Glossary of terms Appendix A marker as a waypoint in connected chartplotter, capable of receiving WPL. The EQXX must be receiving position data. Refer to Interface setup in section 7.2. Expansion (zoom) – this function allows you to take a closer look at a particular section of the water underneath your boat.
- Page 71 EQ42/50/52 Glossary of terms Appendix A Ping to ping filter – can be set to either on or off. With the filter “off”, then each received echo will be reflected on the screen. Whereas with the filter “ON”, the system will compare every two echoes received and only reflect on the screen what is received from both echoes, which will give a more uncluttered and precise presentation.
- Page 72 EQ42/50/52 Glossary of terms Appendix A Transducer – the transducer serves as the acoustic “loudspeaker” and “microphone” to send and receive the signals through the water. Transducers are most often made from ceramic elements carefully built into a robust housing. The ceramic elements change shape when a voltage is placed across them (when the EQXX transmits a signal), and they also generate a voltage when they encounter sound waves (as when the EQXX receives an echo).
-
Page 73: Index
- expansion window, 28,70 - speed, 31 - frequency, 20,69 - gain, 28,70 Cable, basic information, 60 - how the EQ42/50/52 works, 42 CE declaration, 75 - parts of an echosounder, 41 Configuration, 69 - ping to ping filter, 28,71... - Page 74 EQ42/50/52 Echosounder Index Introduction, 5 Key functions, 10 Position, Key symbols in the manual, 5 - display, 15 - editing, 15 Language, 13,31 - menu, 15 Local time and date, 15 Presentation setup, 28 Log, 15 Log speed calibration, 29,70...
-
Page 75: Declaration Of Conformity
Simrad Støvring AS Declaration of Conformity The EMC Directive, Article 10 (1) Undersigned are herewith declaring, that Product: SIMRAD EQ42, EQ50, EQ52 Echosounder is in accordance with the protection requirements in the EMC Directive 89/336/EØF of May 3rd, 1989 Employed harmonized standards: EN 60945:1993 / Amd.1:1993... - Page 77 Warranty SIMRAD warrants that every product shall be free of defects in material and workman- ship as specified below: CATEGORY “A”: •Autopilots •Radars •Instruments •Navigators •Radiotelephones •Plotters •Gyro compasses incl. sensitive elements •Sonars •Echosounders •Trawl Instrumentation. These products are warranted for a period of 24 months on parts and 12 months on labor from date of purchase, except for category B items.
Need help?
Do you have a question about the EQ42 and is the answer not in the manual?
Questions and answers