Table of Contents
Advertisement
Service
This manual is to be used by qualified appliance
technicians only. Maytag does not assume any
responsibility for property damage or personal
injury for improper service procedures done by
an unqualified person.
2004
Over the Range
Domestic
Convection
Microwaves
This Base Manual covers general information
Refer to individual Technical Sheet
for information on specific models
This manual includes, but is
not limited to the following:
AMV6177AAB/W/Q/S
MMV6178AAB/W/Q/S
16023057
Revision 0
May 2004
Advertisement
Table of Contents

Related Manuals for Maytag AMV6177AAB


Summary of Contents for Maytag AMV6177AAB
- Page 1 Service This manual is to be used by qualified appliance technicians only. Maytag does not assume any responsibility for property damage or personal injury for improper service procedures done by an unqualified person. 2004 This Base Manual covers general information...
-
Page 2: Important Information
(such as exposure to electrical shock) may result. CAUTION Maytag will not be responsible for any injury or property damage from improper service procedures. If performing service on your own product, assume responsibility for any personal injury or property damage which may result. -
Page 3: Table Of Contents
Vent Blower .............. 28 Convection Motor ............28 Convection Heater ............. 29 Light Socket ............. 29 Grill Heater ............... 29 Appendix A Installation Instructions ........... A-2 Appendix B Use and Care information ........B-2 16023057 Rev. 0 ©2004 Maytag Services... -
Page 4: Important Safety Information
CAUTION Read the following information to avoid possible exposure to microwave radiation: The basic design of the Maytag and Amana microwave 7. In the area of the transformer, capacitor, diode, and oven makes it an inherently safe device to both use and magnetron there is HIGH VOLTAGE. -
Page 5: Microwave Leakage Testing
(5 cm) spacer supplied with the probe. 4. Press the start pad or turn on the timer and with the magnetron oscillating, measure the leakage by holding the probe perpendicular to the surface being measured. 16023057 Rev. 0 ©2004 Maytag Services... -
Page 6: General Information
Downdraft Cooktop or Warming Drawer Eyelevel Range Grill Range (20") Feature Content Range (36") 1000-3999 Brands Drop In (24") 4000-6999 Maytag/Amana Wall Oven (27") 7000-9999 Range, Free-Standing (30") Slide-In (30") Range Hood Wall Oven RV Range RV Top 16023057 Rev. 0 ©2004 Maytag Services... -
Page 7: Specifications
Place the oven on a Web Site at www.amana.com flat surface such as a kitchen countertop or a specially • For Maytag product call 1-800-462-9824 or visit the designed microwave oven cart. Do not place oven above a Web Site at www.maytag.com gas or electric range. -
Page 8: Electrical Requirements
Press the STOP/ should be run with the circuit conductors and connected CLEAR pad twice to reset any accidental key setting. to the equipment grounding terminal or lead on the appliance. 16023057 Rev. 0 ©2004 Maytag Services... -
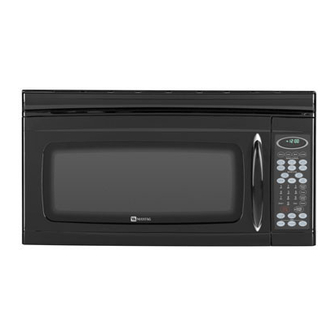
Page 9: Microwave Oven Description
General Information Microwave Oven Description 16023057 Rev. 0 ©2004 Maytag Services... -
Page 10: Troubleshooting Procedures
2. Check fuse. the display, 3. Check oven thermostat. when unit is plugged in. Measure voltage between pin 1 and pin 3 of CN1 connector Is 120 volts Replace indicated? circuit board. Unit operates. 16023057 Rev. 0 ©2004 Maytag Services... - Page 11 Measure resistance of CN2 between pin 1 and pin 3 with door closed. Does ribbon connector have proper connection? Adjust or replace door Reconnect sensing ribbon connector switch. Replace for proper circuit connection. board. Unit operates. 16023057 Rev. 0 ©2004 Maytag Services...
- Page 12 See Testing Procedures. Place a jumper wire across Replace high thermostat. voltage capacitor. Replace magnetron. Replace thermostat. Unit operates. Measure resistance of fan motor. Replace circuit board. Is resistance present? Replace fan motor. 16023057 Rev. 0 ©2004 Maytag Appliances Company...
- Page 13 See Testing resistance? Procedures. Measure Replace Replace resistance of high high voltage voltage diode. high voltage transformer. transformer. See Testing Procedures. Replace high voltage diode. Does diode Unit operates. have correct resistance? Replace magnetron. 16023057 Rev. 0 ©2004 Maytag Services...
- Page 14 Replace ventilation fan. Unit operates. No buzzer sound when Replace Verify normal pressing control pad circuit operation of between stages or at board. circuit board. the end of cooking. Unit operates. 16023057 Rev. 0 ©2004 Maytag Appliances Company...
- Page 15 Measure the voltage at pin 35 GOOD of U01 Voltage reading: 0 Vdc 10 of U03 Voltage reading: about 15V? Defective RELAY1 or poor Replace the connection of circuit board RELAY1 Replace circuit board or correct the connection. 16023057 Rev. 0 ©2004 Maytag Services...
-
Page 16: Error Codes
Buzzer does not sound or sounds continuously. Some segments of 1 or more digits display on the touch panel, or display when they should not. NOTE: Check for microwave energy leakage after replacing Printed Circuit Board Assembly. 16023057 Rev. 0 ©2004 Maytag Appliances Company... -
Page 17: Testing Procedures
22 sec 0 sec Relay 10, 11 Disconnect the leads. Place water in the Convection Convection oven and select Convection Cooking. Cooking Start Cooking Stop Check continuity between the terminals of Continuity Open the relays. 16023057 Rev. 0 ©2004 Maytag Services... - Page 18 Measure resistance across coil ....Less than 20 Ω or more than 45 Ω (70°F, 20°C), motor is defective. Turntable Drive Motor Measure across terminals Voltage: Approximately 120 VAC Resistance: Approximately 4 Ω (Synchronous motor) 16023057 Rev. 0 ©2004 Maytag Services...
- Page 19 Approximately 250-360 KΩ (70°F, 20°C ± 35°F, 2°C) Refer to Parts Manual Power cord Measure resistance of wires. Continuity should be indicated on each for proper power cord wire. part number. Verify polarity and grounding. 16023057 Rev. 0 ©2004 Maytag Services...
- Page 20 12 & 3 Continuity Light On/Off 10 & 3 Continuity Kitchen Timer 12 & 4 Continuity On/Off 10 & 1 Continuity 5-Speed (Vent) 12 & 2 Continuity Auto Time Set 10 & 5 Continuity 16023057 Rev. 0 ©2004 Maytag Services...
- Page 21 10 & 3 Continuity Light Timer 10 & 4 Continuity Kitchen Timer 12 & 4 Continuity On/Off 10 & 1 Continuity 5-Speed (Vent) 12 & 2 Continuity Auto Time Set 10 & 5 Continuity 16023057 Rev. 0 ©2004 Maytag Services...
-
Page 22: Disassembly Procedures
NOTE: When aligning the door for assembly, the door the right slightly, then push the door glass upward to must be opened as much as possible. release the glass from the track. 8. Reassemble in reverse order. 16023057 Rev. 0 ©2004 Maytag Services... -
Page 23: Control Panel
5. Disconnect and mark the wire connectors from p.c. board. 6. Remove screws securing p.c. board to control panel assembly. 7. Reassemble in reverse order. NOTE: Do not flex p.c. board. 16023057 Rev. 0 ©2004 Maytag Services... -
Page 24: Control Key Panel
7. Slide outer case towards the rear of the unit, guide power cord though outer case power cord hole. 8. Place outer case to the side, so no damage will occur to the case. 9. Reassemble in reverse order. 16023057 Rev. 0 ©2004 Maytag Services... -
Page 25: Interlock Door Latch Switches
If the monitor fuse is blown by a failed switch operation, all switches and printed circuit board must be replaced. 16023057 Rev. 0 ©2004 Maytag Services... -
Page 26: High Voltage Capacitor
The fuse is located behind the grille in line with the CAUTION power cord on the right side of the unit. During replacement of magnetron, be certain the R.F. anode gasket is in place around anode stud. 16023057 Rev. 0 ©2004 Maytag Services... -
Page 27: Magnetron Fan Assembly
4. Disconnect wire terminals from oven thermostat. NOTE: Lift upward on left rear corner of air duct to release oven thermostat. Humidity Sensor The sensor is a plug-in device located in the air exhaust duct. 16023057 Rev. 0 ©2004 Maytag Services... -
Page 28: Turntable Motor
13.Replace and reassembly in reverse order. 1. Disconnect power to unit and remove unit from its installation. 2. Remove screws securing damper and motor assembly to top and back of unit. Blower plate Blower unit Blower unit mounting screw 16023057 Rev. 0 ©2004 Maytag Services... -
Page 29: Convection Heater
1. Disconnect power to oven. 2. Remove Grille (see "Grille" procedure). 3. Remove screws securing bulb holder. 4. Remove light bulb and socket. 5. Disconnect wire terminal plug. 6. Replace and reassemble in reverse order. 16023057 Rev. 0 ©2004 Maytag Services... - Page 30 Appendix A 16023057 A – 1 ©2004 Maytag Services...
-
Page 31: Installation Instructions
Installation Instructions A – 2 16023057 ©2004 Maytag Services... - Page 32 Installation Instructions Refer to Service Parts Catalog for correct Upper Cabinet Template part number. 16023057 A – 3 ©2004 Maytag Services...
- Page 33 If you have brick or masonry walls, you will need special hardware and tools. The ductwork you need for the installation is not included. All wall and roof caps must have a back-draft damper. (Shown on page 6). A – 4 16023057 ©2004 Maytag Services...
- Page 34 ^ o k f k d fŠŒ‚ „Œ’‹†‹„ €Œ’‰ ‚’‰‘ †‹ ‚‰‚€‘†€ …Œ€ˆ Œ Œ‘…‚ ‚Œ‹~‰ †‹‡’–K : DO NOT, UNDER ANY CIRCUMSTANCES, REMOVE THE POWER SUPPLY CORD GROUNDING PRONG! : This appliance MUST be grounded! 16023057 A – 5 ©2004 Maytag Services...
- Page 35 Installation Instructions Models AMC4080AA*, MMC5080AA* A – 6 16023057 ©2004 Maytag Services...
- Page 36 = 20 ft. 1-Wall Cap 40 ft. 1-Wall Cap = 40 ft. 8 feet straight 8 ft. 8 feet straight duct 8 ft. qlq^i ibkdqe Z TP ƒ‘K qlq^i ibkdqe Z TP ƒ‘K 16023057 A – 7 ©2004 Maytag Services...
- Page 37 3. Use side cutters or thin snips to cut and remove parts “B” from Back plate. Discard parts "B". Be careful not to distort the plate. See Figure 13. Knock out Parts “B” Parts “B” Figure 13 A – 8 16023057 ©2004 Maytag Services...
- Page 38 Installation Instructions 16023057 A – 9 ©2004 Maytag Services...
- Page 39 Align the centerline of the upper cabinet template with the centerline of the mounting plate, then securely tape or tack the upper cabinet template in place. See mounting plate Figure 23. (3 pieces mounting plate) Figure 23 A – 10 16023057 ©2004 Maytag Services...
- Page 40 OR PLATE, located on page 15. 5. Complete whichever venting system you have chosen. Use caulking compound to seal the exterior wall or roof opening around the wall cap or roof cap. 16023057 A – 11 ©2004 Maytag Services...
- Page 41 Studs Draw Center Line Mounting Plate Space More Than Wall Thickness Toggle Wings Center Line Mounting Plate Toggle Bolt Bolt Support Tab Support Tab (3 pieces mounting plate) Wall Figure 27 Figure 26 A – 12 16023057 ©2004 Maytag Services...
- Page 42 Installation Instructions 16023057 A – 13 ©2004 Maytag Services...
- Page 43 Tighten the bolts until the gap between the upper cabinet and microwave oven is closed. 4. If wall vented or room vented installation is used, go to No.7 on the next page. Figure 30 Figure 31 A – 14 16023057 ©2004 Maytag Services...
- Page 44 Repeat for other filter screen. See Figure 34. Figure 33 8. Plug in the power supply cord. your microwave oven. Figure 34 16023057 A – 15 ©2004 Maytag Services...
- Page 45 Appendix B 16023057 Rev. 0 B– 1 ©2004 Maytag Services...
-
Page 46: Use And Care Information
Use and Care Information B – 2 16023057 Rev.0 ©2004 Maytag Services... - Page 47 Use and Care Information 16023057 Rev. 0 B– 3 ©2004 Maytag Services...
Need help?
Do you have a question about the AMV6177AAB and is the answer not in the manual?
Questions and answers