Table of Contents
Advertisement
Quick Links
PB
PB- - - - 101
PB
PB
101
101
101 PG2 /
PB
PB
PB- - - - 102
PB
102
102
102 PG2
Wireless Panic Button
1. INTRODUCTION
1. INTRODUCTION
1. INTRODUCTION
1. INTRODUCTION
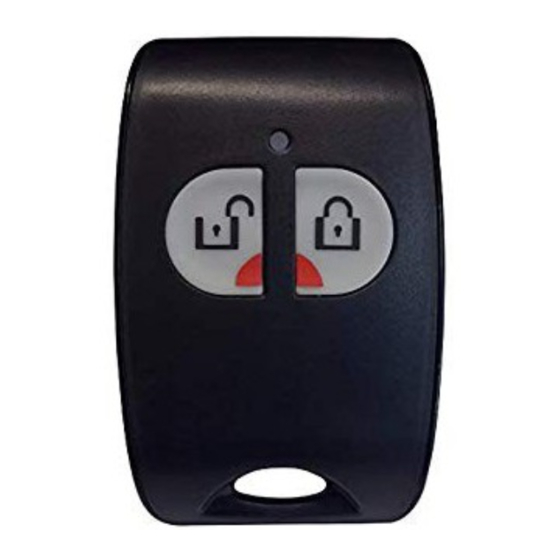
The PB-101 PG2 and PB-102 PG2 are small PowerG pendants,
designed for use with PowerMaster control panels and other
PowerG receivers.
To activate transmission, press the pushbutton(s) at the center of
the unit. When activated, the transmitter sends an alarm code, a
LED indication that confirms successful or failed transmission, and
(only in PB-102) a buzzer sound.
The PB-101/102 has several options for carrying or mounting it.
The unit is supplied with a belt clip, a key chain, a lanyard
necklace, and a holder which can be attached to the belt clip or
mounted on a wall.
2. 2. 2. 2. OPERATION
OPERATION
OPERATION
OPERATION
CAUTION: This equipment shall be used in non-hazardous locations only.
The following functions are available:
Function
Panic
The signal will notify your
central monitoring station of
an emergency situation.
Arm
Arm your system in the Away
mode.
Disarm
Disarm your system.
3. ASSEMBLY FOR
3. ASSEMBLY FOR PORTABILITY AND
3. ASSEMBLY FOR
3. ASSEMBLY FOR
This section describes how to attach the PB-101/102 to various portability options.
WARNING! Choking Hazard; Small parts; The pendant and belt clip are NOT for children under 3 years.
Figure 2 Attaching PB-101/102 to a Belt Clip
1. Slide the PB-101/102 into the holder until you feel it snap securely
inside.
2. To attach the belt clip, slide it onto the rails on the rear of the
holder.
D-304457 PB-101/102 User's Guide
PG2 /
PG2 /
PG2 /
PG2
PG2
PG2
PB-101
Press and hold the button down for
2 – 7 seconds.
Not applicable
---
Not applicable
---
PORTABILITY AND MOUNTING
PORTABILITY AND
PORTABILITY AND
Figure 1. PB-101
Press and hold both buttons down
simultaneously for more than 3
seconds.
Press and hold this button for at least 1
second.
Press and hold this button for at least 1
second.
MOUNTING
MOUNTING
MOUNTING
3. To remove the PB-101/102 from the wall-mounted holder or from
the belt clip, press down the top of the holder and push the pendant
up with your fingers.
Figure 3 Attaching PB-101/102 to a Key Chain
Figure 4 Attaching PB-101/102 to a Lanyard Necklace
User's Guide
and
PB-102
PB-102
1
Advertisement
Table of Contents

Subscribe to Our Youtube Channel
Related Manuals for Visonic PB-101PG2


Summary of Contents for Visonic PB-101PG2
- Page 1 PB- - - - 101 101 PG2 / PG2 / PG2 / PG2 / User’s Guide PB- - - - 102 102 PG2 Wireless Panic Button 1. INTRODUCTION 1. INTRODUCTION 1. INTRODUCTION 1. INTRODUCTION The PB-101 PG2 and PB-102 PG2 are small PowerG pendants, designed for use with PowerMaster control panels and other PowerG receivers.
- Page 2 This side facing up Figure 5 Attaching PB-101/102 to a Wall Mount 1. Using the two screws and plastic anchors included in the PB- 3. To remove the PB 101/102 from the holder, press down the top of 101/102 box, align the holder facing up and secure the holder to the holder and push the pendant up with your fingers as illustrated the wall.
- Page 3 6. PRODUCT LIMITATIONS 6. PRODUCT LIMITATIONS Visonic wireless systems are very reliable and are tested to high standards. However, due to their low transmitting power and limited range (required by FCC and other regulatory authorities), there are some limitations to be considered: A.
- Page 4 Batteries are harmful to health and the environment. Please help to protect the environment from health risks. WARRANTY Visonic (the “Vendor") warrants this product only (the "Product") to the original purchaser However, if the Vendor is held liable, whether directly or indirectly, for any loss or only (the “Purchaser”) against defective workmanship and materials under normal use of...
Need help?
Do you have a question about the PB-101PG2 and is the answer not in the manual?
Questions and answers