Advertisement
Quick Links
Operator's Manual
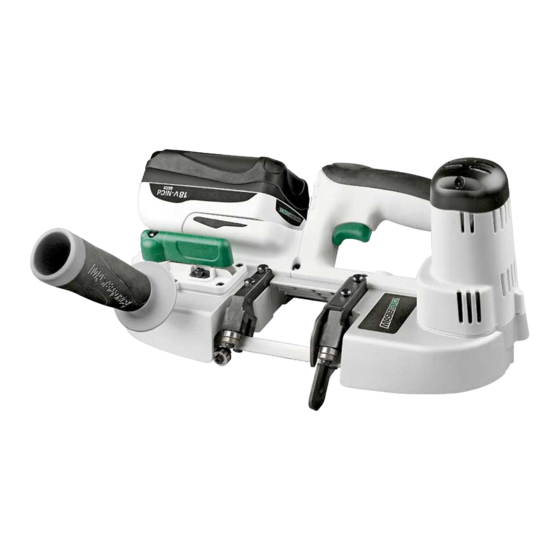
18 Volt Lithium-Ion Portable
Band Saw
Model No. 241-0440
IMPORTANT :
WARNING! To reduce the risk of injury, user must read instruction manual.
Safety symbols in this manual are used to flag possible dangers. The
safety symbols and their explanations require your full understand-
ing. The safety warnings do not, by themselves, eliminate any dan-
ger, nor are they substitute for proper accident prevention measures.
This Safety Alert Symbol indicates caution, warning, or danger. Failure to
obey a safety warning can result in serious injury to yourself or others. To reduce
the risk of injury, fire, or electric shock, always follow the safety precautions..
Advertisement

Summary of Contents for MasterForce 241-0440
- Page 1 Operator’s Manual 18 Volt Lithium-Ion Portable Band Saw Model No. 241-0440 IMPORTANT : WARNING! To reduce the risk of injury, user must read instruction manual. Safety symbols in this manual are used to flag possible dangers. The safety symbols and their explanations require your full understand- ing.
-
Page 2: Table Of Contents
TABLE OF CONTENTS Safety Symbols ....................page 2 Safety Instructions ..................page 4 Description .......................page 10 Assembly ......................page 11 Operation ......................page 12 Maintenance ....................page 14 Warranty ......................page 16 INTRODUCTION SAVE THESE INSTRUCTIONS! This saw has many features for making its use more pleasant and enjoyable. Safety, performance, and dependability have been given top priority in the design of this product, making it easy to maintain and operate. - Page 3 Indicates a potentially hazardous situation, CAUTION: which, if not avoided, could result in minor or moderate injury. (Without Safety Alert Symbol) Indicates a CAUTION: situation that may result in property damage. WARNING: To ensure safety and reliability, all repairs should be per- formed by a qualified service technician at an Authorized Service Center.
-
Page 4: Safety Instructions
.../min Do not expose to rain or use in damp Conditions locations. Alert Read The To reduce the risk of injury, user must read Operator’s operator’s manual. Manual Always wear safety goggles or safety glasses Eye Protection with side shields, or a full face shield when operating this product. - Page 5 WORk AREA SAFETY keep work area clean and well lit. Cluttered or dark areas invite accidents. Do not operate power tools in explosive atmospheres, such as in the presence of flammable liquids, gases or dust. Power tools create sparks which may ignite the dust or fumes. keep children and bystanders away while operating a power tool.
- Page 6 Protective equipment such as dust mask, non-skid safety shoes, hard hat, or hearing protection used for appropriate conditions will reduce personal injuries. Prevent unintentional starting. Ensure the switch is in the off-position before connecting to power source and / or battery pack, picking up or carrying the tool.
- Page 7 keep cutting tools sharp and clean. Properly maintained cutting tools with sharp cutting edges are less likely to bind and are easier to control. Use the power tool, accessories, tool bits etc., in accordance with these instructions, taking into account the working conditions and the work to be performed.
- Page 8 DANCER! Blades coast after saw is switched off. Hold tool by insulated gripping surfaces (handles) when performing an operation where the cutting tool may contact hidden wiring or its own cord. Contact with a “live” wire will make the exposed metal parts of the tool “live”...
- Page 9 Water entering the charger will increase the risk of electric shock. Use of an attachment not recommended or sold by the battery-charger manufacturer may result in a risk of fire, electric shock or injury to persons. Do not abuse the cord or charger. Never use the cord to carry the charger. Do not pull the charger cord to disconnect the plug from receptacle.
-
Page 10: Description
technician at a Service Center when service or repair is required. Incorrect reassembly may result in a risk of electric shock or fire. Unplug the charger from the electrical outlet before attempting any maintenance or cleaning to reduce the risk of electric shock. Disconnect charger from the power supply when not in use. -
Page 11: Assembly
SPECIFICATIONS Motor 18 Volt DC 550FPM No Load Blade Speed 28-13/16“ Length 1/2” Width Blade dimension .020“ Thickness Cutting capacity Round piece Dia. 2 1/2” Or Rectangle piece 2 1/2” x 2 1/2” Saw Weight (with battery) 7LBs 11OZ Battery Type Lithium-Ion Battery Voltage 18 Volt DC... -
Page 12: Operation
during shipping. Do not discard the packing material until you have carefully inspected and satisfactorily operated the tool. PACkING LIST Portable band saw, Saw blade, Side handle and Operator’s manual OPERATION TO ATTACH BATTERY PACk (Fig.2) 1. Lock the trigger switch in the “off” Fig. - Page 13 To turn the tool OFF, release the Fig. 4 switch trigger. INSTALLING A SAW BLADE (FIG.4-6) WARNING! To prevent personal injury, always remove the battery pack from the tool before installing or re- moving the saw blade! 1. Detach the battery pack from the saw.
-
Page 14: Maintenance
TYPICAL APPLICATION (Fig.7) Fig. 7 1. Keep the blade off the workpiece until the motor has reached the selected speed. 2. Start cutting on a surface where the greatest number of teeth will be in contact with the workpiece at INCORRECT CORRECT one time (Fig 7). - Page 15 Use clean cloths to remove dirt, dust, oil, grease, etc. WARNING! When servicing, use only identical MASTERFORCE replacement parts. Use of any other parts may create a hazard or cause product damage. To ensure safety and reliability, all repairs should be performed by a qualified...
-
Page 16: Warranty
WARRANTY If, during normal use, this MASTERFORCE power tool breaks or fails due to a defect in material or workmanship within three years from the date of original purchase, simply bring this tool and its sales receipt back to your...


Need help?
Do you have a question about the 241-0440 and is the answer not in the manual?
Questions and answers