Table of Contents
Advertisement
SERVICE
AIR CONDITIONER
Refer to the service manual in the GSPN(see the rear cover) for the more information.
FREE JOINT MULTI AIR CONDITIONER
MH026FNCA
MH035FNCA
MH052FNCA
MH026FECA
MH035FECA
MH052FECA
NJ030MHXCA
NJ035MHXCA
NJ052MHXCA
NJ0261HXCA
NJ0351HXCA
Manual
Multi Inverter(Free Joint Multi) Series
– Variable Indoor Unit Combination(Free Joint Multi)
– Multi Inverter(Free Joint Multi) Series delivers
comfort to 2~4 rooms with a Single Outdoor Unit
– Smart & Low noise outdoor units in any condition.
Energy Saving
– High Efficiency DC inverter and BLDC Comp.
– Smart Inverter Control algorithm.
– TBR Sine-Wave Compressor & Sine Wave Controller.
Convenient Installation
– 485 non Polarity / Auto addressing
– Easy checking system condition by 7-segment
Space Saving & Environmental Friendly
– Compact & Light Outdoor Unit
– Slim and Quiet Indoor Units
Advertisement
Table of Contents

Related Manuals for Samsung MH026FNCA


Summary of Contents for Samsung MH026FNCA
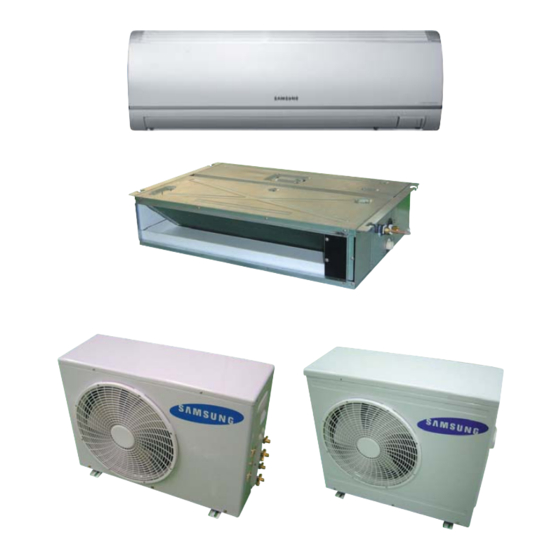
- Page 1 FREE JOINT MULTI AIR CONDITIONER INDOOR UNIT OUTDOOR UNIT MH026FNCA MH050FXCA2A MH035FNCA MH080FXCA4A MH052FNCA MH026FECA MH035FECA MH052FECA NJ030MHXCA NJ035MHXCA NJ052MHXCA NJ0261HXCA NJ0351HXCA SERVICE Manual AIR CONDITIONER THE FEATURE OF PRODUCT Multi Inverter(Free Joint Multi) Series – Variable Indoor Unit Combination(Free Joint Multi) –...
-
Page 2: Table Of Contents
Contents 1. Precautions ............................1-1 Installing the air conditioner ......................1-2 Power supply and circuit breaker ....................1-3 During operation ..........................1-4 Disposing of the unit ........................1-5 Others ..............................2. Product Specifications ......................2-1 The Feature of Product ......................... 2-2 Product Specifications ........................ -
Page 3: Table Of Contents
Contents 9. Troubleshooting ..........................9-1 Items to be checked first ........................ 9-2 Checking and Testing operations ....................9-3 Fault Diagnosis by Symptom 9-12 ....................... 9-4 PCB Inspection 9-18 ........................... 10. Reference for Installation 10-1 ....................... 10-1 Selecting Area for Installation .................... -
Page 4: Precautions
Do not place a cloth or other materials over it. Remove the batteries if you don’t use the remote control for a long time. (If applicable) Use the remote control within 23ft(7m) from the indoor unit. (If applicable) Samsung Electronics... -
Page 5: Disposing Of The Unit
- Release the valve caps on High and Low pressure side. - Use L wrench to close the valve on the high pressure side. - Approximately 2 minutes after, close the valve on the low pressure side. - Stop operation of the air conditioner. - Disconnect the pipes. Samsung Electronics... -
Page 6: Product Specifications
• Felt Structure : New felt has selected to reduce the noise coming out of the compressor. Double layered felt structure absorbs noise by two times and felt is also covering top of the compressor to reduce the noise even more. Samsung Electronics... - Page 7 2-2 Product Specifications Model MH026FNCA MH035FNCA Item INDOOR UNIT Type Wall-mounted Wall-mounted Cooling 9,000 12,000 Btu/hr Heating 10,000 13,000 Cooling 8.31 9.54 Air Volume /min Perfor- Heating 8.56 9.93 mance Cooling Noise Heating Power ø,V,Hz 1,208~230,60 1,208~230,60 Cooling Power Consumption...
- Page 8 Operating Current Heating 0.30 1,065x298x128 Outer Dimension WxHxD inch 42x12x8.6 Weight Liquid OD(inch)xL(ft) ø1/4x24.6 Refrigerant Pipe Size OD(inch)xL(ft) ø1/2x24.6 Drain Hose DxL(mm) ø18x600 Cross-fan Type Resin /steel Blower Type Motor Rated Output 2ROW 16STEP Heat Exchanger Refrigerant Control Unit Samsung Electronics...
- Page 9 Liquid OD(inch)xL(ft) ø1/4x24.6 ø1/4x24.6 ø1/4x24.6 Size Refrigerant Pipe OD(inch)xL(ft) ø3/8x24.6 ø3/8x24.6 ø1/2x24.6 Type Sirocco fan Sirocco fan Sirocco fan Resin/steel Resin/steel Resin/steel Blower Type Motor Rated Output 2ROW 12STEP 2ROW 12STEP 2ROW 12STEP Heat Exchanger Refrigerant Control Unit Samsung Electronics...
- Page 10 ø6.35x7.5 ø6.35x7.5 Refrigerant Pipe Size mmxL(m) ø9.52x7.5 ø9.52x7.5 Drain Hose ø,mm VP20(ID20/OD25) VP20(ID20/OD25) Cross Flow Fan Cross Flow Fan Type Feedback SSR Feedback SSR Blower Type Motor Rated Output 2ROW 12STEP 2ROW 12STEP Heat Exchanger Refrigerant Control Unit Samsung Electronics...
- Page 11 Liquid mmxL(m) ø6.35x7.5 ø6.35x7.5 ø6.35x7.5 Size Refrigerant Pipe mmxL(m) ø9.52x7.5 ø9.52x7.5 ø12.7x7.5 Type Turbo Fan Turbo Fan Turbo Fan Blower Type steel steel steel Motor Rated Output Heat Exchanger 2ROW 10STEP 2ROW 10STEP 2ROW 10STEP Refrigerant Control Unit Samsung Electronics...
- Page 12 BLDC Permanent magnetic Motor Com- pressor Type Lubricant Oil Capacity Protection Device Type Propeller Propeller Fan Motor Blower & Size OD(mm) ø420 ø460 Blower Motor Rated Output Heat Exchanger 2ROW 28STEP 2ROW36STEP Refrigerant Control Device Charging Refrigerant(R410A) 70.55 98.77 Samsung Electronics...
-
Page 13: Accessory And Option Specifications
2-3 Accessory and Option Specifications 2-3-1 Indoor Unit Accessories FNCA Item Descriptions Code-No. Q'TY Remark DB97-02851B (MH026FNCA/MH035FNCA) Installation Plate (Plate-Hanger) DB90-02738A (MH052FNCA) Remote Control DB93-03012P Indoor Unit User Manual DB98-29162A Installation Manual DB98-29163A The design and shape can be changed according to the model. -
Page 14: Disassembly And Reassembly
Pattern Sheet DB97-04095A/B (MH052FECA) Insulation-Install Outlet DB72-00143D Insulation-Install Inlet DB72-00143E Indoor Unit Drain Hose Joint DB94-00758A Rubber DB63-00237A (Grommet Hanger) Insulation-Drain Out DB62-03439H Insulation-Out DB62-03439J Insulation-Drain In DB62-03440H The design and shape can be changed according to the model. Samsung Electronics... -
Page 15: Indoor Unit
Product Specifications Indoor Unit Accessories(cont.) FECA(cont.) Item Descriptions Code-No. Q'TY Remark Cable-tie DB65-10088C Indoor Unit Drain Pipe Holder DB90-02064A The design and shape can be changed according to the model. 2-10 Samsung Electronics... - Page 16 Insulation cover band DB72-00109J Installation Manual DB98-33584A Indoor Unit Flexible hose DB94-01258C (Ass'y drain hose joint) Insulation drain hose DB62-04783A Rubber DB63-00237A (Grommet Hanger) Insulation hose DB72-00398B The design and shape can be changed according to the model. Samsung Electronics 2-11...
- Page 17 DB62-01959D Insulation cover band DB72-00109J Insulation drain-hose DB62-04783A Indoor Unit Cable-tie DB65-00191A Ass'y drain hose DB94-01270H M4x12 tapped Screw 6002-000213 Installation manual DB98-33584A Safety net DB63-01372A The design and shape can be changed according to the model. 2-12 Samsung Electronics...
-
Page 18: Outdoor Unit
Drain Plug Out DB67-20011A Transmitter power cable DB93-05059A (Ass'y Connector Wire-DC Power) Rubber Leg DB73-20134A Outdoor Unit Installation Manual DB98-29164A Service Manual DB98-29161A Nipple Connector DB67-00789A (MH080FXCA4A) The design and shape can be changed according to the model. Samsung Electronics 2-13... - Page 19 Transmitter Power cable DB39-00378E (Wire Harness-DC Source) (MIM-B13) Transmitter communication cable DB39-00253B (Connect Wire-COM) (MIM-B13) Transmitter Case DB61-00450B (Case-Relay PCB Out) (MIM-B13) Cable-tie DB65-10088B DB98-25776A Installation Manual (MIM-B13) The design and shape can be changed according to the model. 2-14 Samsung Electronics...
-
Page 20: Alignment And Adjustments
Indoor unit heat exchanger temperature sensor error (open or short) Indoor fan motor malfunction Option Setting EEPROM error Option error Option Setting (option wasn t set up or option data error) Remote Control on/off Outdoor unit error Outdoor Unit Power Reset Samsung Electronics... - Page 21 : Flickering : Off If you turn off the air conditioner when the LED is flickering, the LED is also turned off. If you re-operate the air conditioner, it operates normally at first, then detect an error again. Samsung Electronics...
- Page 22 : Flickering : Off If you turn off the air conditioner when the LED is flickering, the LED is also turned off. If you re-operate the air conditioner, it operates normally at first, then detect an error again. Samsung Electronics...
- Page 23 Error of float switch Error of setting option switches for optional accessories EEPROM error EEPROM option error : On : Flickering : Off If you turn off the air conditioner when the LED is flickering, the LED is also turned off. Samsung Electronics...
- Page 24 Outdoor unit sensor error - Condenser out sensor(Short/Open) - Self diagnosis Compressor Discharge temperature sensor error Compressor discharge sensor detached - Self diagnosis Compressor OLP sensor error (Short/Open) - Error condition : outdoor temperature under -20˚C - Error level : over 4.95V(-30˚C) under 0.5V(151˚C) Samsung Electronics...
- Page 25 DC peak error (IPM Over Current) Compressor Limit Error DC link Voltage error (under 150V, over 410V) Abnormal compressor running (Compressor Rotation Error) Current sensor error DC link Voltage sensor error OTP Error Inverter micom zero-crossing error Piping(gas leak) NO GAS error(self diagnosis) Samsung Electronics...
-
Page 26: Setting Option Setup Method
Only blue colored 20 digits should be set Set 2 digits using Button. Press button, then will move to down. Set next 2 digits. After setting 10 digits, press button, then "OFF timer" will be displayed. Set next 2 digits. Samsung Electronics... - Page 27 If all lamps of indoor unit are flickering, Plug out, plug in power plug again and press ON/OFF key to retry. If the unit is not working properly or all lamps are continuously flickering after setting the option code, see if the correct option code is set up for its model. Samsung Electronics...
- Page 28 Alignment and Adjustments Table of the option code MODEL OPTION CODE MH026FNCA 027402-14221A-200001-300000 MH035FNCA 027402-16224d-200001-300000 MH052FNCA 026402-19228F-200001-300000 NJ0261HXCA 078605-1420F8-200001-300000 NJ0351HXCA 075605-16225d-200001-300000 NJ030MHXCA 045023-164148-200001-300000 NJ035MHXCA NJ052MHXCA 045023-1941dF-200001-300000 External Static Pressure 2.0(Standard) (mmAq) 015201-14021c 015201-14023E 015201-140390 015203-1403F9 MH026FECA -200001-300000 -200001-300000 -200001-300000 -200001-300000...
- Page 29 MEMO 3-10 Samsung Electronics...
-
Page 30: Disassembly And Reassembly
4. Disassembly and Reassembly Necessary Tools Item Remark +SCREW DRIVER MONKEY SPANNER Samsung Electronics... -
Page 31: Indoor Unit
4-1 Indoor Unit Stop operation of the air conditioner and remove the power cord before repairing the unit. 4-1-1 MH026FNCA/MH035FNCA/MH052FNCA Parts Procedure Remark Front Grille 1) Stop the air conditioner operation and shut off the main power. 2) Open the Front Grille by pulling right and left sides of the hook. - Page 32 (Main PCB) side out. (Inclusion Power Cord) 2) Detach the outdoor unit connection wirefrom the Terminal Block. 3) Loosen 4 fixing screws of Ass’y Control-In. (Use +Screw Driver.) Tray Drain 1) Pull Tray Drain out from the Back Body. Samsung Electronics...
- Page 33 5) Lifting the Heat Exchanger up a little to push the up side for separation from the indoor unit. 1) Loosen the fixing screw. Fan Motor 2) Detach the Fan Motor from the Fan. & 3) Detach the Fan From the left Holder Cross Fan Bearing. Samsung Electronics...
- Page 34 (Use +Screw Driver.) Blower 2) Disassemble 2 Cover Blower Uppers. - After unscrewing 2 screws (Use +Screw Driver.) - Disassemble the Cover Blower Upper with pushing its hook. 3) Disassemble the Cover Control. - Unscrew 2 screws (Use +Screw Driver.) Samsung Electronics...
- Page 35 - Unscrew a screw (Use +Screw Driver.) 6) Disassemble the band Motor for fixing the Motor. - Unscrew 2 screws (Use +Screw Driver.) 7) After disassembling the Motor and Blower for the set, disassemble the Blower by use of 0.12inch(3mm) wrench. Samsung Electronics...
- Page 36 1) Disassemble the Cabinet Top Evap. - Unscrew 11 screws 2) Disassemble the Bracket Outlet Sub that fixes the Drain Pan equipped on the front of the set. - Unscrew 6 screws 3) Disassemble the Drain Cushion from the set. Samsung Electronics...
- Page 37 EEV wire that connected to the inside of PCB. 3) Disassemble the Support Evap. LF that fixes the Evaporator. - Unscrew 2 screws (Use +Screw Driver.) 4) Disassemble the Support Evap RH. - Unscrew 2 screws (Use +Screw Driver.) Samsung Electronics...
- Page 38 Case. 4) In case of disassembling the Case Control, disassemble the Case Control from the set after unscrewing the screw connected to the direction of Blower. - Disassemble if after disassembling the Cabinet Top Motor 1-1). Samsung Electronics...
- Page 39 5) In case of disassembling the Trans Power, unscrew the screw fixing on the Case. Disassemble if after disassembling the case PCB 4-4). Bracket Outlet 1) Disassemble the Bracket Outlet assembled on the Cabinet. - Unscrew 10 screws (Use +Screw Driver.) 4-10 Samsung Electronics...
- Page 40 Disassembly and Reassembly 4-1-3 MH052FECA Parts Procedure Remark 1) Pull out the Filter as picture 1 or picture 2. Filter 2) If it is necessary, after disassembling 8 indicating screws, detach the Bracket Filter. Samsung Electronics 4-11...
- Page 41 Ass’y Cabinet-Top Motor. & Motor (Use +Screw Driver.) 2) After disassembling 3 indicating screws, detach Ass’y Case Blower Upper. (Use +Screw Driver.) _ Press the pothook of the Case Blower and detach Ass’y Case Blower Upper. 4-12 Samsung Electronics...
- Page 42 4) Detach the Motor Wire Connected to PCB and Capacitor. 5) After disassembling the indicating screws, detach the wire connected to the Partition. (Use +Screw Driver.) 6) After disassembling 2 indicating screws, detach the Ass’y Band Motor. (Use +Screw Driver.) Samsung Electronics 4-13...
- Page 43 Motor by 3mm inner hexagon spanner. Drain Pan 1) After disassembling 15 indicating screws, detach Ass’y Cabinet-Top Evap. (Use +Screw Driver.) 2) After disassembling 6 indicating screws, detach the Bracket Outlet. 3) Detach the Drain Pan. 4-14 Samsung Electronics...
- Page 44 2) Detach the Sensor from the Control Box.(including 2 Sensors) 3) After disassembling 2 indicating screws, detach Ass'y Support Evap LF. (Use +Screw Driver.) 4) After disassembling 2 indicating screws, detach Ass'y Support Evap RH. (Use +Screw Driver.) Samsung Electronics 4-15...
- Page 45 3) If only the disassembly of Capacitor is required, detach it from the set. 4) If only the disassembly of Case Control is required, detach it from the set after disassembling 2 indicating screws. (Use +Screw Driver.) 4-16 Samsung Electronics...
- Page 46 Disassembly and Reassembly Parts Procedure Remark 5) Detach the Transformer after disassembling 2 indicating screws. Work is possible after disassembling the Case PCB. 1) After disassembling 16 indicating screws, Ass'y Bracket detach Ass'y Bracket Outlet. Outlet (Use +Screw Driver.) Samsung Electronics 4-17...
- Page 47 5) Loosen 2 fixing screws, 5 bolts and detach the Front Cabinet. (Use +Screw Driver.) 6) Loosen 2 fixing screws and pull up the Control Box. (Use +Screw Driver.) 7) Loosen 9 fixing screws and detach the Cabinet Side. (Use +Screw Driver.) 4-18 Samsung Electronics...
- Page 48 1) Loosen the fixing nut and detach the Fan. (Use +Screw Driver.) & Motor 2) Loosen 4 fixing bolts and detach the Motor. (Use +Screw Driver.) 3) Loosen 4 fixing bolts and detach the Bracket Motor. (Use +Screw Driver.) Samsung Electronics 4-19...
- Page 49 2) Disassemble the Inlet and Outlet Pipe by & welding. Compressor 3) Loosen the fixing screws of the Heat Exchanger. (Use +Screw Driver.) 4) Detach the Heat Exchanger. 5) Loosen 3 nuts of the Compressor. (Use Monkey Spanner.) 6) Detach the Compressor. 4-20 Samsung Electronics...
- Page 50 3) Loosen 2 fixing screws of the Ass'y Control Out. (Use +Screw Driver.) 4) Loosen 6 fixing screws and detach the Cabinet Upper. (Use +Screw Driver.) 5) Loosen 2 fixing screws, 7 bolts and detach the Cabinet Front. (Use +Screw Driver.) Samsung Electronics 4-21...
- Page 51 Disassembly and Reassembly Parts Procedure Remark 6) Loosen 2 fixing screw and pull up the Control Box. (Use +Screw Driver.) 7) Pull the felt and detach it. 8) Detach the Terminal Cover and detach the comp lead wire. 4-22 Samsung Electronics...
- Page 52 2) Disassemble the Inlet and Outlet Pipe by Compressor welding. 3) Loosen the fixing screw of the Heat Exchanger. (Use +Screw Driver.) 4) Detach the Heat Exchanger. 5) Loosen 3 nuts of the Compressor. (Use Monkey Spanner.) 6) Detach the Compressor. Samsung Electronics 4-23...
- Page 53 MEMO 4-24 Samsung Electronics...
-
Page 54: Exploded Views And Parts List
5. Exploded Views and Parts List 5-1 Indoor Unit 5-1-1 MH026FNCA/MH035FNCA Samsung Electronics... - Page 55 Exploded Views and Parts List Parts List Q'TY Code No. Description Specification SA/ SNA MH026FNCA MH035FNCA DB94-00454J ASS'Y BACK BODY ASS'Y DB94-00454H ASS'Y BACK BODY ASS'Y DB61-01632D BACK BODY HIPS DB69-00834A CUSHION BACK BODY DB96-03149A ASS'Y SUPPORT EVAP RH HIPS...
- Page 56 Exploded Views and Parts List 5-1-2 MH052FNCA Samsung Electronics...
- Page 57 SGCCT0.6 DB61-01981B HOLDER-PIPE HIPS DB90-03966B COVER TERMINAL HIPS DB93-03012P ASS’Y REMOCON DB96-03817A ASS’Y EVAP-SUPPORT RH HIPS DB31-00267A MOTOR FAN 50/60HZ DB94-00456B ASS’Y CROSS FAN ASS’Y DB97-02075A ASS’Y BOLT-SPECIAL DB94-00455A ASS’Y BEARING-RUBBER DB94-40007A ASS’Y BEARING-MOTOR DB61-01977A BRACKET EVAP SGCC-M Samsung Electronics...
- Page 58 Exploded Views and Parts List 5-1-3 MH026FECA/MH035FECA 23-5 23-6 23-4 23-1 23-7 23-8 23-3 23-2 Samsung Electronics...
- Page 59 DB61-03149A HOLDER WIRE PP BLACK 23-5 DB65-00105L TERMINAL BLOCK 6P 6P, POWER 23-6 DB65-00105M TERMINAL BLOCK 6P 6P, COMMUNICATION 23-7 DB26-00080A TRANS POWER 230V, 50HZ 23-8 2301-001370 CAPACITOR 450V 1.5µF DB32-00142A ASS'Y THERMISTOR ASS'Y DB32-00141A THERMISTOR EVAP ASS'Y Samsung Electronics...
- Page 60 Exploded Views and Parts List 5-1-4 MH052FECA 30-1 30-6 30-2 30-3 30-4 30-5 Samsung Electronics...
- Page 61 30-4 DB65-00105L TERMINAL BLOCK 6P 6P,POWER 30-5 DB65-00105M TERMINAL BLOCK 6P 6P,COMMUNICATION 30-6 DB26-10070G TRANS POWER 60HZ DB32-00142A ASS'Y THERMISTOR ASS'Y DB32-00141A THERMISTOR EVAP 800mm DB61-02349A CLIP BRUSH NYLON66,BLACK DB90-02101A ASS'Y COVER CONTROL ASS'Y DB93-05959C ASS'Y PCB ASS'Y Samsung Electronics...
- Page 62 Exploded Views and Parts List 5-1-5 NJ0261HXCA/NJ0351HXCA 27-6 27-6-1 27-6-2 27-6-3 27-1 27-4 27-5 27-2 27-3 26-1 26-2 Samsung Electronics...
- Page 63 FOAM-PE,T12,20,165,GREY,NON FLAmmABILITY 27-3 DB63-00237A GROMMET-HANGER 27-4 DB67-00285A DRAIN HOSE-SOCKET POM,T3 27-5 DB72-00401C INSULATION JOINT-OUT FOAM-PE,T3,W200,L200,GREY 27-6 DB94-01258C ASS'Y DRAIN-HOSE JOINT ASS'Y 27-6-1 DB67-00923A DRAIN HOSE-HOUSING ABS(GP35),GREEN 27-6-2 DB67-00336E HOSE DRAIN-PVC SOFT PVC,14,20,3,GRAY 27-6-3 DB67-00805B DRAIN HOSE-JOINT B ABS,T3.0,NORmAL Samsung Electronics 5-10...
- Page 64 Exploded Views and Parts List PSSMA(Slim 1 way Cassette Panel) 5-11 Samsung Electronics...
- Page 65 COVER-DISPLAY PCB HIPS,2.5,117,154,BLK DB64-00237A PANEL-DISPLAY LED AKM-2800,PC DB64-01759A PANEL FRONT-SLIM 1WAY ABS,40,465,1180,DA White DB64-01760A WINDOW-DISPLAY PCB PC,1.5,40,40,-,MILKY WHT DB64-01762A GRILLE-AIR INLET ABS,2.0,213,859,WHT DB65-00023A CLIP-WIRE-ASS'Y NYLON,AG-240E DB66-01187A BLADE-G ABS,5,11.6,WHT DB93-05321A ASS'Y PCB SUB FR-1,LEAD FREE DB63-01696A COVER-SCREW ABS,2.5,19,34,WHT Samsung Electronics 5-12...
- Page 66 Exploded Views and Parts List 5-1-6 NJ030MHXCA/NJ035MHXCA/NJ052MHXCA 5-13 Samsung Electronics...
- Page 67 MINI 4WAY CASSETTE DB63-01372A GUARD SAFTY HSWR,T2.5 DB95-01947C THERMISTOR EVAP IN 415mm,MINI 4WAY CASSETTE DB95-01958B THERMISTOR EVAP OUT 280mm,MINI 4WAY CASSETTE DB94-01903B ASS'Y DRAIN HOSE INSTALL MINI 4WAY CASSETTE DB94-01903A ASS'Y DRAIN HOSE INSTALL MINI 4WAY CASSETTE Samsung Electronics 5-14...
- Page 68 Exploded Views and Parts List PMSMA(Mini 4 way Cassette Panel) 5-15 Samsung Electronics...
- Page 69 STS304,T0.5 DB69-01269A CUSHION-IN EPS,30 DB69-01270A CUSHION-OUT EPS,30 DB64-01420A GRILLE-AIR INLET ABS,WHT DB63-01423A FILTER-PRE MINI PP,BLK,ANTI BACTERIAL FILTER DB70-00302A PLATE-HANGER STS304,T0.5 6002-000534 SCREW-TAPPING PH,2S,M3,L8,ZPC(BLK),SWRCH18A 6002-000536 SCREW-TAPPING PH,2S,M4,ZPC(YEL) 6002-001079 SCREW-TAPPING TH,2S,M4,L10 6011-001493 BOLT-HEX M6,L10,ZPC(YEL),SWRM18A DB61-02480B CONNECTOR-MOTOR B POM,NATURAL WASHER Samsung Electronics 5-16...
- Page 70 5-2 Outdoor Unit 5-2-1 MH050FXCA2A 16-2 16-1 16-3 16-4 16-6 16-8 16-11 16-9 16-5 16-7 16-10 16-12 13-1 5-17 Samsung Electronics...
- Page 71 PLATE-CONTROL OUT UPPER 16-7 DB70-00928A PLATE-CONTROL OUT MAIN SGCC-M 16-8 DB65-00181D TERMINAL BLOCK 16-9 DB65-00181F TERMINAL BLOCK 16-10 DB95-01180A ASS'Y-TERMINAL BLOCK ASS'Y 16-11 DB93-06290A ASS'Y PCB DISPLAY ASS'Y DB27-00042A REACTOR 5MH±5%,40.0±5V DB32-00175B THERMISTOR CONDENSER 103AT,204CTB DB32-00176A THERMISTOR 103AT,204CTB Samsung Electronics 5-18...
- Page 72 Exploded Views and Parts List 5-2-2 MH080FXCA4A 16-2 16-1 16-3 16-4 16-6 16-8 16-11 16-9 16-5 16-7 16-10 16-12 13-1 5-19 Samsung Electronics...
- Page 73 SGCC-M 16-7 DB65-00181D TERMINAL BLOCK 16-8 DB65-00181F TERMINAL BLOCK 16-9 DB95-01180A ASS’Y-TERMINAL BLOCK ASS’Y 16-10 DB93-06290A ASS’Y PCB SUB-DISPLAY ASS’Y DB27-00043A REACTOR 20A, 50Hz DB32-00175B THERMISTOR COND 103AT,204CTB DB32-00176C THERMISTOR WIRE OUT/DISCHARGE 103AT,204CTB DB90-04157A ASS’Y HANDLE ASS’Y Samsung Electronics 5-20...
-
Page 74: Wiring Diagram
6. Wiring Diagram 6-1 Indoor Unit FNCA This Document can not be used without Samsung's authorization. Samsung Electronics... - Page 75 Indoor Unit (cont.) FECA This Document can not be used without Samsung's authorization. Samsung Electronics...
- Page 76 Wiring Diagram 1HXCA This Document can not be used without Samsung's authorization. Samsung Electronics...
- Page 77 Wiring Diagram MHXCA This Document can not be used without Samsung's authorization. Samsung Electronics...
- Page 78 6-2 Outdoor Unit MH050FXCA2A This Document can not be used without Samsung's authorization. Samsung Electronics...
- Page 79 Wiring Diagram MH080FXCA4A This Document can not be used without Samsung's authorization. Samsung Electronics...
-
Page 80: Schematic Diagram
7. Schematic Diagram 7-1 Indoor Unit FNCA This Document can not be used without Samsung's authorization. Samsung Electronics... - Page 81 Schematic Diagram FECA This Document can not be used without Samsung's authorization. Samsung Electronics...
- Page 82 Schematic Diagram 1HXCA This Document can not be used without Samsung's authorization. Samsung Electronics...
- Page 83 Schematic Diagram MHXCA This Document can not be used without Samsung's authorization. Samsung Electronics...
- Page 84 7-2 Outdoor Unit 7-2-1 MH050FXCA2A/MH080FXCA4A Temperature sensor & EEV SMPS Inverter This Document can not be used without Samsung's authorization. Samsung Electronics...
-
Page 85: Pcb Diagram
8. PCB Diagram 8-1 MAIN PCB(Indoor Unit) FNCA The red number connecter is not used. & Power Temperature Sensor Motor RPM Feedback Auto Grill Remocon Module HVPS(High voltage Generator) Humidity Sensor BLADE-H Step Motor Anions Display Indoor Fan Motor Samsung Electronics... - Page 86 Heater Temperature Option Switch Wired Remote Controller Power(12V) Fan (Tap Control) Control Signal Ventilator & Drain Pump “ Display Hot Coil ‘ Operating Check Signal Fan (SSR) HALL IC Trans In Download Main Power COM 1 Trans out Samsung Electronics...
- Page 87 CN41-Temp. sensor CN51-FLOAT S/W CN61, CN62-Slide Panel CN83- External Control #1:ROOM Temp. Sensor #1:GND #1:On/off Contact point input #1,#6:DC12V #2:GND #2:Float S/W #2~#5:Motor Control #2:GND #3:EVA IN Temp. sensor #7~#10:Not used #4:GND CN42-Temp. sensor #1:EVA OUT Temp. Sensor #2:GND Samsung Electronics...
- Page 88 PCB Diagram 1HXCA (cont.) - Panel CN01 : Connect the Main PBA of the Indoor Unit #1~#5:Control Display LED #6:Not used connection #7:Receive signals from wireless remote controller Connector #8:GND #9:VCC (DC5V) Samsung Electronics...
- Page 89 DC12V Out(Wired Remocon Power) : YW396-02V(WHT) Panel Louver(Stepping Motor) : SMW250-10(WHT) Micom Program Download : SMW200-10(BLK) “ External Control Out(Error, Compressor State) : SMW250-04(RED) Display PCB : SMW200-9(WHT) ‘ External Control In(On/Off Control Signal) : SMW250-02(RED) SSR Fan Control : SMW250-03(WHT) Samsung Electronics...
-
Page 90: Sub Pcb(Indoor Unit)
8-2 SUB PCB(Indoor Unit) FNCA The red number connecter is not used. External Signal MAIN PCB Connection Samsung Electronics... -
Page 91: Main Pcb(Outdoor Unit)
8-3 MAIN PCB(Outdoor Unit) MH050FXCA2A/MH080FXCA4A Power N COND/OLP Temperature Sensor & Power L DIS/OUT Temperature Sensor BLDC FAN EEV Connector AC FAN Comp. Connector Wire Communication 485 Reactor Connector Wire Samsung Electronics... -
Page 92: Troubleshooting
The compressor stops intermittently in a The compressor stops intermittently or the fan speed of the COOL mode or DRY mode, and fan speed of the indoor unit decreases to prevent inside/outside air frozen indoor unit decreases. depending on the inside/outside air temperature. Samsung Electronics... -
Page 93: Checking And Testing Operations
First current EEV2 current step Target Discharge temperature EEV3 current step Total capacity of the indoor units Fan RPM (H:high,L:low,Blank:off ) Safety control • The EEV 2 and EEV 3 of MH050FXCA2A model is always displayed as blank. Samsung Electronics... - Page 94 Button [K1] 1 times DIS 01 DIS 02 Display [DIS 01 ] is flickering on the setting time. Outdoor Temperature 32˚F or more less than 32˚F Time duration (Cool mode) (Heat mode) 5min~10min 20min~50min Samsung Electronics...
- Page 95 - On this mode the controller will ignore the manual address number set on the rotary switch on the indoor PCB. - To confirm the indoor address number assigned by this mode, use "TEST MODE" and the address number will be displayed on the LED display on the indoor unit. Samsung Electronics...
- Page 96 02--communication with indoor unit C; 03--communication with indoor unit D; In case of Manual address mode,you can do pipe check operation for check whether you connect the pipes correctly or not. But you need set indoor address switch yourselves. Samsung Electronics...
- Page 97 Troubleshooting Switch Setting and Testing Operation (cont.) TO SET ADDRESSING MANUALLY BY ROTARY TYPE PICTURE MODEL SWITCH “SW02 ” MH026FNCA MH035FNCA MH052FNCA MH026FECA SLIM DUCT MH035FECA MH052FECA SW02 SLIM 1 WAY NJ0261HXCA CASSETTE NJ0351HXCA NJ030MHXCA MINI 4 WAY NJ035MHXCA CASSETTE...
- Page 98 Cooling mode (indoor unit check) → Inlet air temp.-Outlet air temp : From 10°K to 12°K (indicative delta T) Heating mode (indoor unit check) → Outlet air temp.-Inlet air temp : From 11°K to 14°K (indicative delta T) In heating mode,the indoor fan motor can remain off to avoid cold air blown into conditioned space. Samsung Electronics...
- Page 99 Indoor unit heat exchanger in temperature sensor error (open/short) E237 E251 Condenser temperature sensor error (open/short) Compressor Discharge temperature sensor error (open/short) E251 Compressor OLP sensor error (open/short) E320 Please, The System turn off and replace sensor which is related. Guidance Samsung Electronics...
- Page 100 Replace outdoor unit’s ass’y control or indoorr unit’s Step 2 EEV Coil ass’y control. Basically, This error caused by communication between indoor units and outdoor unit. Guidance First of all, check the all coommunication connection and PCB’s status. Samsung Electronics...
- Page 101 This is caused by protection mode behavior. Analysis This is indoor Evaporator Freezing protection mode. Step 1 Please, check indoor unit, whether inlet or outlet grill is closed. Step 2 Please, check indoor unit, whether indoor fan is working. 9-10 Samsung Electronics...
- Page 102 Error code. Check point Remarks These Error codes only apply with Try-run mode, in case of system have some defect as result of try-run operation. Analysis Refer to self-detection algorithm (Check Error Code meaning and check it out) Samsung Electronics 9-11...
-
Page 103: Fault Diagnosis By Symptom
2 digit alternatively. Any Error code on LED display? Wait for 5 minutes to check error code Consult error code table because some error judgement needs long time Check Major parts(See 12-5) Consult error code(Next Page) 9-12 Samsung Electronics... - Page 104 ? Error related to outdoor controller except Consult LED pattern on wiring diagram on temperature sensor and communication outdoor controller between indoor unit and outdoor unit ? See Error Code Table and Check “Main checking point” Samsung Electronics 9-13...
- Page 105 After power off this error will display until Blink DC LINK capacitor discharged.(Max 20sec.) Blink Option error (EEPROM error) Abnormal condition Blink Comp. peak current (Over Current) Blink Comp. starting error Comp. rotation error Blink DC-Link voltage error Blink Comp. V Limit Error 9-14 Samsung Electronics...
- Page 106 Press K4 key on the outdoor display PCB for several times to change the display to sensor temperature value. Left 1 digit of the LED is data index and Right 3 digits are the value Index Value Remark Estimated Primary current value from The unit is 0.1A Compressor current Samsung Electronics 9-15...
- Page 107 Press K4 key on the outdoor display PCB for several time to change the display to sensor temperature value. Left 1 digit of the LED is data index and Right 2 digits are the value. Index Value Remark Discharge sensor temperature OLP sensor temperature The unit is degree C Condenser sensor temperature Outdoor sensor temperature 9-16 Samsung Electronics...
- Page 108 Left 1 digit of the LED is data index and Right 3 digits is the value. Index Value Remark EEV-A step EEV-B step The step value range is between Zero and 480. EEV-C step EEV-D step 9-3-7 Pipe matching See 9-2 "Checking and Testing operations". Samsung Electronics 9-17...
-
Page 109: Pcb Inspection
9-4-2 Procedure 12-4-2 The parts should be replaced in the following procedure. Check for any faulty part. Detach the faulty part. Replace it with a new part. Check the operation of the new part. The repair is completed. 9-18 Samsung Electronics... -
Page 110: Reference For Installation
• It is harmful to the air conditioner if it is used in the following environments: greasy areas (including areas near machines), salty areas such as coast areas, areas where sulfuric gas is present such as hot spring areas. Contact your dealer for advice. Samsung Electronics 10-1... - Page 111 2. Make sure that you put the remote control unit in an area not exposed to direct sunlight, and where there is no source of heat. 3. Make sure that you use the remote control unit in an area away from TVs, audio units, cordless phones, fluorescent lighting fixtures and other electrical appliances (at least 3.3ft). 10-2 Samsung Electronics...
-
Page 112: Connecting Up And Purging The Circuit
183kgf•cm with a torque wrench. Service port 7. Check for gas leakage. • At this time, especially check for gas leakage from the 3 way valve’s stem nuts, and from the service port cap. Samsung Electronics 10-3... - Page 113 6 Mount the valve stem nuts and the service port cap to the valve,and tighten them at the torque of 183kgf•cm with a torque wrench. 7 Check for gas leakage. - At this time,especially check for gas leakage from the 3-way valve ’s stem nuts,and from the service port cap. 10-4 Samsung Electronics...
-
Page 114: Refrigerant Refill
7) Stop operation of the air conditioner. 8) Close the 3 way valve, disconnect the pressure gauge, and open the 3 way valve again. 9) Close the cap of each valve. Samsung Electronics 10-5... - Page 115 7) Stop operation of the air conditioner. 8) Close the 5/8" service valve, disconnect the pressure gauge, and open the 5/8" service valve again. 9) Close the cap of each valve. 10-6 Samsung Electronics...
-
Page 116: Refrigerant Adjustment
85% of the rated voltage. And then, a voltage meter will be useful to check the rate of the voltage drop. Samsung Electronics 10-7... -
Page 117: Flare Nut Fixing Torque
10-5 Flare Nut Fixing Torque Torque (kg . cm) Torque(kg . cm) Outer diameter Fixing Torque Final Torque ø 1/4 inch (Liquid Side) ø 3/8 inch (Gas Side) ø 1/2 inch (Gas Side) 10-8 Samsung Electronics... -
Page 118: Pump Down" Procedure
6. Make sure you do not bend the connection pipes in the middle and store together with the cables. • 7. Move the indoor and outdoor units to a new location. • 8. Remove the mounting plate for the indoor unit and move it to a new location. Samsung Electronics 10-9... - Page 119 6. Make sure you do not bend the connection pipes in the middle and store together with the cables. • 7. Move the indoor and outdoor units to a new location. • 8. Remove the mounting plate for the indoor unit and move it to a new location. 10-10 Samsung Electronics...
-
Page 120: Reference Information
200~220V, 50Hz Free Inverter Version 220~240V, 50Hz Redd Digital Scroll _,12.. Indoor 127V, 50Hz _,A,B.. Outdoor Indoor/Outdoor Type Refrigerant 1 way Slim 1 way R407C Mini 4 way R410A Silhouette Duct Slim Vivave Moderato Console CONV Outdoor Samsung Electronics 11-1... - Page 121 FREE JOINT MULTI FOR EUROPE Buyer code Product Type Capa Serial Version Indoor Capacity Multi *K BTU Basic - CAP Indoor(K BTU) MR(02R~) Outdoor Mode Refrigerant R410A Inverter Semi Product Indoor Outdoor R407C Indoor Type Vivave Moderato 11-2 Samsung Electronics...
- Page 122 380V, 60Hz, CONV R410A/PRM Console 3phasea Capa R410A/Flagship 460V, 60Hz, FAC & Large Capacity KW/BTU'Liter 3phasea Vivace Version Neo-Forte (EEV) Export Neo-Forte Solar (Water) Tank Crystal High efficiency EER mode indoor unit Hydro Unit HYDRO Water tank Samsung Electronics 11-3...
-
Page 123: Refrigerating Cycle Diagram
11-2 Refrigerating Cycle Diagram MH050FXCA2A 11-4 Samsung Electronics... - Page 124 Reference Information MH080FXCA4A Samsung Electronics 11-5...
-
Page 125: Pressure & Capacity Mark
Heat exchanger; A device, used to transfer heat from a fluid on one side of a barrier to a fluid ASS’Y EVAP/ASS’Y COND on the other side without bringing the fluids into direct contact. (Full name : assemble evaporator / assemble condenser) 11-6 Samsung Electronics... -
Page 126: Q & A For Non-Trouble
It occurs when the drain pump is plugged out or it is out of order. Check the power of the drain pump and the position of the drain hose, and when the pump is faulty, contact the drain pump manufacturer. Samsung Electronics do not manufacture drain pumps. So, we are not able to correct the drain pump problems. - Page 127 Set up a sun blind over the outdoor unit and clear the neighboring obstacles from the outdoor unit to provide good ventilation. When it goes off frequently during a heat wave, it would prevent the turn-off and increase the cooling capacity cleaning the outdoor unit or spraying some water to the heat exchanger. 11-8 Samsung Electronics...
- Page 128 There is a cost table. But, our service engineer needs to visit to total up the cost correctly. When you move in, make sure to contact Samsung Electronics Service Center or Authorized Service Agent in advance to streamline the process.
-
Page 129: Common Sense Of Refrigeration
But generally the value of fresh indoor temperature is that below 0.2(m/s) of indoor air circulation, the temperature is 21~28˚C when the wall temperature is the same as the indoor's and relative humidity is 30~31% in summer, the winter temperature is 20~24˚C and relative humidity is 30~60% in winter. 11-10 Samsung Electronics... - Page 130 Asia http://asia.samsungportal.com Mideast & Africa http://mea.samsungportal.com This Service Manual is a property of Samsung Electronics Co., Ltd. © Samsung Electronics Co., Ltd. Apr. 2011. Any unauthorized use of Manual can be punished under applicable Printed in Korea. International and/or domestic law.
Need help?
Do you have a question about the MH026FNCA and is the answer not in the manual?
Questions and answers