Table of Contents
Advertisement
Quick Links
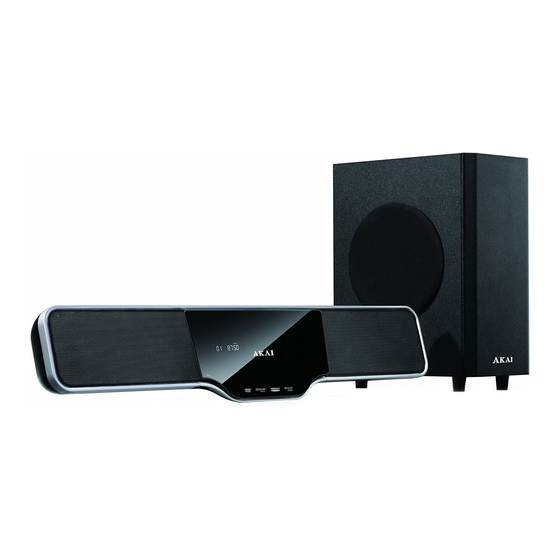
English: AHC1600
Index
1. Safety
o
1.1. Intended use
o
1.2. Labels in this manual
o
1.3. General safety instructions
2. Preparations for use
3. Installation
4. Functions
5. Operation
6. Cleaning and maintenance
7. Technical data
8. Disposal of used electrical and electronic equipment
Safety
Intended use
The DVD Micro System plays music from CDs and music, videos and photos from DVDs and USB.
The appliance also plays photos from Kodak picture CDs. Read the manual carefully before the first
use.
DVDs and DVD appliances are manufactured under the worldwide agreed DVD regional code system
that the appliance will operate only with corresponding disc of the same regional code. If the code
number on the label of a DVD does not match that on the label alongside, the DVD will not play on this
appliance.
The appliance has built in copyright protection technology that prevents copying from a disc to any
media. If a video recorder is connected to the appliance, the video output image will be distorted
during recording.
Manufactured under license from Dolby Laboratories. "Dolby" and the double-D symbol are
trademarks of Dolby Laboratories. Confidential unpublished works. Copyright 1992-1997 Dolby
Laboratories. All rights reserved.
Advertisement
Table of Contents

Subscribe to Our Youtube Channel
Related Manuals for Akai AHC1600


Summary of Contents for Akai AHC1600
- Page 1 English: AHC1600 Index 1. Safety 1.1. Intended use 1.2. Labels in this manual 1.3. General safety instructions 2. Preparations for use 3. Installation 4. Functions 5. Operation 6. Cleaning and maintenance 7. Technical data ...
-
Page 2: Labels In This Manual
The product complies with Kodak picture CD format and will display Kodak picture CDs. The "KODAK Picture CD Compatible" logo is a trademark of Eastman Kodak Company and is used with permission. Because of the great variety of products with USB ports and their sometimes quite manufacturer- specific functions we can neither guarantee that all devices will be recognised, nor that all operating options that are possible in theory will actually work. -
Page 3: Preparations For Use
Preparations for use Unpacking Unpack the appliance carefully. Check the package contents as described below. If any item is missing, please contact your reseller. Remove the labels from the front panel carefully if present. We recommend that you retain the original carton and packing materials in case it ever becomes necessary to return your product for service. -
Page 4: Installation
Installation Install batteries Install batteries Remove the battery cover. Insert the batteries matching the (+) and (-) polarity markings. CAUTION Incorrect installation can cause battery leakage and corrosion which will damage the appliance. Corrosion, oxidation, battery leakage and any other gradually acidic defect of this nature will invalidate the guarantee. - Page 5 Connect the tv Use one of the two cables for this Please note: Cables are not included...
-
Page 6: Remote Control
Functions Remote control 1. STANDBY button 2. Digit buttons 3. GOTO button 4. EQUALIZER button 5. S.EFFECT button 6. STOP button 7. FAST FORWARD button 8. FAST REWIND button 9. VOLUME button (+/-) 10. TITLE button 11. Arrow buttons 12. AUDIO button 13. - Page 7 ASB90i soundbox 1. Loudspeaker 2. USB slot 3. PORT INPUT 4. STANDBY 5. SOURCE 6. STOP 7. VOLUME +/- 8. PREVIOUS 9. PLAY/PAUSE 10. NEXT 11. OPEN 12. DC INPUT (25V) 13. FM ANTENNA 14. SUBWOOFER OUTPUT 15. AUX INPUT 16.
-
Page 8: Operation
Operation All functions of the appliance are accessible using the remote control. All instructions refer to operation with the remote control, unless indicated otherwise. Quick start General functions Set the appliance in the standby mode. To switch on the appliance, press the STANDBY button (1). To switch back to the standby mode, press the STANDBY button (1) again. -
Page 9: General Setup Menu Operation
Select AUX mode. Use the FUNCTION (23) key for this. Connect the external appliance to your AHC1600. General setup menu operation This chapter explains a complete setup of the appliance: settings of screen display, audio setup and video setup. -
Page 10: General Settings Menu
General settings menu To change the initial settings The following actions have to be carried out with the remote control. Press the SETUP button (13). Press the arrow buttons (left and right) (11) to select a menu. The submenu is displayed directly. ... - Page 11 Audio setup page Speaker settings DOWNMIX: Select LT/RT to mix 5.1-channel audio into left channel and right channel. Select STEREO to mix 5.1 channel audio into signal stereo. EQUALIZER For various audio settings. 3D processing creates a virtual sound experience for various audio settings. With REVERB you can create an echo effect.
- Page 12 Rating setup page PARENTAL Set a rating for movies played by the appliance. Movies rated higher than the level set for the parental lock can not be viewed. The password to reset the rating is 136900. This function is only available with discs that have parental rating encoded. SET PASSWORD Change the default password.
- Page 13 After the disc has been loaded, a content menu will display on the TV screen. Press the arrow buttons (11) to select a menu item. Press the ENTER button (28) to enter the selected menu item. During playback, the following functions are available: ...
- Page 14 Using the MP3/MPEG4 playback function Insert an MP3/MPEG4 disc. A content menu will display on the TV screen. Press the up/down arrow buttons (11) to select a folder or a file. Press ENTER (28) to enter the selected folder or file. ...
- Page 15 USB functions Slide the USB port out. Insert the USB device in the slot . The device can only be connected one way. After the device has been connected, a content menu will display on the TV screen. Press the arrow button (11) (up and down) to select a folder or a file. ...
-
Page 16: Radio Functions
To fine tune the frequency, press the SEARCH button (+ or -) (7/8). To skip to the next preset station, press the RADIO buttons (+ or -) (25/26). AUX IN Select AUX mode.Use the FUNCTION (23) key for this. Connect the external appliance to your AHC1600. -
Page 17: Cleaning And Maintenance
Cleaning and maintenance WARNING Before performing any cleaning or maintenance, switch off and unplug the appliance. Clean the outside of the appliance with a soft cloth. When the appliance is very dirty, dampen the cloth slightly with water and a neutral solution. Handle and care of a disc ... - Page 18 Disc output Laser type: Frequency range: 20 Hz ~ 20 kHz Signal/noise ratio: > 80 dB (1kHz) Dynamic range: > 70 dB (1 kHz) Distortion: < -60 dB (1kHz) Wow en flutter Television system: PAL/NTSC Region code: 2 Front speakers Impedance: 6 OHM Subwoofer Casing material: wood...
-
Page 19: Disposal Of Used Electrical And Electronic Equipment
For more detailed information about recycling of this product, please contact your local city office, your household waste disposal service or the shop where you purchased the product. For more information and warranty conditions, please visit: www.akai.eu Do not dispose of batteries as household waste but take them to a battery recycling facility.
Need help?
Do you have a question about the AHC1600 and is the answer not in the manual?
Questions and answers