Table of Contents
Advertisement
Quick Links
AMD320 manual
Index
1. Intended use
2. Safety
o
2.1. Labels in this manual
o
2.2. General safety instructions
3. Preparations for use
o
3.1. Unpacking
o
3.2. Package contents
4. Installation
o
4.1. Install batteries
o
4.2. Connecting the system
o
4.3. Connecting random equipment
o
4.4. Connecting to the mains
5. Functions
o
5.1. Remote control
o
5.2. AMD350 Microset
6. Operation
o
6.1. Quick start
o
6.2. General setup menu operation
o
6.3. DVD/CD functions
o
6.4. Radio functions
o
6.5. USB functions
o
6.6. LINE-IN
o
6.7. Operation with BLUETOOTH
7. Cleaning and maintenance
o
7.1. Handle and care of a disc
8. Technical data
9. Disposal of used electrical and electronic equipment
Advertisement
Table of Contents

Related Manuals for Akai AMD320


Summary of Contents for Akai AMD320
- Page 1 AMD320 manual Index 1. Intended use 2. Safety 2.1. Labels in this manual 2.2. General safety instructions 3. Preparations for use 3.1. Unpacking 3.2. Package contents 4. Installation 4.1. Install batteries 4.2. Connecting the system 4.3. Connecting random equipment 4.4.
-
Page 2: Intended Use
1.Intended use The Microset plays music from CDs, and music, videos and photos from DVDs and USB. The appliance shows photos from Kodak picture CDs as well. The appliance also offers the option to rip CDs. The Microset can be operated via Bluetooth. -
Page 3: Safety
2.Safety 2.1. Labels in this manual WARNING A warning means that injury or death is possible if the instructions are not obeyed. CAUTION A caution means that damage to the equipment is possible. A note gives additional information, e.g. for a procedure. The appliance functions as a portable media player. -
Page 4: Preparations For Use
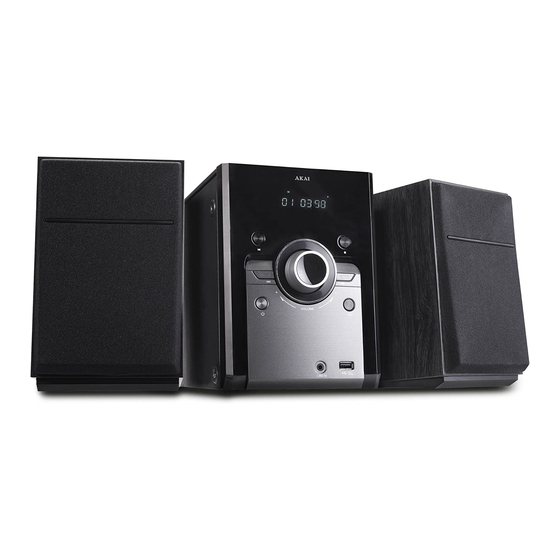
3.2. Package contents The following items are included in the received package: 1 x AMD320 DVD Micro System 2 x Speaker 1 x Remote control... -
Page 5: Installation
4.Installation 4.1. Install batteries Install batteries Remove the battery cover. Insert the batteries matching the (+) and (-) polarity markings. CAUTION Incorrect installation can cause battery leakage and corrosion which will damage the appliance. Corrosion, oxidation, battery leakage and any other gradually acidic defect of this nature will invalidate the guarantee. - Page 6 4.3. Connecting random equipment Connect the tv Use one of the cables as presented in the image below.
- Page 7 4.4. Connecting to the mains Connect the appliance to the mains. Switch on the appliance.
- Page 8 5.Functions 5.1. Remote control STANDBY button Digit buttons GOTO button PLAY / PAUSE button SETUP button PBC button PROGRAM button OSD button FAST FORWARD / REWIND button 10. TITLE button 11. Arrow buttons 12. AUDIO button 13. SLOW button 14. SOUND EFFECT button 15.
- Page 9 23. NEXT / PREVIOUS button 24. VOLUME button (+/-) 25. SUBTITLE button 26. ENTER button 27. MENU button 28. STEP button 29. RESET button 30. ZOOM button 31. STOP button 5.2. AMD350 Microset...
- Page 10 PLAY/ PAUSE DISPLAY SCREEN REMOTE CONTROL SENSOR PREVIOUS STOP NEXT VOLUME +/- SOURCE STANDBY 10. AUX IN 11. USB 2.0 slot 12. HDMI 13. COAXIAL DIGITAL AUDIO OUTPUT 14. COMPOSITE VIDEO OUTPUT 15. LEFT / RIGHT AUDIO INPUT 16. FM wire antenna 17.
-
Page 11: Operation
6.Operation All functions of the appliance are accessible using the remote control. All instructions refer to operation with the remote control, unless indicated otherwise. 6.1. Quick start General functions Set the appliance in the standby mode. To switch on the appliance, press the STANDBY button (1). To switch back to the standby mode, press the STANDBY button (1) again. - Page 12 To select the source mode AUX, press the SOURCE button (22). Connect the external appliance to your AMD320 Mircoset. USB and Memory card functions Please note: the disc cover must be closed in order to use the USB functions.
- Page 13 6.2. General setup menu operation This chapter explains a complete setup of the appliance: settings of screen display, audio setup and video setup. General settings menu To change the initial settings The following actions have to be carried out with the remote control. ...
- Page 14 OSD LANG In the OSD LANG section, press the arrow buttons to choose the language. Screensaver on/off. The screensaver will be turned on automatically when there is no picture. last memory: on/off When the DVD is paused, playback will automatically resume from where last stopped. VIDEO Colour settings RESOLUTION: select the desired resolution.
- Page 15 DEFAULT Restore all default settings of the appliance, except the settings for the menu items PARENTAL and PASSWORD. 6.3. DVD/CD functions Preparation Turn on the television. After the disc has been loaded, a content menu will display on the TV screen. ...
- Page 16 To playback in slow-motion, either forward or backward, press the SLOW button (13) repeatedly. The available speeds are: 1/2, 1/4, 1/6, 1/8, 1/16. To play the DVD frame by frame, press the STEP button (28). Press the PLAY/PAUSE button (4) to resume normal playback.
- Page 17 Using the MP3/MPEG4 playback function Insert an MP3/MPEG4 disc. A content menu will display on the TV screen. Press the up/down arrow buttons to select a folder or a file. Press ENTER (26) to enter the selected folder or file. ...
-
Page 18: Installation
6.4. Radio functions Press the SOURCE button (22) to select the tuner mode. To switch between Mono and Stereo reception, press the MO/ST button (27). Touch MEMORY (12) to add the current station to your favourites Use the number buttons to determine the preset position. -
Page 19: Functions
6.5. USB functions Preparation Turn on the television. Insert the USB device in the slot . The device can only be connected one way. Press the USB button (15). After the device has been connected, a content menu will display on the TV screen. ... - Page 20 To select the source mode LINE-IN, press the SOURCE button (22). 6.7. Operation with BLUETOOTH You can wirelessly connect the AMD320 to devices that have Bluetooth A2DP. Establishing a Bluetooth connection (PAIREN) Turn on the Bluetooth function of your device ...
-
Page 21: Cleaning And Maintenance
7.Cleaning and maintenance WARNING Before performing any cleaning or maintenance, switch off and unplug the appliance. Clean the outside of the appliance with a soft cloth. When the appliance is very dirty, dampen the cloth slightly with water and a neutral solution. 7.1. -
Page 22: Technical Data
8.Technical data AMD320 Microset Voltage: 100 - 240VAC / 60 Hz Power consumption: 75W Frequency response: +/- 1,5 dB (20Hz ~20KHz) Speaker output: 2 x 15W RMS Disc output Television system: PAL/NTSC Frequency range: 20Hz ~20KHz Signal/noise ratio: >80dB (1kHz) Dynamic range: >70dB (1kHz) -
Page 23: Disposal Of Used Electrical And Electronic Equipment
For more detailed information about recycling of this product, please contact your local city office, your household waste disposal service or the shop where you purchased the product. For more information and warranty conditions, please visit: www.akai.eu Do not dispose of batteries as household waste but take them to a battery recycling facility.
Need help?
Do you have a question about the AMD320 and is the answer not in the manual?
Questions and answers