ResMed Stellar 100 User Manual
Invasive and noninvasive ventilators
Hide thumbs
Also See for Stellar 100:
- User manual (270 pages) ,
- Manual (13 pages) ,
- Quick start manual (2 pages)

Related Manuals for ResMed Stellar 100


Summary of Contents for ResMed Stellar 100
- Page 1 Stellar ™ Stellar ™ InvasIve and nonInvasIve ventIlators User Guide English Respiratory Care Solutions Making quality of care easy...
- Page 2 Respiratory Care Solutions Making quality of care easy...
- Page 3 ™ Stellar ™ Stellar User Guide English...
-
Page 4: Table Of Contents
Patient interface Humidification Internal battery ResMed USB stick Use on an aircraft Mobile use Setting up for noninvasive use ....... . 4 Attaching the H4i heated humidifier for noninvasive use Setting up for invasive use . - Page 5 Cleaning and maintenance ........19 Daily Weekly Monthly Replacing the air filter Disinfection...
-
Page 6: Introduction
Clinical Guide. Indications for use The Stellar 100/150 is intended to provide ventilation for non-dependent, spontaneously breathing adult and pediatric patients (30 lb/13 kg and above) with respiratory insufficiency, or respiratory failure, with or without obstructive sleep apnea. The device is for noninvasive use, or invasive use with an uncuffed or deflated tracheostomy. -
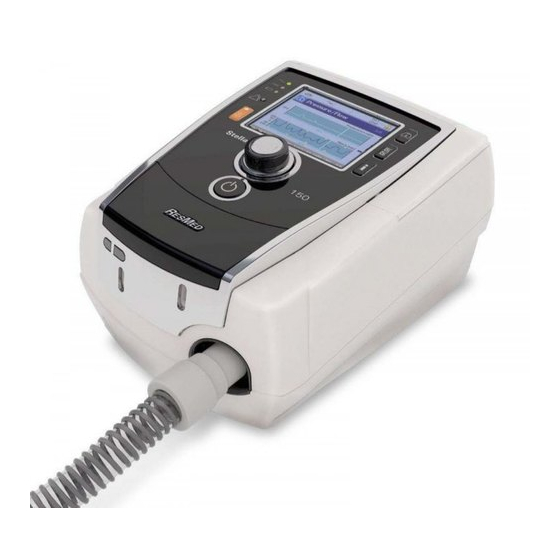
Page 7: Product View
• 9’ 10” (3 m) air tubing • SlimLine™ air tubing • Clear air tubing (disposable) • H4i™ heated humidifier • Antibacterial filter • Heat moisture exchanger filter (HMEF) • ResMed XPOD oximeter • Nonin™ pulse oximetry sensors • FiO monitoring kit (external cable, T-piece adapter) •... -
Page 8: Patient Interface
50% to increase the durability. ResMed USB stick A ResMed USB stick may be used with the device either to help the clinician to monitor your treatment or to provide you with updated device settings. For more information, see “Data management”... -
Page 9: Mobile Use
For setup and correct use, see the Stellar Mobility Bag User Guide. For extended mobile use, the ResMed Power Station II external power supply unit can be used as an additional power source. Limitations apply to the use of oxygen with the Stellar Mobility Bag. -
Page 10: Attaching The H4I Heated Humidifier For Noninvasive Use
• The heating feature of the H4i is disabled when the device is not mains powered. Setting up for invasive use The Stellar can be used invasively only with the ResMed leak port and an uncuffed or deflated cuff tracheostomy tube. - Page 11 If an external humidifier is not being used, you can connect the HMEF to the leak port if necessary. Connect the catheter mount. ** The leak port or the HMEF can be connected to standardized tracheostomy interfaces including connector pieces like catheter mounts. The catheter mount and the external humidifier are not part of the ResMed component.
-
Page 12: Working With Other Optional Accessories
• • ResMed strongly recommends adding oxygen into Stellar’s oxygen inlet at the rear of the device. Entraining oxygen elsewhere, ie into the breathing system via a side port or at the mask, has potential to impair triggering and accuracy of therapy/monitoring and alarms (eg, High Leak alarm, Non-vented mask alarm). -
Page 13: Starting Therapy Using Oxygen
Oxygen supply Press spring to release connection after use Starting therapy using oxygen Fit the oxygen connector to the oxygen inlet of the device. Attach the other end of the oxygen supply tubing to the oxygen supply. Press to start treatment. Turn on oxygen. -
Page 14: Attaching An Antibacterial Filter
Regularly check the filter for entry of moisture or other contaminants. The filter must be replaced according to the manufacturer‘s specifications. Note: ResMed recommends using a filter with a low impedance (less than 2 cm H O at 60 L/min, eg, PALL BB 50 filter). -
Page 15: Stellar Basics
Stellar basics About the control panel Mains Power LED LCD Screen On when operating on mains power. External power supply On when external battery is connected. Internal battery LED On when internal battery is in menu Monitoring use. Flashes when device is turned off and battery is charging. -
Page 16: Lcd Screen
LCD screen The LCD screen displays the menus, monitoring screens and alarm status. Warm-up feature H4i Ramp time ResMed USB stick Program Mains power Therapy mode External power supply Patient mode Internal battery Clinical mode Title bar Current screen/number of... -
Page 17: Starting Therapy
You can use the warm-up feature to pre-heat Warm-up humidifier the water in the humidifier prior to starting treatment. The humidifier will be automatically detected when the device is turned on. The Treatment screen provides the option to start warming the humidifier. If the humidifier is heating, the related symbol is displayed at the top of the LCD screen. -
Page 18: Turning Off The Power
Turning off the power Stop the therapy. Press the power switch at the back of the device once and follow the instructions on the display. Note: To disconnect the device from the mains power pull out the power cord from the power socket. -
Page 19: Tailoring Treatment Setup Options
Tailoring treatment setup options Setting Ramp Ramp time is a feature that can be enabled Ramp time by your clinician by setting a maximum ramp time. Designed to make the beginning of treatment more comfortable, ramp time is the period during which the pressure increases from a low start pressure to the treatment pressure. -
Page 20: Using The Menus
Using the menus The device has three menus (Monitoring, Setup, Info) accessed by the equivalent buttons on the right of the LCD screen. In each menu there are screens that display settings, device or therapy information. Treatment Clinical Settings Event Summary Monitoring Leak Pressure / Flow... -
Page 21: Setup Menu
For a full list of compatible masks for this device, see the Mask/Device Compatibility List on www.resmed.com on the Products page under Service & Support. If you do not have internet access, please contact your ResMed representative. -
Page 22: Setup Menu: Configuration Menu
Parameter Description Learn Circuit The device is calibrated according to your air tubing system. 1. If in use, turn off the oxygen flow. 2. Select the mask type. 3. Set up the air circuit including accessories and patient interface. Note: For invasive use, do not connect a catheter mount, tracheostomy tube or HMEF, see “Setting up for invasive use”... -
Page 23: Info Menu
Event Summary Event summary displays the summary of three types of events: changes in settings, alarms and system events (eg, connection of ResMed USB stick). There are up to 200 events of each type, displayed in chronological order, with the most recent event displayed at the top by default. -
Page 24: Data Management
• Do not store files on the USB stick other than those created by the device or application. Unknown files may be lost during data transfer. Plug the ResMed USB stick to one of the two USB connections on the rear side of the device. -
Page 25: Weekly
Weekly Remove the air tubing from the device and the patient interface. Wash the air tubing in warm water using mild detergent. Rinse thoroughly, hang and allow to dry. Reconnect the air tubing to the air outlet and patient interface. CAUTION Do not use bleach, chlorine, alcohol or aromatic-based solutions (including all scented oils), moisturizing or antibacterial soaps to clean the air tubing or the device. -
Page 26: Multipatient Use
This product should be inspected by an authorized ResMed service center five years from the date of manufacture, except for the internal battery which must be replaced every two years from the manufacturing date of the device. - Page 27 Problem / possible cause Action LCD: Internal Battery Empty! The remaining battery charge is below Connect the device to mains power. Note: In case of a total power failure, the 15%.The device can be powered by the internal battery for maximum 2 minutes. therapy settings will be stored and therapy will resume when the device is powered again.
- Page 28 • Connection of a non-vented mask. • Ensure the mask has vents. • Mask vents may be blocked. • Ensure the mask vents are not • ResMed leak port is missing or vent is blocked. blocked. • Ensure the leak port is installed and that the vent is not blocked.
-
Page 29: Other Troubleshooting
Problem / possible cause Action LCD: Low FiO Level! has dropped below the pre-set • Perform FiO sensor calibration. alarm level. • If the problem persists contact your clinician. LCD: High FiO Level! has exceeded the pre-set alarm • Perform FiO sensor calibration. - Page 30 Learn Circuit (see • Too many components have been “Setup menu” on page 16). included or the impedance of accessories in use is above ResMed’s recommendation, eg, type of filter, external humidifier, air tubing. Troubleshooting...
-
Page 31: Technical Specifications
Problem / possible cause Solution The delivered airflow is not humid/heated although the H4i humidifier is in use The humidifier is not properly attached. Correctly attach the humidifier. The humidifier does not heat. The device is currently powered by battery use or not connected to the mains. - Page 32 Sound pressure level 29 dBA as measured according to ISO 17510 – 1; 2002. 32 dBA with uncertainty of 3 dBA as measured according to ISO 17510 – 1:2007 . Alarm Volume Range > 45 dBA - <85 dBA at 3’ 3” (1 m); 3 steps: low medium, high Dimensions (L x W x H) 9.1”...
-
Page 33: Guidance And Manufacturer's Declaration - Electromagnetic Emissions And Immunity
RTCA/DO-160 can be used during all phases of air travel without further testing or approval by the airline operator. ResMed confirms that the Stellar meets RTCA/ DO-160 requirements. This device is not suitable for use in the presence of a flammable anesthetic mixture. - Page 34 Voltage dips, <5% Ut (>95% dip in < 12 V (>95% dip in Mains power quality should be that of a typical short Ut) for 0.5 cycle 240V) for 0.5 cycle commercial or hospital environment. interruptions If the user of the device requires continued 40% Ut (60% dip in 96 V (60% dip in and voltage...
-
Page 35: Symbols
The device must only be used with masks (and connectors ) recommended by ResMed, or by a clinician or respiratory therapist. A mask should not be used unless the device is turned on and operating properly. The vent hole or holes associated with the mask should never be blocked. - Page 36 • Do not use the device if there are obvious external defects, unexplained changes in performance. Only use orignal and approved ResMed accessories and parts. • • Use only accessories from the original package. If the packaging is damaged, the respective product must not be used, and should be disposed along with the packaging.
-
Page 37: Limited Warranty
• Portable diagnostic/screening devices This warranty is only available to the initial consumer. It is not transferable. If the product fails under conditions of normal use, ResMed will repair or replace, at its option, the defective product or any of its components. - Page 38 Respiratory Care Solutions Making quality of care easy...
- Page 39 US 6755193, US 6810876, US 6840240, US 6845773, US 6945248, US 7089937, US 7137389, US 7255103, US 7367337, US 7520279, US 7628151, US 7644713, US 7661428. Other patents pending. Protected by design registrations: EU 1768045 ResMed, SlimLine, SmartStart, Stellar, and TiCONTROL are trademarks of ResMed Ltd. ResMed, SlimLine, SmartStart and Stellar are registered in U.S. Patent and Trademark Office. © 2011 ResMed Ltd Global leaders in sleep and respiratory medicine www.resmed.com...
Need help?
Do you have a question about the Stellar 100 and is the answer not in the manual?
Questions and answers