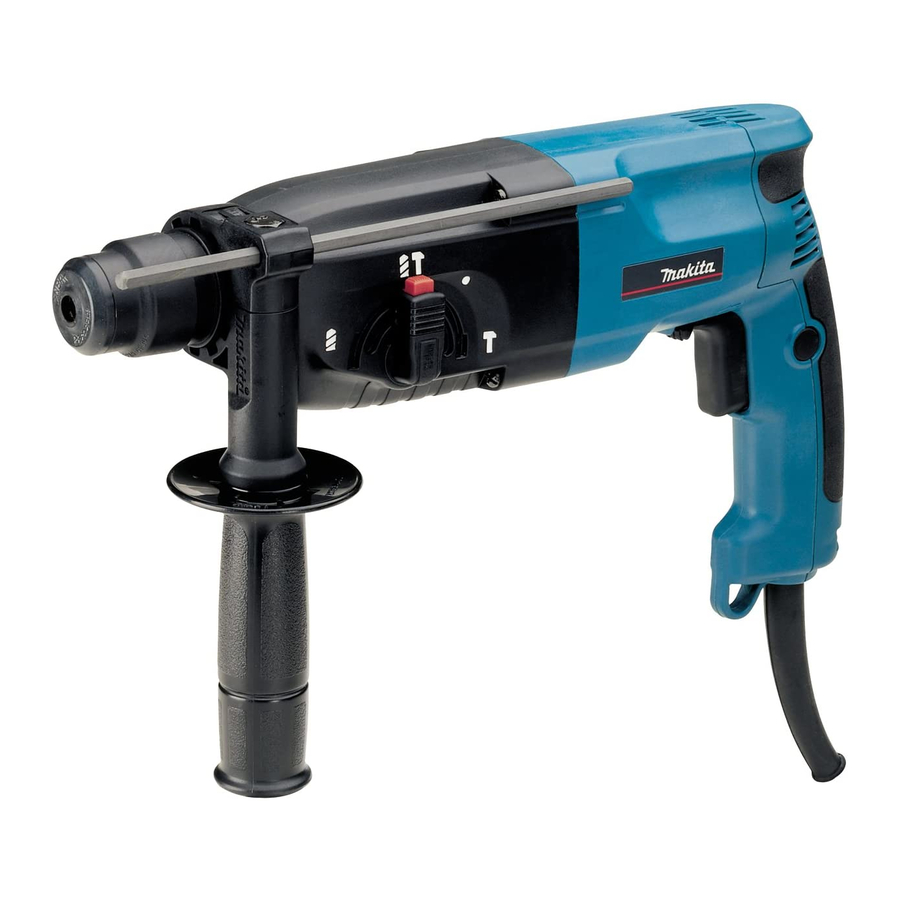
Makita HR2450 Instruction Manual
Rotary hammer
Hide thumbs
Also See for HR2450:
- Instruction manual (57 pages) ,
- Parts list (5 pages) ,
- Technical information (22 pages)
Table of Contents
Advertisement
Quick Links
Advertisement
Table of Contents

Related Manuals for Makita HR2450


Summary of Contents for Makita HR2450
- Page 1 Rotary Hammer MODEL HR2450 MODEL HR2450F MODEL HR2450X MODEL HR2450T MODEL HR2450FT MODEL HR2451 003571 DOUBLE INSULATION I N S T R U C T I O N M A N U A L WARNING: For your personal safety, READ and UNDERSTAND before using.
-
Page 2: Specifications
AC supply. They are double-insulated in accordance with European Standard and can, therefore, also be used from sockets Director without earth wire. MAKITA INTERNATIONAL EUROPE LTD. Michigan Drive, Tongwell, Milton Keynes, Bucks MK15 8JD, ENGLAND... -
Page 3: Safety Instructions
SAFETY INSTRUCTIONS ENA001-2 WARNING: When using electric tools, basic safety precautions, including the following, should always be followed to reduce the risk of fire, electric shock and personal injury. Read all these instructions before operating this product and save these instructions. For safe operations: tion and changing accessories. - Page 4 ADDITIONAL SAFETY RULES FOR TOOL ENB010-1 Hold tools by insulated gripping surfaces when In cold weather or when the tool has not been performing an operation where the cutting tool used for a long time, let the tool warm up for a may contact hidden wiring or its own cord.
-
Page 5: Functional Description
1. Lamp Reversing switch action 001293 For Model HR2450,HR2450F,HR2450X,HR2450T and HR2450FT This tool has a reversing switch to change the direction of rotation. Move the reversing switch lever to the position (A side) for clockwise rotation or the position (B side) for counterclockwise rotation. - Page 6 Changing the quick change chuck for SDS-plus 004415 For model HR2450T/HR2450FT The quick change chuck for SDS-plus can be easily exchanged for the quick change drill chuck. Removing the quick change chuck for SDS-plus CAUTION: • Before removing the quick change chuck for SDS-plus, always remove the bit.
- Page 7 Hammering only 003574 For chipping, scaling or demolition operations, depress the lock button and rotate the action mode changing knob to the symbol. Use a bull point, cold chisel, scaling chisel, etc. CAUTION: • Do not rotate the action mode changing knob when the tool is running under load.
- Page 8 Installing or removing the bit 001296 Clean the bit shank and apply bit grease before installing the bit. 1. Bit shank 2. Bit grease Insert the bit into the tool. Turn the bit and push it in until it engages. 001297 After installing, always make sure that the bit is securely held in place by trying to pull it out.
-
Page 9: Operation
Depress the lock button and rotate the action mode changing knob to the 003577 symbol. Then make sure that the bit is securely held in place by turning it slightly. Depth gauge 001299 The depth gauge is convenient for drilling holes of uniform depth. Loosen the side grip and insert the depth gauge into the hole in the side grip. - Page 10 Blow-out bulb (optional accessory) 002449 After drilling the hole, use the blow-out bulb to clean the dust out of the hole. 1. Blow-out bulb Chipping/Scaling/Demolition 003580 Set the action mode changing knob to the symbol. Hold the tool firmly with both hands. Turn the tool on and apply slight pressure on the tool so that the tool will not bounce around, uncontrolled.
- Page 11 Drilling in wood or metal For Model HR2450/HR2450F/HR2450X/HR2451 004223 Use the optional drill chuck assembly. When installing it, refer to “Installing or removing the bit” described on the previous page. For model HR2450T/HR2450FT Use the quick change drill chuck as standard equipment. When installing it, refer to “changing the quick change chuck for SDS-plus”...
-
Page 12: Maintenance
CAUTION: • These accessories or attachments are recommended for use with your Makita tool specified in this manual. The use of any other accessories or attachments might present a risk of injury to persons. Only use accessory or attachment for its stated purpose. - Page 13 Memo...
- Page 14 Memo...
- Page 15 Memo...
- Page 16 Makita Corporation 884425D220...
Need help?
Do you have a question about the HR2450 and is the answer not in the manual?
Questions and answers