Table of Contents
Advertisement
Quick Links
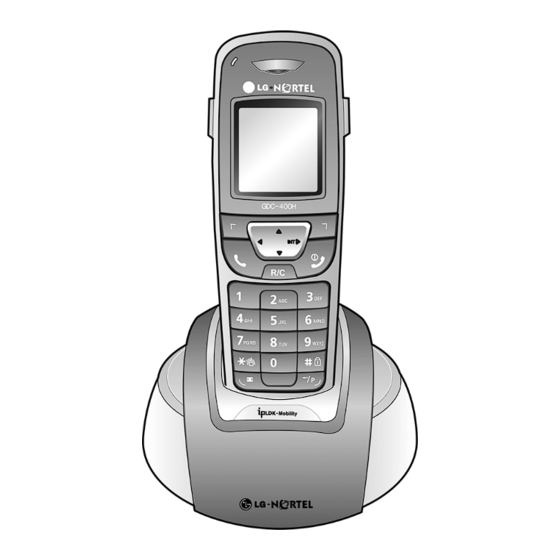
The purpose of this manual is to give a user the right way to use a GDC-400H wireless
terminal and its accessories. This manual lists the matters that a user has to avoid for right
use and explains the features of the wireless terminal as a terminal of ipLDK-
24/100/300/300E systems. The features which are explained in this manual describe the
user-interface for ipLDK series DECT key system of local sale. Also it illustrates the
specifications of the terminal and its accessories. The wireless terminal, GDC-400H (GAP),
is designed and manufactured for interface with ipLDK series DECT key system and LG-
Nortel doesn't guarantee inter-operability between any other GAP system and GDC-400H
(GAP). Please, refer to 'ipLDK System Installation Manual' about applicable peripheral items.
3
Advertisement
Table of Contents

Subscribe to Our Youtube Channel
Related Manuals for LG-Nortel GDC-400H


Summary of Contents for LG-Nortel GDC-400H
- Page 1 The purpose of this manual is to give a user the right way to use a GDC-400H wireless terminal and its accessories. This manual lists the matters that a user has to avoid for right use and explains the features of the wireless terminal as a terminal of ipLDK- 24/100/300/300E systems.
-
Page 2: Table Of Contents
3.1 INSTALLING THE BATTERY ................21 3.2 PUT THE BELT CLIP INTO HANDSET ..............21 3.3 CONNECTING THE CHARGER ................22 3.4 CHARGING THE HANDSET ................. 22 3.5 WIRELESS TERMINAL(GDC-400H)..............23 Ⅳ .BASIC FUNCTIONS ..................24 4.1 MAKING A CALL ....................24 4.1.1 EXTERNAL MAKING A CALL ................ - Page 3 Table of Contents 5.2 FIND PHONEBOOK DIRECT MENU..............34 Ⅵ .PROGRAMMING FEATURES ................35 6.1 CALL REGISTER ....................35 6.1.1 MISSED CALL....................35 6.1.2 RECEIVED CALL.................... 36 6.1.3 DIALED CALL ....................36 6.1.4 DELETE CALL ....................36 6.2 IMAGE & SOUND....................37 6.2.1 IMAGES......................
- Page 4 Table of Contents 7.6 SYSTEM REDIAL ....................47 7.6.1 TO REDIAL SAVED NUMBER ..............47 7.6.2 TO REDIAL LAST NUMBER................47 7.6.3 SAVE A CURRENT NUMBER FOR LATER USE ........47 7.7 CALL FORWARD ....................48 7.7.1 TO CANCEL CALL FORWARD..............48 7.8 DO NOT DISTURB(DND) ..................
- Page 5 9.6 CHANGE OF SUBSCRIBED SYSTEM..............64 Ⅹ .USEFUL INFORMATION................... 66 10.1 SYSTEM SPECIFICATION.................. 65 10.2 HAND-HELD TYPE WIRELESS TERMINAL (GDC-400H) SPECIFICATION .. 66 10.3 CHARGER(400-SSC) SPECIFICATION ............66 TROUBLESHOOTING GUIDE................68 APPENDIX ......................70 A. USER MENU TREE ....................69 B.
- Page 6 Important Safety Information...
- Page 7 Important Safety Information...
- Page 8 Important Safety Information...
- Page 9 Important Safety Information...
- Page 10 Important Safety Information...
- Page 11 Important Safety Information...
-
Page 12: Ⅰ.unpacking
Ⅰ.Unpacking At first, make sure that you have all the parts shown below. 1. Handset 2. Base Unit 3. AC Adapter 4. Battery 2ea 5. Owner’s Manual 6. Belt Clip Warning This equipment is not designed for making emergency calls when the power fails. Make alternative arrangements for access to emergency services. -
Page 13: Ⅱ.phone Overview
Ⅱ.Phone Overview Descriptions of the important phone components 2.1 Front and Back View of Handset 1. Earpiece 9. LCD(LIQUID Crystal Display) 2. Ring LED 10. Up/Down Button 3. Left Soft Button 11. Right Soft Button 4. Left Button 12. Right/Transfer/Internal Button 5. -
Page 14: Description Of Button
Ⅱ.Phone Overview 2.2 Description of Button Button Function [TALK] Try to make a call Redial number saved in handset. [END/POWER] Pressing longer than 1 second : Power Off Pressing shorter than 1 second :Leave a call back or a message Pressing shorter than 1 second: Ignore an call during incoming. - Page 15 Ⅱ.Phone Overview Button Function [CALL BACK] Pressing shorter than 1 second : Leave a call back or a message [UP/DOWN] Talking Mode : Up / Down the level of Rx volume, Call by name, CLIP Standby Mode : In Menu: Navigate and select among function items in a menu or submenu.
-
Page 16: Lcd Display
Ⅱ.Phone Overview 2.3 LCD Display The LCD of GDC-400H GAP has 128 x 128 pixels that are capable to display 10 icons and 7 lines x 18 characters per line. The LCD shows different wireless states and displays visual feedback for the actions performed by user. -
Page 17: Message Display
Ⅱ.Phone Overview 2.4 Message Display Message area from System Local Message area of Phone Message Description Display Duration STA xxxx Station number Standby Mode CALL FROM When a call is received from During ringing and until cutting STA xxxx intercom, it indicates a call paging off a Call from station xxx CALL TO... -
Page 18: Front And Back View Of Base Unit
Ⅱ.Phone Overview 2.5 Front and Back View of Base Unit 1 Charging terminal 2 Charge / In use lamp Keep the charging terminal Illuminates when the handset is clean; Use cotton swab to on the base. Blinking when the phone is in use. remove stain from the 1. -
Page 19: Ⅲ.setting Up
When you replace the battery, press the latch on the cover and slide down to open. After then replace the new battery. You can purchase new battery in LG-Nortel SVC Center. 3.2 Put the Belt Clip into Handset... -
Page 20: Connecting The Charger
Warning Use only the mains power adaptor supplied. Any other adaptor could 1. Adapter damage your GDC-400H and invalid your warranty 2. To AC OUTLET 3.4 Charging the Handset Please charge the battery for about 12 hours before initial use. The battery charge level is shown at the top right of the LCD screen. -
Page 21: Wireless Terminal(Gdc-400H)
Rubber lid for ear-microphone ♣ A general ear-microphone can be used. Warning Do not insert any external substance except ear-microphone for GDC-400H in the hole. Inserting anything except for ear-microphone provided by general maker may cause severe damage to the terminal. -
Page 22: Ⅳ .Basic Functions
Ⅳ. BASIC FUNCTIONS 4.1 Making a Call To make a call by entering numbers on your keypad 4.1.1 External Making a Call Press button. “ ” and “EXT” symbol are displayed and you can hear the dial tone. Enter the dialing number. Press button again to end the call The call duration and the current time are displayed. -
Page 23: Placing An Outside Call
Ⅳ. BASIC FUNCTIONS the Find ( ) button, all phonebook names are displayed, and then you can select the desired name by pressing the UP/DOWN ( )buttons. Press the Call ( ) button to dial the telephone number, if you find the desired name. Another method is as the below. -
Page 24: Post Dial
Ⅳ. BASIC FUNCTIONS 4.3.2 Post Dial ipLDK-24/100 → CO Line Access Code (9, 8+XX or 88+XX) → Phone number → Connection ; (XX means CO line number) ipLDK-300/300E → CO Line Access Code (9,8+XX or 88+XXX) → Phone number →Connection ; (XX means CO Group Number, XXX means CO line number) You may dial telephone number after pressing TALK ( ) button. -
Page 25: Answering A Call
Ⅳ. BASIC FUNCTIONS 4.4 Answering a Call Receive a phone call using the handset. When the phone is ringing, the “EXT” or “INT” symbol related to the incoming call flashes. In the LCD Message area from system, message from system is displayed. At the same time, in the Local message area, name and CID is displayed. -
Page 26: Unscreened Transfer
Ⅳ. BASIC FUNCTIONS 4.5.2 Unscreened Transfer When the called station begins to ring, Press END ( ) button to complete the transfer after ring back tone is heard. Then, a message is displayed on the LCD of the called station. If the call is not answered within 30 seconds, recall ring is ringing at both stations. -
Page 27: Flash
Ⅳ. BASIC FUNCTIONS 4.7 Flash During conversation (through CO line or intercom), releasing current call and entering dialing mode can be done at once by Flash. The FLASH button is also used to transfer a CO line call through a PABX. If you are talking with intercom line, press FLASH ( ) button to release a call. -
Page 28: Adjust Ringer Volume
Ⅳ. BASIC FUNCTIONS 4.11 Adjust Ringer Volume The user can adjust ringer volume in the range 1 ~ 9. Press the Menu ( ) button to enter the menu. Select Image & Sound menu. Select Sounds menu and press the OK ( ) button. -
Page 29: Ⅴ.phonebook
Ⅴ.Phonebook In the Off-Hook Mode (reference 5.1 Phonebook Menu) While talking, press Option ( ) button and select Phone Book in Call Options menu. In the On-Hook Mode Press Names ( ) button (reference 5.1 Phonebook Menu) Press the DOWN( ) button (reference 5.2 Find Phonebook Direct Menu) 5.1 Phonebook Menu There are 4 sub menu. -
Page 30: Modify
Ⅴ.Phonebook 5.1.3 Modify Search directory to modify (reference 5.1.1 Find) Modify name and number, to use or cancel CO access code or saved position. English Mode Number to Repeat < > & Italian Mode Number to Repeat < > á è... - Page 31 Ⅴ.Phonebook Spanish Mode Number to Repeat < > á à é è í ì Ç ñ ó ò ú ù € & Russian Mode Number to Repeat < > α σ в г Α Б В Г д е ё ж...
-
Page 32: Delete
Ⅴ.Phonebook 5.1.4 Delete 5.1.4.1 Delete One Search directory to delete (reference 5.1.1 Find) Press Delete ( ) button to delete selected phonebook. 5.1.4.2 Delete All All Phone Book directories will be deleted. 5.2 Find Phonebook Direct menu Press DOWN ( ) button. -
Page 33: Ⅵ.programming Features
Ⅵ.Programming Features To enter the programming features menu, the user has to press the Menu ( ) button during Idle Mode or during Not Subscribed Mode. During a call, either internal or external, no access to the programming feature is possible. The following list shows the programming features menu structures. -
Page 34: Received Call
Ⅵ.Programming Features 6.1.1.3 Delete The user can delete call. In Option mode, select Delete menu press the OK ( ) button. Press the OK ( ) button to delete the selected number. Selected number is deleted and goes back to the previous menu. 6.1.1.4 Call The user can make a call with the selected number. -
Page 35: Image & Sound
Ⅵ.Programming Features 6.1.4.1 Missed Calls The user can delete all Missed Calls. In Option mode, select Missed Calls menu press the OK ( ) button. Press the OK ( ) button to delete all Missed Calls. All Missed Calls are deleted and goes back to the previous menu. 6.1.4.2 Received Calls The user can delete all Received Calls. -
Page 36: Phone Register
Ⅵ.Programming Features Ringing Type You can hear melodies.(9 melodies) You can choose Ring by pressing the ) button. LEFT/RIGHT( You can set as External/ Internal Ring by pressing the SET ( ) button. Volume 9 volumes. You can choose volume by pressing the LEFT/RIGHT( ) button. -
Page 37: Base Choice
Ⅵ.Programming Features 6.3.2 Base Choice The wireless terminal, GDC-400H(GAP), can be subscribed to up to 4 GAP systems. However, the wireless terminal can’t use all systems at the same time. Only one system selected by a user is available for using the wireless terminal. This function is to select system that a user wants to use. -
Page 38: Appointment
Ⅵ.Programming Features 6.3.5.2 Reset Settings Select Reset menu and press OK ( ) button. “HS PIN : ” is displayed Input “HS PIN” and press OK ( ) button to move into Reset submenus. Select Settings menu and press OK ( ) button. -
Page 39: Modify Text
Ⅵ.Programming Features 6.4.2 Modify Text Select Modify Text and press the OK ( ) button. And then you can modify the text. If you finish modifying text, press the OK ( ) button. 6.4.3 Delete Select Delete and press the OK ( ) button. -
Page 40: Alarm Clock
Ⅵ.Programming Features 6.5.2 Alarm clock You can hear alarm sound in the desired time. Use, you should enter the present time at first and confirm the current time is correct. Select Alarm clock and press the OK ( ) button. Change the alarm state to Yes or No with the LEFT/RIGHT( ) buttons, and then press the OK (... -
Page 41: Keypad Lock
Ⅵ.Programming Features 6.5.7 Keypad Lock This function is to prevent from pressing any key unconsciously. In keypad lock mode, when a user receives a call, the mode is changed to the key-unlock mode automatically. When hanged up a call, the mode is returned to the keypad lock mode. A user can only receive an incoming call in this mode. -
Page 42: Call Park
Ⅶ.DECT Functions 7.1 Call Park A user can park using CO line to CO line parking location. 7.1.1 Call Park While connected to an outside call; Press TRANS ( ) button shorter than 1 second. Dial a parking location. The CO line being used is on hold and the wireless terminal goes to an idle state. 7.1.2 Retrieving a parked call Press TALK ( ) button. -
Page 43: Ⅶ .Key System Functions
Ⅶ.DECT Functions 7.3 Answering a Message Waiting Indication If a message is displayed on the LCD, it indicates that a message is left to you. The first left message will be answered at first. Press TALK ( ) button. Press CALL BACK ( ) button. -
Page 44: System Speed Dial
Ⅶ.DECT Functions 7.5 System Speed Dial 7.5.1 Storing Speed Dial Numbers A user can use speed dial numbers stored personally in a station speed bin. One speed dial number can be dialed up to 24 digits. Press TALK ( ) button. Press PROGRAM ( ) button longer than 1 second. -
Page 45: Using System Speed Numbers
Ⅶ.DECT Functions 7.5.5 Using System Speed Numbers Press TALK ( ) button. Press SPEED ( ) button shorter than 1 second. Dial speed bin number. (ipLDK-24/100: 2000~3499, ipLDK-300: 2000~4999,ipLDK-300E: 2000~6999). STOP! When a user makes a call to some exclusive subscribers or all CO lines are reserved, error tone is heard. -
Page 46: Call Forward
Ⅶ.DECT Functions 7.7 Call Forward When a user can’t receive calls, a user can forward all user’s calls to another subscriber’s station. Press TALK ( ) button. Press Press the call forward type: Call Forward Type Call Forward Condition Call Forward Destination Follow me Station No. -
Page 47: Do Not Disturb(Dnd)
Ⅶ.DECT Functions 7.8 Do Not Disturb(DND) When a user doesn’t want to receive a call, this function can be used. 7.8.1 To Program Do Not Disturb (DND) Press TALK ( ) button. Press (Confirmation tone will be heard) 7.8.2 To Cancel Do Not Disturb (DND) Press TALK ( ) button. -
Page 48: Authorization Code
Ⅶ.DECT Functions 7.9 Authorization Code 7.9.1 To Register Access Authorization Code To prevent unauthorized outside call (DISA access or Trunk Access), a user can lock/unlock a station with an access authorization code. Press TALK ( ) button. Press PROGRAM ( ) button longer than 1 second and press Dial the station’s 5-digit Access Authorization code. -
Page 49: Restoring Outside Calls
Ⅶ.DECT Functions 7.10.2 Restoring Outside Calls Press TALK ( ) button. Press PROGRAM ( ) button longer than 1 second and press Dial the current Access Authorization code. Press PROGRAM ( ) button longer than 1 second (Confirmation tone will be heard). Note An access authorization code should be registered. -
Page 50: Wake-Up Call
Ⅶ.DECT Functions 7.14 Wake-up Call 7.14.1 To Register Wake-up Call The system automatically sends ring signal to a station that already registered a wake-up time. Two kinds of wake-up call exist; effective for one-day or effective until canceled. 7.14.2 To Register Wake-up Time Press TALK ( ) button. -
Page 51: Paging
Ⅶ.DECT Functions 7.16 Paging 7.16.1 To page Press TALK ( ) button. Dial page zone. (See the below table. Confirmation tone will be heard.) After the tone, speak in a normal tone of voice. Press TALK ( ) button. LDK-24 LDK-100 LDK-300/300E Page Zone... -
Page 52: Station Program Recovery
Ⅶ.DECT Functions 7.18 Station Program Recovery This function is to recover the previously programmed data. It will be certified by LCD display. The followings are programmed data to be recovered. Station number. Idle LCD message. Message icon. FORWARD message format. DND message format. -
Page 53: Programming User Custom Message
Ⅶ.DECT Functions 7.20 Programming User Custom Message A user may program a custom message to be displayed on the LCD of calling terminal. Press TALK ( ) button. Press PROGRAM ( ) button longer than 1 second. Press (Confirmation tone will be heard.) Enter the message. -
Page 54: To Delete The Greeting
Ⅶ.DECT Functions 7.21.5 To delete the greeting Press TALK ( ) button. Press PROGRAM ( ) button longer than 1 second. Press 7.21.6 To record a paging message Press TALK ( ) button. Press PROGRAM ( ) button longer than 1 second. Press Press # to start recording. -
Page 55: Mobility Management Function
8.2.2 Ear Microphone Button Function If an Ear Microphone is attached to a GDC-400H, it can receive or release a call. Press the button on the Ear Microphone to receive the call while a ring sounds, and do the same action to release the call. -
Page 56: Ⅷ.dect Functions
Ⅷ.DECT Functions ※ Using noise canceling or unidirectional Ear Microphone /headset, whose Microphone impedance is below 1 KΩ may cause the abnormal operation (Self-answering without press button when incoming call and similar on-hook when if put Ear Microphone in/off in the middle of talking). -
Page 57: System Id & Authentication Code
Ⅸ. Installation of Wireless Terminal A user should do subscription procedure to use a wireless terminal with key system. The procedure is an auto mode subscription. A user has to get only AC from the system before subscription processing. The details are described in ‘9.2 Subscription’. The wireless terminal is allowed to be subscribed to up to 4 GAP systems. -
Page 58: Ⅸ .Installation Of Wireless Terminal
This procedure is for subscribing the wireless terminal to ipLDK-24/100/300/300E WOTS system. To subscribe GDC-400H, you should follow two steps. The First step is making the system be in subscription enabled state. While the system is in subscription enabled state, you should second step. - Page 59 Ⅸ. Installation of Wireless Terminal At the Wireless Terminal Menu ( ) + Select Phone Register menu + Select Subscription + Select empty BASE + AC code + OK ( Press Menu ( ) button. Main Menu is displayed on the LCD. Select Phone Register menu by pressing Navigation ( ) button and OK ( button.
-
Page 60: De-Subscription I
Ⅸ. Installation of Wireless Terminal 9.3 De-subscription I De-subscription makes a wireless terminal loose access right to the ipLDK-24/100/300/300E WOTS. To de-subscribe the wireless terminal, it should be in an idle state. To De-subscribe VOLUME At the Attendant Station + 0# + Flex. -
Page 61: De-Subscription Ii
Ⅸ. Installation of Wireless Terminal 9.4 De-subscription II There is another way to de-subscribe locally. The subscription data of the phone (stored in MPB and WTIB or the wireless terminal) should be erased separately at both sides by 9.3 de- subscription Ⅰ... -
Page 62: Authentication
Ⅸ. Installation of Wireless Terminal 9.5 Authentication The process by which the identity of a user of the wireless terminal is checked by the system. The User Personal Identification (UPI), manually entered by a user, is used for user authentication. To Authenticate a User VOLUME At the Attendant Station... -
Page 63: System Specification
Ⅹ.Useful Information 10.1 System Specification Standard DECT/GAP Frequency band 1880~1900MHz Typical distance from a base station to a wireless terminal 70meters Items 1. Board 2. Max. Cell 4. Registrable 5. Max. Number Channels Max. Simultane Applic Name (Base Terminal able W /Cell Station Number... -
Page 64: Ⅹ .Useful Information
Ⅹ.Useful Information 10.2 Hand-held Type Wireless Terminal (GDC-400H) Specification Item Spec 133mm ×44mm ×20mm(H ×W ×D) Size: Weight: Color: Warm gray Maximum power: 250mW Modulation method: GFSK Battery 15 hours Talking Mode: 150 hours Standby Mode: DC 2.4V/920mAh (NiMH) Type:... - Page 65 Troubleshooting Guide Problem Reason Solution Check the battery then, press LCD is empty. No power POWER button. “NO CHANNEL” is displayed Wait until a free channel is No free channel when pressing TALK button. released. While connected to a call, Small Voice Small voice level Press UP button.
-
Page 66: Troubleshooting Guide
Troubleshooting Guide Problem Reason Solution wireless channel. Do desubscribe locally in both When pressing TALK button, sides, Subscription Phone icon ( ) is blinking the system and the terminal and Disagreement several times and disappeared. subscribe the terminal in the system again. -
Page 67: User Menu Tree
Appendix A. USER MENU TREE 1_4_1 Missed Calls 1_1 Missed Call 1. Call Register 1_4_2 Received Calls 1_2 Received Call 1_4_3 Dialed Calls 1_3 Dialed Call 1_4_4 All Calls 1_4 Delete Call Tone 1 ~ 15 2_2_1_1 Ringing Type 2_1_1 Wallpaper 1 Volume 1 ~ 9 2_2_1_2 Volume 2_1_2 Wallpaper 2... -
Page 68: Appendix
Appendix B. Function Short-Key Table Function Short-Key Table related to Key System Call Service * ipLDK-24/100/300/300E FEATURE INPUT KEY Call Transfer (During a call) [TRANS] + STA # + END( ) + STA # + (if busy tone is heard) Call Waiting/Camp On TALK( ) + STA # + [CALL BACK]... - Page 69 Appendix FEATURE INPUT KEY Delete Greeting ) + [PROGRAM] + 6 + 6 TALK( Delete Paging Message ) + [PROGRAM] + 6 + 7 TALK( Universal Night Answer ) + 5 + 6 + 9 TALK( )+8+digit(ipLDK-300/300E : 01~72. ipLDK-100 :01~24, TALK( CO Line Access ipLDK-24: 01~08)
-
Page 70: The Lcd Messages Related To A Call
Appendix C. The LCD Messages Related To a Call The followings describe messages displayed on the LCD of an attendant station and the wireless terminal in Talking Mode. At the DKTU VOLUME 1. NO RESPONSE Description: After key system requests a call to the wireless terminal, if there is no response from the wireless terminal, this message is displayed on the LCD of DKTU. - Page 71 Appendix At the Wireless Terminal 1. NO CHANNEL Description: There is not enough system resource. If the message is displayed frequently on the LCD of DKTU, the system should be installed more. There is no available RF channel. ① There is no available PCM Hi-way; MPB side ②...
- Page 72 파일 이름: 060503_ST_GDC_400H_PT_SW(최종 4) 폴더: D:₩Manual₩작업중₩작업중_4 월 21 일까지_GDC_400H₩ 최종 서식 파일: C:₩Documents and Settings₩써니₩Application Data₩Microsoft₩Templates₩Normal.dot 제목: Thank you very much for purchasing a DECT 주제: 만든 이: 안선희 키워드: 메모: 만든 날짜: 2006-05-03 오후 4:18 수정 횟수: 마지막으로 저장한 날짜: 2006-05-03 오후 4:35 마지막으로...
Need help?
Do you have a question about the GDC-400H and is the answer not in the manual?
Questions and answers