Table of Contents
Advertisement
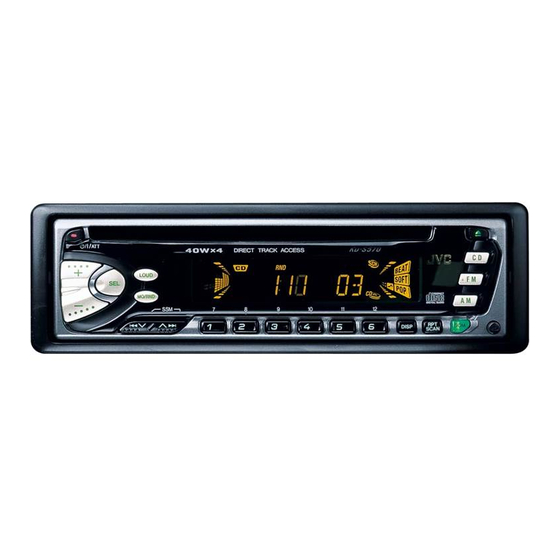
CD RECEIVER
RECEPTOR CON CD
RECEPTEUR CD
For installation and connections, refer to the separate manual.
Para la instalación y las conexiones, refiérase al manual separado.
Pour l'installation et les raccordements, se référer au manuel séparé.
KD-S620
KD-S570
INSTRUCTIONS
MANUAL DE INSTRUCCIONES
MANUEL D'INSTRUCTIONS
KD-S620/S570
KD-S620/S570
KD-S620/S570
KD-S620
KD-S570
DIGITAL AUDIO
For customer Use:
Enter below the Model No. and
Serial No. which are located on
the top or bottom of the cabinet.
Retain this information for future
reference.
Model No.
Serial No.
GET0003-001A
COMPACT
[J]
Advertisement
Table of Contents

Related Manuals for JVC KD-S620


Summary of Contents for JVC KD-S620
- Page 1 For installation and connections, refer to the separate manual. Para la instalación y las conexiones, refiérase al manual separado. Pour l’installation et les raccordements, se référer au manuel séparé. INSTRUCTIONS MANUAL DE INSTRUCCIONES MANUEL D’INSTRUCTIONS KD-S620 KD-S620 KD-S570 KD-S570 For customer Use: Enter below the Model No. and Serial No.
-
Page 2: How To Reset Your Unit
3. CAUTION: Do not open the top cover. There are no user-serviceable parts inside. Leave all servicing to qualified service personnel. 4. CAUTION: This CD player uses invisible laser radiation, however, is equipped with safety switches to prevent radiation emission when unloading CDs. It is dangerous to defeat the safety switches. -
Page 3: Table Of Contents
Thank you for purchasing a JVC product. Please read all instructions carefully before operation, to ensure your complete understanding and to obtain the best possible performance from the unit. CONTENTS How to reset your unit ... 2 BASIC OPERATIONS ... 4 RADIO OPERATIONS ... -
Page 4: Basic Operations
1 second. Turn on the power. Select the source. To operate the tuner, see pages 5 – 9. To operate the CD player, see pages 10 – 12. Adjust the volume. Volume level indicator Note: When you use this unit for the first time, set the built-in clock correctly, see page 19. -
Page 5: Radio Operations
RADIO OPERATIONS Listening to the radio To search stations of higher frequencies. To search stations of lower frequencies. To stop searching before a station is received, press the same button you have pressed for searching. To tune in a particular frequency without searching: 1 Press FM or AM to select the band. -
Page 6: Storing Stations In Memory
Storing stations in memory You can use one of the following two methods to store broadcasting stations in memory. • Automatic preset of FM stations: SSM (Strong-station Sequential Memory) • Manual preset of both FM and AM stations FM station automatic preset: SSM You can preset 6 local FM stations in each FM band (FM1, FM2, and FM3). -
Page 7: Manual Preset
Manual preset You can preset up to 6 stations in each band (FM1, FM2, FM3 and AM) manually. EXAMPLE: Storing an FM station of 88.3 MHz into the preset number 1 of the FM1 band Repeat the above procedure to store other stations into other preset numbers. -
Page 8: Tuning Into A Preset Station
Tuning into a preset station You can easily tune into a preset station. Remember that you must store stations first. If you have not stored them yet, see pages 6 and 7. Select the band (FM1, FM2, FM3 or AM) you want. -
Page 9: Other Convenient Tuner Functions
Other convenient tuner functions MO/RND RPT/SCAN Scanning broadcast stations When you press RPT/SCAN while listening to the radio, station scanning starts. Each time a broadcast is tuned in, scanning stops for about 5 seconds (tuned frequency number flashes on the display), and you can check what program is now being broadcasted. If you want to listen to that program, press the same button again to stop scanning. -
Page 10: Cd Operations
CD OPERATIONS Playing a CD Total playing time of the inserted disc Note on One-Touch Operation: When a CD is already in the loading slot, pressing CD turns on the unit and starts playback automatically. CAUTION on Volume Setting CDs produces very little noise compared with other sources. If the volume level is adjusted for the tuner, for example, the speakers may be damaged by the sudden increase in the output level. -
Page 11: Locating A Track Or A Particular Portion On A Cd
Locating a track or a particular portion on a CD To fast forward or reverse the track Press and hold Press and hold 4 To go to the next track or the previous track Press of the next track. Each time you press the button consecutively, the beginning of the next tracks is located and played back. -
Page 12: Selecting Cd Playback Modes
Selecting CD playback modes To play back tracks at random (Random Play) You can play back all tracks on the CD at random. Each time you press MO/RND (Mono/Random) while playing a CD, CD MO/RND random play mode turns on and off alternatively. When the random mode is turned on, the RND indicator lights up on the display and a track randomly selected starts playing. -
Page 13: Sound Adjustments
SOUND ADJUSTMENTS Adjusting the sound You can adjust the treble/bass sound and the speaker balance. Indication Adjust the bass (Bass) Adjust the treble (Treble) Adjust the front and rear speaker (Fader)* balance Adjust the left and right speaker (Balance) balance Adjust the volume (Volume) Note:... -
Page 14: Turning On/Off The Loudness Function
Turning on/off the loudness function The human ear is less sensitive to low and high frequencies at low volumes. The loudness function can boost these frequencies to produce well-balanced sound at low volume level. Each time you press LOUD, the loudness function turns on and off alternatively. LOUD... -
Page 15: Using The Sound Control Memory
Using the Sound Control Memory You can select and store a preset sound adjustment suitable to each playback source. (Advanced SCM) Selecting and storing the sound modes Once you select a sound mode, it is stored in memory, and will be recalled every time you select the same source. -
Page 16: Recalling The Sound Modes
Recalling the sound modes Notes: • You can adjust each sound mode to your preference, and store it in memory. If you want to adjust and store your original sound mode, see “Storing your own sound adjustments” on page 18. •... -
Page 17: Canceling Advanced Scm
Canceling Advanced SCM You can cancel the Advanced SCM (Sound Control Memory), and unlink the sound modes and the playback sources. When shipped from the factory, a different sound mode can be stored in memory for each source so that you can change the sound modes simply by changing the sources. LINK ON: Advanced SCM (different SCMs for different sources) LINK OFF: Conventional SCM (one SCM for all sources) -
Page 18: Storing Your Own Sound Adjustments
Storing your own sound adjustments You can adjust the sound modes (BEAT, SOFT, POP: see page 15) to your preference and store your own adjustments in memory. Within 5 seconds LOUD Within 5 seconds Within 5 seconds Repeat the same procedure to store other settings. To reset to the factory settings Repeat the same procedure and reassign the preset values listed in the table on page 15. -
Page 19: Other Main Functions
OTHER MAIN FUNCTIONS Setting the clock 2,3 1,4 2,3 To check the current clock time (changing the display mode) Press DISP repeatedly. Each time you press the button, the display mode changes as follows. During tuner operation: Frequency • If the unit is not in use when you press DISP, the power turns on, the clock time is shown for 5 seconds, then the power turns off. -
Page 20: Selecting The Level Display
Selecting the level display You can select the level display according to your preference. When shipped from the factory, “VOL 2” is selected. VOL 1: Shows the volume level indicator and the equalization pattern indicator. VOL 2: Alternates “VOL 1” setting and illumination display. OFF: Erase the volume level indicator and the equalization pattern indicator. -
Page 21: Detaching The Control Panel
Detaching the control panel You can detach the control panel when leaving the car. When detaching or attaching the control panel, be careful not to damage the connectors on the back of the control panel and on the panel holder. How to detach the control panel Before detaching the control panel, be sure... -
Page 22: Remote Operations (Only For Kd-S620)
REMOTE OPERATIONS This section is ONLY FOR KD-S620. Before using the remote controller: • Aim the remote controller directly at the remote sensor on the main unit. Make sure there is no obstacle in between. • Do not expose the remote sensor to strong light (direct sunlight or artificial lighting). -
Page 23: Using The Remote Controller
Using the remote controller RM-RK31 For KD-S620 1 Functions the same as the 2 • Functions as the BAND button while listening to the radio. Each time you press the button, the band changes. • Does not function as the PROG button. -
Page 24: Maintenance
• After starting the heater in the car. • If it becomes very humid inside the car. Should this occur, the CD player may malfunction. In this case, eject the CD and leave the unit turned on for a few hours until the moisture evaporates. -
Page 25: Troubleshooting
The volume control is turned to the minimum level. Connections are incorrect. Signals are too weak. The antenna is not connected firmly. The CD player may function incorrectly. The built-in microcomputer may function incorrectly due to noise, etc. Remedies Insert the CD correctly. -
Page 26: Specifications
Stereo Separation: 35 dB Capture Ratio: 1.5 dB [AM Tuner] Sensitivity: 20 V Selectivity: 35 dB CD PLAYER SECTION Type: Compact disc player Signal Detection System: Non-contact optical pickup (semiconductor laser) Number of channels: 2 channels (stereo) Frequency Response: 5 Hz to 20 000 Hz... - Page 27 http://www.jvcmobile.com Visit us on-line for Technical Support & Customer Satisfaction Survey. US RESIDENTS ONLY Having TROUBLE with operation? Please reset your unit Refer to page of How to Reset Still having trouble?? USA ONLY Call 1-800-252-5722 http://www.jvcservice.com We can help you! VICTOR COMPANY OF JAPAN, LIMITED EN, SP, FR 0800HISFLEJES...
- Page 28 • The following illustration shows a typical installation. However, you should make adjustments corresponding to your specific car. If you have any questions or require information regarding installation kits, consult your JVC car audio dealer or a company supplying kits. Before mounting: Press (Control Panel Release) to detach the control panel if already attached.
- Page 29 Manija Poignée Liste des pièces pour l’installation et raccordement Les pièces suivantes sont fournies avec cet appareil. Après vérification, veuillez les placer correctement. FOR KD-S620 PARA KD-S620 POUR LES KD-S620 Remote controller Mando a distancia Télécommande Battery Pila Pile CR2025...
-
Page 30: Electrical Connections
NEGATIVA solamente. Si su vehículo no posee este sistema, será necesario un inversor de tensión, que puede ser adquirido en los concesionarios de JVC de equipos de audio para automóviles. • Reemplace el fusible por uno con la corriente especificada. Si el fusible se quemase frecuentemente consulte con su concesionario de JVC de equipos de audio para automóviles. - Page 31 Amplifier / Amplificador / Amplificateur Rear speakers Altavoces posteriores Haut-parleur arrière INPUT JVC amplifier Amplificador de JVC Amplificateur JVC Signal cord (not supplied with this unit) Cable de señal (no suministrado con esta unidad) Cordon de signal (non fourni avec cet appareil) LINE OUT...
Need help?
Do you have a question about the KD-S620 and is the answer not in the manual?
Questions and answers