Table of Contents
Advertisement
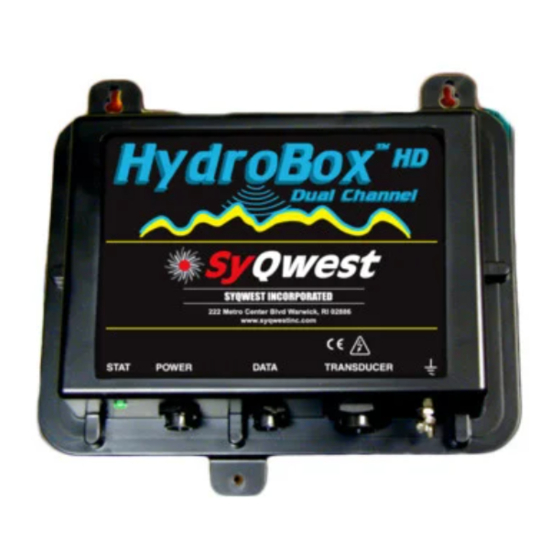
SYQWEST INCORPORATED
High Resolution Echo Sounders and Acoustic Systems
For Precision Seafloor Exploration
HydroBox
Hydrographic
™
Echo Sounder
• Installation
• Operation
• Maintenance
Ver 3, 7.25.10
222 Metro Center Blvd.
Warwick, RI 02886 USA
TEL: (401) 921-5170 / FAX: (401) 921-5159
tech-support@syqwestinc.com
|
http://www.syqwestinc.com/
Advertisement
Table of Contents

Subscribe to Our Youtube Channel
Related Manuals for Syqwest HydroBox


Summary of Contents for Syqwest HydroBox
- Page 1 SYQWEST INCORPORATED High Resolution Echo Sounders and Acoustic Systems For Precision Seafloor Exploration HydroBox Hydrographic ™ Echo Sounder • Installation • Operation • Maintenance Ver 3, 7.25.10 222 Metro Center Blvd. Warwick, RI 02886 USA TEL: (401) 921-5170 / FAX: (401) 921-5159 tech-support@syqwestinc.com...
-
Page 3: Table Of Contents
NMEA I/O Output written to Port during Playback ............1-9 2.0 INSTALLATION..........................2-1 ..............2-1 YDRO YSTEM NSTALLATION VERVIEW 2.1.1 Important Notes regarding Hydrobox operation – Please Read! ........2-1 2.1.2 - Getting Started........................2-2 TRANSDUCERS (DIMENSIONS & MOUNTING) ..............2-3 2.2.1 P/N P04816 TRANSDUCER 33/210Khz................2-3 2.2.2 P/N P04817 TRANSDUCER 50/210Khz................2-4 2.2.3... - Page 4 – F ........................4-1 IRMWARE PDATE 4.3.1 – Connection ........................4-2 4.3.2 – Firmware Update File ....................4-2 4.3.3 – HydroBox PC Software Firmware Update ..............4-2 – T .........................4-3 ROUBLESHOOTING 4.4.1 – HydroBox Sensor Troubleshooting .................4-3 4.4.2 – HydroBox PC Software Troubleshooting................4-3 ............4-4...
-
Page 5: Introduction
HydroBox Sensor device. It will also include this manual in PDF format and any Release Notes that have been generated. A hardcopy of the HydroBox™ Manual is also included so that the user may learn to install, operate, and maintain the HydroBox™ Equipment and Accessories. The manual also includes a section on acoustic theory. -
Page 6: Echo Sounding Principles
1) An introduction (this section), which provides a system overview and basic outline of echosounding acoustics. 2) Installation, which provides details on how to properly mount all of the HydroBox System components. Details on installing the HydroBox PC Software package are included also. -
Page 7: Figure 1-1 Absorption Coefficient Versus Frequency
HYDROBOX ™ Operations and Maintenance Manual For echo sounders, the distance actually traveled is two times the distance to the seafloor from the source transducer (from the transmission source, to the bottom and back again). This results in a significant source of signal loss for the system receiving the sound pulse, which must be compensated for at the receiver. - Page 8 HYDROBOX ™ Operations And Maintenance Manual Sound reflected off the seafloor usually suffers a significant loss in intensity. Part of this loss is due to scattering (reflection) but most of it results from the portion of sound entering the new medium and traveling into the seafloor until it is completely absorbed.
- Page 9 HYDROBOX ™ Operations and Maintenance Manual Cavitation is a result of the pressure on the face of the transducer reducing to a level that permits the water to boil (i.e. turn from a liquid to a gas). This is directly related to the flow around the transducer as described above.
-
Page 10: Figure 1-2 Acoustic Beam Pattern
HYDROBOX ™ Operations And Maintenance Manual Beam Width The beam width of a transducer is described as the width of the main lobe of a transmit pattern. The width is usually measured between the -3 dB points on either side of the beam pattern. Shown in Figure 1-2 is a transmit beam pattern for a 125 kHz transducer. -
Page 11: Specifications
NMEA 0183, GLL, GGA, RMC, VTG, VHW, HDT Geographic Position Selectable Baud Rates (RS-232): 4800, 9600, 19200, 38400 Data Interface SYQWEST HydroBox Interface, 57600 Baud (RS-422) Printer Output Centronics (Parallel Port) interface to TDU Series Thermal Printers Shallow Water < 1 meter; frequency dependant... -
Page 12: Software Features Added In Release V2.45
Bottom Gate Limits are provided to help the user ensure that the data captured reflects the correct digitized bottom depth when conditions are difficult. The Hydrobox is intended for use in shallow water. Unfortunately, using any sonar in very shallow water creates challenges due to surface reverberation and multiple echo issues. -
Page 13: Nmea Depth Output Written To .Csv File
1.5.6 NMEA Depth Output written to .CSV file The Hydrobox host application has been updated to write the NMEA Depth output string to a comma separated variable file that can be easily imported into an MS Excel spreadsheet or another application for processing. - Page 14 HYDROBOX ™ Operations And Maintenance Manual THIS PAGE INTENTIONALLY LEFT BLANK INTRODUCTION 1-10 ©2006 SyQwest Incorporated...
-
Page 15: Installation
HydroBox. A summary is given of the software installation and setup procedure as well. Although the HydroBox Sensor is designed to deliver the highest levels of quality and performance, it can best attain those standards when the equipment has been properly installed. Because of the great variety of vessels that will employ the HydroBox Sensor, it is not feasible to provide complete and detailed instructions that will fit all installation possibilities. -
Page 16: Getting Started
Verify that all parts described in the next section have been shipped with the unit. Basic Equipment The following (Table 2-1) is a list of the basic equipment supplied with the HydroBox Hydrographic Echo Sounder. SINGLE CHANNEL SYSTEM... -
Page 17: Transducers (Dimensions & Mounting)
Operations and Maintenance Manual Accessories and Options The following items are available to complement and enhance the operation of the HydroBox echosounder. Please contact your authorized SyQwest distributor or visit our web site for information and assistance in obtaining any of these items. -
Page 18: P/N P04817 Transducer 50/210Khz
HYDROBOX ™ Operations And Maintenance Manual 2.2.2 P/N P04817 TRANSDUCER 50/210Khz Resonant Frequency: 50/210 KHz. Nominal Impedance: 60/60 ohms Beamwidth (@ 3 dB point): 50khz 210khz Cable: 30 feet (2C 14AWG) (with plug ) Housing Material: Urethane Stem: Stainless Steel, ½-14NPS Thread... -
Page 19: P/N P04515 Transducer 210Khz 8 Deg
HYDROBOX ™ Operations and Maintenance Manual 2.2.3 P/N P04515 TRANSDUCER 210Khz 8 deg Resonant Frequency: 210 KHz. (nominal) Nominal Impedance: 50 ohms Beamwidth (@ 3 dB point): 8 degrees Cable: 30 feet (with plug to mate with recorder) Housing Material:... -
Page 20: Installing The Hydrobox Electronics
The HydroBox Sensor Unit is designed for portable, marine applications but maybe used in permanent installations as well. The user must determine if the HydroBox Sensor Unit is to be mounted on the vessel or just placed in a convenient place on-board the vessel. Either way the appropriate location for the unit needs to be determined. -
Page 21: Figure 2-2 Bulkhead Mounting The Sensor Unit
HYDROBOX ™ Operations and Maintenance Manual Mounting the Sensor Unit This section outlines the steps for mounting the Sensor Unit. Refer to Figure 2-2 while installing. The unit may be mounted either horizontally or vertically. The keyhole slots make installation in hard to reach areas easier, but be sure to tighten all mounting hardware securely. -
Page 22: Installing The Hydrobox Transducer
Handling Transducers The transducer is the heart of the HydroBox system and, in spite of its appearance and size, is a delicate instrument. Although it is designed to be in contact with and survive tough marine environments, it should not be dropped or mishandled during the installation. -
Page 23: Figure 2-3 Typical Over The Side Mount (Reference Drawing)
Portable Transducer Installation Portable installations of the HydroBox transducer for most survey vessels will be of the over-the-side pipe mount type. This type of installation is achieved with the following list of materials:... -
Page 24: Figure 2-4 Over The Side Transducer Mounting Picture
HYDROBOX ™ Operations And Maintenance Manual Refer to Figure 2-3 above while reading and implementing the Installation procedure listed below. Over The Side Transducer Mounting (Example mount shown as reference only) Figure 2-4 Over The Side Transducer Mounting Picture CAUTION: Never pull, carry or hold the transducer by the cable as this may sever internal connections. - Page 25 For some applications it may be necessary and/or convenient to mount the HydroBox Transducer permanently in the hull of the vessel. Due to the construction of the HydroBox Transducer it may be directly affixed to the hull of the vessel. A Seachest Installation can be used, but is not required.
-
Page 26: Electrical Connections
There are 3 connections that need to be made to the HydroBox Sensor Unit and the PC for the system function properly. The user also has the option of connecting a GPS input and/or a Thermal Printer. The sections below describe the connection details for each. -
Page 27: Figure 2-6 Hydrobox Sensor Power Connector
10-30VDC and is capable of providing 8 watts of power to the unit. Although the HydroBox Sensor unit is reverse polarity and over-voltage protected, it is always required that the power mains be turned off during system wiring for both personal and equipment safety. -
Page 28: Figure 2-7 Hydrobox Sensor Data Connector
The standard cable is 30 feet in length and has the 10 pin connector that mates to the Transducer connector on the HydroBox Sensor Unit. Only 3 of the pins on the 10 pin connector are wired to the unit. -
Page 29: Hydrobox Pc Software Installation
COM port that is software selectable by the user. When selecting a PC to use with the HydroBox system the user should insure that PC hardware supports 2 COM Ports if a Navigation input is desired (the HydroBox Sensor/PC interface requires 1 COM port). - Page 30 Also, once the installation is complete, you can check the Launch the program box to execute the HydroBox software as soon as you close the installer. If not, you can run the HydroBox PC software by using the Windows Start button to find the HydroBox menu under Programs, or simply double-click on the HydroBox icon located on your Desktop.
-
Page 31: Operation
HydroBox. 3.1.1 - The Main Window The HydroBox Main interface is divided into two fields, the Controls and Status field, and the Data field. The vertical window boundary between the fields may be positioned by the user as desired. - Page 32 GPS (See “Configure NMEA I/O” in Section 3.2.1 for more information). Position info is also provided when a GPS receiver is connected to the PC and the HydroBox Software is configured and receiving valid GPS data. When GPS Position data is not available, the display will show “Latitude N/A”...
- Page 33 Operations and Maintenance Manual The ping count is included to provide the user with a means of estimating how fast the HydroBox Sensor is pinging, and also for how long. The ping count is reset to zero when any of the following events occur: The HydroBox PC Software is restarted.
- Page 34 6. Color Palette and Unit Controls The HydroBox PC Software allows you to choose from 4 standard color palettes by clicking on one of the radio buttons located in the Color Control section. If you wish to create your own palette, you can do so by selecting Custom and clicking on the button to right of it.
-
Page 35: The Menu Bar
These filenames are found between the “User Preferences” and “Exit” menu options. Clicking one will immediately begin playback of the file. Exit You can exit the HydroBox PC Software by either using the “Exit” on this file menu, or by simply clicking on the windows default close button OPERATION 3-5... -
Page 36: Edit Menu
3.3.1.1 Configure Sonar Port Select Serial Port This menu allows you to choose which PC COM port the HydroBox Sensor is connected to. In addition, you can enable/disable communication to the sensor by toggling the “Enable Serial IO” check box. It also allows you to input the transducer draft in either feet or meters. -
Page 37: Configure Nmea I/O
HYDROBOX ™ Operations and Maintenance Manual 3.3.1.2 Configure NMEA I/O This menu allows the user to configure the HydroBox software receive NMEA 0183 navigational information from a GPS receiver, or equivalent. The user may also use this menu to select an output format for digital depth. -
Page 38: Nmea Depth (Dpt)
Eventing”, event marks are inserted only when one is requested by the user using one of the methods described above. “Periodic Eventing” allows the HydroBox software to insert events at a specific interval, depending on the number of minutes entered by the user. While in periodic mode, the user may still insert manual event marks in addition to the periodic ones. -
Page 39: Configure Thermal Printer
Operations and Maintenance Manual NOTE: External Eventing requires an additional free COM Port. If there are no more available COM Ports on your PC, contact SYQWEST for an expansion card. NOTE: Periodic Eventing is not available when External Eventing has been enabled. -
Page 40: Configure Detection Threshold
This parameter needs to be used carefully. 3.3.1.7 - Configure Gate Limits Allows the user to select to the minimum and maximum limits on which the Hydrobox will look for a valid bottom return. 3.3.1.8 User Preferences This menu allows you to configure recording and playback options. -
Page 41: Table 3-1 Sound Velocity (Celcius Versus Part Per Thousand)
In addition, both the Local Time and UTC Time zones can be synchronized to GPS Time provided that a GPS Receiver is connected to the HydroBox PC Software and configured correctly. (Refer to Configure NMEA I/O in Section 3.2.1 for more information) Sound Velocity The User Preferences Menu brings up the Preferences Window shown above. -
Page 42: The View Menu
This feature was included in order to provide a method to zoom in on bottom data previously recorded without one of the HydroBox Sensor’s enhanced zoom modes enabled. When enabled, two zoom bars will appear on the scalebar of the Normal Data window. - Page 43 Normal data (assuming the zoom range is smaller than the normal range). There are 4 display modes available with HydroBox software, including 3 Zoom modes, and 1 without any zoom. They include: Normal This mode displays the normal bottom data by itself without any zoom information.
-
Page 44: Diagnostic View
3.3.3 – The Help Menu This menu includes a software Help guide along with an About HydroBox option. Clicking it will display a window with information such as the HydroBox software version and SYQWEST company information. In addition, the software will request and display Hardware/Firmware version information from the HydroBox Sensor providing the Sensor is connected and communicating properly. -
Page 45: Data Outputs
Operations and Maintenance Manual Data Outputs This section lists the various data output formats available from the Data I/O at the HydroBox. This section provides more detailed, information for each format (sentence) to allow the user to interface with external peripheral devices Hardware pin-out connections are shown in Figure 2-7 3.4.1 ODEC Depth (dpt) Format... -
Page 46: Nmea Depth (Dpt)
HYDROBOX ™ Operations And Maintenance Manual 3.4.4 NMEA Depth (dpt) Sample data strings $SDDPT, 3.4, 0.0 $SDDPT, 6.4, 0.0 $SDDPT, 6.4, 0.2 Industry standard NMEA 0183 string. Water depth relative to the transducer and offset of the measuring transducer. Format described below. -
Page 47: Maintenance
4.0 MAINTENANCE – POST (Power On Self Test) Each time power is applied to the HydroBox Sensor, it performs a series of self-tests to ensure that it is working optimally. The tests occur as follows: Test 1 – Initialization Test Checks overall functionality of the sensor hardware to verify it is operational. -
Page 48: Connection
(See Data Interface Connector in Section 2.2.7). 4.3.2 – Firmware Update File If a Firmware Update file is available, SyQwest can send the user a disk containing the file, or it may be downloaded from our website (http://www.syqwestinc.com). -
Page 49: Troubleshooting
“Sonar Port” menu communication with PC software correct COM port 3) Contact SYQWEST Support 3) Flash Memory is corrupt Dept for assistance 4.4.2 – HydroBox PC Software Troubleshooting Symptom Possible Cause Solution 1) Check connections between PC and Sensor 2) Make sure the Sensor’s LED... -
Page 50: How To Perform Software And Firmware Updates
Uninstall the old versions of HydroBox software. Install the new version of HydroBox software provided to your PC. Connect the HydroBox power and data cable to the HydroBox. Do not power it on. Using Windows Explorer go to the directory: C:\Program files\SyQwest\ HydroBox \Firmware\ and copy the HydroFW.hex file and place it into the “HydroBox”... -
Page 51: Appendix 1 Additional Information
Hydrobox Data Interface – Half Duplex, 57.6KBaud, 8, 1, None fixed. When the Hydrobox and Hypack are used together, the NMEA output information from the Hydrobox is provided via a null modem connection from one user assign COM port connection to another user assigned COM port as shown in the attached drawing. -
Page 52: Configuring Hydrobox To Use With Survey Software And Laptop Pc
COM 6 is B etc. 2. Connect Interface cable to 4 port cable and equipment as shown in Figure 5-1. 3. In Hydrobox software, select EDIT from taskbar then “Configure Sonar Port”. Select COM port Windows assigned for connector A. -
Page 53: Figure 5-1 Hypack Serial Connections
HYDROBOX ™ Operations and Maintenance Manual Figure 5-1 HYPACK Serial Connections APPENDEX 1 5-3 ©2006 SyQwest Incorporated... -
Page 54: Figure 5-2 Optional Interface Connections
HYDROBOX ™ Operations And Maintenance Manual OPTIONAL EXTERNAL INTERFACE CONNECTIONS Figure 5-2 Optional Interface Connections END OF MANUAL APPENDIX 1 5-4 ©2006 SyQwest Incorporated...
Need help?
Do you have a question about the HydroBox and is the answer not in the manual?
Questions and answers