Table of Contents
Advertisement
Quick Links
Download this manual
See also:
Instruction Manual
Advertisement
Table of Contents

Related Manuals for Hanna Instruments HI 96715C


Summary of Contents for Hanna Instruments HI 96715C
- Page 1 99 Washington Street Melrose, MA 02176 Phone 781-665-1400 Toll Free 1-800-517-8431 Instruction Manual Visit us at www.TestEquipmentDepot.com HI 96715C Ammonia Medium Range ISM...
-
Page 2: Table Of Contents
Dear Customer, PRELIMINARY EXAMINATION Thank you for choosing a Hanna product. This manual will provide you with the necessary information for the correct use of the instrument. Please read it carefully before using the meter. Please examine this product carefully. Make sure that the instrument is not damaged. If any damage occurred during shipment, please notify your Dealer. -
Page 3: General Description
GENERAL DESCRIPTION SPECIFICATIONS Range 0.00 to 9.99 mg/L (as NH The HI 96715 is an auto diagnostic portable microprocessor meter that benefits from Hanna’s 0.01 mg/L for measurement Resolution years of experience as a manufacturer of analytical instruments. It has the advanced optical 0.1 mg/L for calibration and validation system based on a special tungsten lamp and a narrow band interference filter that allows most Accuracy... -
Page 4: Principle Of Operation
A microprocessor controlled LED emits radiation which is first optically conditioned and beamed PRINCIPLE OF OPERATION to the sample contained in the cuvette. The optical path is fixed by the diameter of the cuvette. Then the light is spectrally filtered to a narrow spectral bandwidth, to obtain a light beam of Absorption of Light is a typical phenomenon of interaction between electromagnetic radiation and intensity I or I. -
Page 5: Errors And Warnings
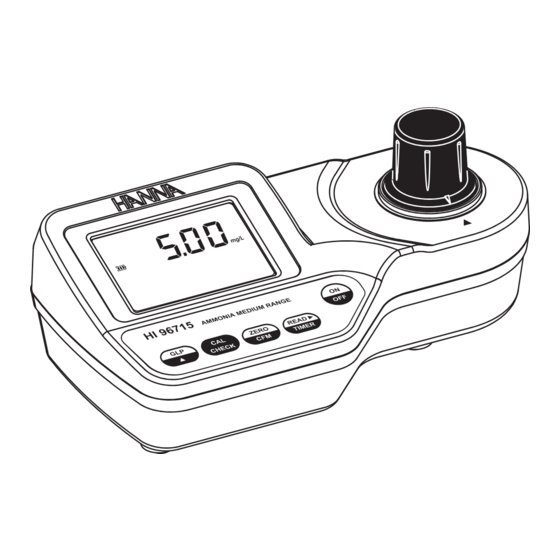
KEYPAD DESCRIPTION ERRORS AND WARNINGS • ON/OFF: to turn the meter on and off. • ZERO/CFM: this is a bi-functional key. Just press to zero the meter prior to measurement, The instrument shows clear messages when erroneous condition appears. Messages are also displayed or to confirm edited values. -
Page 6: General Tips For An Accurate Measurement
Under range: A blinking “0.00” indicates that the sample Battery low: The battery must be replaced soon. absorbs less light than the zero reference. Check the procedure and make sure you use the same cuvette for reference (zero) and measurement. Over Range: A flashing value of the maximum concentration Dead battery: This indicates that the battery is dead and must indicates an over range condition. -
Page 7: Startup
• It is important that the sample does not contain any debris. STARTUP This would corrupt the reading. Prepare the instrument for measurement as follows: • In order to avoid reagent leaking and to obtain more • Unpack the instrument by removing the dust protection sleeve from the instrument cuvette accurate measurements, it is recommended to close the holder. -
Page 8: Validation Procedure
• Press ZERO/CFM and the lamp, cuvette Alternatively, wait for 3 minutes and 30 and detector icons will appear on the seconds and just press READ/ READ/ READ/ READ/ READ/ /TIMER /TIMER /TIMER /TIMER /TIMER. display, depending on the measurement In both cases, the lamp, cuvette and phase. -
Page 9: Calibration Procedure
• Place the CAL CHECK Standard HI 96715-11 CALIBRATION PROCEDURE Cuvette A into the cuvette holder and ensure that the notch on the cap is positioned securely Note: It is possible to interrupt calibration procedure at any time by pressing CAL CHECK or into the groove. - Page 10 • After a few seconds the display will show DATE INPUT “-0.0-”. The meter is now zeroed and ready • Press GLP/ to edit the desired year for calibration. The blinking “READ” asks for (2000-2099). If the key is kept pressed, reading calibration standard.
-
Page 11: Glp
• The instrument will return automatically • Press READ/ /TIMER to enter in the to the measurement mode by displaying factory calibration restore screen. The dashes on the LCD. instrument asks for confirmation of user calibration delete. • Press ZERO/CFM to restore the factory calibration or press GLP/ again to abort factory calibration restore. -
Page 12: Battery Replacement
BATTERY REPLACEMENT WARRANTY To replace the instrument’s battery, follow the steps: HI 96715 is warranted for two years against defects in workmanship and materials when used for its intended purpose and maintained according to the instructions. • Turn the instrument off by pressing ON/OFF. This warranty is limited to repair or replacement free of charge.
Need help?
Do you have a question about the HI 96715C and is the answer not in the manual?
Questions and answers